
Build Your Own Robot: A Step-by-Step Guide
Want to learn how to build your own robot at home? It's easy and affordable! In this guide, we'll show you how to create a BeetleBot that moves like a Roomba. This is a great introduction to the world of robotics for people of all ages and experience levels.
Part 1
Step 1: Slide Heat Shrink Tubing onto the Motor Wheels.
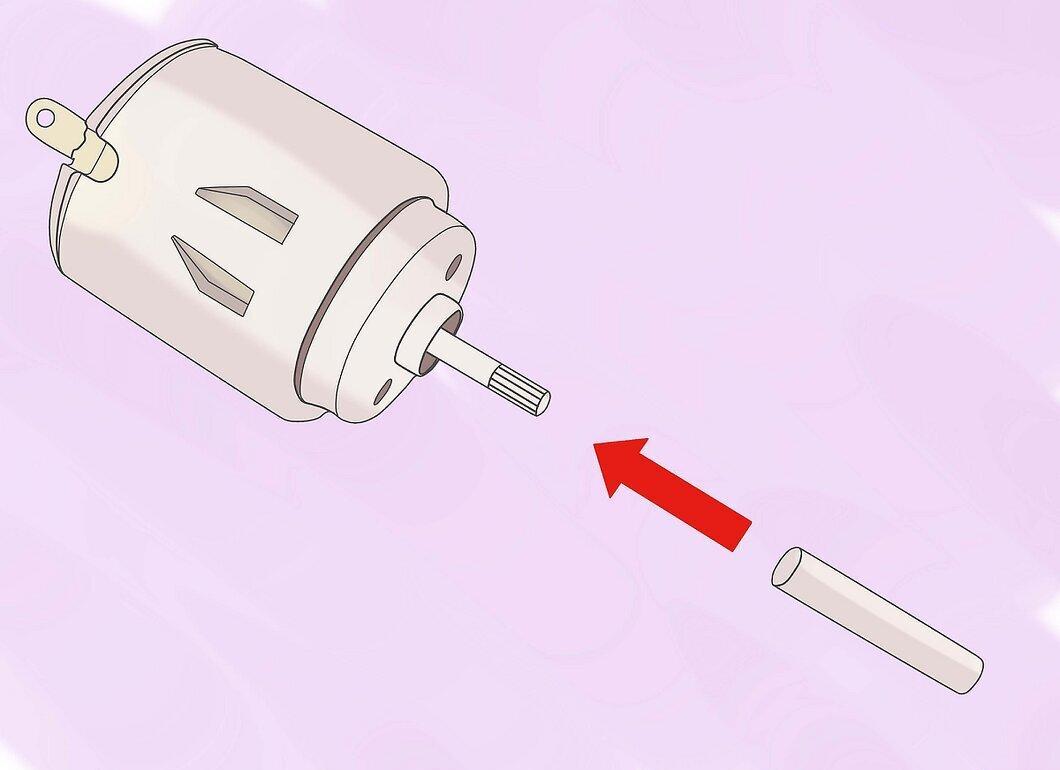
Slide the heat shrink tubing onto the motor wheels. Cut the tubing to be slightly longer than the wheel, slide it onto the wheel, and carefully shrink it using a lighter or soldering iron. You can layer multiple pieces to increase the diameter and create "tires."
Step 2: Attach Switches to the Back of the Battery Compartment.
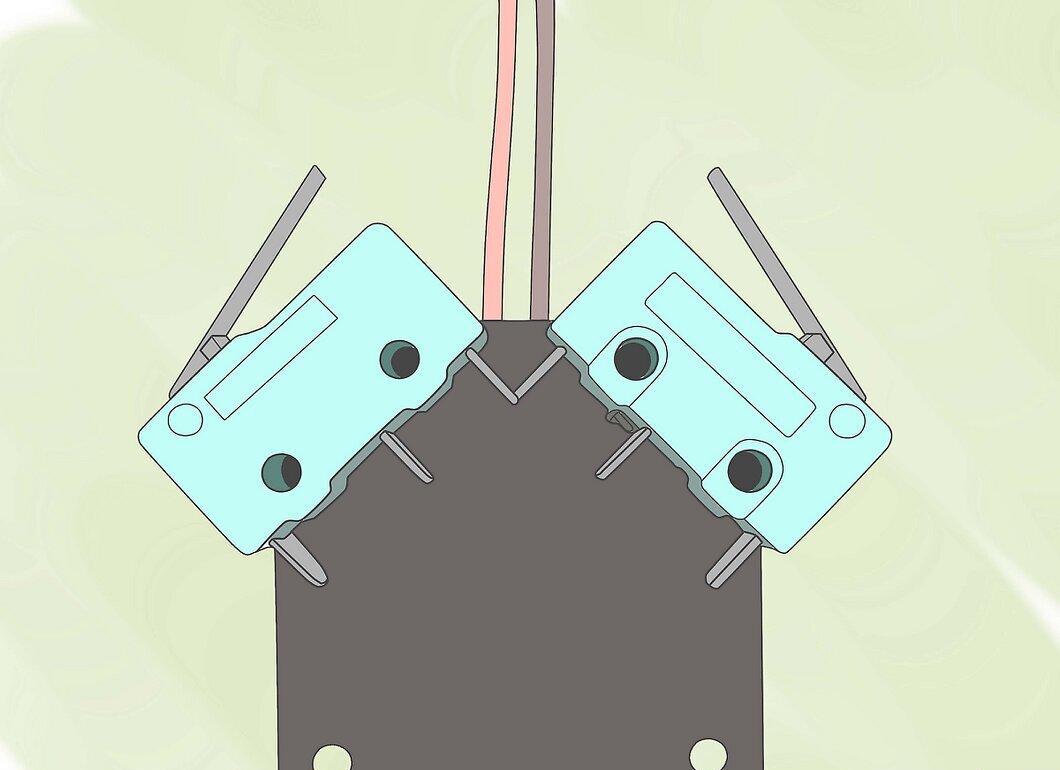
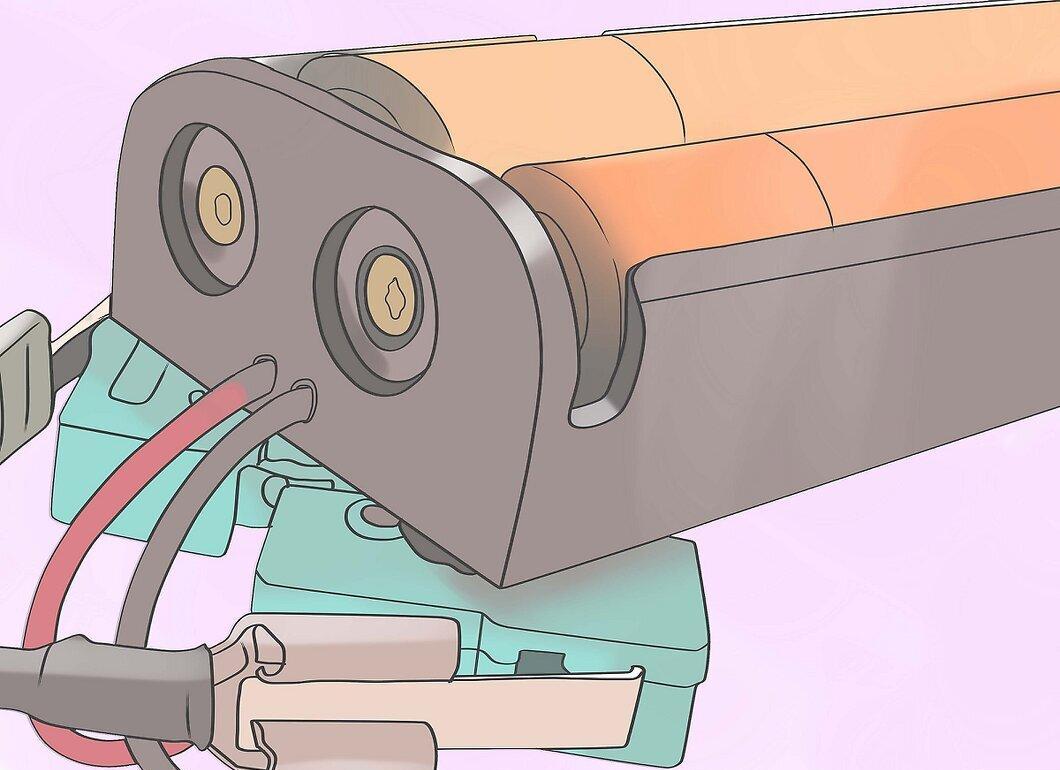
Secure the switches to the backside of the battery compartment. Glue them to a flat surface facing outward. Ensure that the wires come out on this side. Position the switches at an angle so that the outer contacts touch the central line of the device.
Step 3: Position the Levers Next to the Wires.
Step 4: Install the Metal Plate.
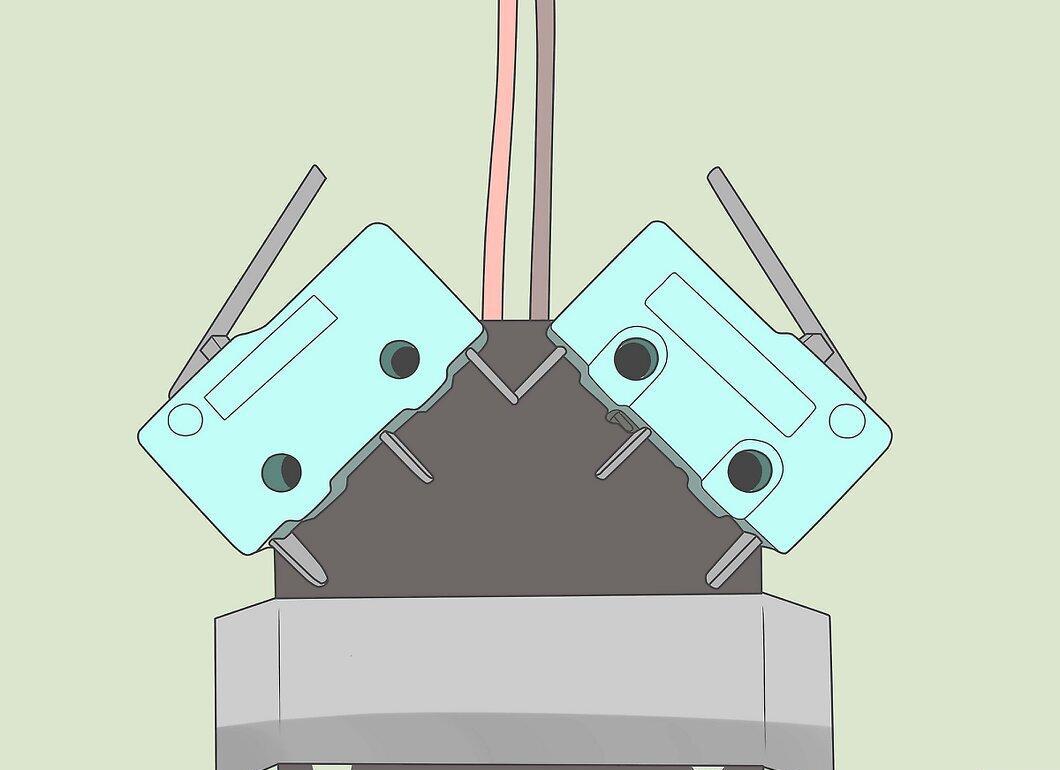
Place a 2.5 cm by 7.5 cm aluminum plate behind the switch and bend the excess portion at a 45-degree angle. Secure it with hot glue and allow the glue to dry completely before proceeding.
Step 5: Secure the Motors to the Metal Wings.
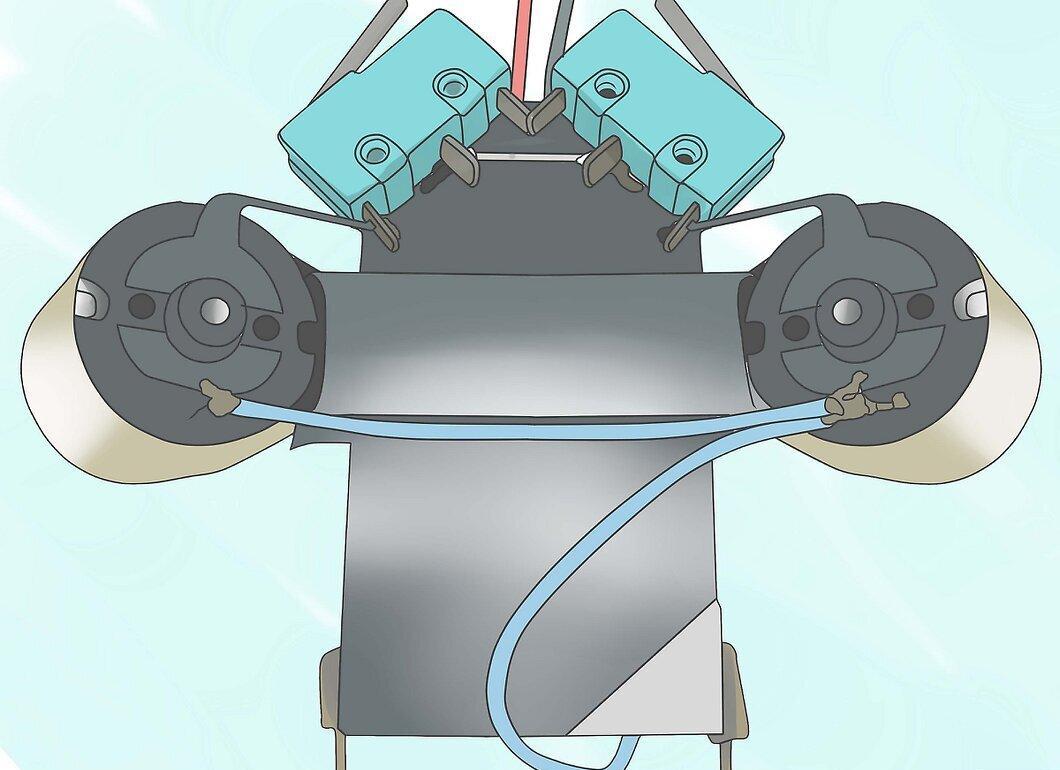
Glue the motors to the bent part of the metal using hot glue, ensuring that the "tires" make contact with the surface. Make sure the motors rotate in opposite directions—one motor should be upside down.
Step 6: Create the Back Wheel.
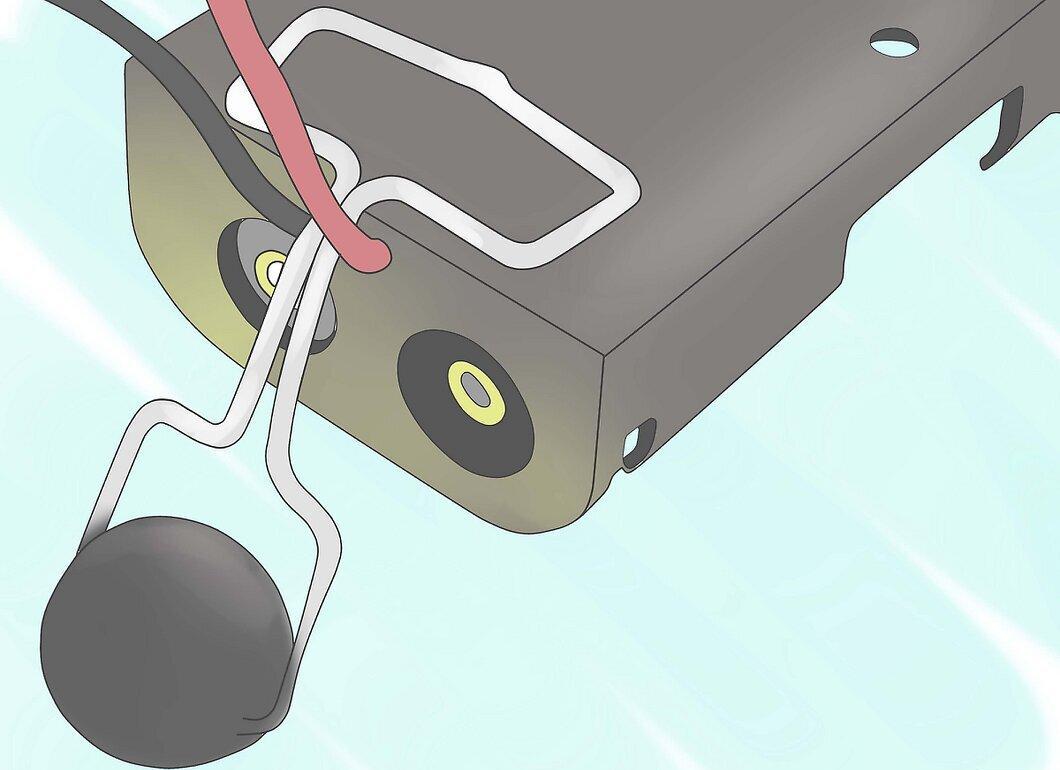
Make a back wheel so your robot doesn’t drag its rear end. Take a large paperclip and shape it like a TARDIS or a house with a bead on top. Place it on the opposite side of the wires and glue the edges securely to the battery compartment with hot glue.
Step 7: Solder the Robot's Wires.
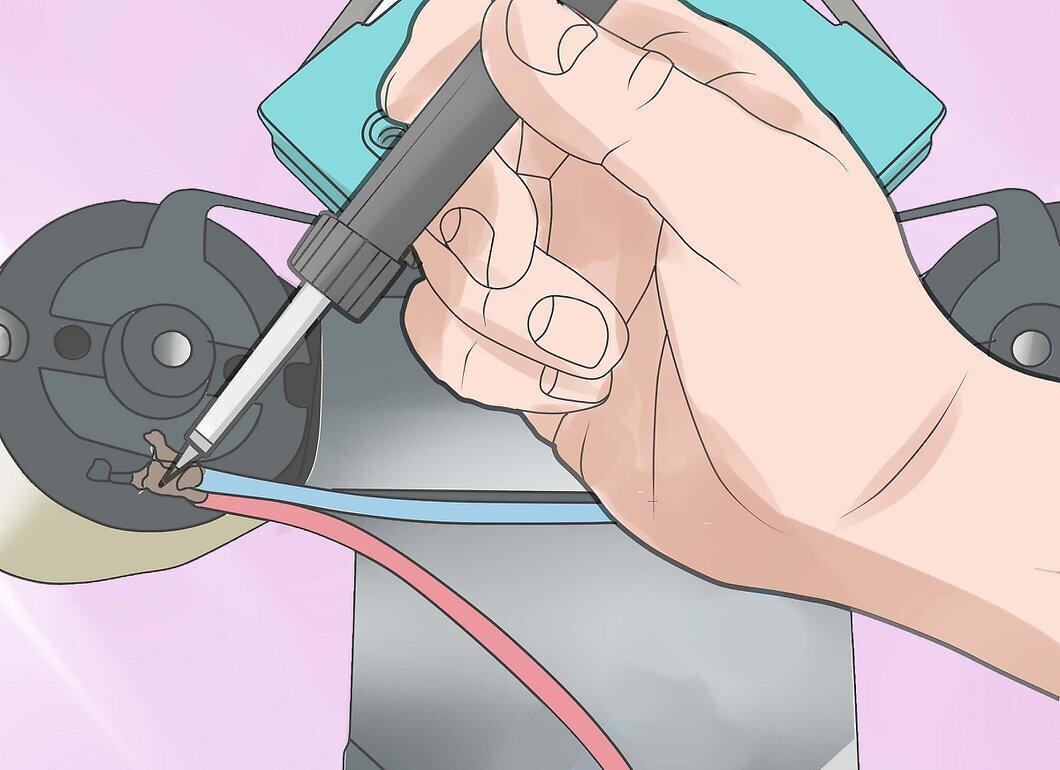
You will need a soldering iron and solder to connect all the electrical wires of the robot. Be careful to ensure everything works correctly. Here’s the connection sequence:
- Solder both switches together.
- Then connect a small wire between the two central contacts of the switches.
- Solder one wire from the negative and one from the positive motor for the final switch connection.
- Connect the wires between the motors to combine them.
- Connect the wire from the back motor to the battery compartment, linking the negative and positive terminals.
- Place the positive wire from the battery compartment to the central contact of the switches.
- The negative wire will be connected to the central contact of one of the switches.
Step 8: Create Antennas for the Robot.
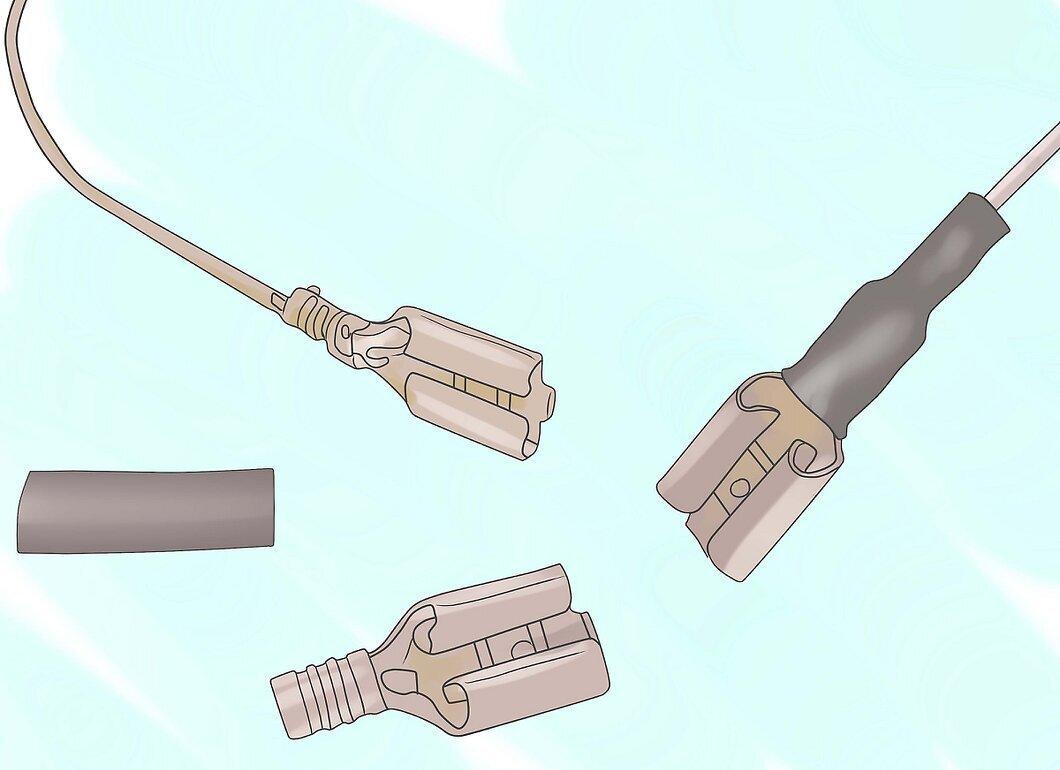
Make antennas for the robot. Cut rubber bands or plastic ends from spare connectors, straighten two paperclips (to resemble insect antennae), and connect them to the antennas using heat shrink tubing.
Step 9: Connect the Antennas to the Switches.
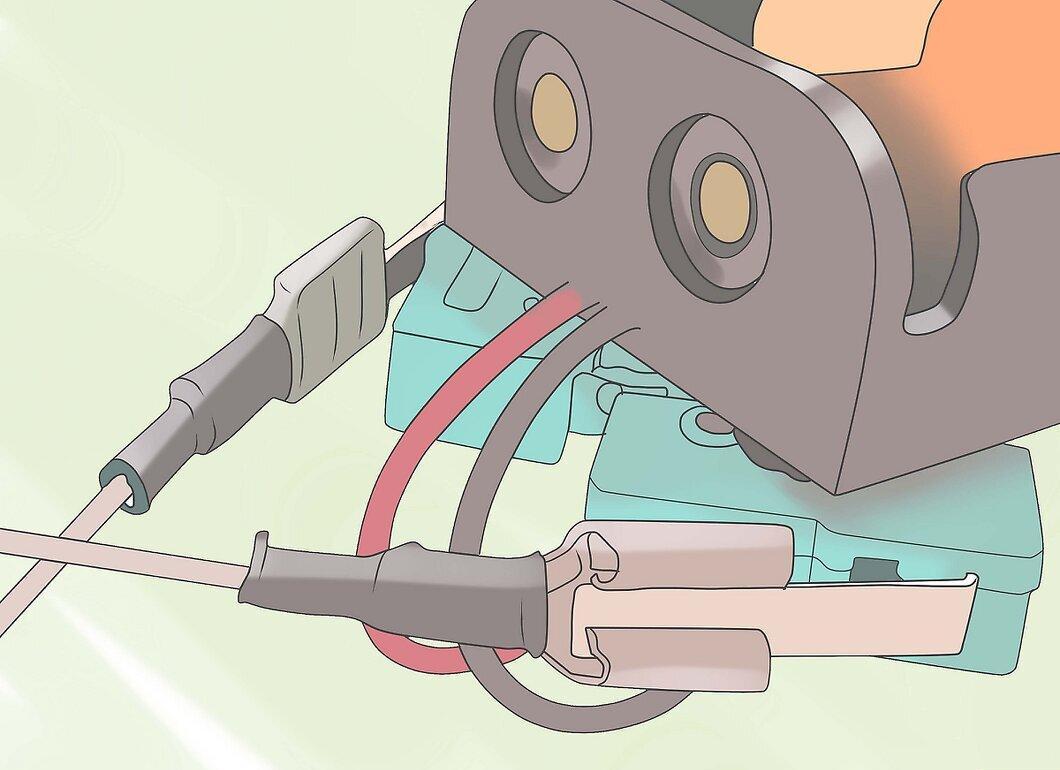
Secure the antennas to the switches using spare connectors and glue (if necessary, to prevent them from falling off).
Step 10: Power On the Robot by Inserting Batteries into the Compartment.
Insert batteries into the compartment to activate the robot. It should start moving like a Roomba, although it probably won’t clean your floor. Congratulations! Don’t forget to teach your robot the Three Laws of Robotics.


