Roses are often regarded as symbols of romance and love. They are beautiful and captivating to look at. Even if you don't have a green thumb, you can still create a rose on paper.
Blooming Rose
Step 1. Start with a small circle.

- Make sure to use a sketch pencil so you can erase it later for a clean drawing.
Step 2. Add a spiral line around the circle.

- This will serve as the base for drawing the smallest petals.
Step 3. Add an oval, starting from the opposite side of the circle.

- This will give you a foundation to help you draw the petals.
- Make sure the central circle does not extend beyond the larger oval.
Step 4. Add another outline for the petals.
- Do this on the opposite side by flipping your paper over.
Step 5. Add another outline for the petals.

- Do this on the opposite side by flipping your paper over.
- You should now have 3 petals.
Step 6. Add another set of petals.

- This time, make the petals a bit larger than the previous ones.
Step 7. Add another set of petals.

- Again, make the petals slightly larger than the previous ones.
Step 8. Outline your drawing with a pen.

- Remember to note the overlapping lines and areas that should be hidden.
- The lines may not look perfect and clear, but they should be neat when you erase the pencil.
Step 9. Erase the pencil sketch and add details.
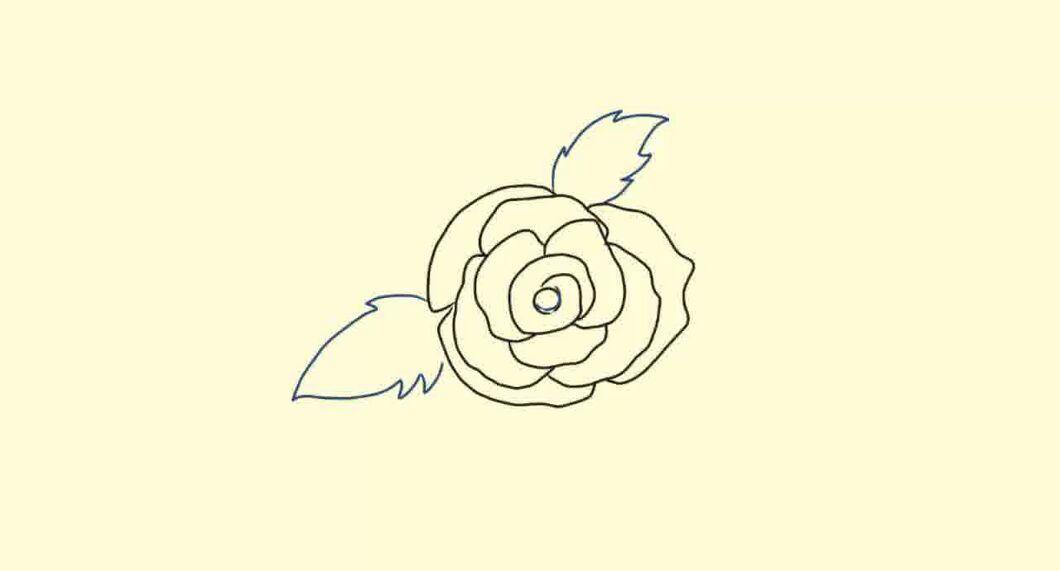
- You can add smaller petals inside the main spiral.
- Feel free to include some leaves and even droplets of dew.
Step 10. Color your rose.
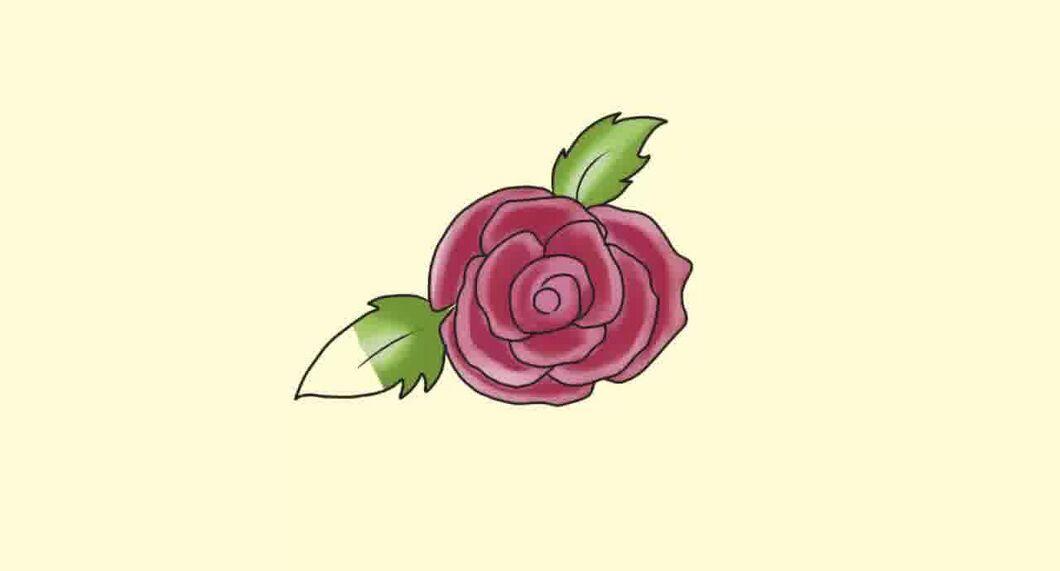
- Remember that roses come in various colors. Try to get creative with the colors. Use unusual shades like purple-green, white, or even black. But red and yellow should always be included.
Ornamental Rose
Step 1. Start by drawing a circle with teardrop shapes around it.

- This will be the main part of your rose.
- The teardrop shapes will represent leaves.
Step 2. Add a small circle inside the large circle.

- It doesn’t have to be exactly in the center.
Step 3. Add petal lines.

- To do this, draw rounded lines around the small circle.
- These rounded lines together should form a triangle.
Step 4. Add more lines for petals.

- To do this, draw rounded lines around the small circle.
- These rounded lines together should again form a triangle.
- The ends of these lines should not extend beyond those you previously drew.
Step 5. Add more lines for petals.

- Similar to before, draw rounded lines around the small circle.
- These lines should form a triangle once more.
- The ends of these lines should not extend beyond those you previously drew.
- Don't forget to add some lines for leaves.
Step 6. Draw pen lines parallel to the pencil lines.

- After outlining, remember to erase the pencil to keep the drawing neat.
- For an ornamental effect, leave spaces between the shapes.
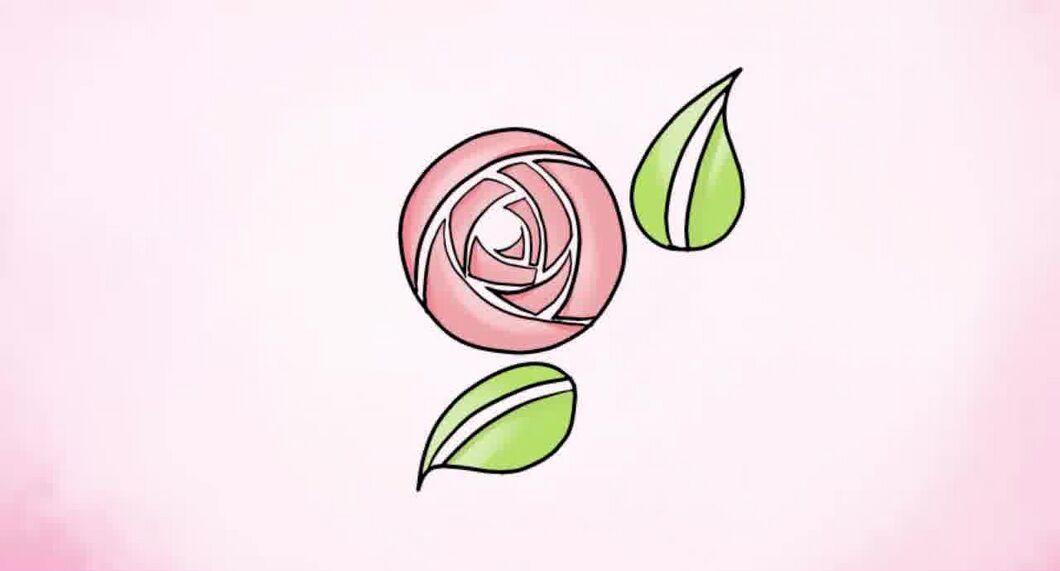
Step 7. Color the rose.
Stemmed Rose
Step 1. Lightly draw a vertical line as the base for your stem.

Lightly draw a vertical line as the base for your stem. It should be fairly straight, but freehand – no ruler needed.
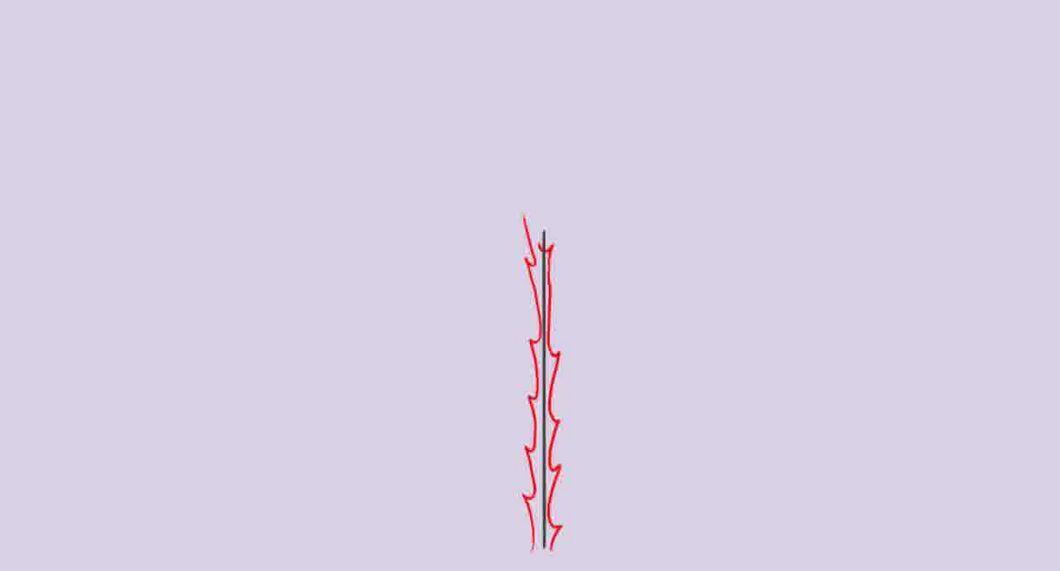
Step 2. Draw thorns.

Draw thorns. Refer to the image below for assistance.
Step 3. Continue drawing similarly on both sides of the stem, using the picture as a guide.
Step 4. Draw a horizontal line with two semi-circles (one on top, the other below) to create the top of the leaf.
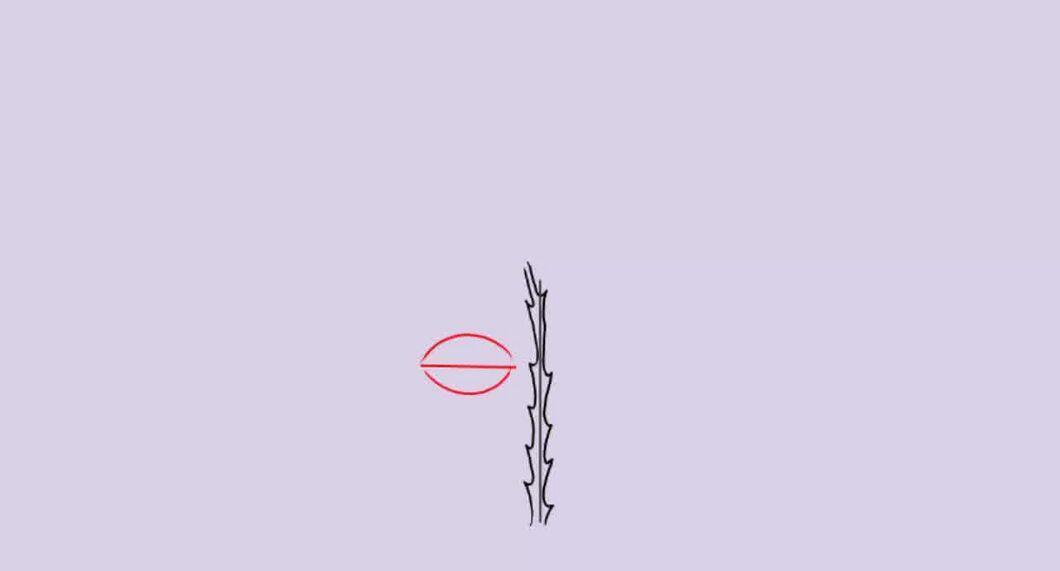
Step 5. Next, from the end, draw a line with one curve that points back toward the stem.
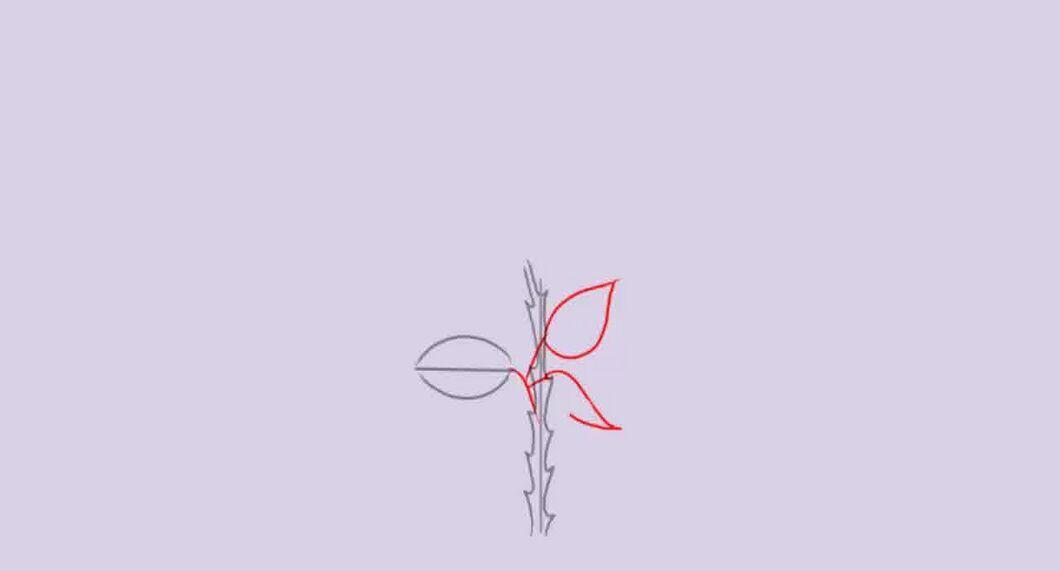
Next, from the end, draw a line with one curve that points back toward the stem. This outlines the leaf. You may have several leaves; usually, three are enough, but on opposite sides of the stem and at slightly different angles.
Step 6. Draw a line down to the center of each leaf and small lines connecting the center to its edges.
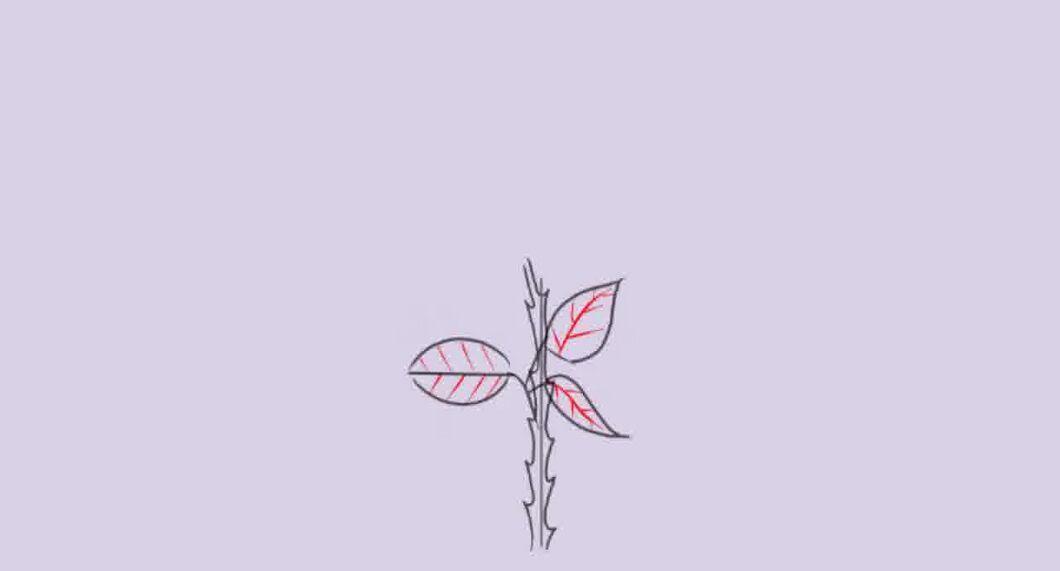
Step 7. Draw banana-shaped leaves at the base of the flower stem (curving down like a cup).
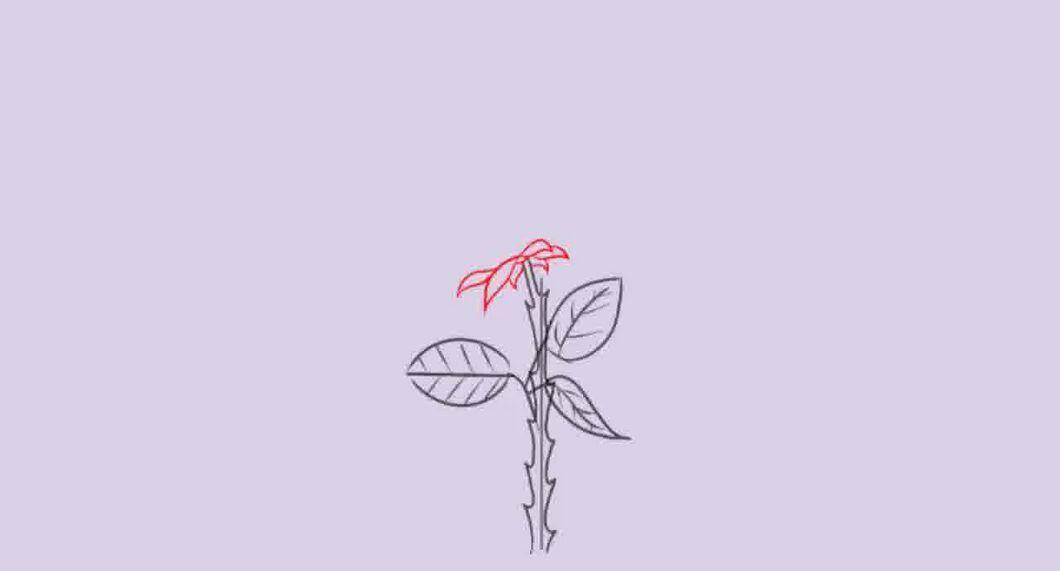
Draw banana-shaped leaves at the base of the flower stem (curving down like a cup). Draw several on either side and of varying lengths and sizes, ensuring they all start from the top of the stem.
Step 8. Draw two large teardrop shapes at the top of the leaf platform drawn in the previous step.
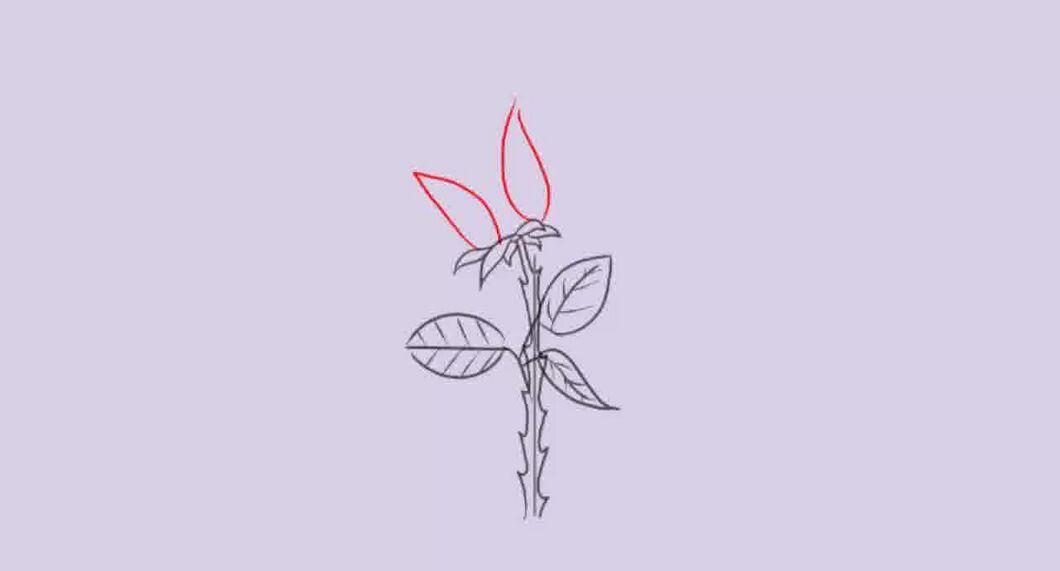
Draw two large teardrop shapes at the top of the leaf platform drawn in the previous step. There should be a gap between them.
Step 9. Draw a few more teardrop shapes behind the first two.
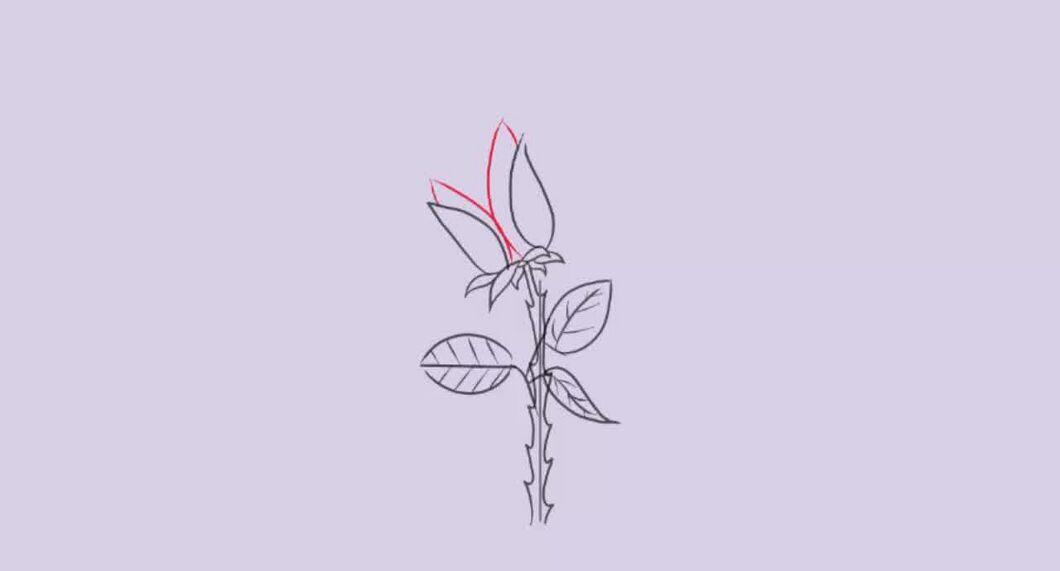
Draw a few more teardrop shapes behind the first two. Remember not to draw parts that might be hidden behind the front petals.
Step 10. Draw the central bud of the flower, with the top slightly opened.

Step 11. Shade one edge of each petal.

Shade one edge of each petal. Think about where the light is coming from.
Step 12. Color if you wish.

Step 13. You're done.