
Skipping stones is an exhilarating pastime that demands a certain level of skill, including speed, angle of throw, and spin. You can have a great time at a lake or any other body of water while creating unforgettable moments with friends and family. Even if you don’t manage to break the Guinness World Record of 51 skips in one throw, you can still impress the kids with your stone-throwing prowess. Just remember, success comes with practice, and your efforts will be worth it.
Part 1
Step 1. Find a Suitable Water Spot with Flat Stones.
Look for a body of water with a smooth surface and plenty of flat stones. The shores of lakes or calm stretches of rivers are ideal. Ocean shores may be less favorable unless there are no strong waves that day. However, serene beaches in coves can also work well for skipping stones. If you want to throw stones in rough water, heavier stones are better as they can cut through the waves without veering off course. Just keep in mind that heavier stones can be harder to throw, so be prepared for that.
- If you can’t find a smooth surface with suitable stones, don’t hesitate to bring your own. It’s challenging to hone your technique if you spend too much time searching for each next stone.
Step 2. Choose the Perfect Stone.
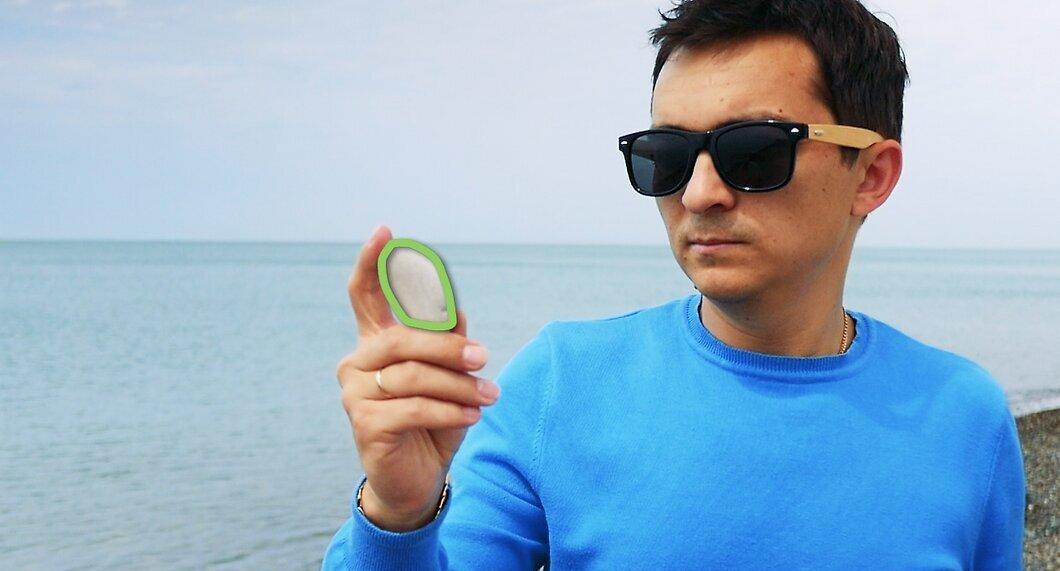
When selecting a stone, look for one that is thin, flat, and rounded, about the size of your palm. It should be heavy enough to withstand wind and water turbulence, yet light enough for a proper throw. The flatter and smoother the stone, the better it will skip across the water’s surface without breaking tension.
- It’s worth noting that the record-holder prefers stones with bumps or ridges, as they grip better and allow for a better spin during the throw.
- A stone with many small dimples can reduce water resistance, just like a dimpled golf ball reduces air resistance. Experiment with different stones to find the one that suits you best.
- If you have calloused hands, you might find it easier to hold smooth stones. However, for soft and delicate hands, such stones may be challenging to grip.
Step 3. Position Your Index Finger on the Edge of the Stone.
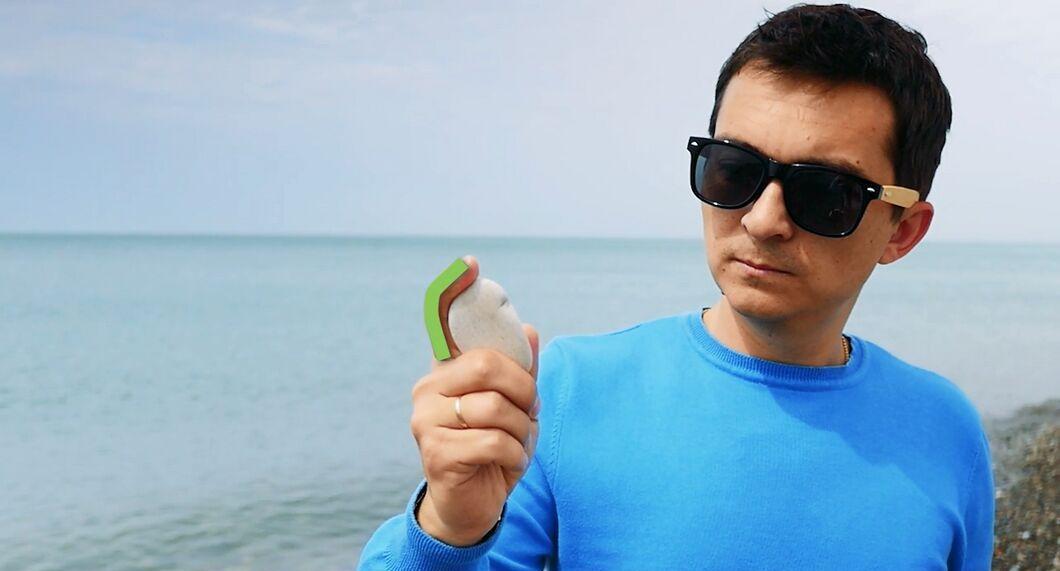
Place your index finger on the edge of the stone, holding the flat sides with your thumb on one side and your middle finger on the other. This is one way to grip the stone; the key is to throw it so it spins along a straight line, with the flat part almost parallel to the water’s surface. Make sure the stone rests in the hook of your index finger, while your thumb controls the top of the stone.
- Consider the size of your hands when doing this. If you have small hands, it’s better to choose a smaller stone that you can hold securely.
Step 4. Stand Sideways to the Water, Feet Shoulder-Width Apart.
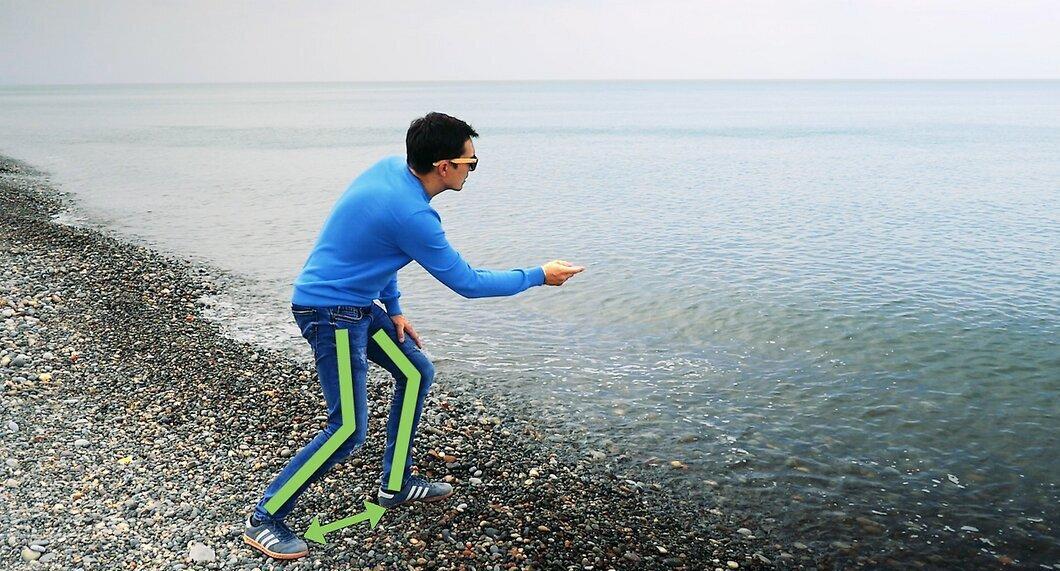
Stand sideways to the water, with your left shoulder forward if you’re right-handed (or vice versa). By slightly bending your knees, you can throw the stone almost parallel to the water’s surface. Research shows that the optimal angle between the stone and the water is 20 degrees; if the angle is too shallow, the stone will slow down due to friction, and if it’s too steep, it will simply sink upon hitting the water’s surface.
- If you're tall, you might find it difficult to throw at the right angle. You can compensate by throwing the stone with more speed. Practice throwing at a 20-degree angle, even if you don’t get it right at first.
Step 5. Bend Your Wrist and Throw the Stone Towards the Water.
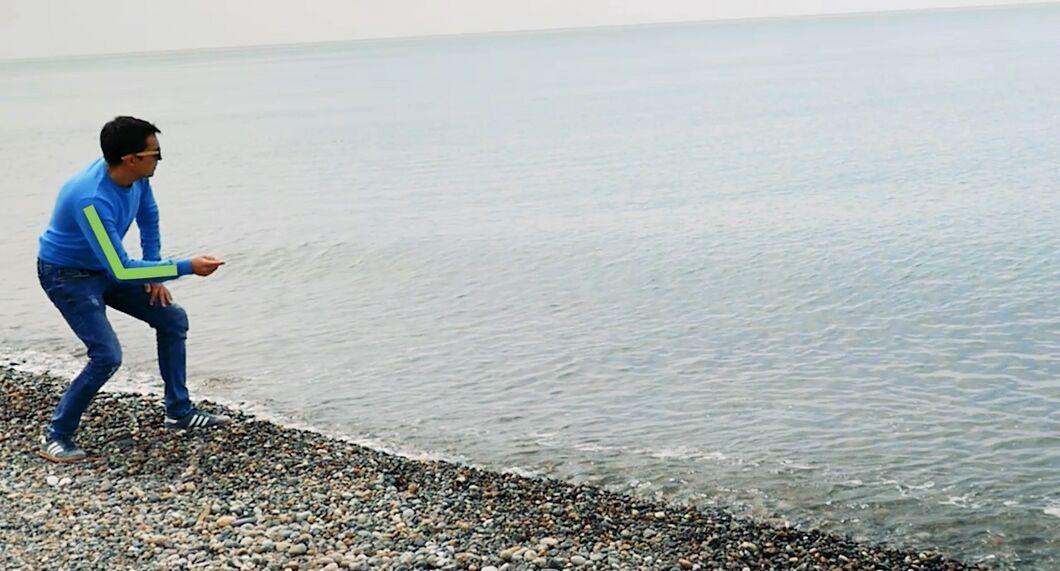
Bend your wrist back and then flick it forward to throw the stone towards the water's surface. Don’t compare this to throwing a frisbee; instead, envision a softball pitch. It’s crucial to bend your wrist correctly to build potential energy and throw the stone at the right angle, spinning it counterclockwise. Throw as quickly as possible while maintaining proper technique. The right angle and spin are more important than speed.
- The world record holder uses a technique similar to a baseball pitcher’s throw, continuing the arm motion even after releasing the stone.
Step 6. Engage Your Legs.
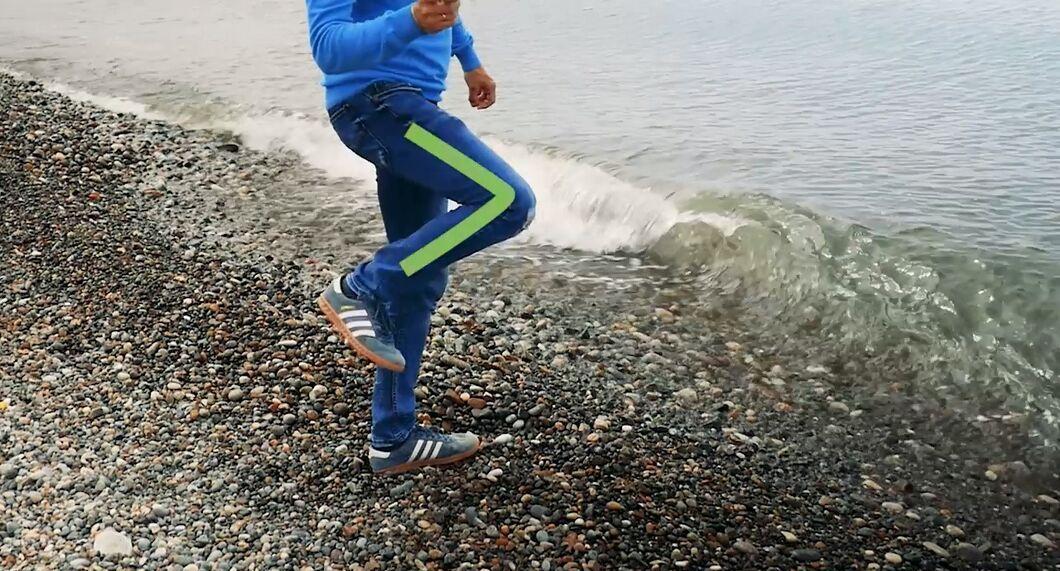
Don’t forget about your legs. Start by focusing on your arm technique, but once you feel comfortable throwing for the desired speed and angle, begin incorporating your legs into the motion. This will add power and help improve your technique. Try the following:
- Bend your knees to lower your body by at least 15 centimeters. This will give you more force when throwing.
- To increase momentum, raise your front leg about 15 centimeters off the ground. Lean more on your back leg, throw the stone, and land on your front leg. This resembles a baseball pitcher’s technique.
- You can skip stones barefoot or in flip-flops on the beach, but if you want to increase your effectiveness, wear sneakers for better grip on the ground.
Step 7. Follow Through with Your Throw.
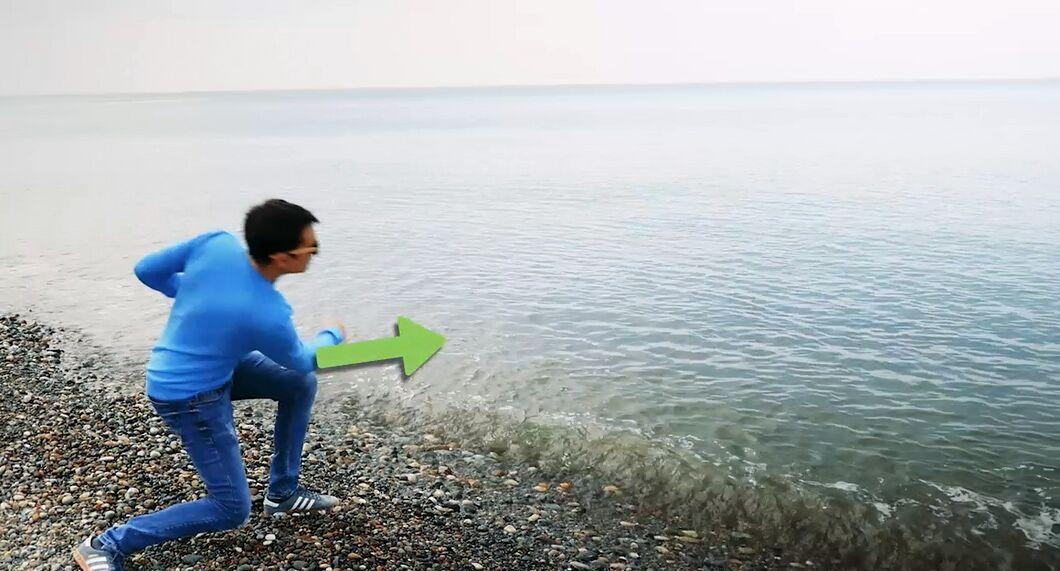
Don’t forget to “follow through” with your throw. Avoid stopping your hand immediately after releasing the stone, as this can lead to a quick deceleration of the stone. Instead, after your wrist is flicked back, move your hand forward, passing through the length of your chest and finishing at shoulder height with your opposite hand. This will allow you to put all your strength into the throw and the stone will skip more times.
- Imagine it’s a baseball throw or a tennis swing—the full motion will yield better results.
Step 8. Practice Regularly.
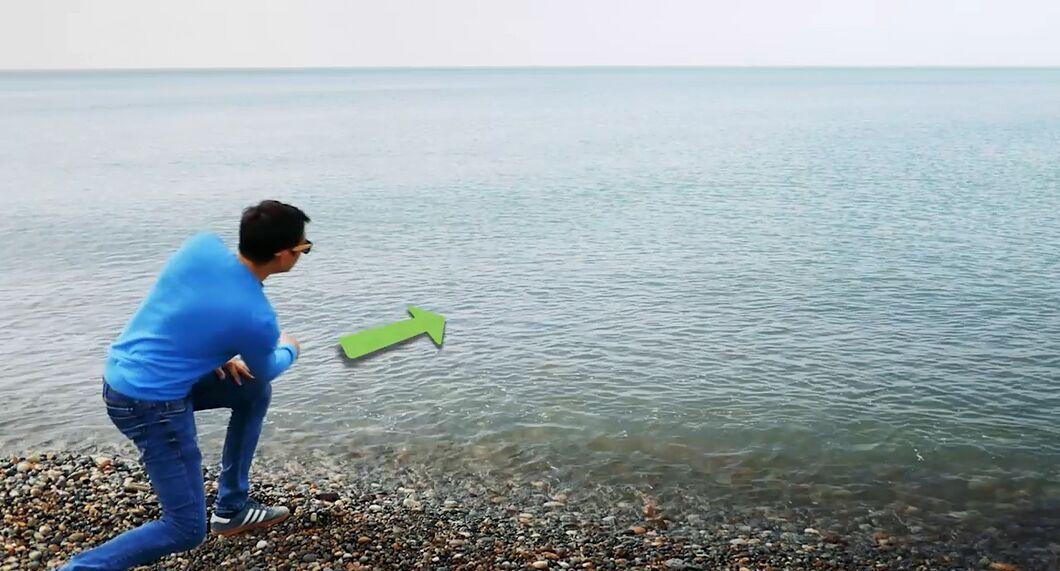
Don’t stop once you’ve got the hang of it! If the stone flies too high on the skip, it may mean you’re throwing it too close to yourself and the angle is too wide; try to throw so that the first skip occurs further from you. If the stone flies too hard, it may jump high and land at a wide angle, causing it to sink. However, if thrown too far, the stone may simply roll across the water, and the friction will reduce its momentum, also leading to sinking.
- Experiment with stones of different weights and sizes. You may find that you prefer lighter stones or, conversely, heavier ones.
- In the summer, when you have free time, aim to skip 20 stones a day until you feel confident in the technique. Remember, you don’t have to become a world record holder—it’s all about having fun.


