
__VOR, short for "VHF Omnidirectional Range," is a type of radio navigation system used to identify commercial aircraft. VOR transmits radio signals on ultra-short frequencies, including station identifiers, Morse code (and sometimes voice), and data that enables onboard equipment to establish the magnetic bearing from the station to the aircraft (the direction from the VOR station relative to the Earth's magnetic pole at the moment of setup). This positioning line is referred to as a "radial" in VOR terminology. Pilots then use this information to determine the position of the aircraft and navigate to their destination. This article assumes you already have basic working knowledge of aircraft operation.
Changing Course
Step 1. Setup and Identification.
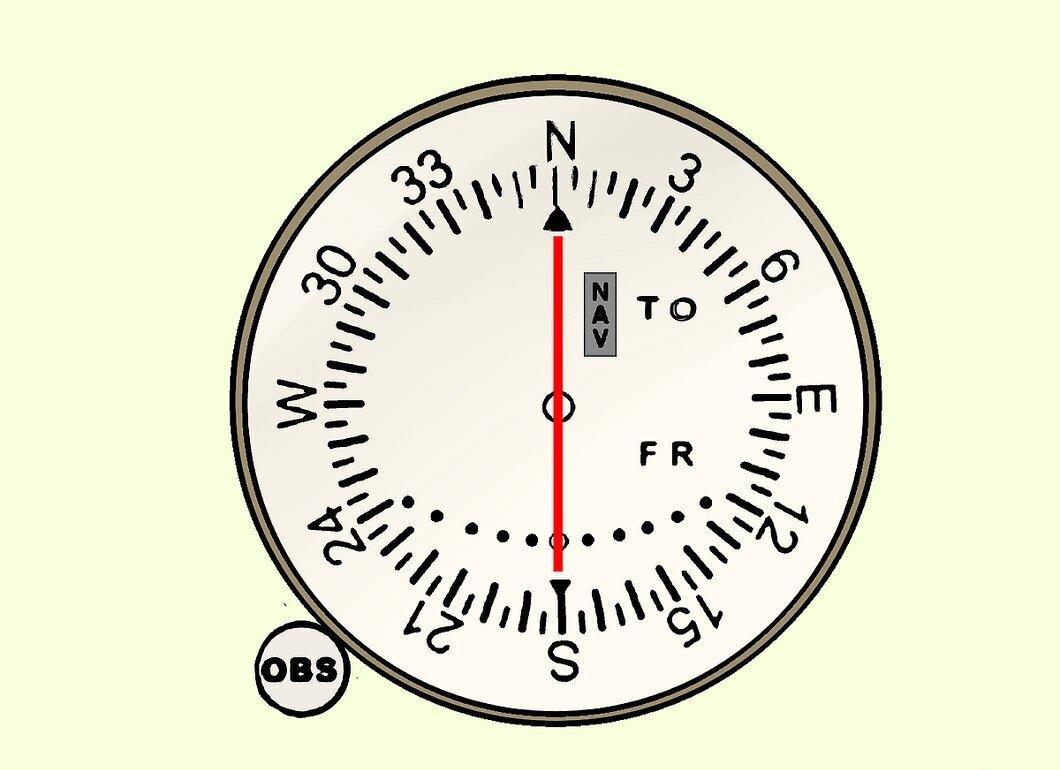
Setup and identification. Tune the navigation radio to the VOR frequency. This should be indicated in the Visual Flight Rules (VFR) and Instrument Flight Rules (IFR), as well as in Instrument Flight settings. Ensure you have selected the correct station and that the signal is strong by listening for the identifiers transmitted in Morse code.
Step 2. Understand the Basics.
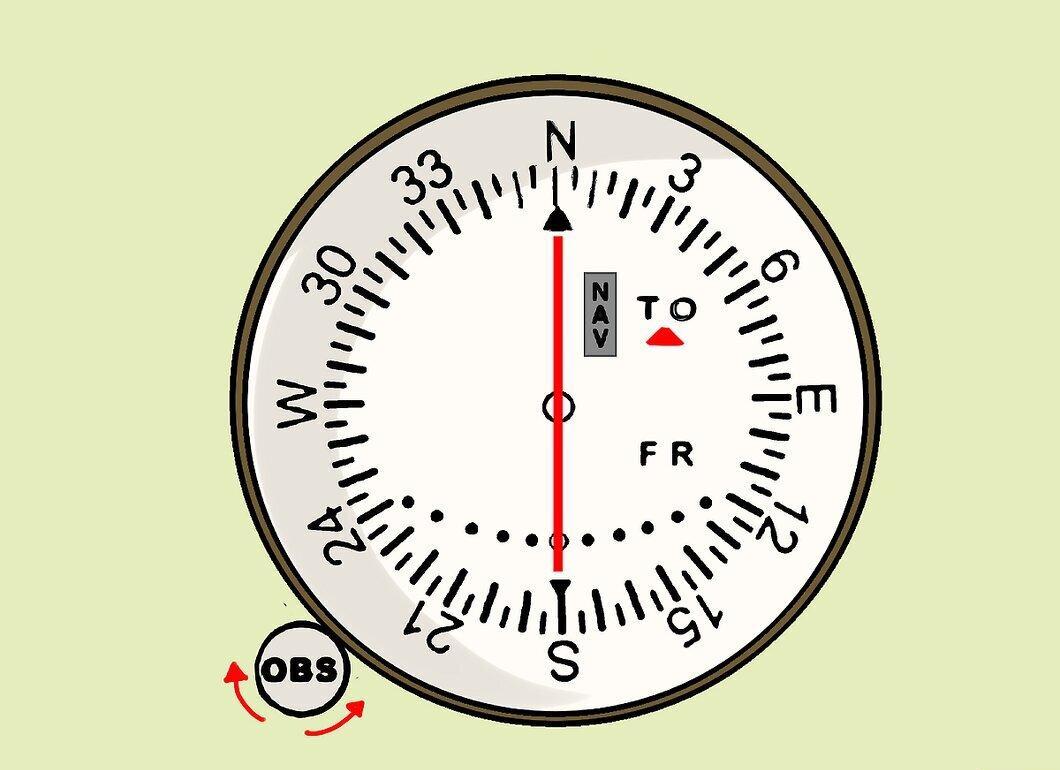
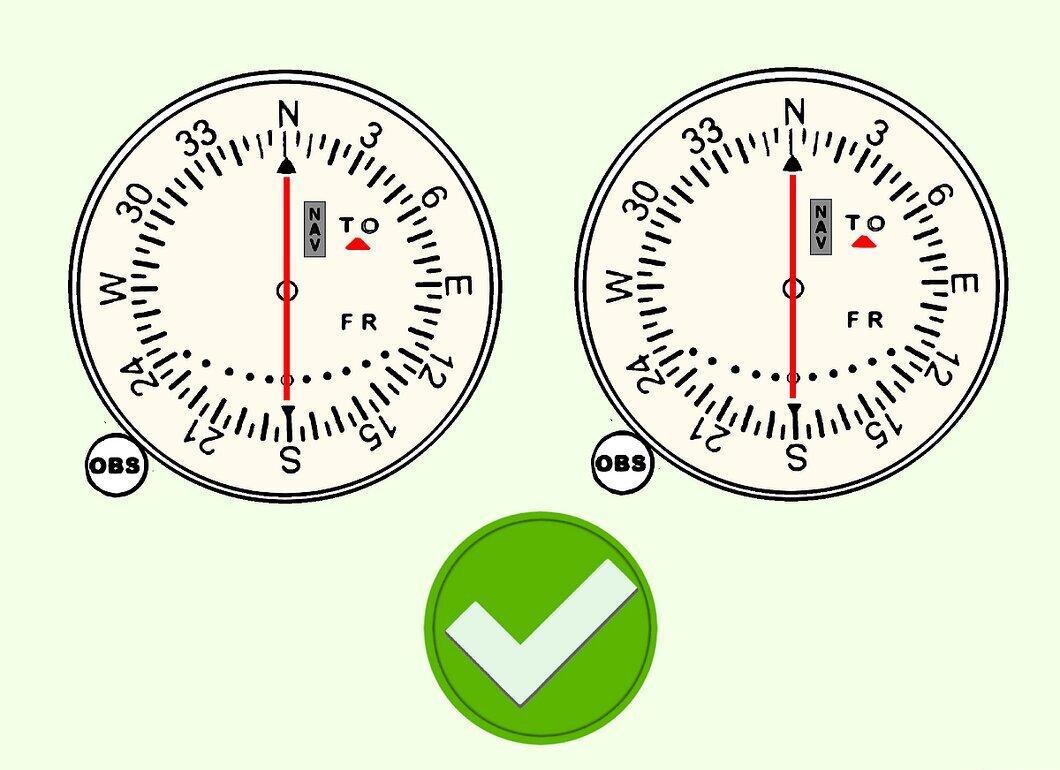
Understand the basics. Determine your radial by turning the OBS (Omni Bearing Selector) knob until the CDI (Course Deviation Indicator) is centered and you receive the "FROM" indicator. Looking at the image on the right, you can see that the needle is centered, and the instruments indicate the "FROM" indicator (a small white triangle pointing towards "FR"); thus, the aircraft is on a radial of 254 degrees. The direction of the aircraft doesn't matter; it is somewhere on the line 254° from the VOR station. To fly towards the VOR station, you first need to adjust the OBS knob until the CDI needle...
Identifying Intersections
Step 1. Follow the Assigned Course.
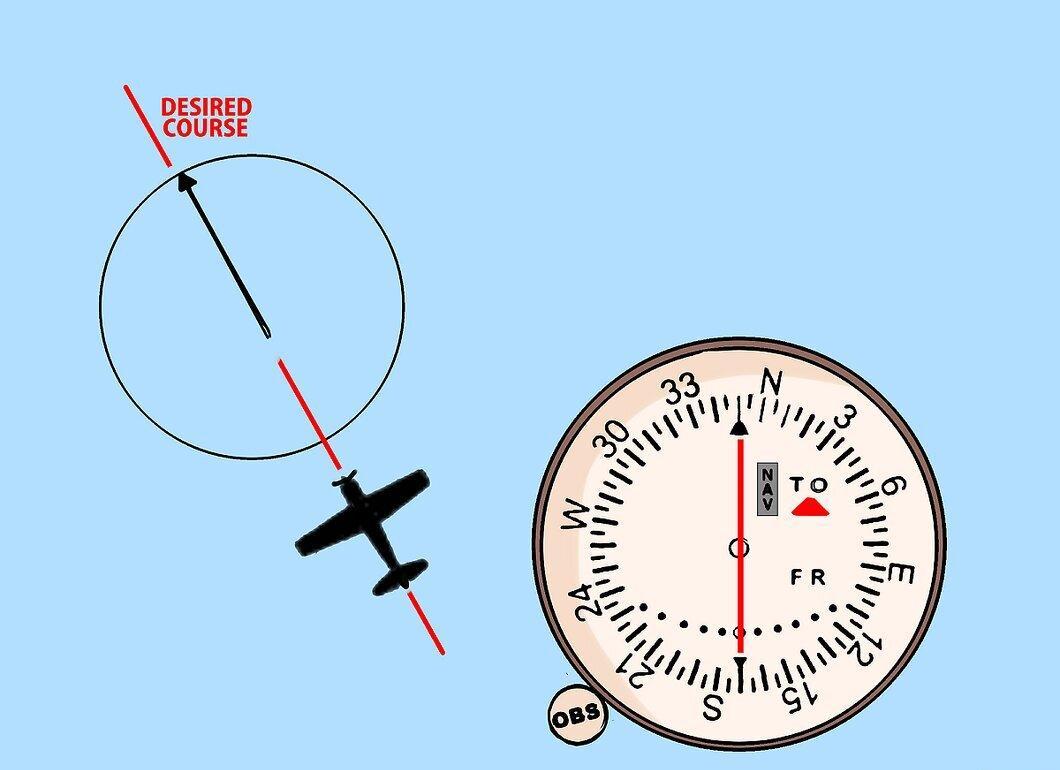
Follow the assigned course. You can find the airway direction in VFR or IFR. Set the course in the OBS and turn the aircraft to follow the indicated direction. Once the direction is set, pay attention to the CDI position. If the needle points to the right, you are off course to the right. Similarly, if the needle points to the left, you are off course to the left.
Step 2. Change Course.
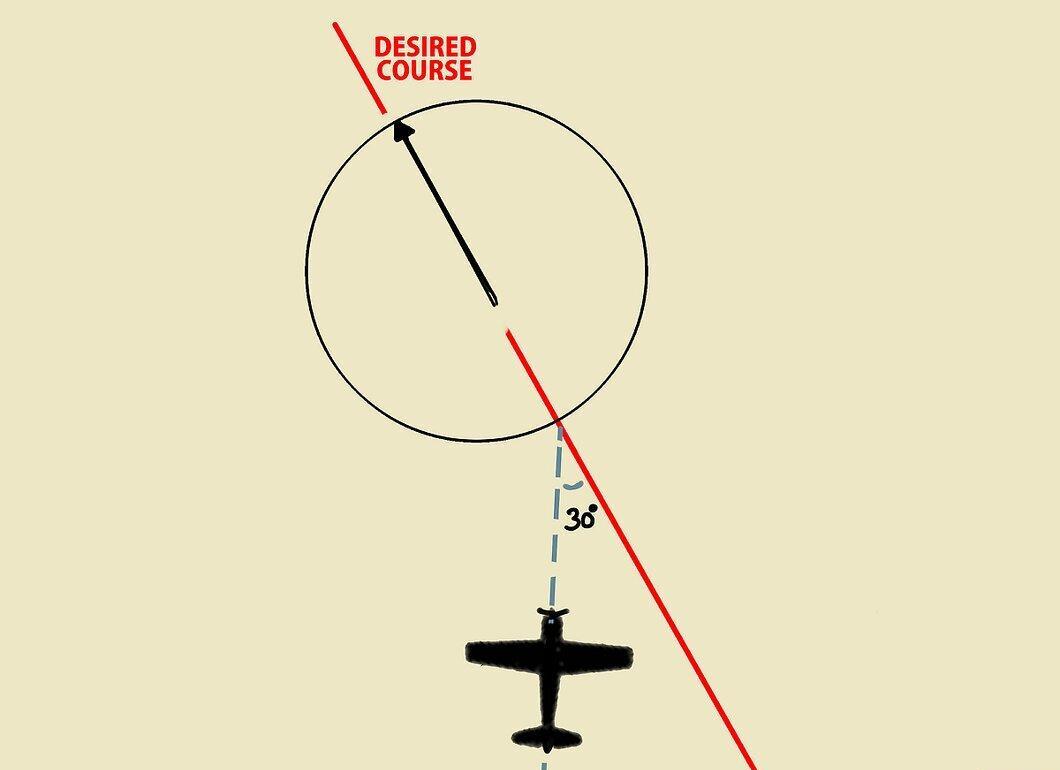
Change course. Turn 30 degrees in the direction indicated by the CDI to change course. While 30° is commonly used and is easiest to maintain, you can choose any angle of deviation. For example, if you are far from the desired course, a deviation greater than 30° may be needed to get back on course before reaching your destination.
Step 3. Track the Course.
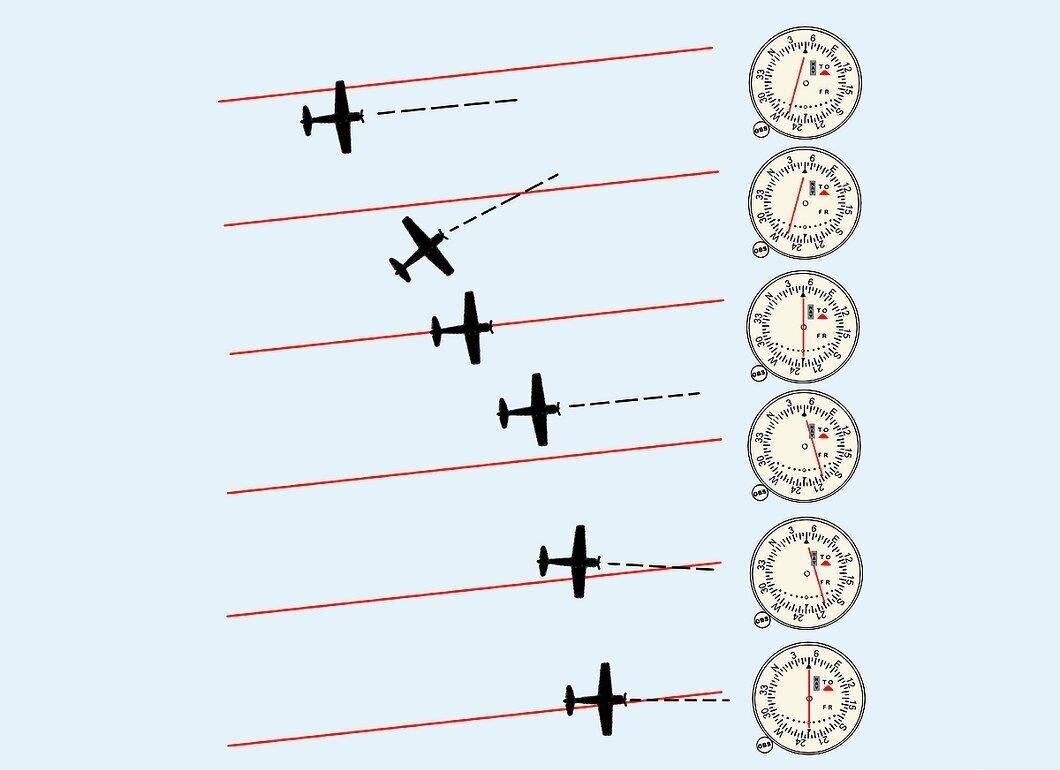
Track the course. As the CDI approaches the center, adjust your heading to align with the course. Keep the needle centered to remain on course. If it begins to drift left, turn left to return to course. Tracking inbound (toward the station) and outbound (away from the station) radials works the same way, but you should get the "TO" indication when flying inbound and the "FROM" indication when flying outbound radials.
Step 4. Wind Correction.
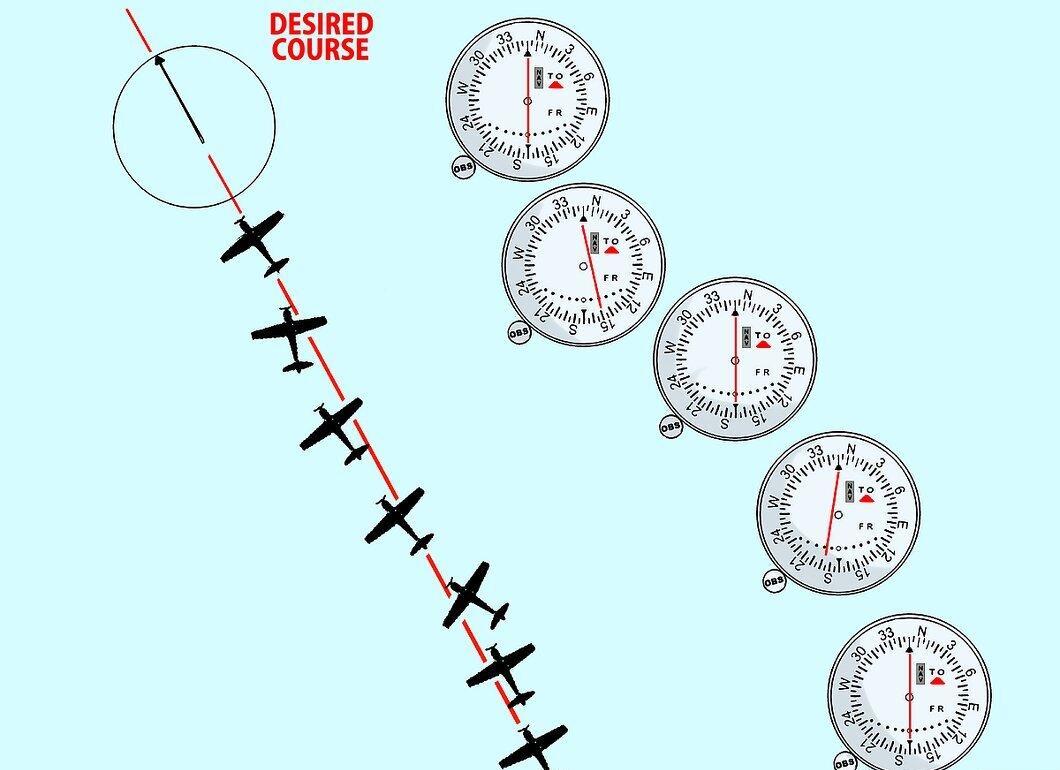
Make a wind correction. If the wind is blowing you off course, adjust your heading and use a wind correction angle (WCA) of about ten degrees into the wind. If that's not enough, increase the WCA. If it's too much, reduce the correction until the CDI needle is centered.
Part 3
Step 1. Set up and Identify Both VOR Stations as Before.
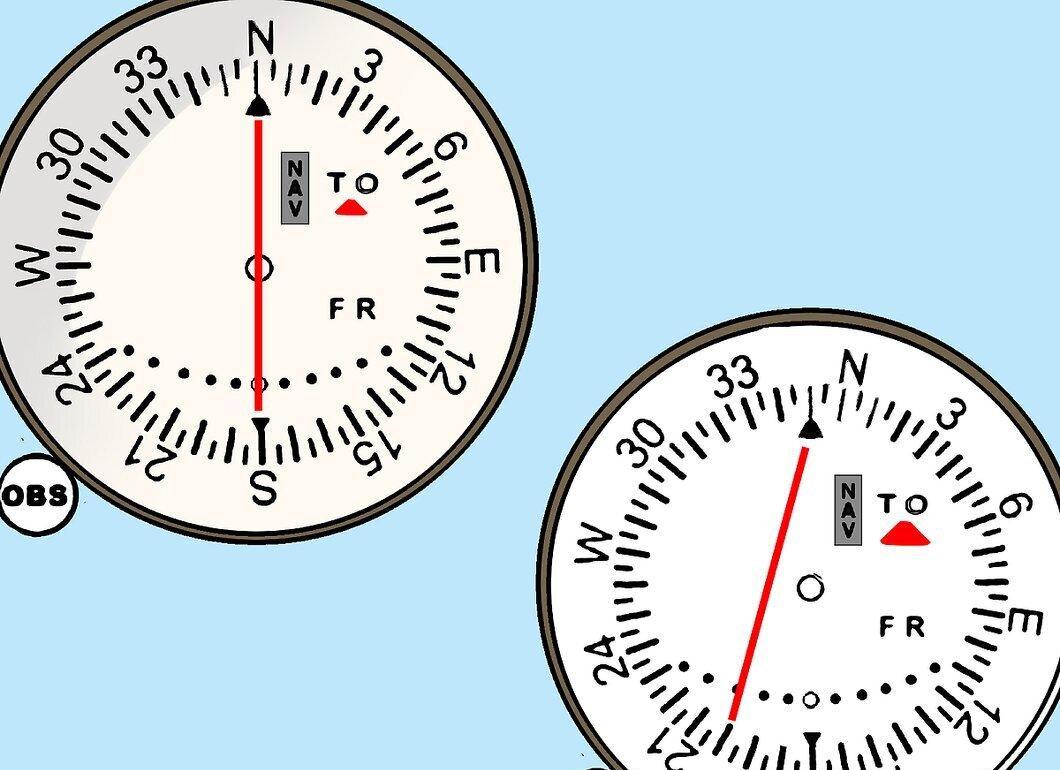
Set up and identify both VOR stations as before. Two VOR receivers are ideal, but you can still identify intersections with one VOR receiver by switching frequencies and comparing the radials from both VORs.
Step 2. Set Up OBS.
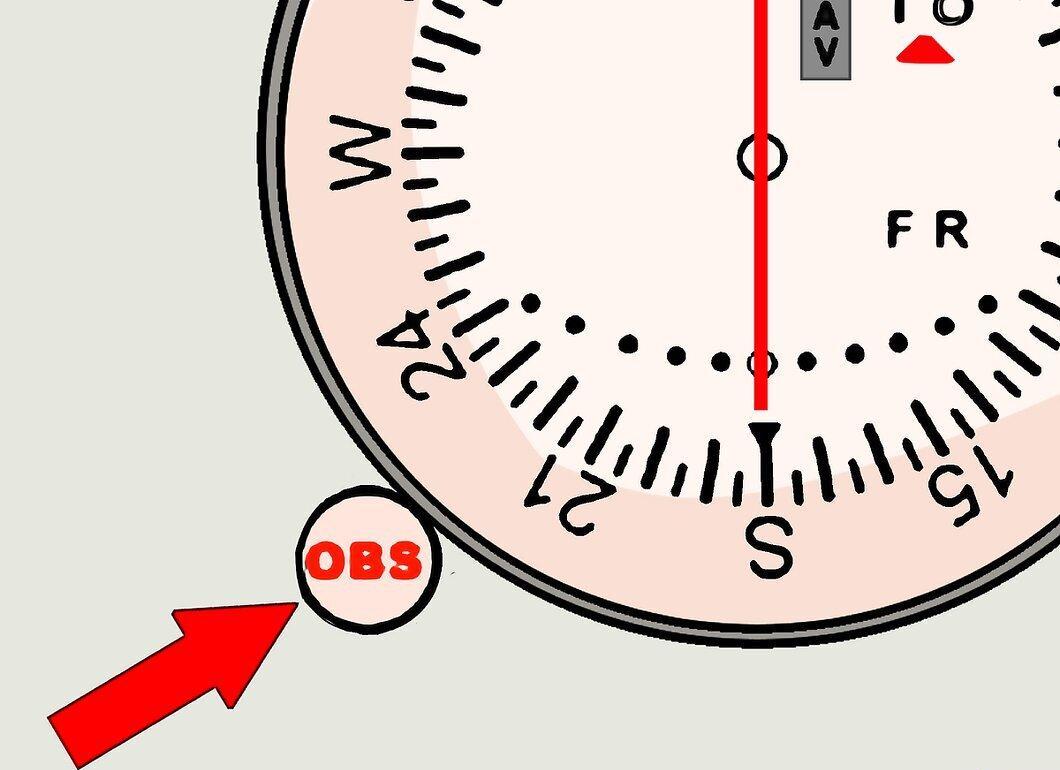
Set up OBS. Use the OBS to set the correct radials from each VOR. The radials should be shown on VFR and IFR charts. On the VFR chart, arrows indicate the intersection point of VOR radials, while the IFR chart shows from the VOR to the intersection point.
Step 3. Wait for Both CDI Needles to Center.
Wait for both CDI needles to center. While tracking the course from one VOR, monitor the second VOR, waiting for the CDI indicator to center. Once both indicators are centered, you will be at the intersection.
- Use ranging equipment to eliminate the need for a second VOR. While tracking the radial to a VOR, use the ranging equipment to determine your distance to the station. The distance indicated by the equipment will be shown on the IFR chart and can be used to determine the intersection. For example, the WARIC intersection is defined as radial 238 from the VOR and a distance of 21 nautical miles by ranging equipment.
- Sometimes a course radio beacon can be used instead of the second VOR. The procedure is the same, but keep in mind that a course radio beacon is twice as sensitive as a VOR.


