
A local network has become an integral part of most modern offices. If you work in such an environment and want to connect to the network for internet access, keep reading!
Part 1
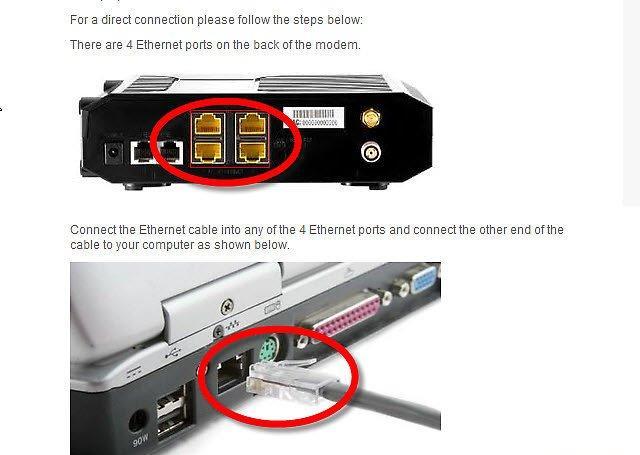
Step 1. Start by connecting the RJ-45 network cable to your computer.
Step 2. Right-click the "My Network Places" icon on your desktop and select "Network Properties."
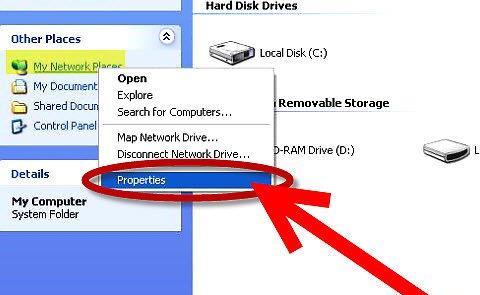
If you don't see the icon, you can find it through the "My Computer" window or via the "Start" menu -> "Network Connections." In any case, select "Network Properties."
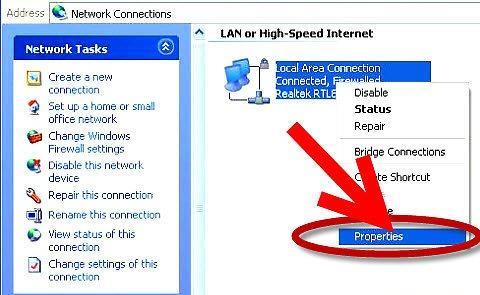
Step 3. In the opened window, under the heading "Network or High-Speed Internet," right-click on "Local Area Connection" and choose "Properties."
Step 4. In the dialog box that appears, scroll down to the item "Internet Protocol (TCP/IP)" and click the "Properties" button.
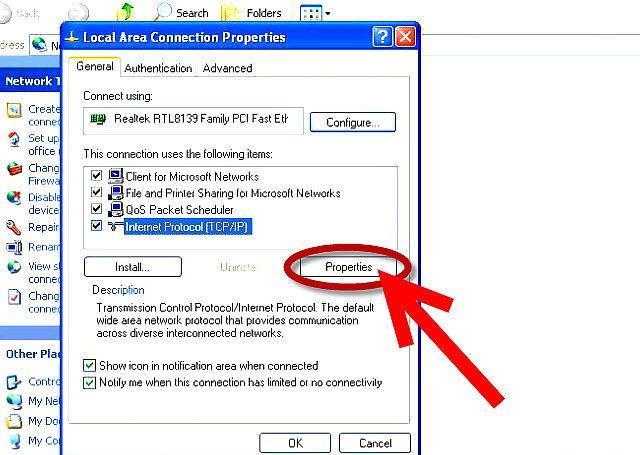
Step 5. To allow your computer to automatically find network settings, keep the option "Obtain an IP address automatically" enabled.
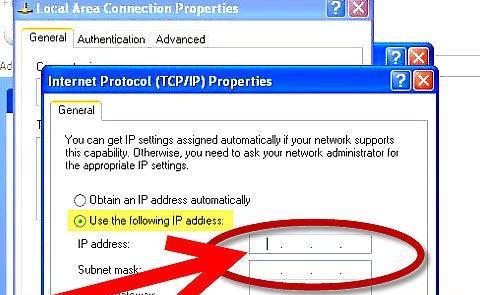
This option works only if there is a DHCP server in your network that automatically assigns IP addresses. If you need to set the parameters manually, follow these steps:
- Select the option "Use the following IP address" and enter the required IP address. Be sure to consult with your network administrator to avoid duplicating an already used address, as this may cause a conflict. Also, enter the Subnet Mask and Default Gateway.
- The Subnet Mask helps determine the network class, while the Default Gateway indicates the routers located in your local network.
- Next, enter the Preferred and Alternate DNS server.
- Click "OK" to save changes, or "Cancel" if you wish to revert to the previous settings.
Step 6. Ensure that the option "Show icon in notification area when connected" is enabled.
This will allow you to see when your local network is active and connected to the internet.


