
A hexagonal picnic table is an excellent choice for friendly get-togethers or various outdoor artistic projects. Its unique shape allows all guests to focus on the center of the table, making it ideal for shared experiences.
Part 1
Step 1: Gather Your Materials
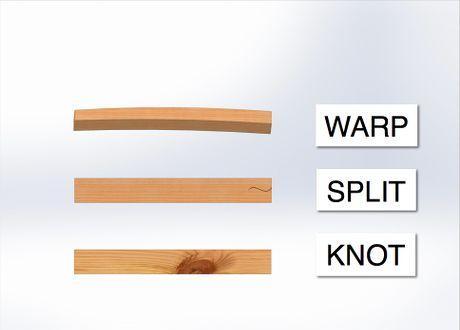
Collect all the necessary materials mentioned in the "What You'll Need" section below. It's important to choose high-quality materials with minimal defects, cracks, or warps. Ideal options include cedar, mahogany, or new recycled plastic decking. This guide uses swamp pine wood.
- Set up a workspace for convenient cutting and assembling of parts. You'll need a table or workbench with an area of at least 0.4 square meters, along with saw horses and a bench for the miter saw.
Step 2: Outline the Hexagon on Your Workspace
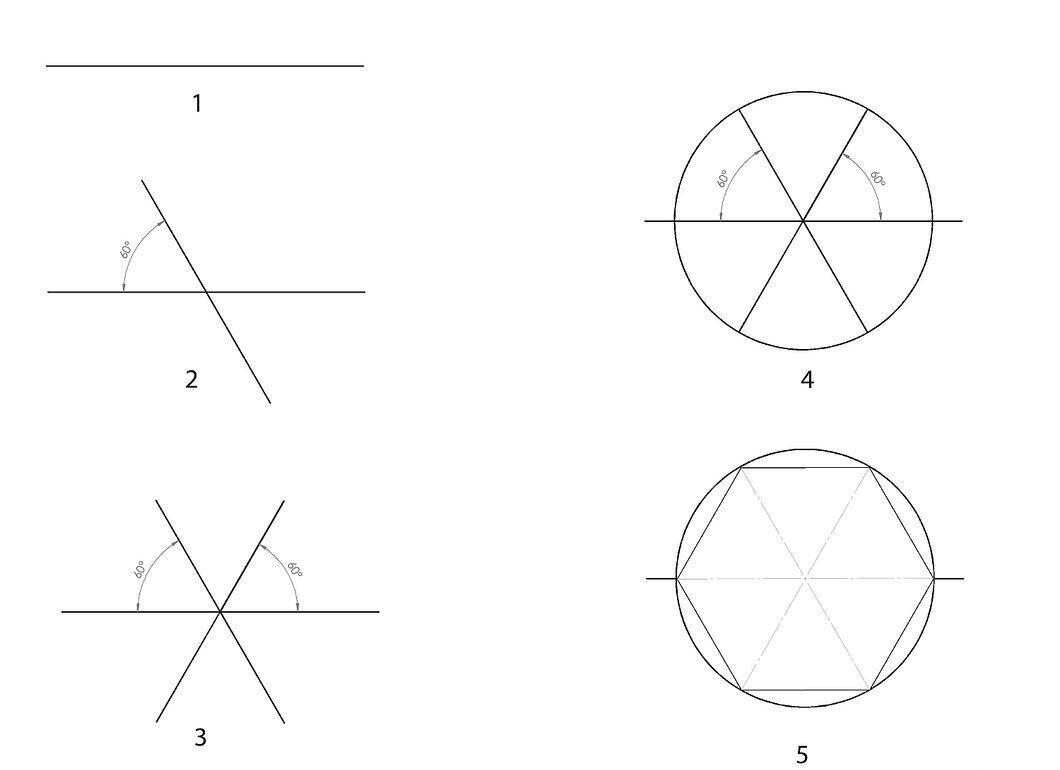
Mark the outline of the hexagon that will serve as the base or center of your table on your work surface or a sheet of plywood. This will help you position the slats correctly.
- Use a carpenter's square, referencing the center line, to mark two 60-degree angles on each side. Make them about 3.75 cm longer than the two crossbars positioned end to end, and mark the angles to achieve the correct shape (6 angles of 60 degrees total 360°). Then measure equal distances from the center and connect these points to create the outline.
Step 3: Set the Length of the Slats for the Hexagon's Outer Edge
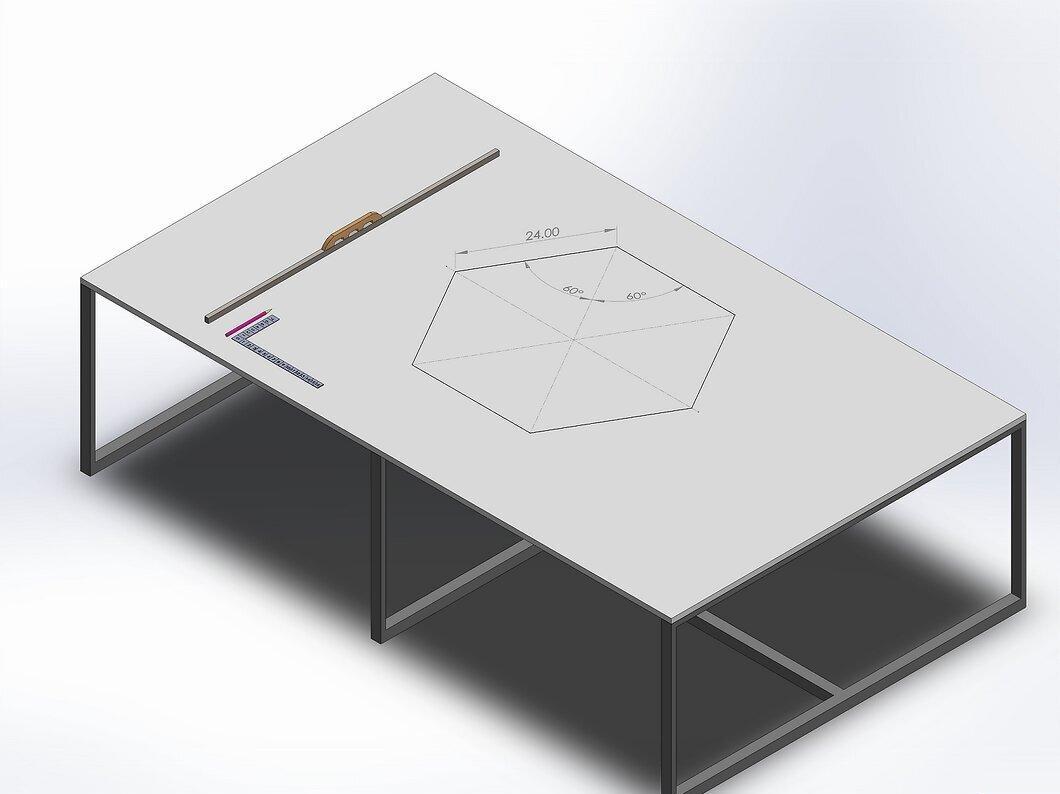
Using the previously drawn outline, establish the length of the slats forming the outer edge of the hexagon. In this table example, the length of each side is 61 cm; cut a 30-degree angle on both ends (leaving 60 degrees). When two sides connect, the angle between them is 120 degrees.
Step 4: Connect the Ends to Form the Hexagon
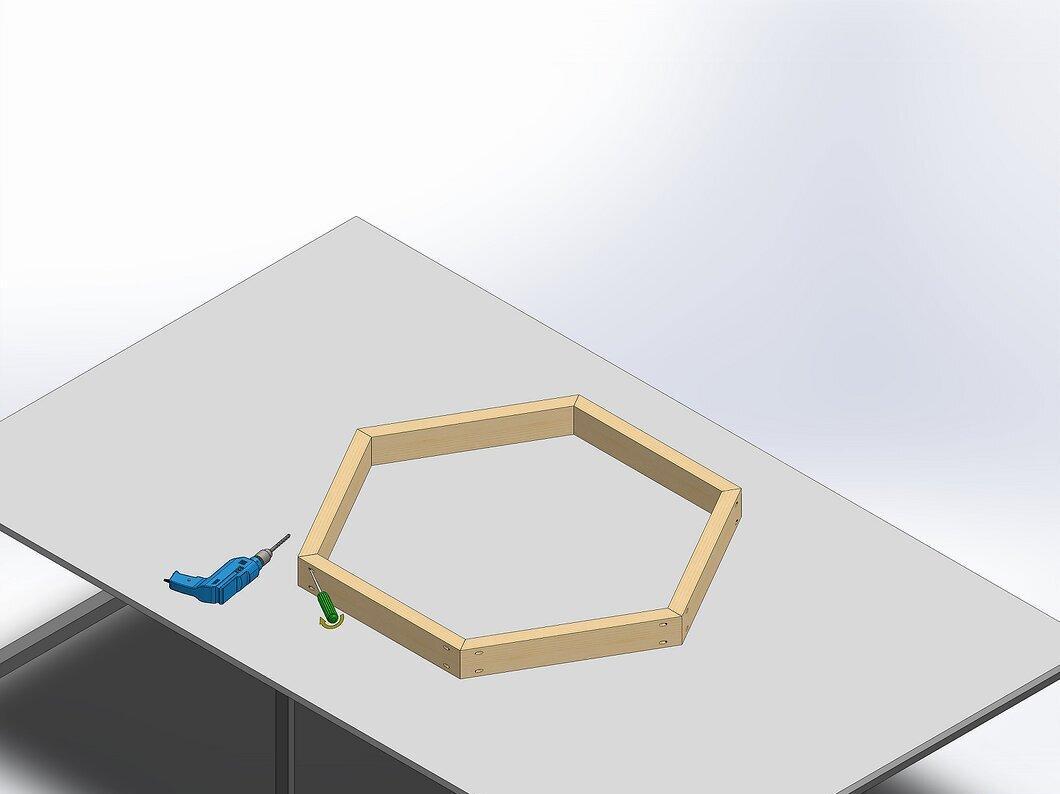
Join the ends to create an equilateral hexagon and secure them using galvanized or corrosion-resistant screws that are 6.35 cm long. Pre-drill holes for the fasteners to ensure a strong connection.
Step 5: Ensure Equal Sides
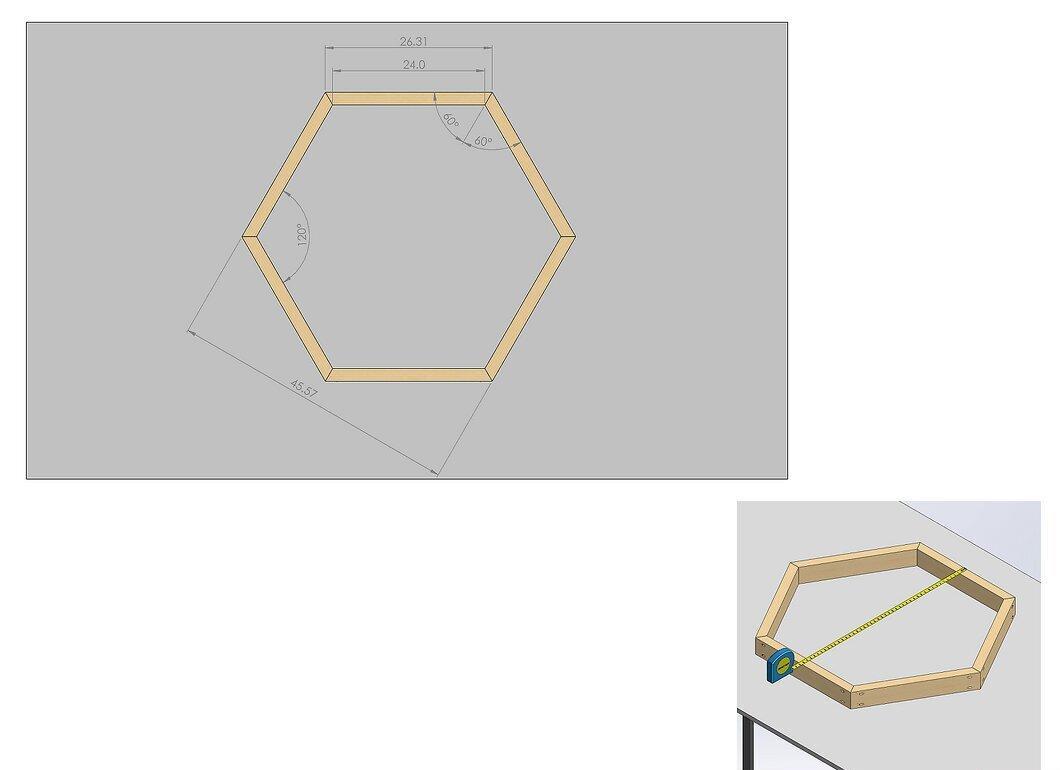
Check that the sides of the hexagon are equal by measuring the parallel sides. In this project, each side should be about 114 cm. To prevent side movement, angle nail two sides to the tabletop with screws before securing the internal frame components.
Step 6: Split the Hexagon into Two Parts
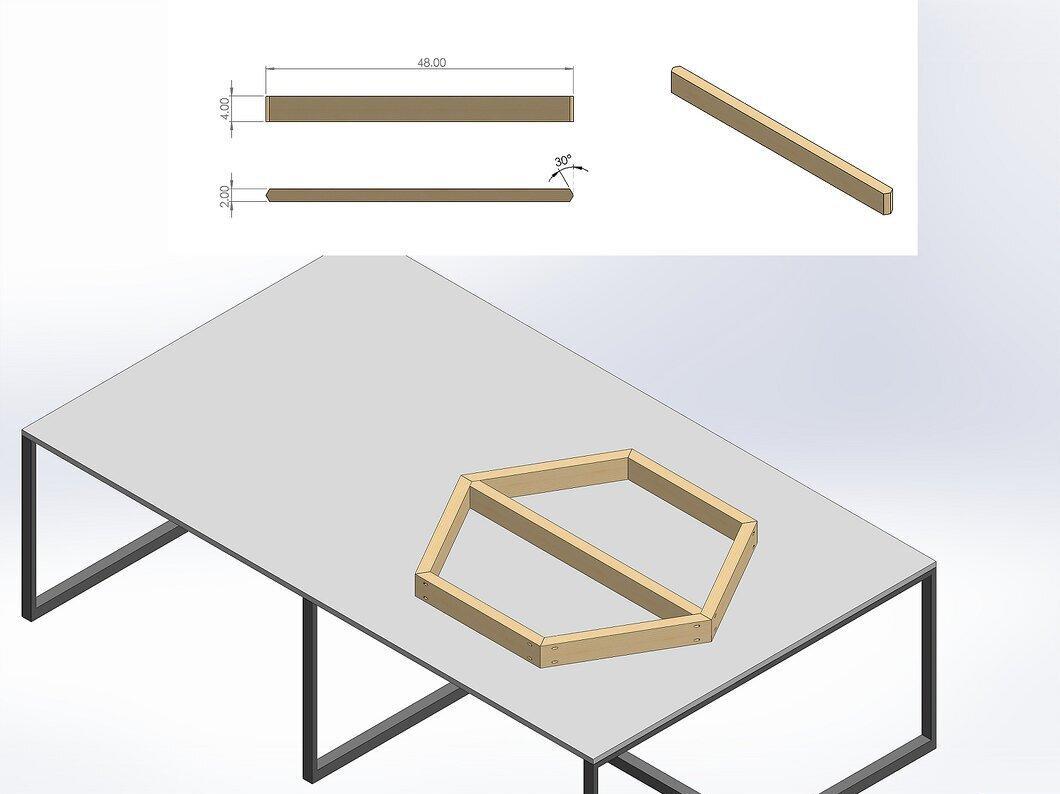
Divide the hexagon between two opposite corners to create a 30-degree angle at each end, measuring 5 cm from the corner to the center. Repeat if necessary to obtain precise dimensions.
Step 7: Secure the Slats at Each End
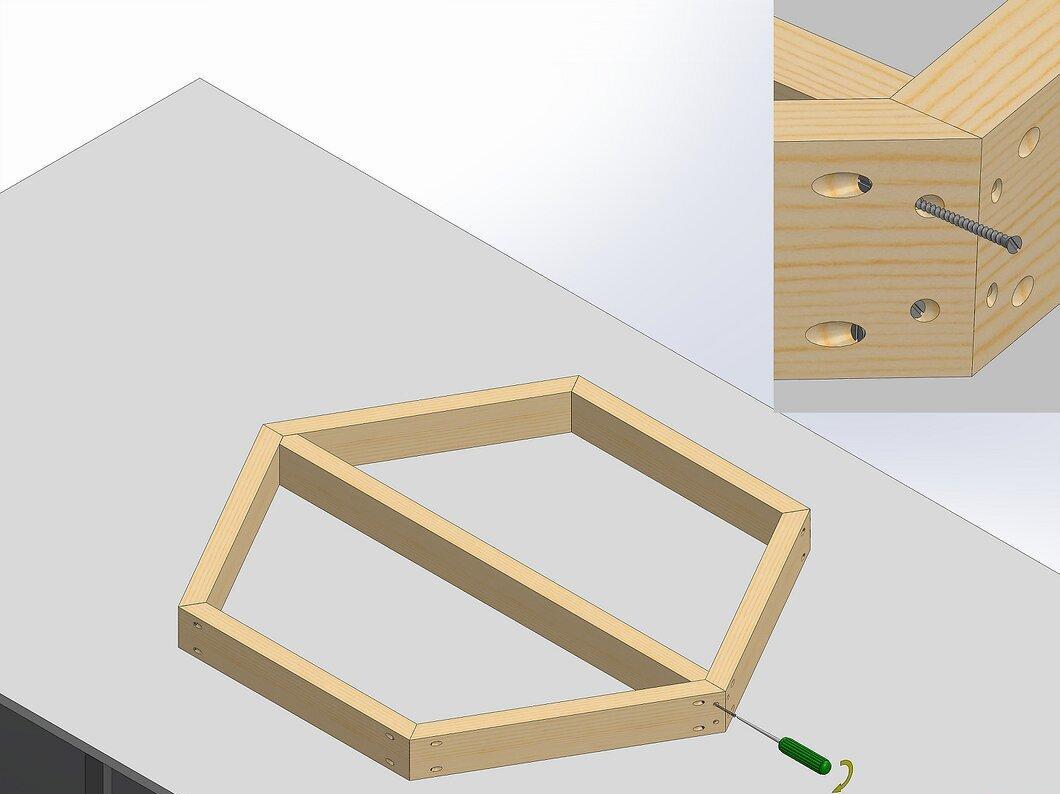
Attach 5 cm x 10 cm slats at each end using screws. Remember to pre-drill holes to prevent wood splitting and to securely tighten the screws. This structure will serve as the base for the tabletop, so it's important that all parts fit tightly together.
Step 8: Cut Four Crossbars
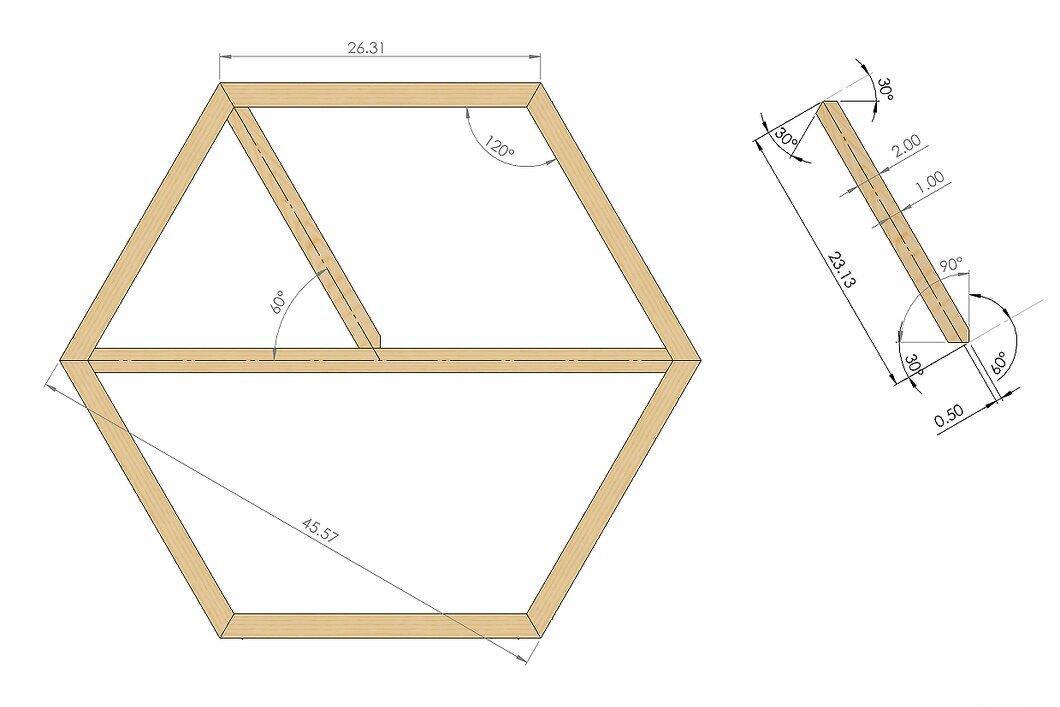
Measure the length of the crossbar from the center of the 5 cm x 10 cm slat to one corner and cut to the desired length. To create the angles, mark the center at 5 cm from each end and cut 30 degrees from each edge towards the center. One end will be cut at 30 degrees, and the other at 90 degrees, resulting in a 60-degree angle.
Step 9: Attach the Crossbars
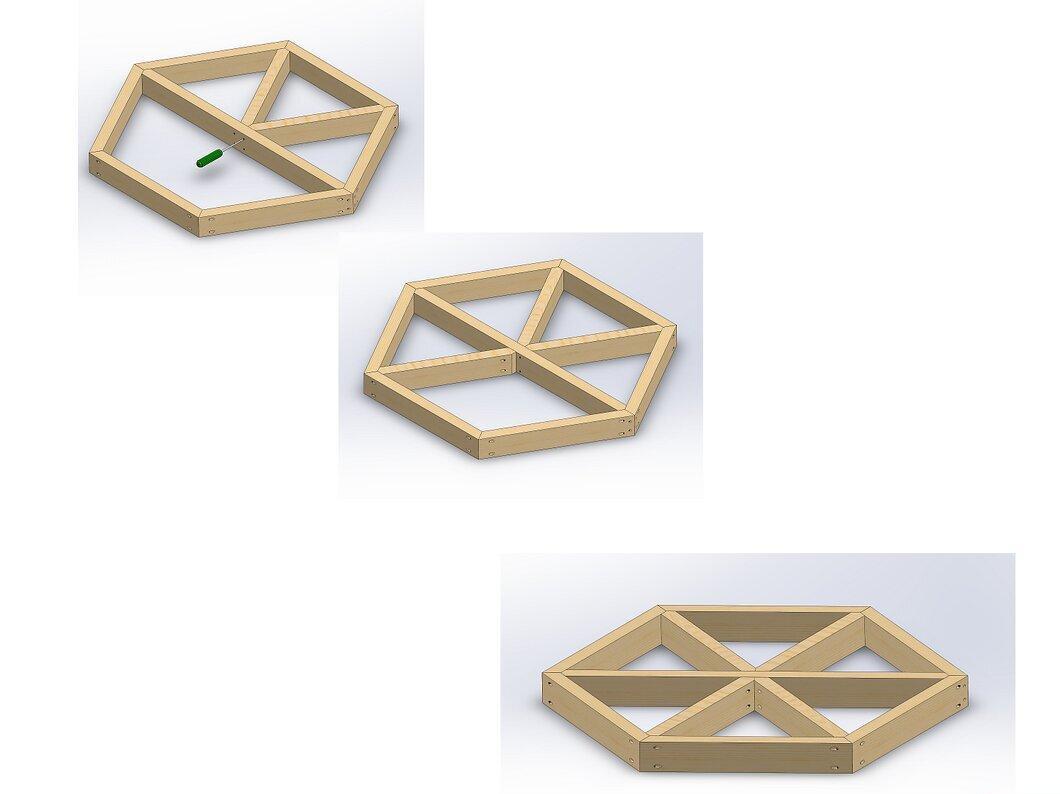
Attach these crossbars using screws for the first pair through the center board and at an angle for the opposite side. Don't forget to pre-drill holes, especially if the fasteners are close to the edges.
Step 10: Check the Frame's Symmetry
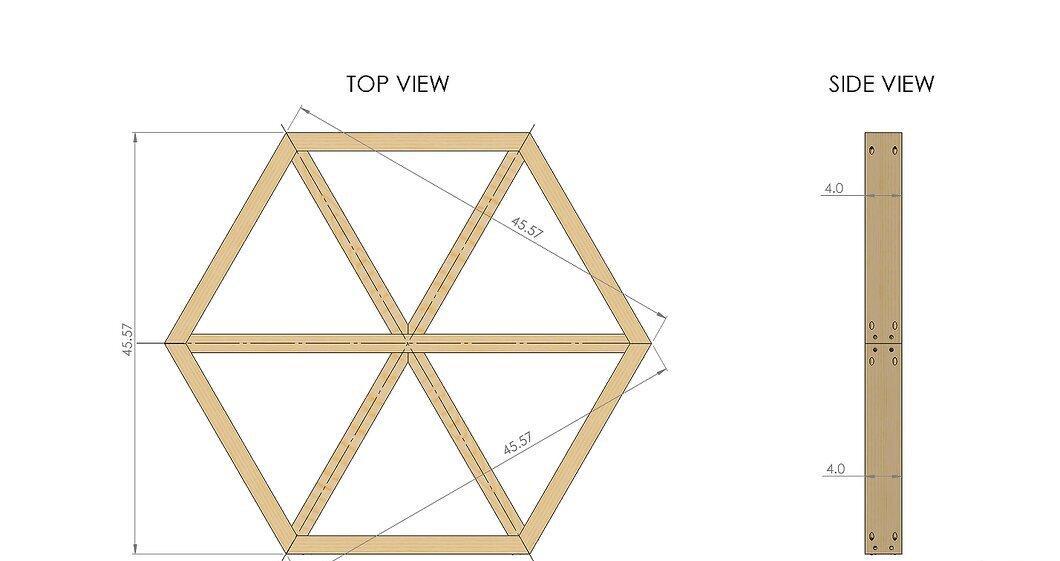
Ensure that the frame is symmetrical and all sides are of equal length. Check that the edges are level on the top and bottom. Remember that even processed lumber can vary slightly in width and thickness, so this is important for quality work.
Step 11: Cut 6 Boards for Vertical Walls
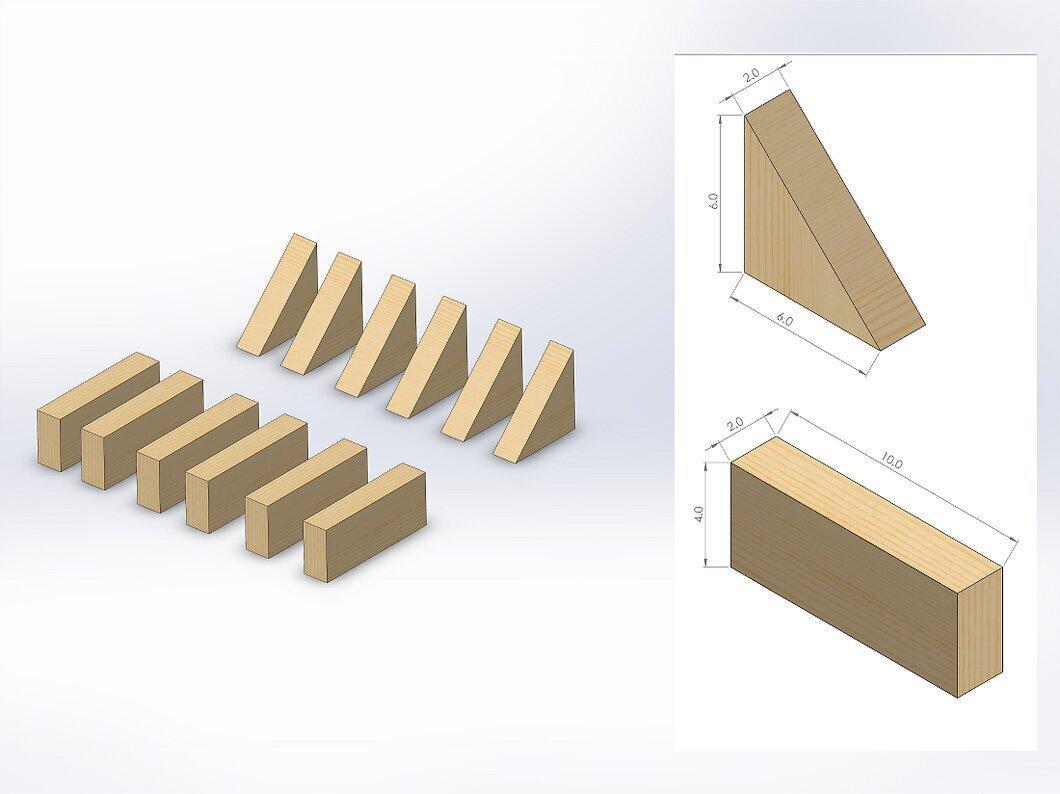
Create 6 boards for the vertical walls that will support the tabletop, as well as 6 diagonal braces for added support. In the illustrations, the parts adjacent to the legs measure 25 cm in length, while the diagonal braces are 15 cm long with a 45-degree angle at each end.
Step 12: Pre-drill Holes for Fasteners
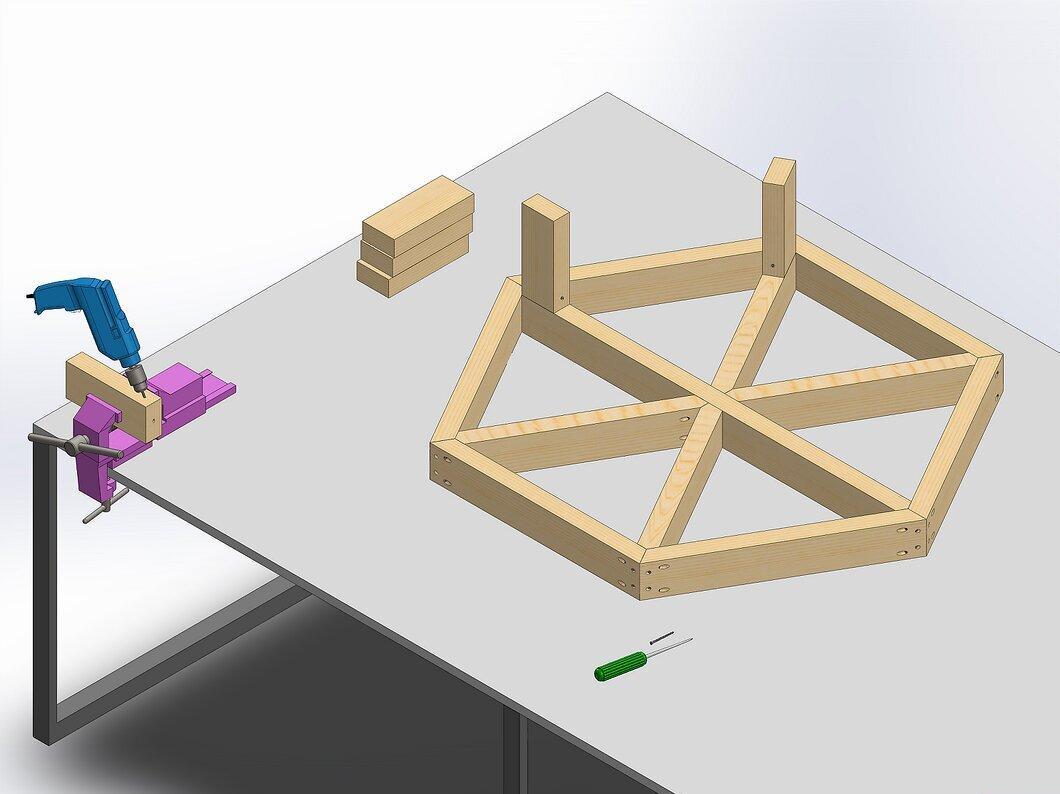
Drill holes for the fasteners to connect the supports to the frame. Secure the braces to these components. The screws should be flush with the frame to ensure a secure attachment. Use the same 6.35 cm (number 10) corrosion-resistant wood screws.
Step 13: Install the Vertical Walls
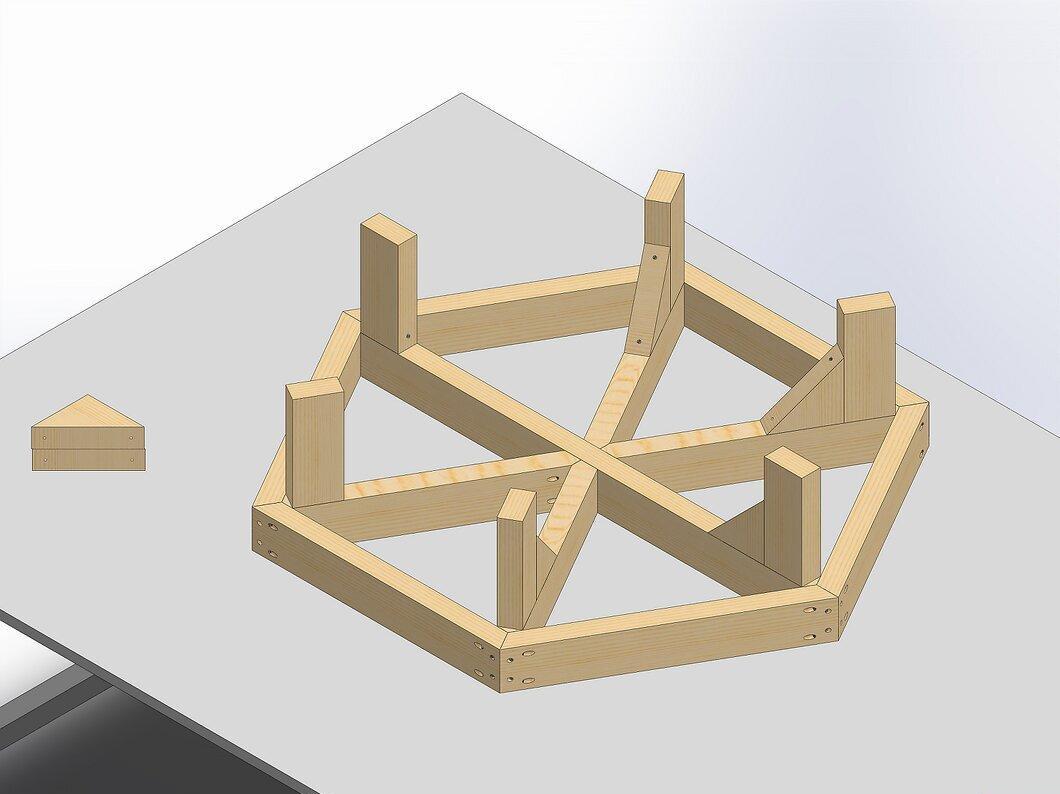
Place each vertical wall in position, securing the braces and ensuring all parts are properly aligned.
Step 14: Install the Central Board
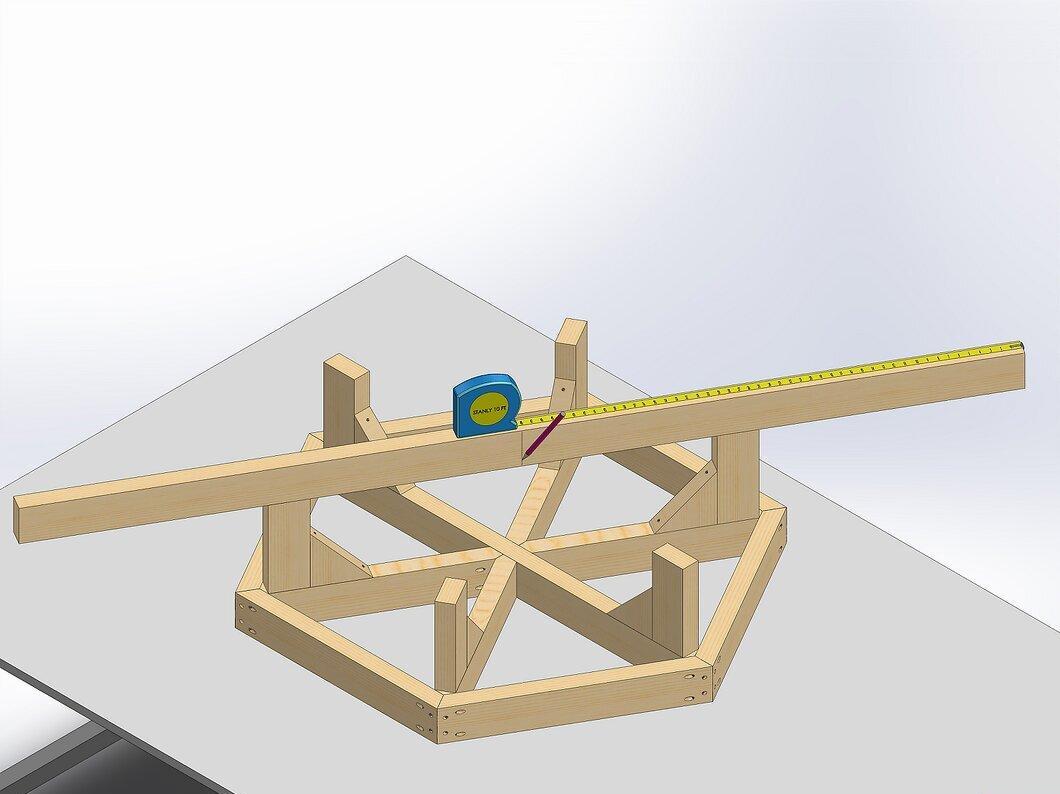
Lay a 243 cm board measuring 5 cm x 10 cm between two opposite corners on top of the vertical slats and center it. Secure it in place with screws.
Step 15: Mark the Center of the Central Board
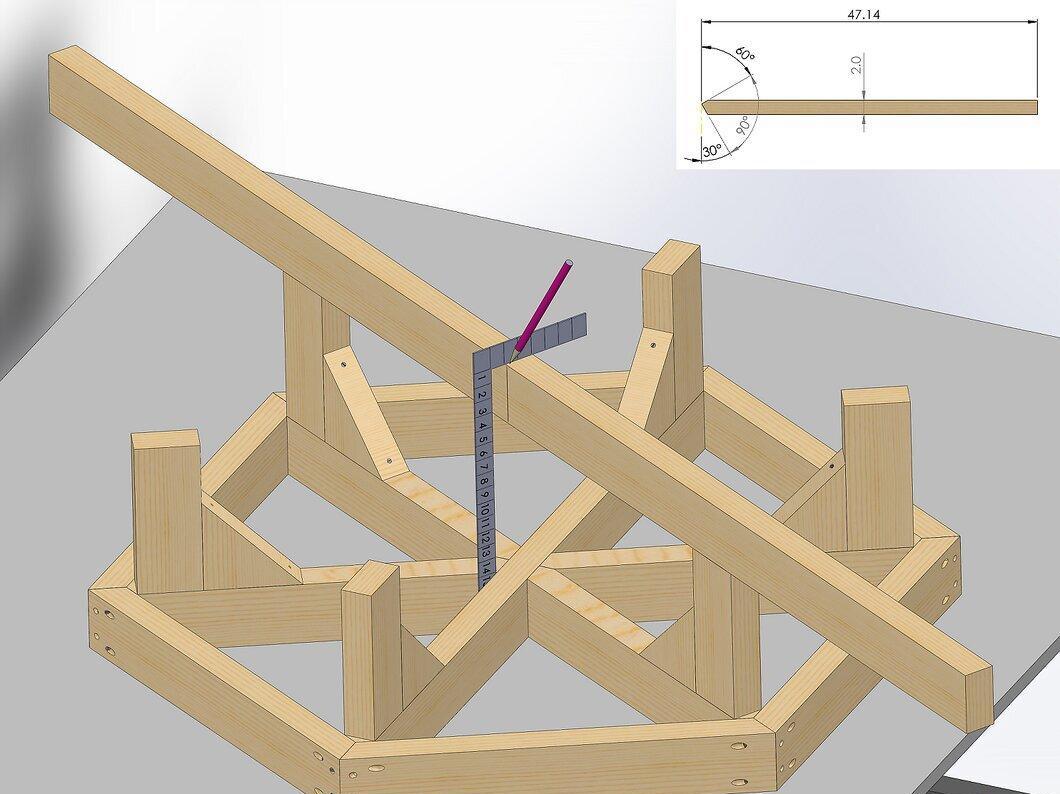
Mark the center of this board and draw lines down from each side with a square to indicate where the beam slats will be attached. Cut a 30-degree angle on one end of four of these slats.
Step 16: Attach the Beam Slats
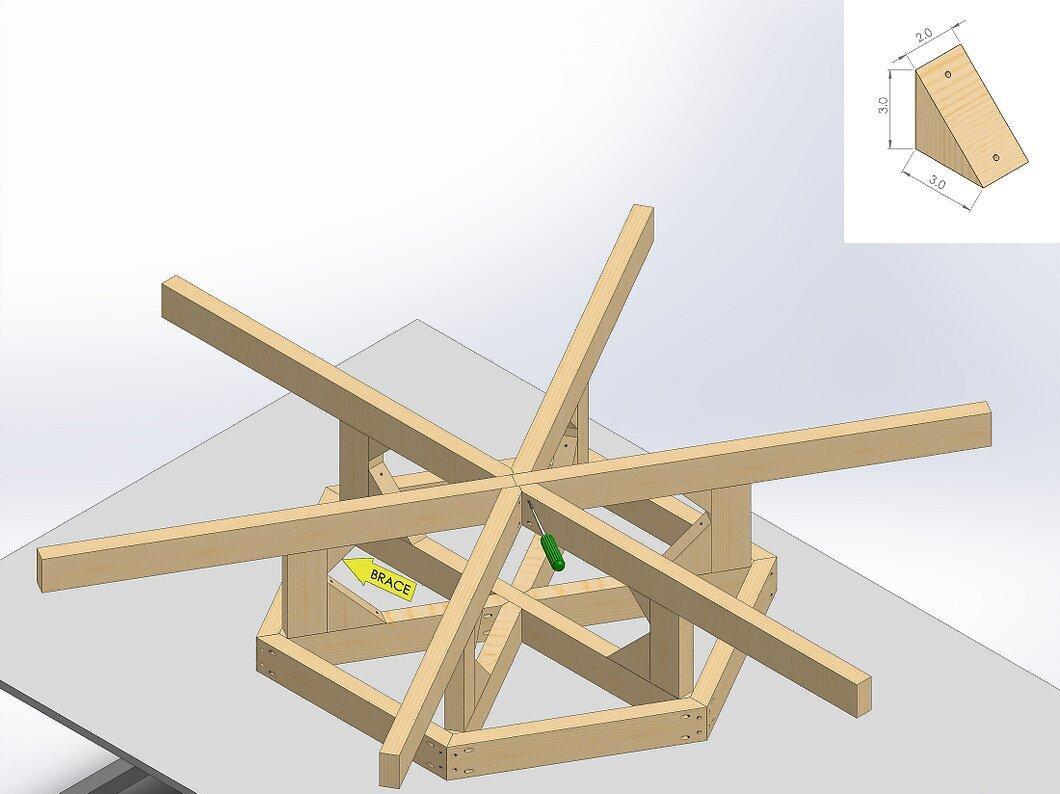
Attach the beam slats to the central board and each end of the vertical slats. For added stability, you can include diagonal supports.
Step 17: Cut a Reinforcement Board
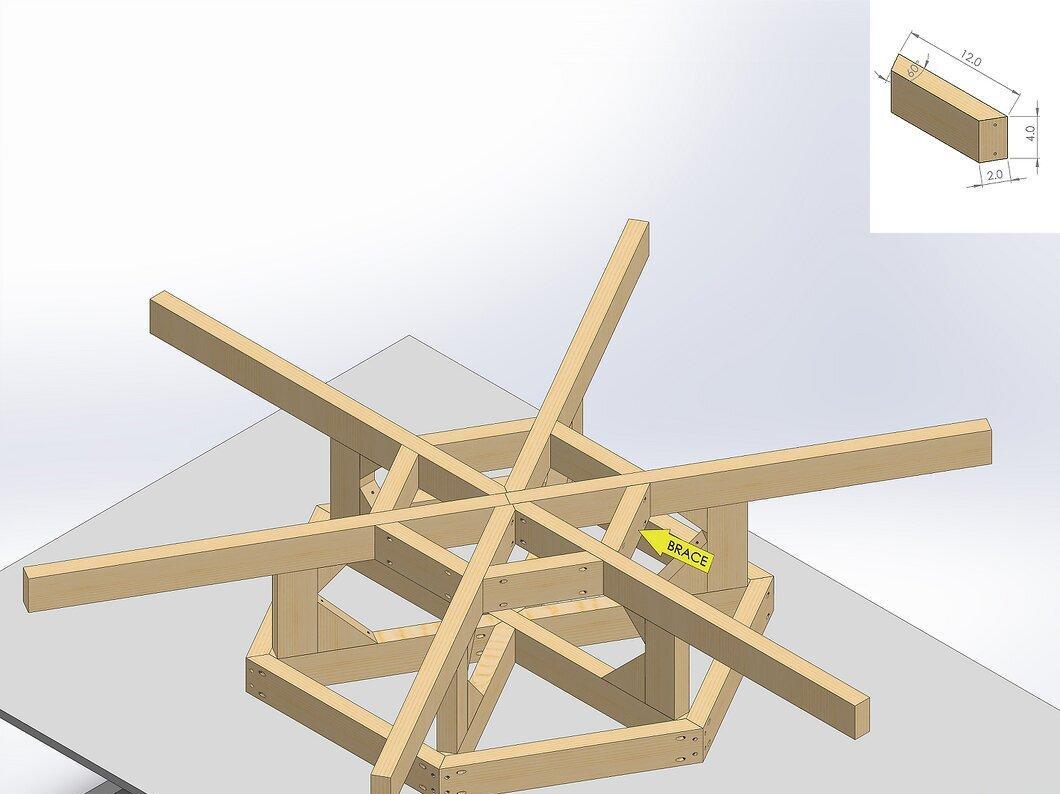
Cut a board measuring 5 cm x 10 cm and 30 cm long with 30-degree cuts on the ends. Install it between the crossbars to reinforce the structure. Ensure they are level as this is important for supporting the seating.
Step 18: Cut Boards for Seating
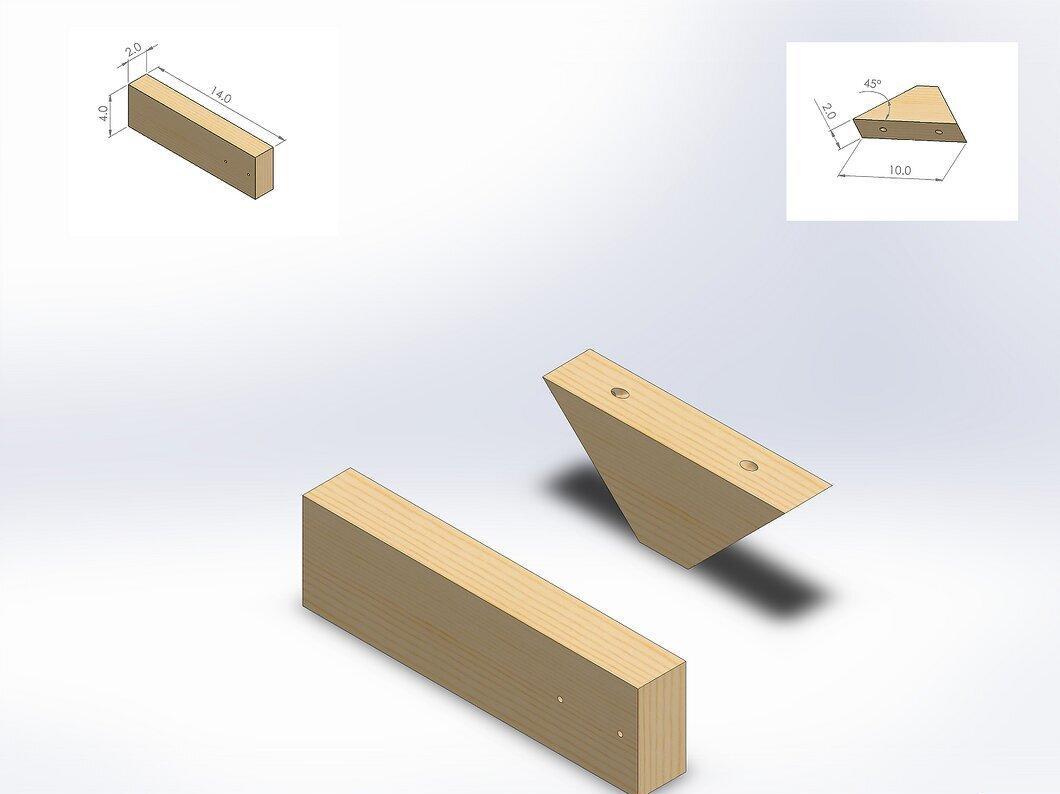
Create six boards measuring 35 cm and 5 cm x 10 cm with pointed ends, as well as six diagonal braces measuring 25 cm with a 45-degree angle on each end.
Step 19: Secure the Seating Boards
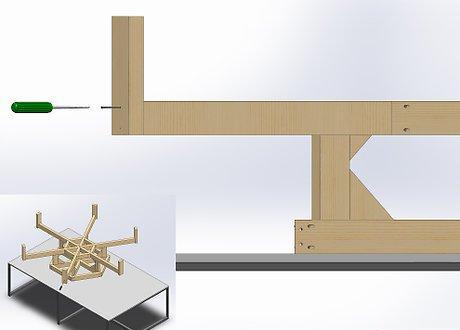
Attach the 35 cm boards so that they are level with the bottom of the crossbars extending from the center of the top frame. Use larger screws for attachment, as they need to support the weight of the table and those seated at it.
Step 20: Install the Diagonal Braces
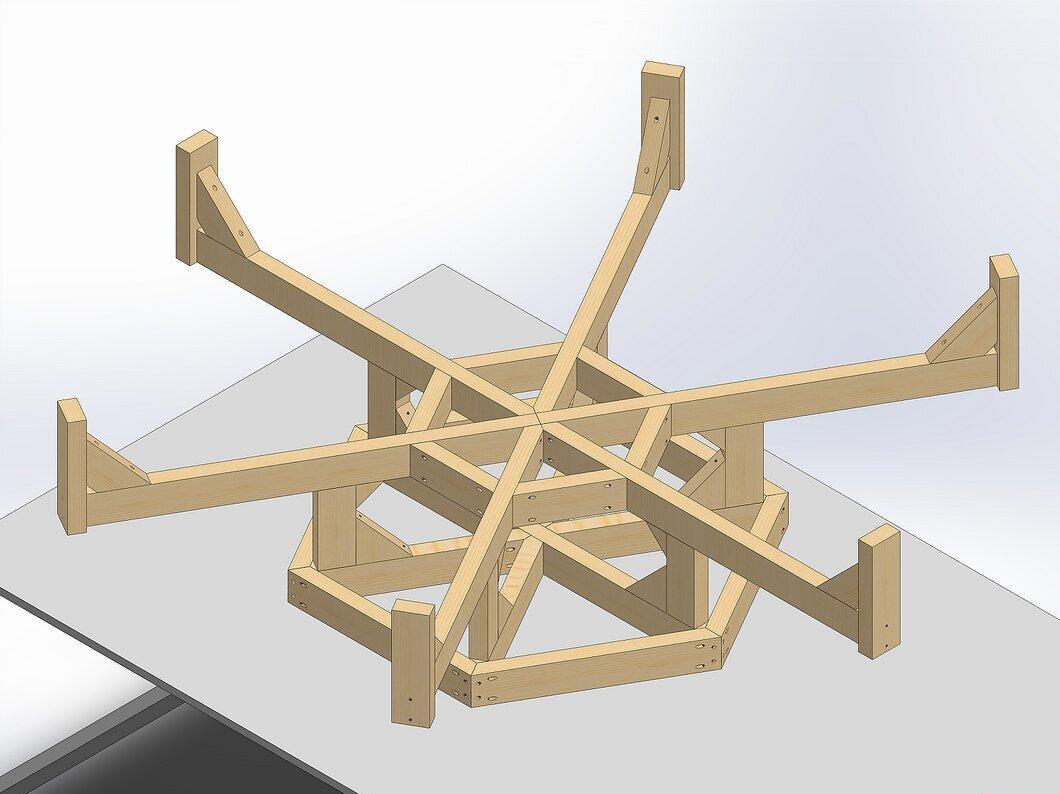
Attach the diagonal braces to the legs, ensuring that the angles are right and the components fit tightly together.
Step 21: Check the Structure's Stability
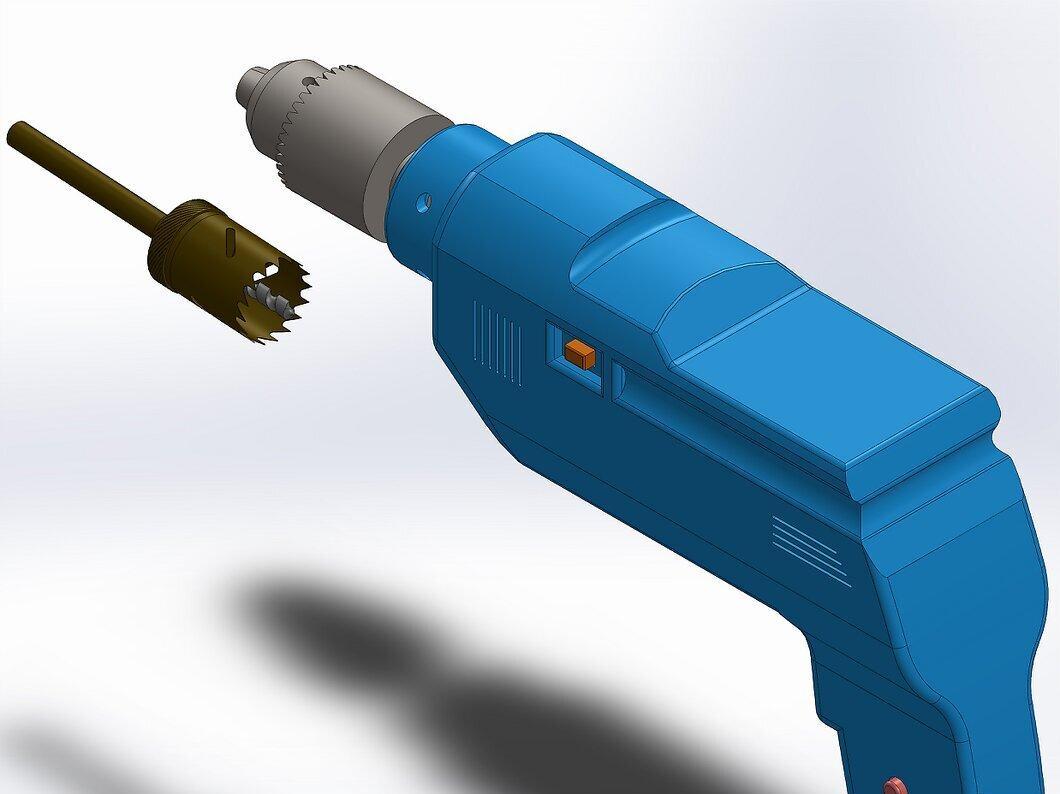
Make sure all fasteners are secure and the structure is sturdy. Add screws to any connections that seem weak and replace any damaged slats.
Step 22: Flip the Frame
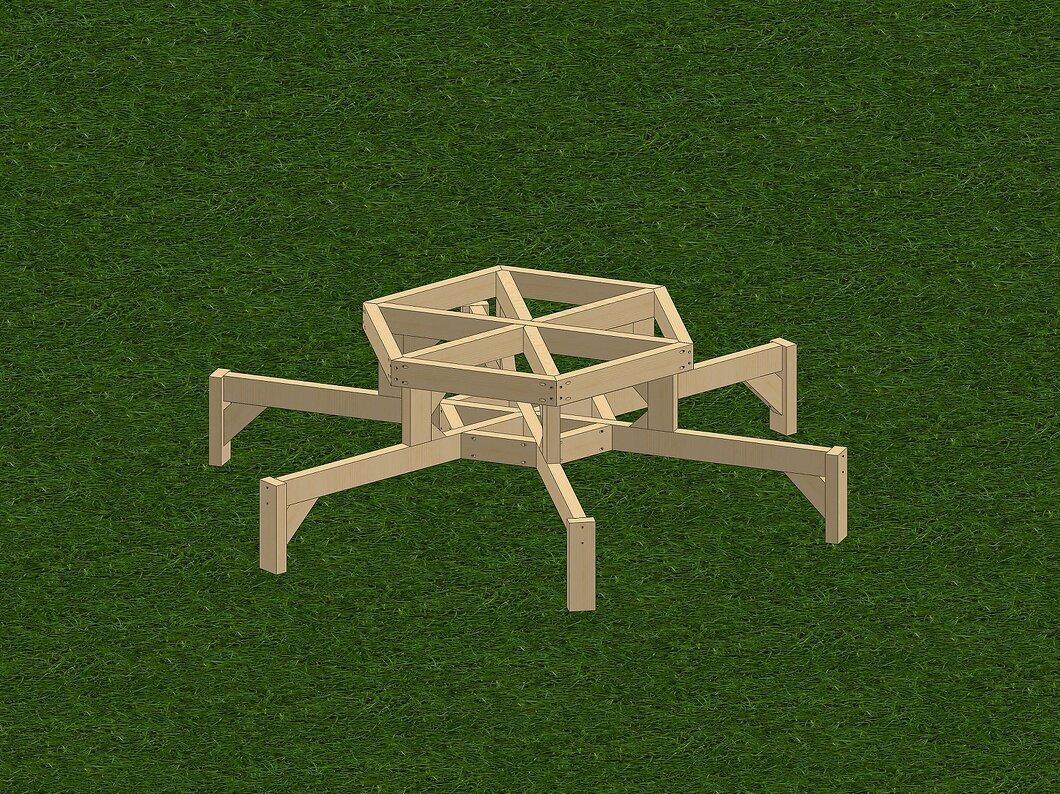
Turn the frame so that it stands upside down on the ground. The legs should rest securely on the surface. If any leg appears too long or unstable, you can trim it, but this isn't necessary if everything has been done correctly.
Step 23: Begin Attaching the Tabletop
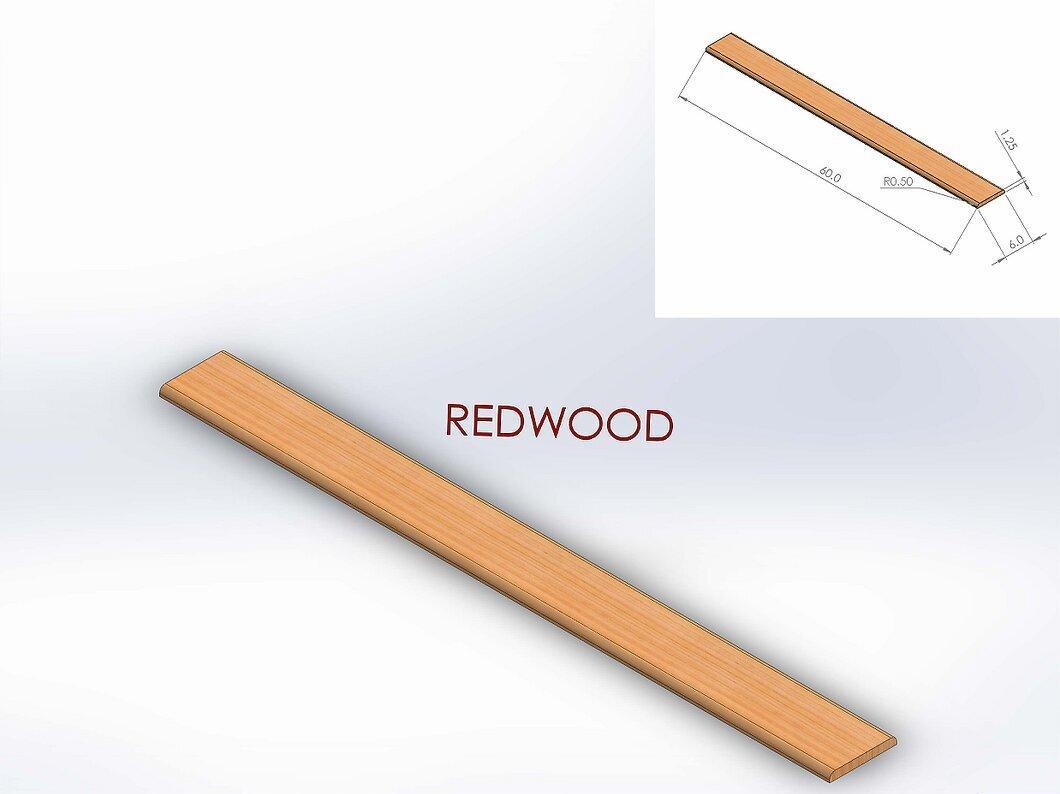
Attach the tabletop to the frame. The illustrations show deck boards measuring 3 cm x 15 cm with rounded edges, made from cedar or mahogany. Treated swamp pine slats measuring 5 cm x 10 cm also work well.
Step 24: Install the First Tabletop Board
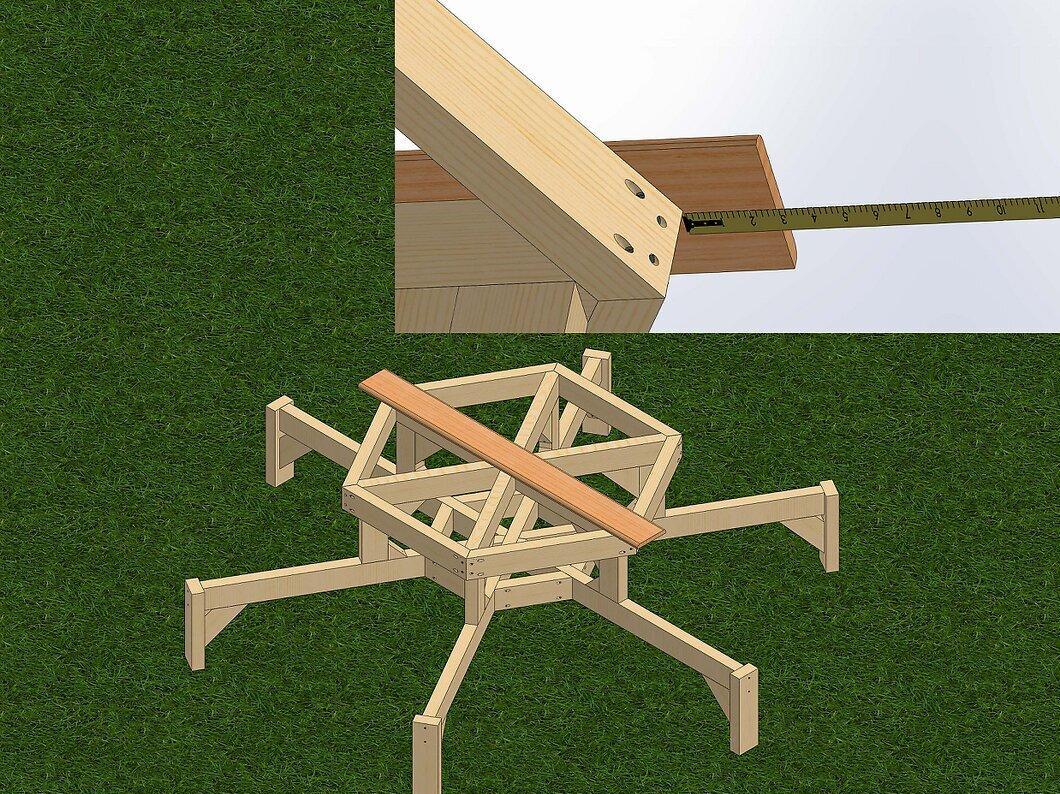
Place the first board centered between two opposite corners, checking the distance from the edges. Allow one end to extend down by 7.5 cm—screw the board in to secure it. Continue adding boards until one side is nearly fully covered.
Step 25: Trim the Edges
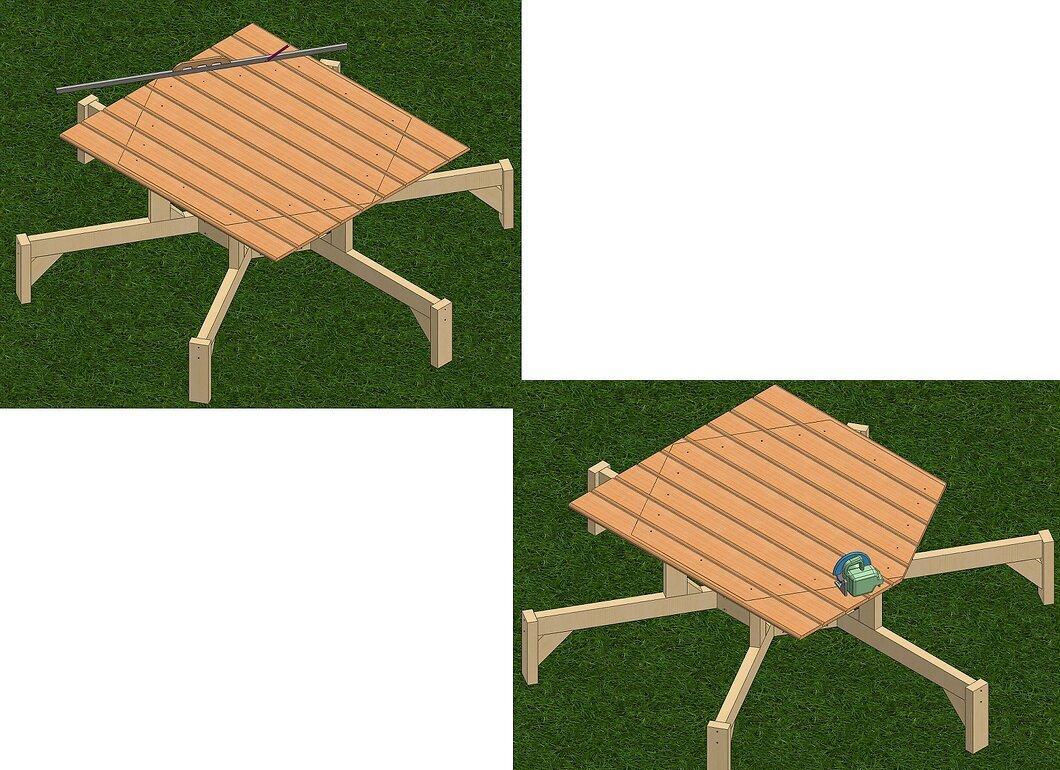
Draw a line parallel to the support frame, 7.5 cm outside the frame, and cut the boards with a circular saw. Ensure the boards are securely fastened so they don’t warp due to weather exposure.
Step 26: Finish Laying the Tabletop
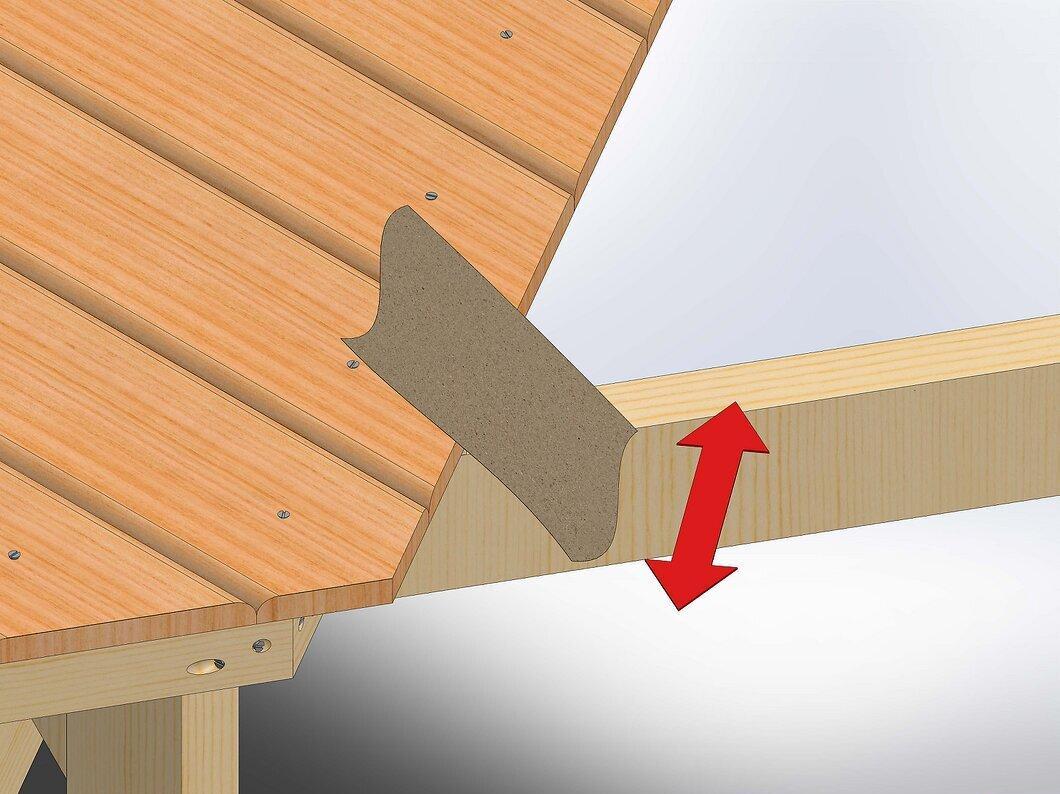
Complete the laying and securing of the tabletop boards, trimming the edges so they are even and symmetrical concerning the frame. Sand the edges to avoid injuries for table users.
Step 27: Install the Seating Boards
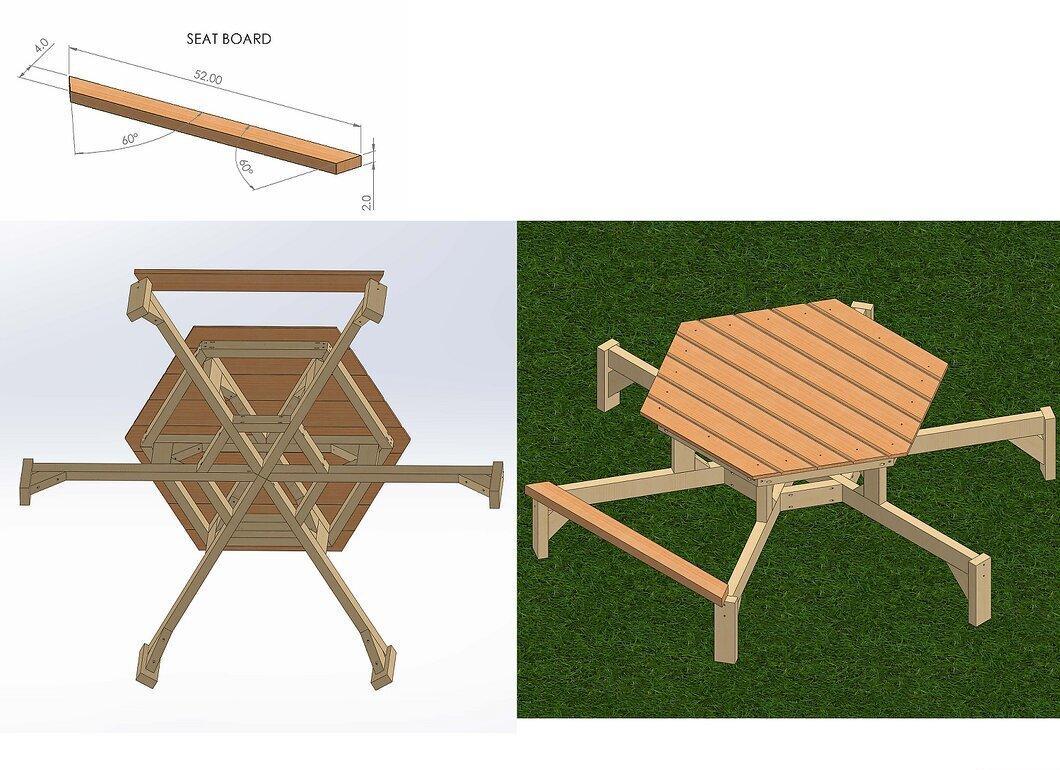
Place the seating boards on the 5 cm x 10 cm slats located on the outer side of the support frame. Ensure that each end is cut at a 30-degree angle and that the outer sides cover the tops of the legs. Drill pilot holes at the ends of the seating boards.
Step 28: Install All the Seating Slats
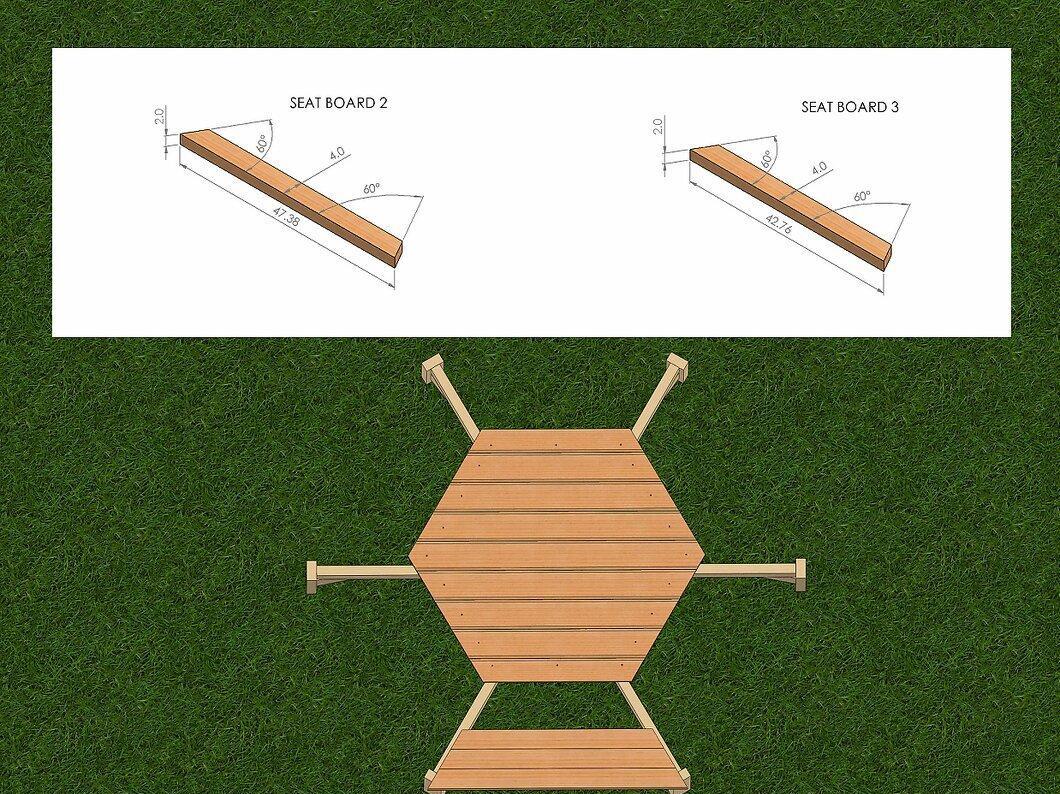
Secure all seating boards, checking angles and adjusting them so that each board sits snugly against its neighbor.
Step 29: Sand the Edges and Corners
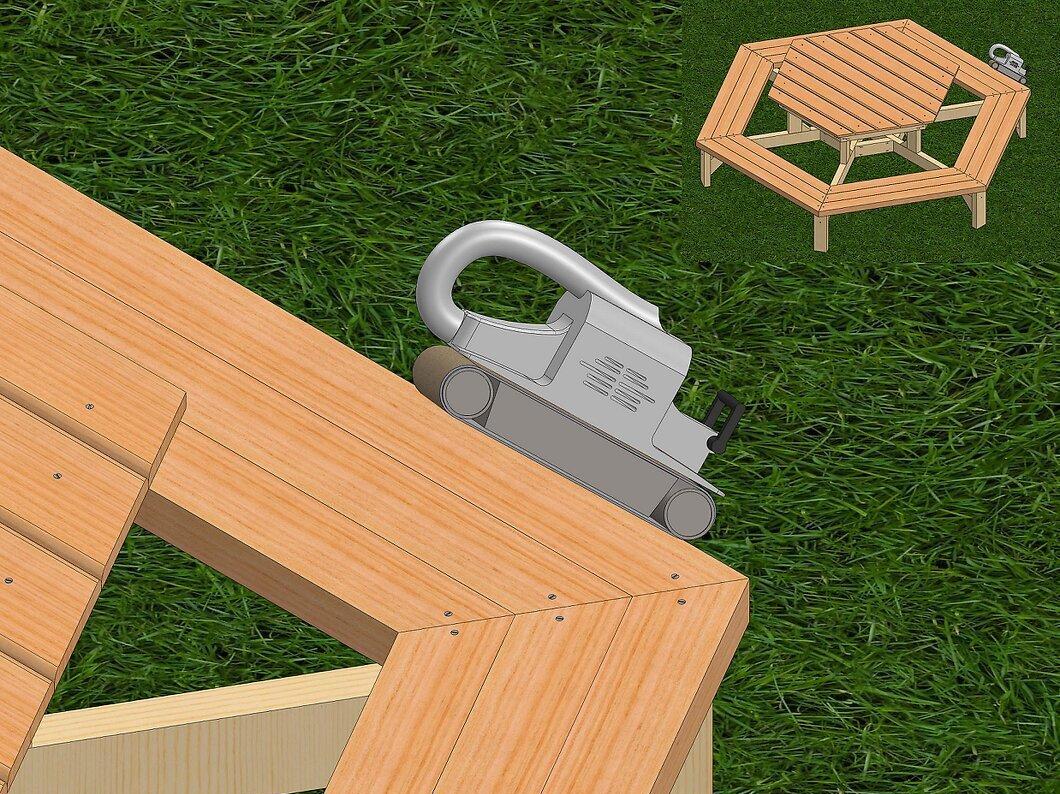
Sand all edges where splinters or rough surfaces may exist and round the corners to prevent injuries.
Step 30: Finish the Table
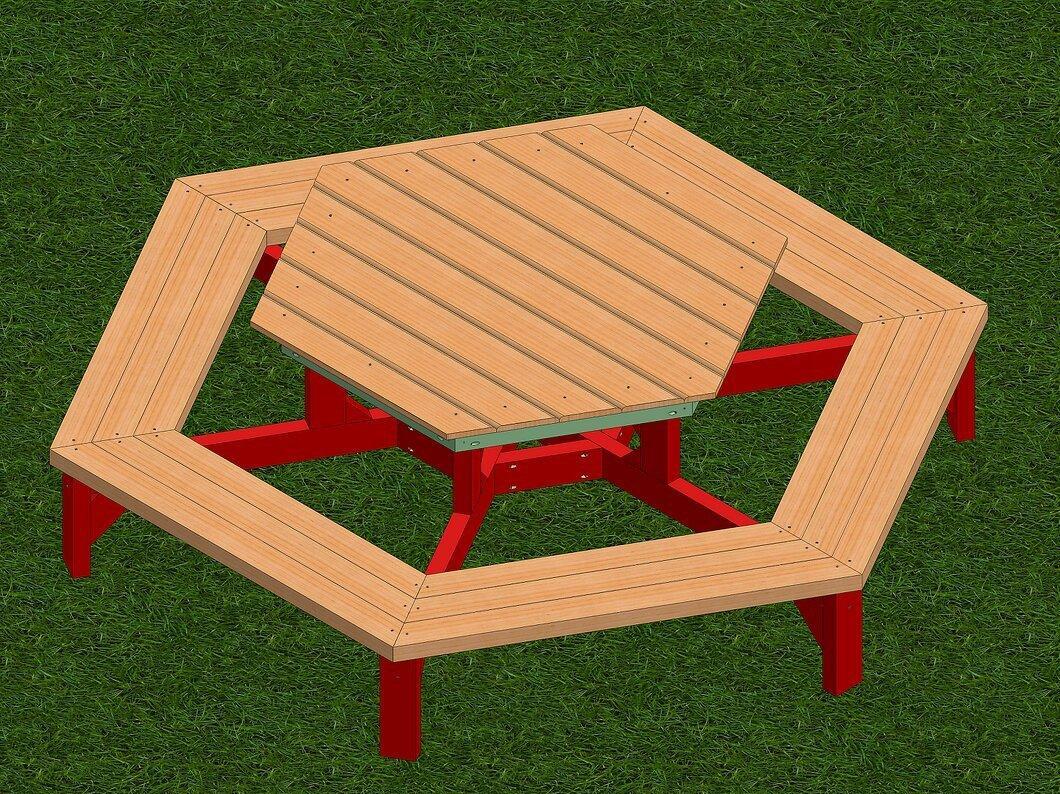
Apply an outdoor primer or weather-resistant paint to the table, and then enjoy your new hexagonal picnic table!


