
Creating presentations in PowerPoint is easy, but sharing them with people who don't have the software can be challenging. To simplify the sharing process, it’s recommended to convert your slides into MP4 video format, which can be played on any computer or mobile device and uploaded to platforms like YouTube. The latest versions of PowerPoint come with a built-in converter, while older versions like PowerPoint 2007 require a bit more effort.
PowerPoint 2010/2013
Step 1. Create your presentation in PowerPoint.
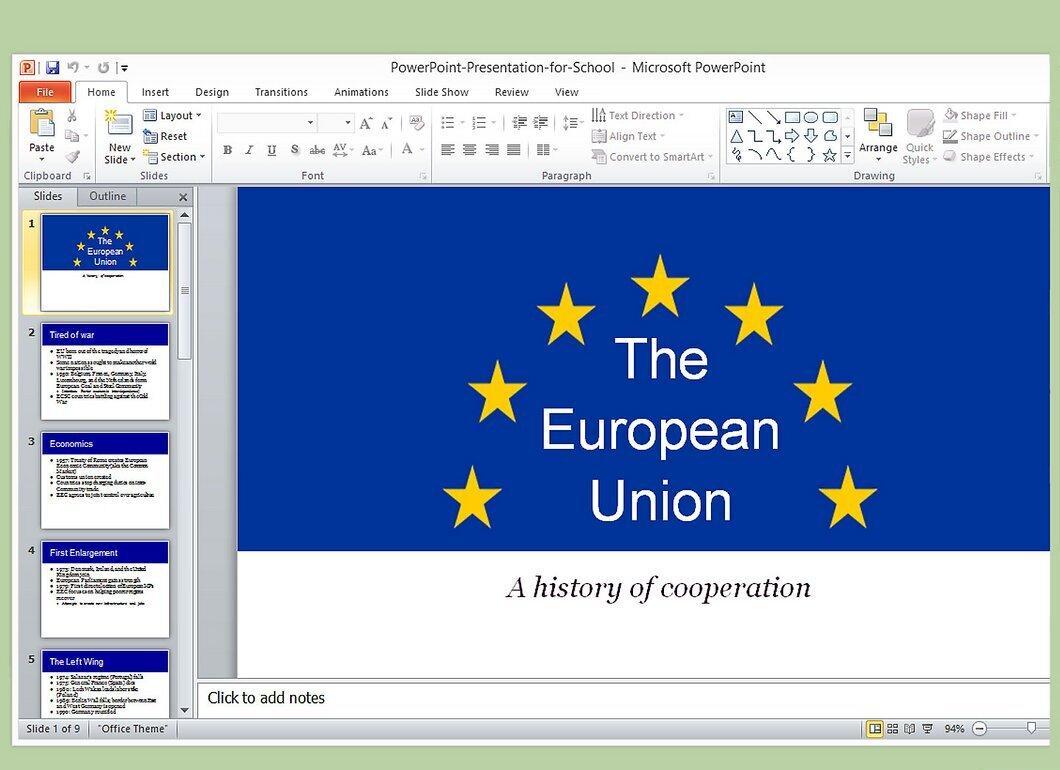
Start by creating your presentation. When converting to MP4, all transitions, timing settings, and other parameters will remain intact. So make sure to utilize all the features PowerPoint has to offer to craft your project.
Step 2. Click on 'File'.
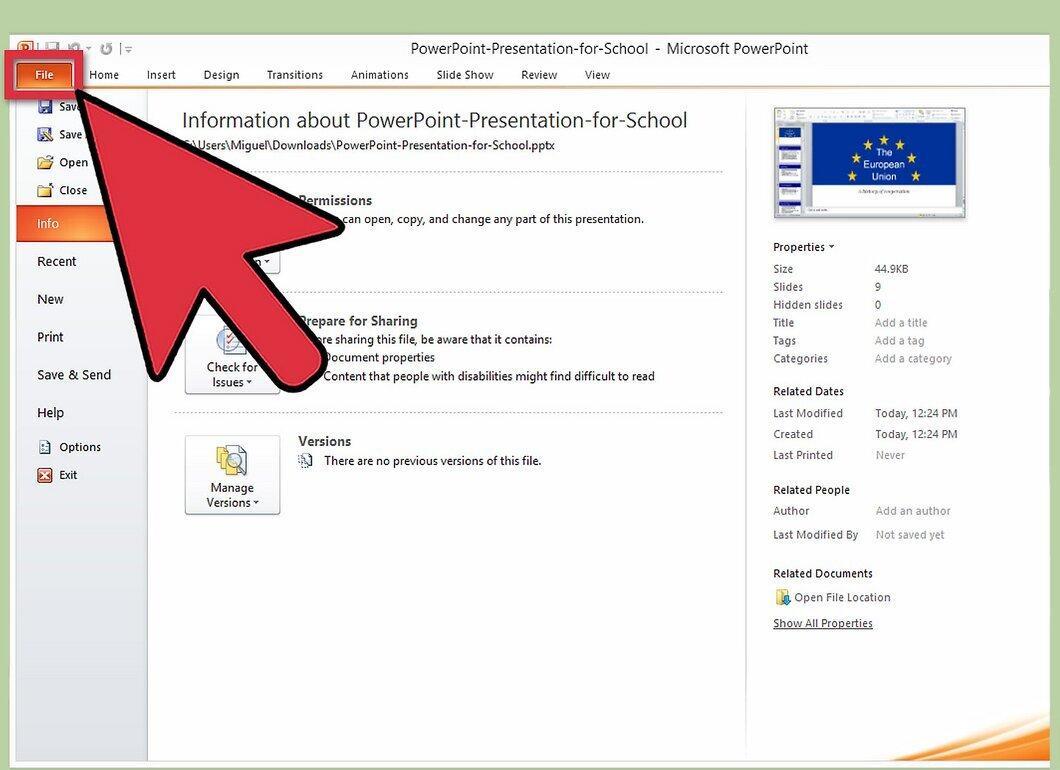
Click on 'File'. In some versions of PowerPoint 2010, this option may be replaced with the Microsoft Office logo button.
Step 3. Go to 'Export' or 'Share'.
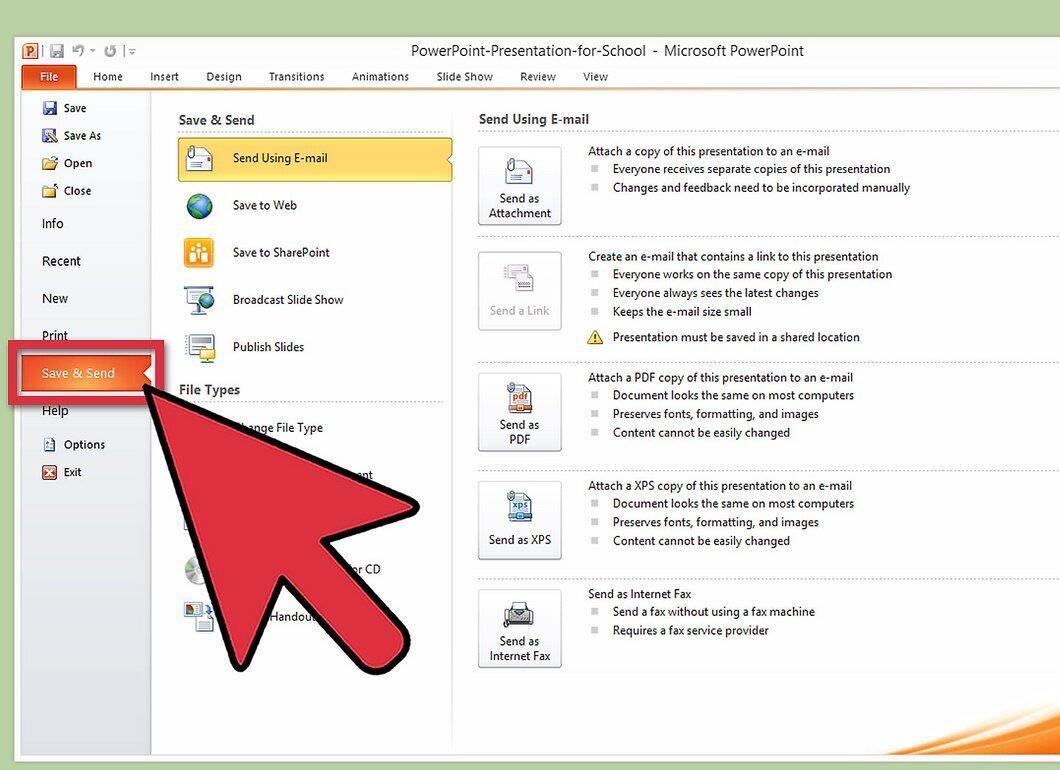
In the menu, select 'Export' (for PowerPoint 2013) or 'Share' (for PowerPoint 2010). This will allow you to convert your presentation into other formats.
Step 4. Click on 'Create Video'.
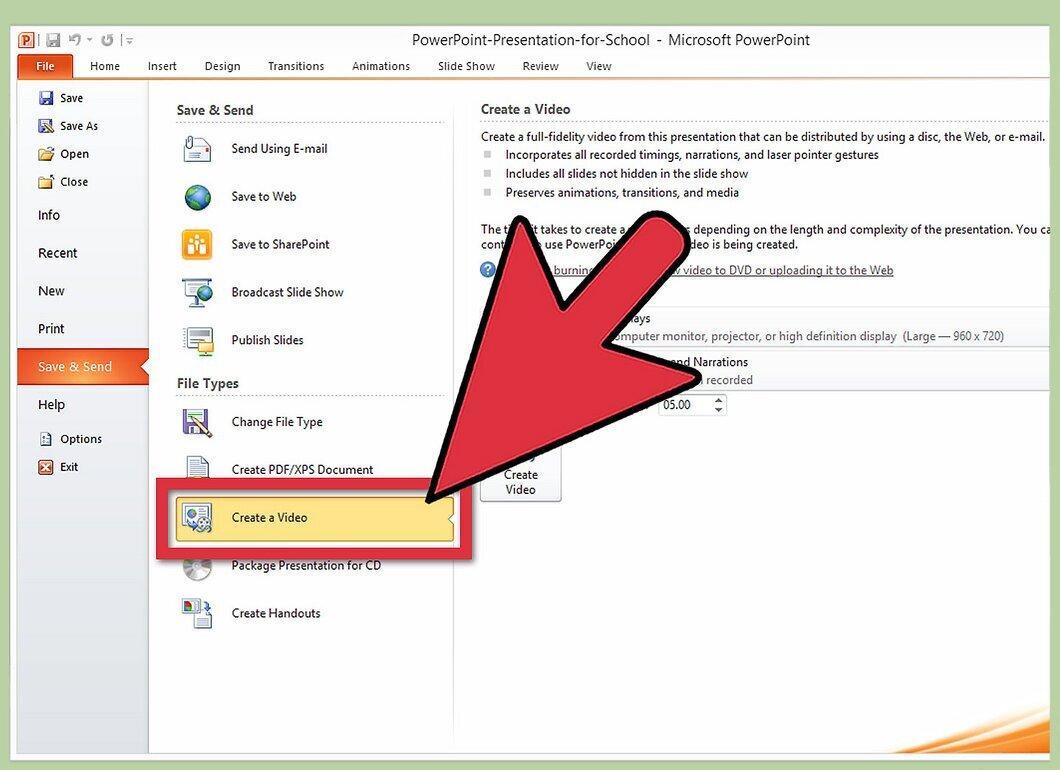
Click on 'Create Video'. A window will pop up where you can set the parameters for your upcoming video file.
Step 5. Choose video quality.
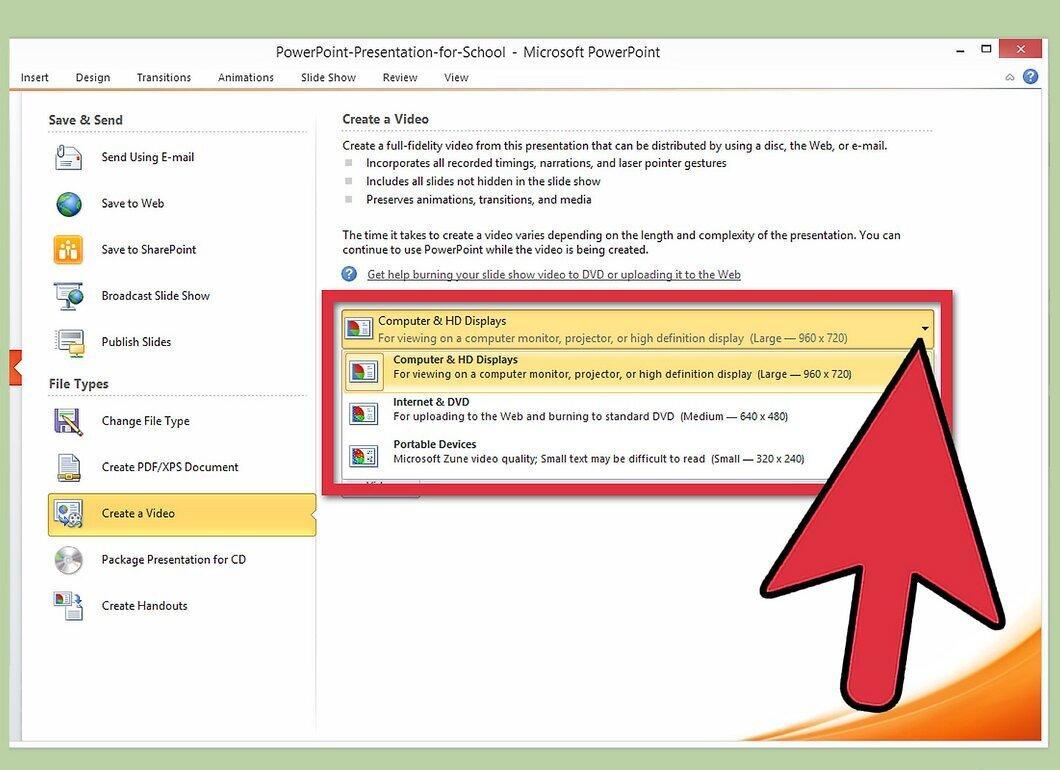
Select the quality. This parameter affects the size and clarity of the image. Low quality will result in a compact file but with a less clear image. You can choose between three quality options, which may differ slightly in PowerPoint 2010 and 2013:
- The 'Presentation' option (2013) or 'High' (2010) will create a video with the best quality, ideal for projecting on large screens, but the file size will be quite large.
- The 'Internet' option (2013) or 'Medium' (2010) is suitable for uploading to YouTube or viewing on a computer screen, resulting in a smaller file size while maintaining good quality.
- The 'Low' option (for both versions) will create the most compact file but with a blurry image — a good choice for older mobile devices.
Step 6. Set timing settings.
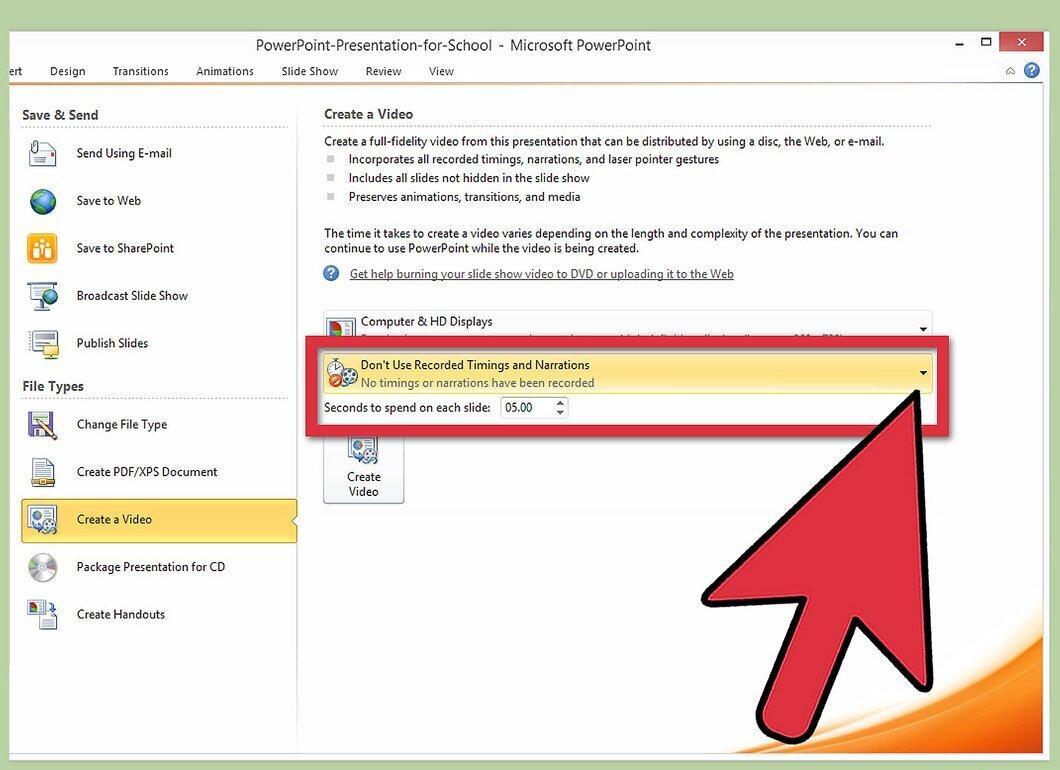
Adjust the timing settings. In the menu located under the quality options, you can set the time intervals for transitions between slides. You can keep the original settings or specify new time intervals.
- In this menu, you will be able to make changes and preview them before proceeding.
Step 7. Click 'Create Video'.
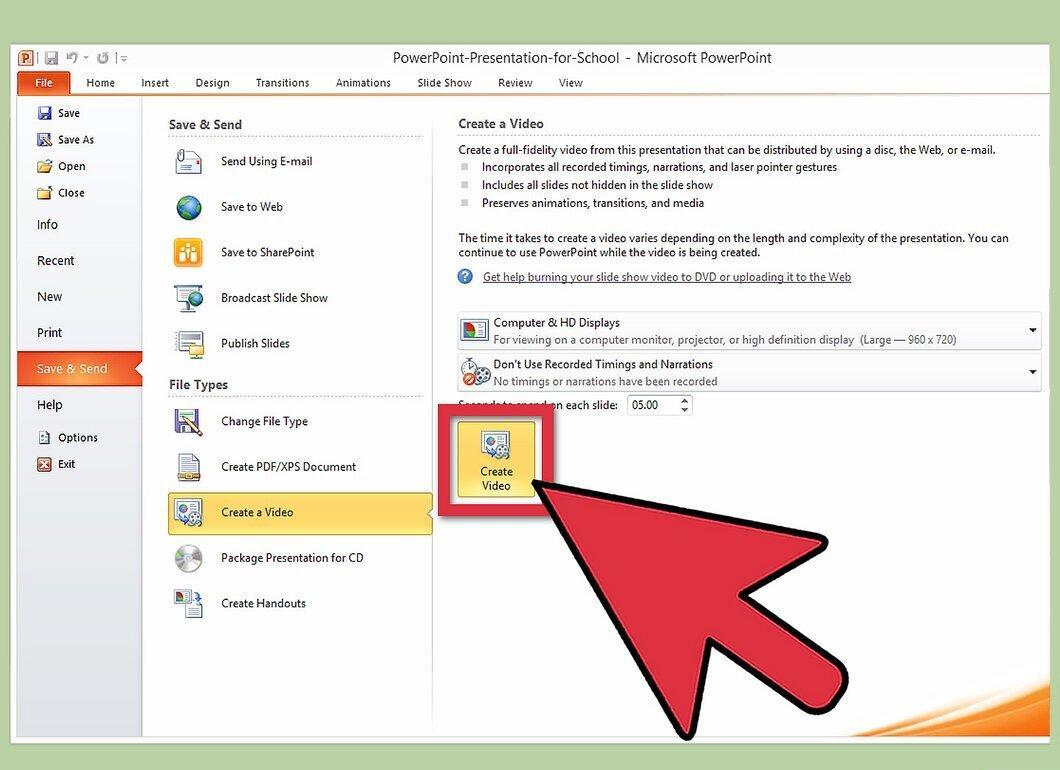
Click on 'Create Video'. A standard save window will open.
Step 8. Name and save the file.
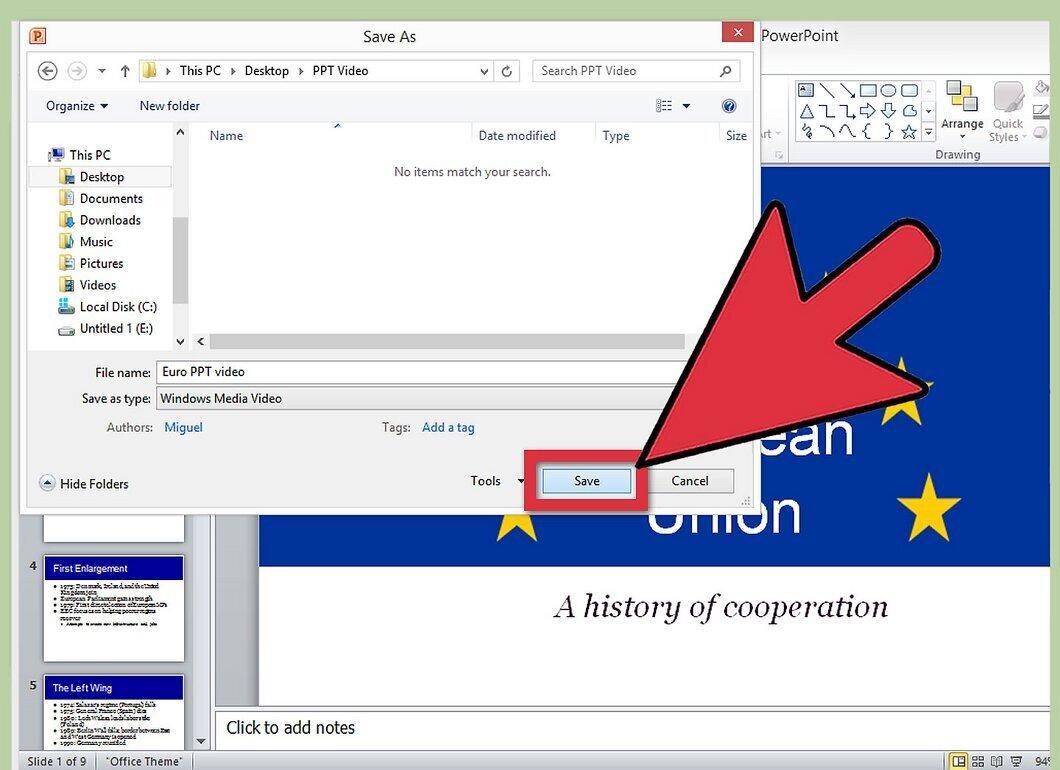
Enter a file name and select a folder for saving. PowerPoint will begin the process of creating the video file, which will take some time depending on the length of the presentation. You will see a progress indicator at the bottom of the window.
Step 9. Play the created video.

Locate and play your new MP4 video. This format is supported by most media players and can be played on both computers and mobile devices.
PowerPoint 2007 and Earlier Versions
Step 1. Understand the video creation process.

Keep in mind that in older versions of PowerPoint, you cannot save your presentation in MP4 format. You will need a free video editor like Windows Movie Maker, which will create a video based on image files from each slide. First, create images of the slides directly in PowerPoint.
Step 2. Install Windows Movie Maker if not already installed.
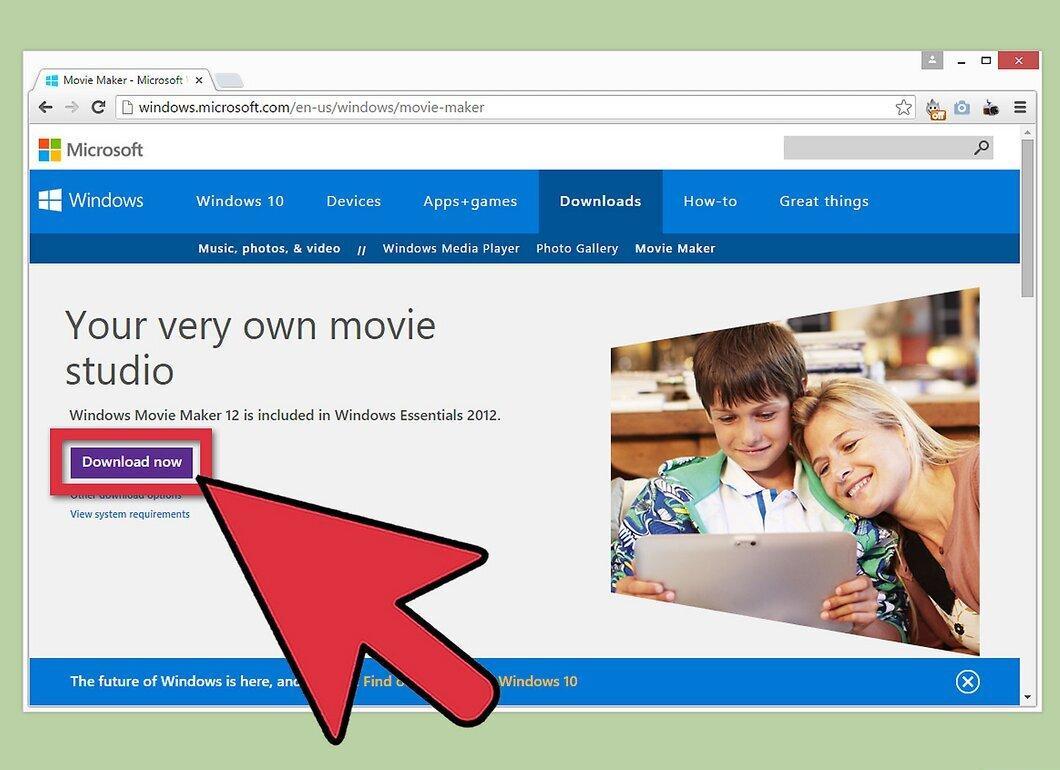
If you don’t have Windows Movie Maker, install it. Most versions of Windows come with it pre-installed, but if you’re using Windows 7 or 8, you can download it from the official website.
Step 3. Export your presentation to image files.
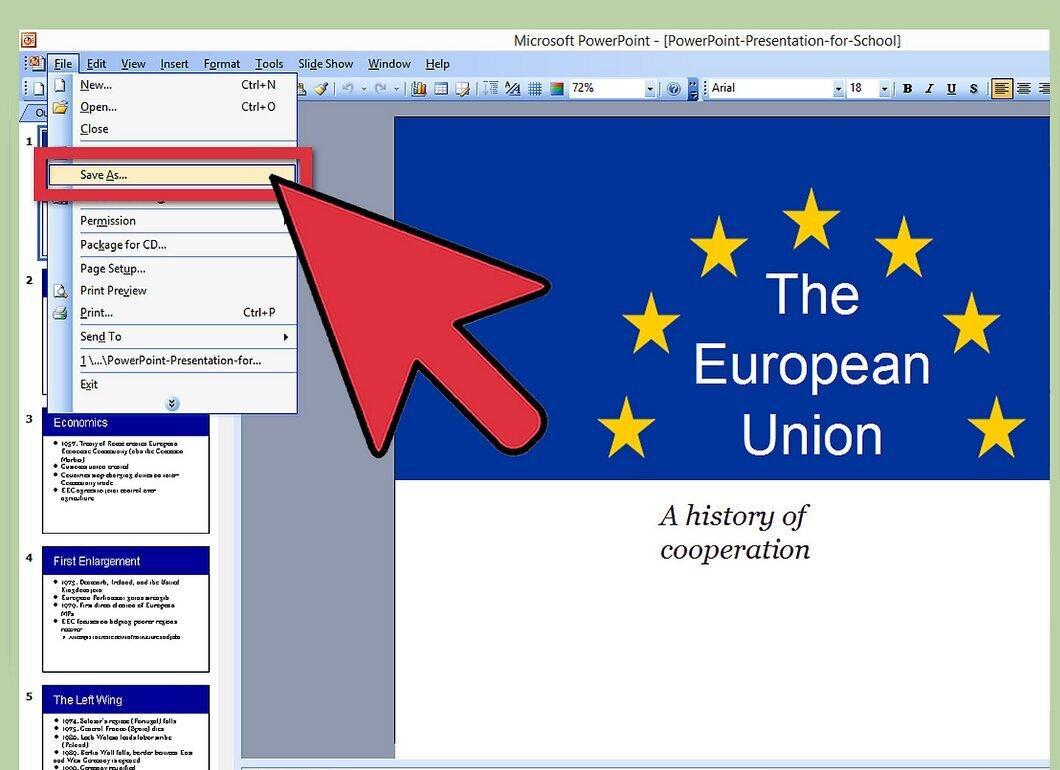
After installing Movie Maker, export the presentation slides to JPG files that will be used to create the video.
- Click the MS Office logo button or 'File', then 'Save As'.
- In the 'Save as type' menu, select 'JPEG File Interchange'.
- Create or choose a folder to save the slide image files.
- Click 'Save', then in the pop-up window select 'All Slides'.
Step 4. Launch Windows Movie Maker.
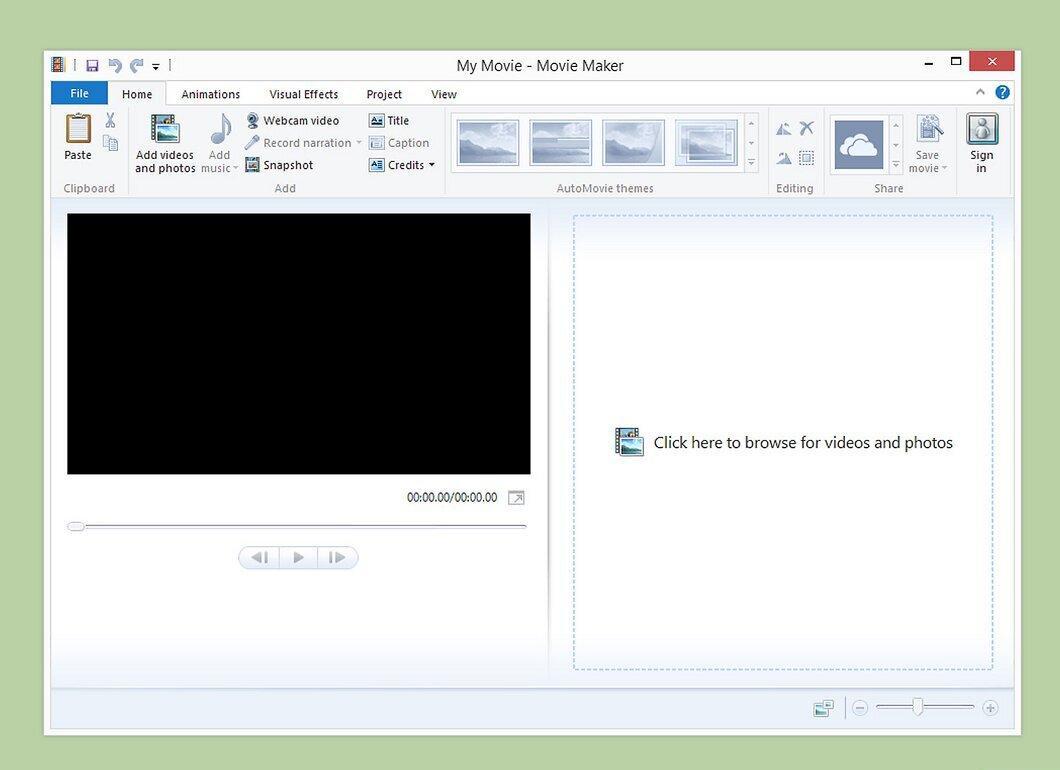
Open Windows Movie Maker. Once all graphic files are created, import them into the program to form the MP4 file.
Step 5. Import the files.
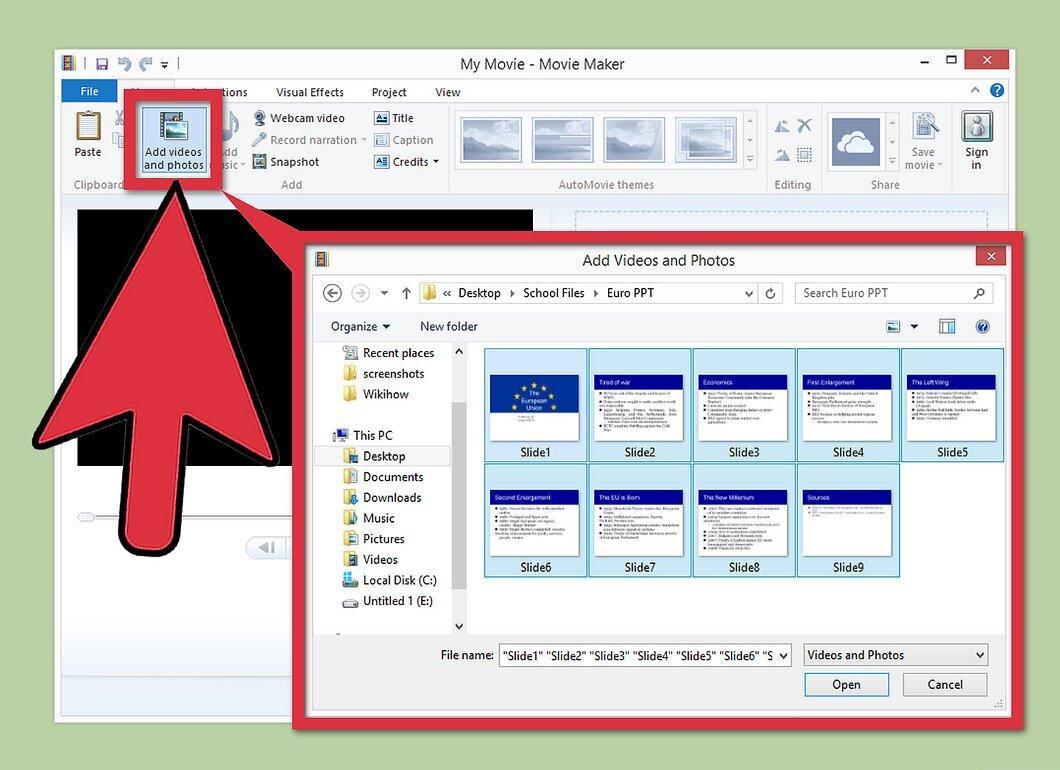
In Movie Maker, add the folder containing the slide image files.
- Click 'File' and select 'Import into Collection'. In Movie Maker 2012, choose 'Add videos and photos' instead.
- Navigate to the folder with the created image files and select all of them. The folder name should match the name of your presentation.
- Click 'Open' to import the files into Movie Maker.
Step 6. Arrange the slides.
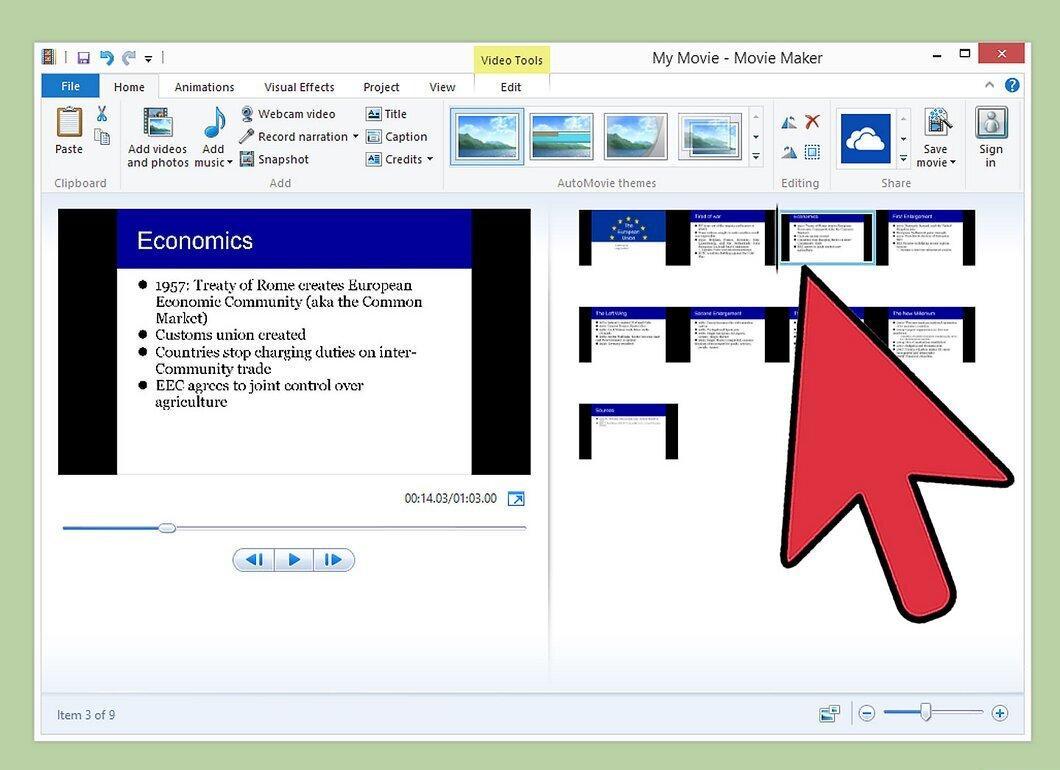
Arrange the slides. Depending on the version of Movie Maker, the process may vary slightly. In earlier versions, select all images and drag them to the timeline. In Movie Maker 2012, the slides will be automatically arranged.
Step 7. Set timing parameters.
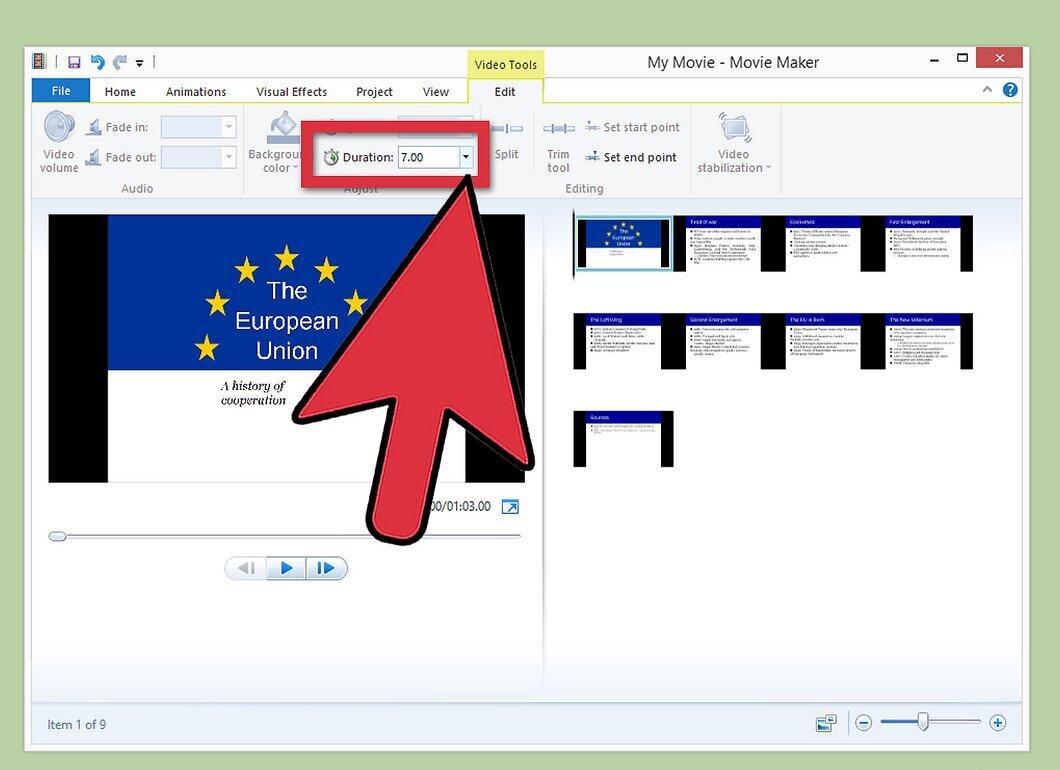
Adjust the timing for the slides. Increase or decrease the time each slide will be displayed based on the amount of information you want to convey. Give your audience enough time to absorb the material.
Step 8. Add transitions between slides.
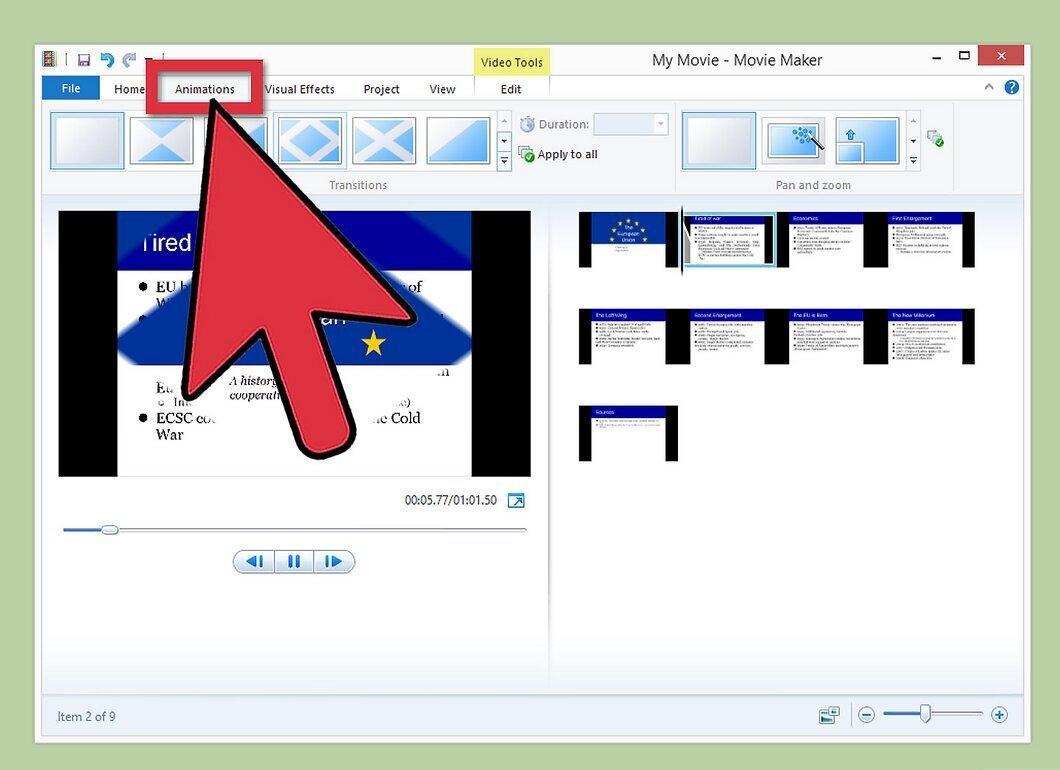
Add transitions. Use Windows Movie Maker’s features to add effects between slides. Interesting transitions can make the viewing experience more engaging, but don’t overdo it so as not to distract from the content.
- You can find additional tips online on using transition features in Windows Movie Maker.
Step 9. Save the video file.
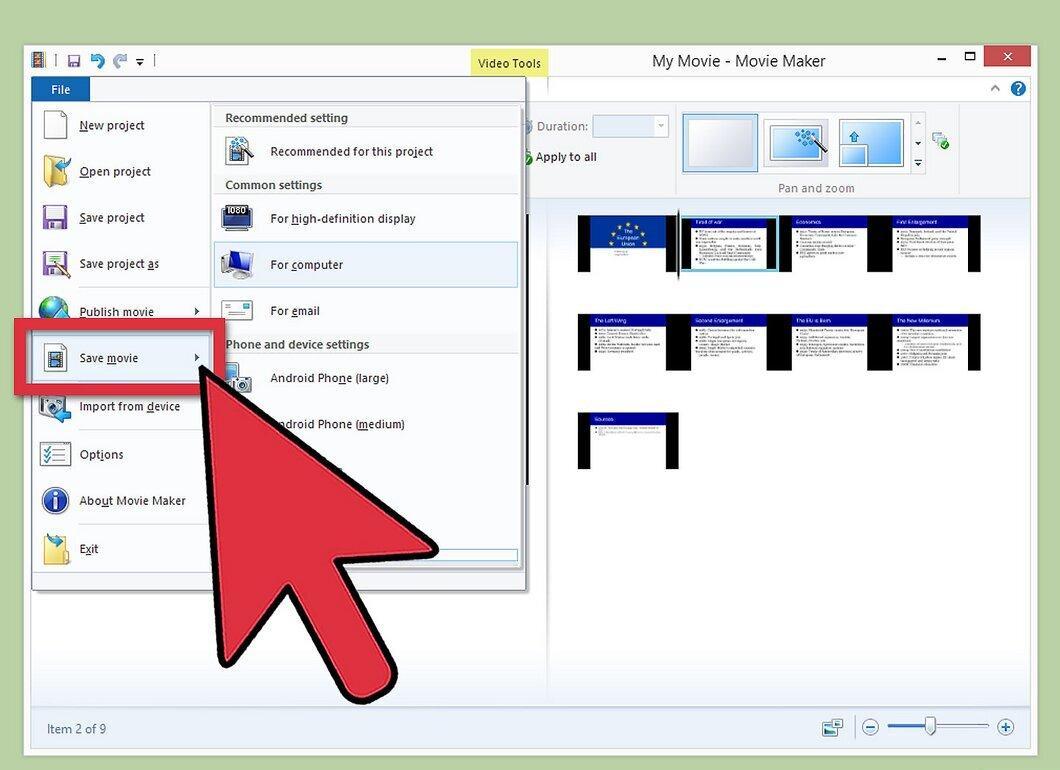
Save your presentation as an MP4 file. After making all the changes, select 'Save Movie' or 'Save to Computer'. If the program asks which device you want to play the video on, choose 'For Computer' or another device. Enter a file name and save it as MPEG-4.
Step 10. Wait for the video file to be created.
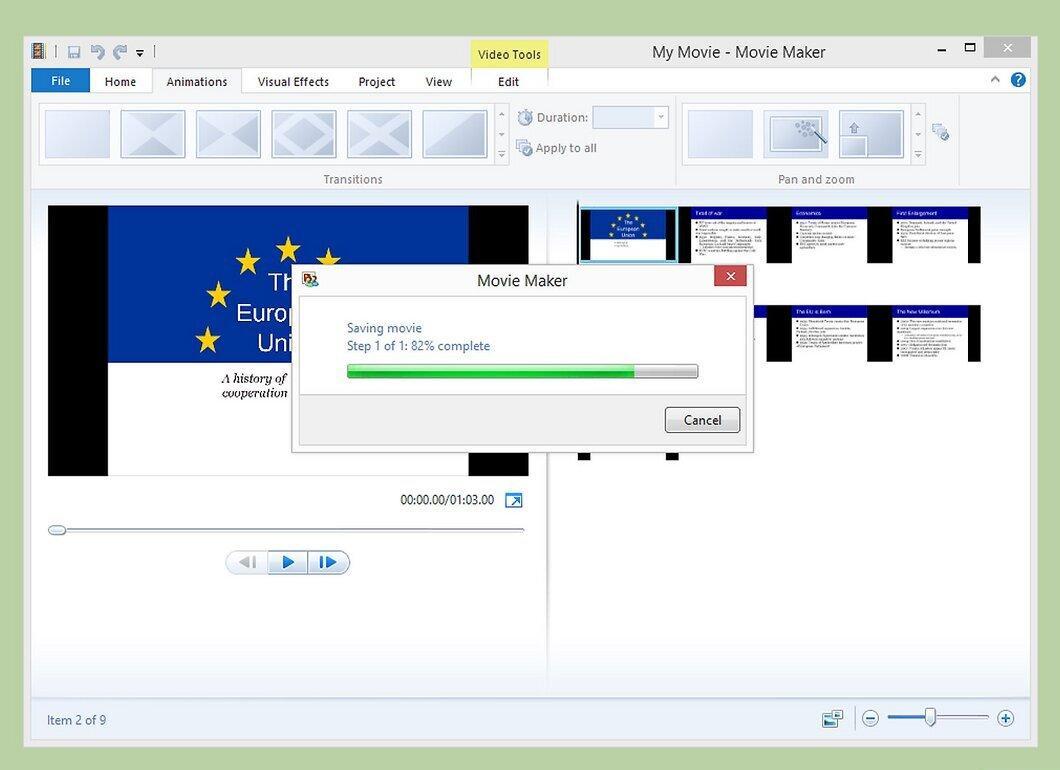
Wait for Windows Movie Maker to finish creating your video. This may take some time depending on the presentation length. Once done, you’ll be able to play or share your video with others.


