
No hot water? Don’t worry! You can easily repair or replace the control elements and heating elements in most standard electric water heaters that operate on 120, 208, and 240 volts. These devices utilize classic linear control rather than the modern microprocessor models that are increasingly available. To enlarge any image, simply click on it.
Water Heater Repair
Step 1. Check the Electrical Panel
First, make sure that the circuit breakers in the electrical panel are in the "on" position. Check for blown fuses and ensure they are securely in place. If the breaker is off, switch it to "on" and replace any blown fuses. After that, wait 30–60 minutes for the water to heat up. If it’s still cold, proceed to the next steps.
Step 2. Disconnect the Power
Before you start working, disconnect the power. Remember that most water heaters under voltage can cause electric shock, burns, or even death if you come into contact with live wires. Remove fuses or switch the breaker to "off", then close the panel and hang a warning sign to prevent anyone from accidentally turning the power back on during your repair.
Step 3. Remove Access Panels
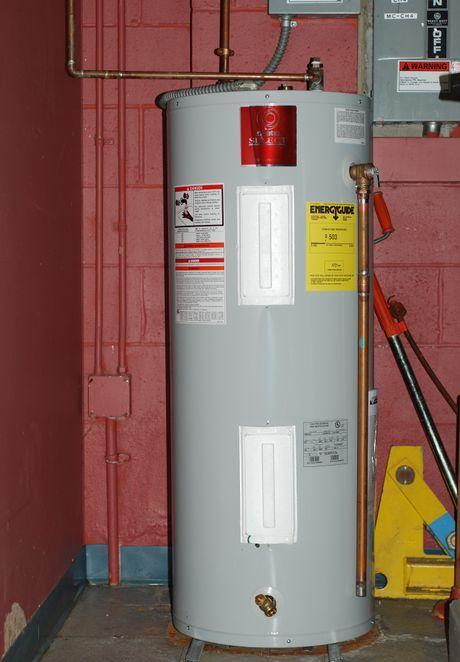
Remove the upper and, if present, lower access panels. They are usually secured with screws that need to be carefully unscrewed and stored safely for later reinstallation. Use a voltmeter or tester to check for voltage between the terminals and the grounded casing. If electricity is still connected, do not continue working until the source of the voltage is found.
Step 4. Remove Insulation
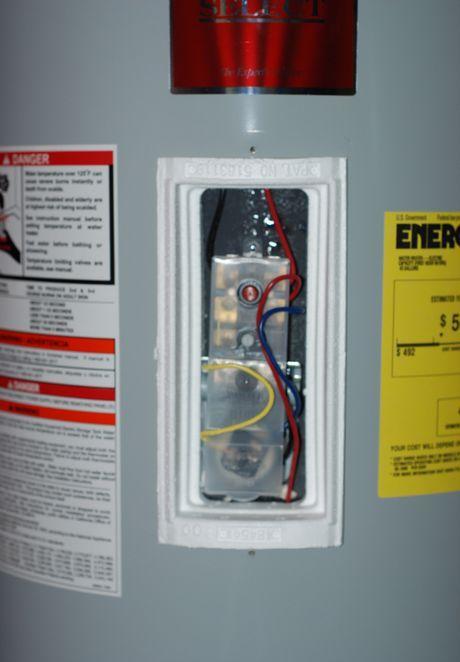
Remove any insulation that may be blocking access to the controls (thermostat and high-temperature switch) and the heating element. Once you remove the thermal insulation, you will see a polyethylene protective cover. Carefully bend the wires away from the protective material and remove the upper panel to access the terminals.
Step 5. Look for Signs of Damage
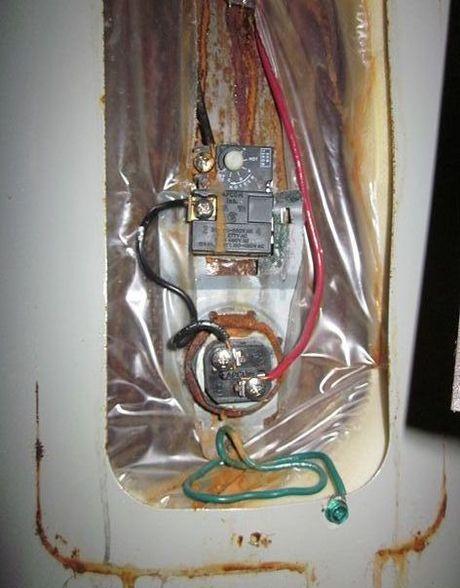
Conduct a visual inspection for any obvious damage. Leaks can occur due to a damaged tank, poorly fitted pipes, or inadequate sealing of holes through which the heating element passes. If the problem is not addressed, moisture can cause internal control damage.
- If the wires and controls are covered in rust, this could lead to short circuits and other issues such as overheating and insulation burning. Black carbon deposits may also indicate a short circuit and the presence of exposed wires, which is very dangerous.
- If the wires are damaged and have a smaller gauge, this can lead to overheating and hazardous situations. Replace all parts that show signs of moisture damage or short circuits, including wires, insulation, and the control itself.
Step 6. Identify Key Components
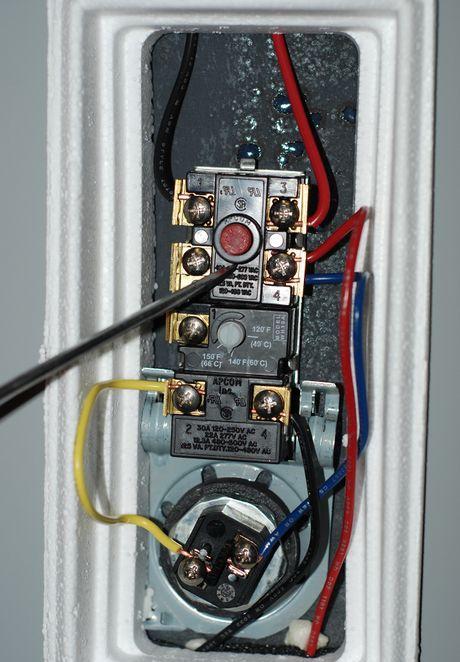
- High-Temperature Switch: has a reset button and four terminal screws. Typically, the upper terminals are connected to external wiring, while the lower terminals connect to the lower thermostat.
- Thermostat: features a temperature scale. Take note of its position and settings.
- Heating Element: has two terminals, each connected to a wire. It is usually located beneath the control.
Step 7. Check for Electricity with a Tester
Make sure that power is indeed off using a tester. Set the multimeter to measure AC voltage and connect the probes to the corresponding terminals.
Step 8. Measure the Voltage
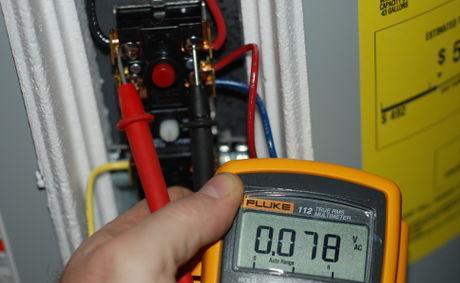
Measure the voltage by setting the maximum range for AC voltage. Bring the probes to the terminals of the high-temperature switch. If the voltage is still on, check the circuit panel again.
- In the image, the tester shows 0.078 V, which is considered no voltage.
Step 9. Set the Multimeter to Ohms
Set the multimeter to resistance measurement mode. Check the readings: on an analog device, the needle should be at zero, and on a digital one, it should display "OL" or "1".
Step 10. Disconnect One Wire from the Heating Element
Step 11. Connect the Black Probe of the Tester to the "Neutral" Terminal
Step 12. If there are multiple terminals, connect the Red Probe to the "Ohms" Terminal
Step 13. Set the Range to R x 1
Step 14. Touch the Metal Tips of the Tester Probes Together
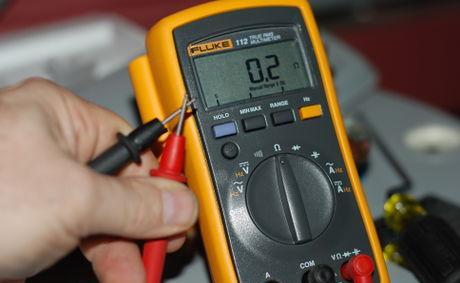
Touch the probes together to check that the multimeter shows zero. If not, you may need to replace the batteries.
Step 15. Replace the Batteries if Necessary
Step 16. Touch the Tips of the Probes to the Heating Element Terminals
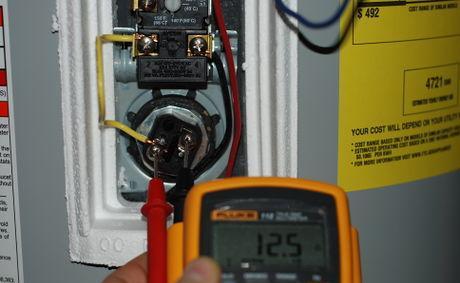
Touch the probes to the terminals of the heating element and check the readings on the multimeter display.
- In the image, the multimeter shows 12.5 Ohms, which is within the normal range for this element.
Step 17. An Intact Heating Element Shows Low Resistance
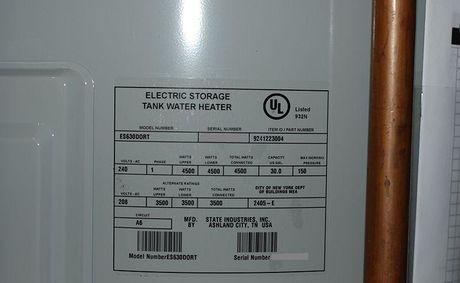
Remember that a normal heating element should show resistance between 10 to 20 Ohms. For precise calculations, use an online calculator by entering your water heater parameters.
- The image shows the "nameplate" of the water heater with power specifications.
Step 18. Check the Element for Grounding
Step 19. Connect the Tester Probes to the Ends of the Wires
Step 20. Touch the Red Probe to the Heating Element Terminal Bolt
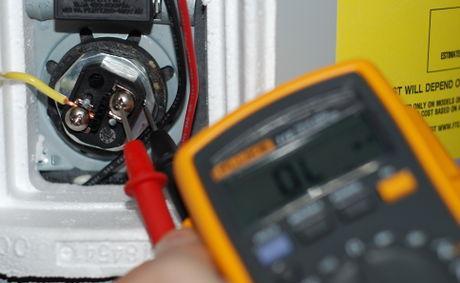
Touch the probes to the terminals of the heating element and ensure the multimeter shows "infinity". If not, the element needs to be replaced.
Step 21. Reconnect the Wire to the Heating Element for Resistance Testing
Step 22. Repeat Steps for the Lower Thermostat and Heating Element
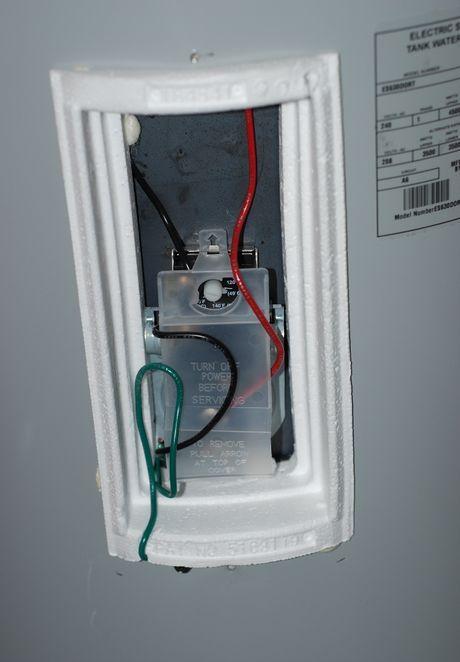
- Ensure that you have removed the lower access panel and protective cover. {"smallUrl":"https://www.wikihow.com/images_en/thumb/c/c2/Waterheater_004_860.jpg/460px-Waterheater_004_860.jpg","bigUrl":"https://www.wikihow.com/images/thumb/c/c2/Waterheater_004_860.jpg/374px-Waterheater_004_860.jpg","smallWidth":460,"smallHeight":687,"bigWidth":375,"bigHeight":560,"licensing":"","zoomWidth":375,"zoomHeight":560,"zoomUrl":"https://www.wikihow.com/images/thumb/c/c2/Waterheater_004_860.jpg/374px-Waterheater_004_860.jpg"}
- As in previous steps, remove the protective cover for access to the terminals.
Step 23. Set the Lower Thermostat to Minimum
Step 24. Set the Upper Thermostat to Maximum
Step 25. Check that the Tank Contains Warm Water
If the tank has very cold or hot water, temperature changes may be hard to perceive.
Step 26. Connect the Water Heater to Power
Reconnect the water heater to power for further testing, being careful to avoid electric shock. Ensure all wires are connected properly.
Step 27. Switch the Tester Red Wire to "Volts"
Step 28. Set the Multimeter to a Minimum Value Above 240 V
Set the multimeter to a value exceeding 240 V, as standard household water heaters operate on 120, 208, or 240 V.
Step 29. Check the Upper Heating Element Terminals
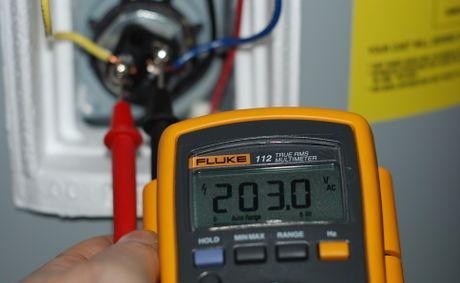
Check for line voltage by touching the probe to each terminal. If voltage is present, the element is ready to work.
- Line voltage showed 208 V, which is normal for heater operation.
Step 30. If There Is No Current, Reset the High-Temperature Switch
Try resetting the high-temperature switch by pressing the reset button.
Step 31. Check for Current at the Heating Element
Step 32. Check the High-Temperature Switch Terminals
Step 33. If There Is No Current, Look for an Open Circuit
Check all connections and wiring for possible damage.
Step 34. Once Power Is Restored, Retest the Heating Element
Recheck the upper heating element for line voltage.
Step 35. If No Current, Replace the Upper Control
Step 36. Set the Upper Thermostat to Minimum Temperature
Step 37. Set the Lower Thermostat to Maximum Temperature
Step 38. Check the Lower Heater for Line Voltage
Step 39. If There Is No Current, Check the Connection to the Lower Thermostat
Step 40. If There Is No Line Voltage, Replace the Upper Control
Step 41. If Voltage Is Present, Check the Heating Element Terminals
Step 42. If There Is No Voltage, Replace the Lower Thermostat
Step 43. If Voltage Is Present, Wait for the Water to Heat
Step 44. Set Thermostats to the Same Temperature
Set the temperature no higher than 60 degrees to avoid burns. A lower temperature will also help reduce electricity costs.
Step 45. Restore Insulation and Close Covers
Replacing Elements
Step 1. Ensure Power Is Off
Step 2. Water Level Should Be Below Heating Elements
Step 3. Disconnect Cold Water Supply
Step 4. Open Hot Tap to Drain Water
Step 5. Close Drain Valve When Tank Is Empty
Step 6. Disconnect Wires from Heating Element
Step 7. Remove Heating Element
Heating elements may be secured in various ways. In most cases, they are fixed with bolts that need to be unscrewed.



