
Google Chrome accumulates various data to enhance your browsing experience. You might need to clear your history for several reasons: you may have visited unwanted sites, want to remove autofill data, or simply need to free up space on your hard drive. You can delete your history directly in Chrome. To do this, press Ctrl+H to open the "History" section.
Complete Browser History Cleanup
Step 1. Open the Chrome Menu.
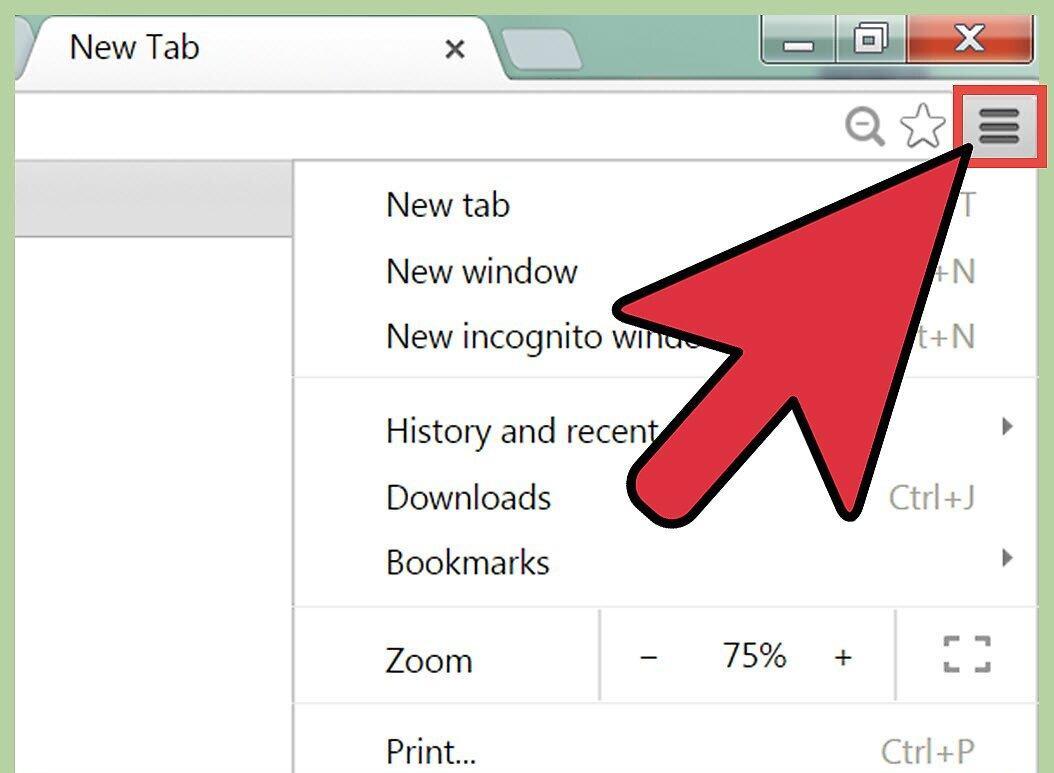
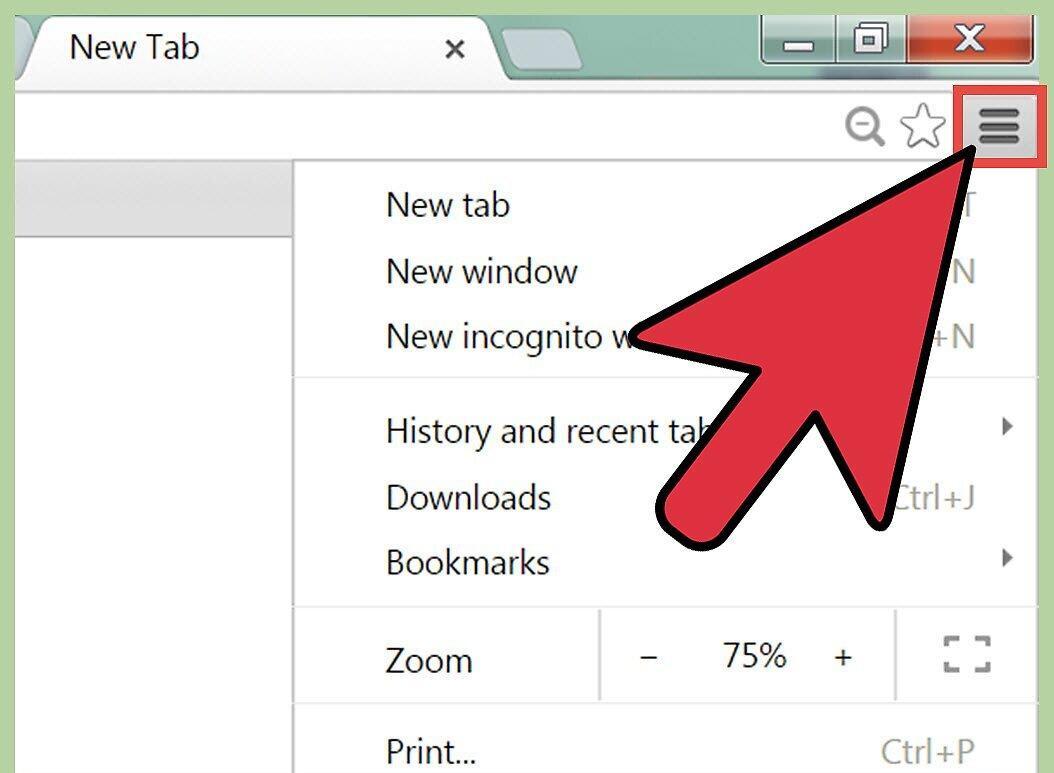
Start by opening the Chrome menu – click on the icon in the upper right corner of the browser window that looks like three horizontal lines (some call it a "hamburger").
Step 2. Find the "History" Option.
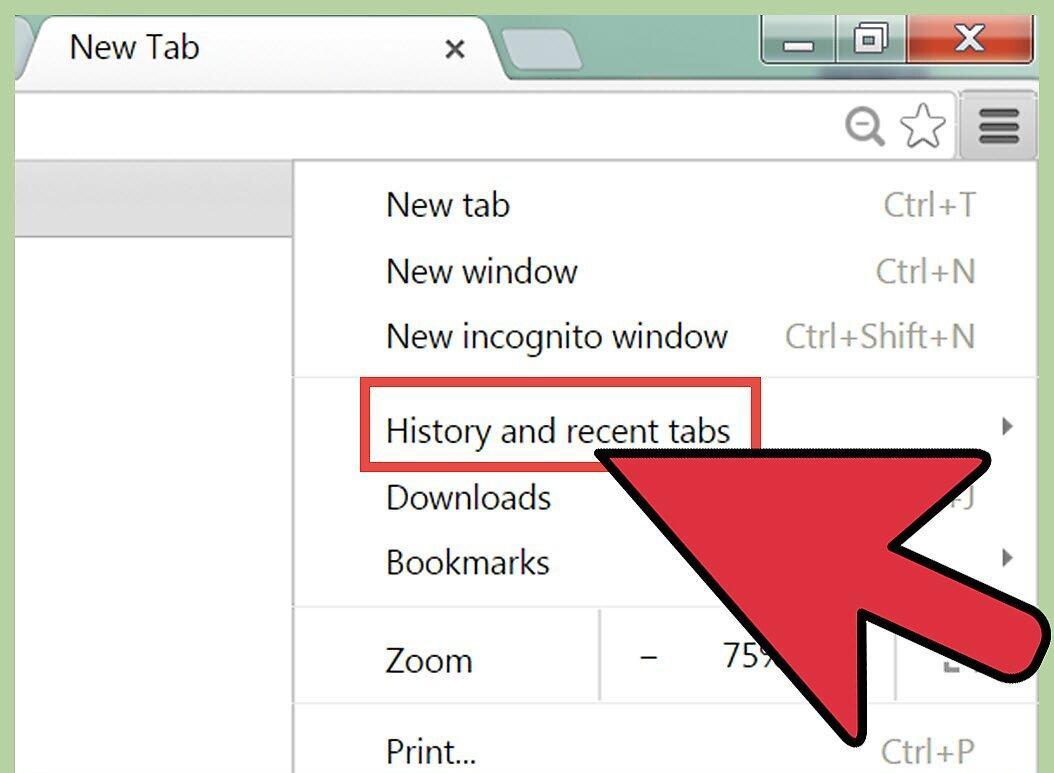
In the dropdown menu, select "History." You can also use the shortcut Ctrl+H. This will open the "History" tab, where you will see a list of the pages you've visited, sorted by time.
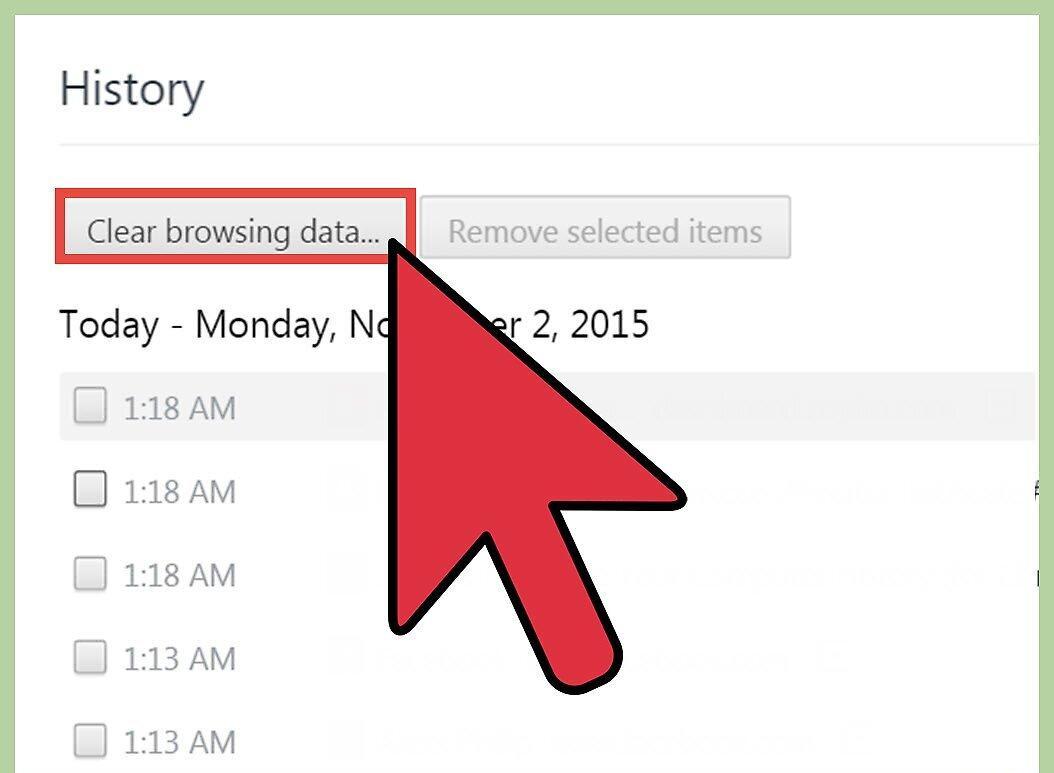
Click on the "Clear browsing data" button. A "Clear browsing data" window will appear (you can also access it by entering the address: chrome://settings/clearBrowserData). Here, you can select which items you want to delete, as well as specify the time range for which you want to clear the history.
Step 4. Choose the Time Range.
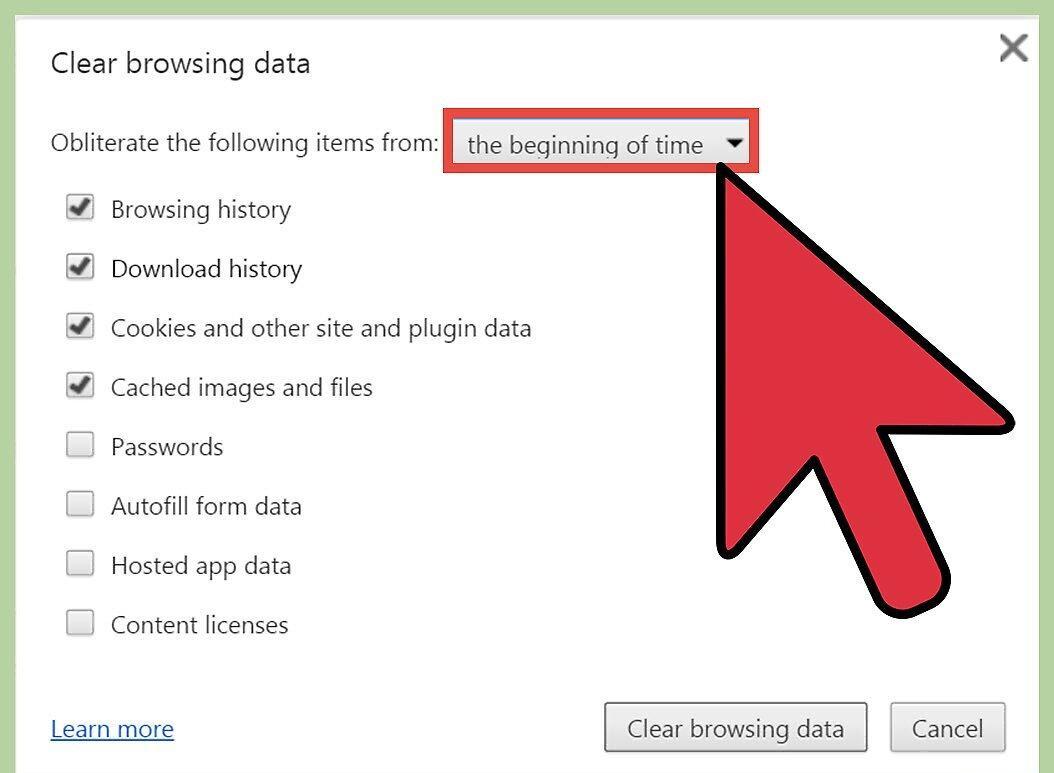
In the "Delete the following items" menu, choose the desired period: "Last hour," "Yesterday," "Last week," "Last 4 weeks," or "All time" (selecting the last option will delete all history).
Step 5. Specify What You Want to Delete.
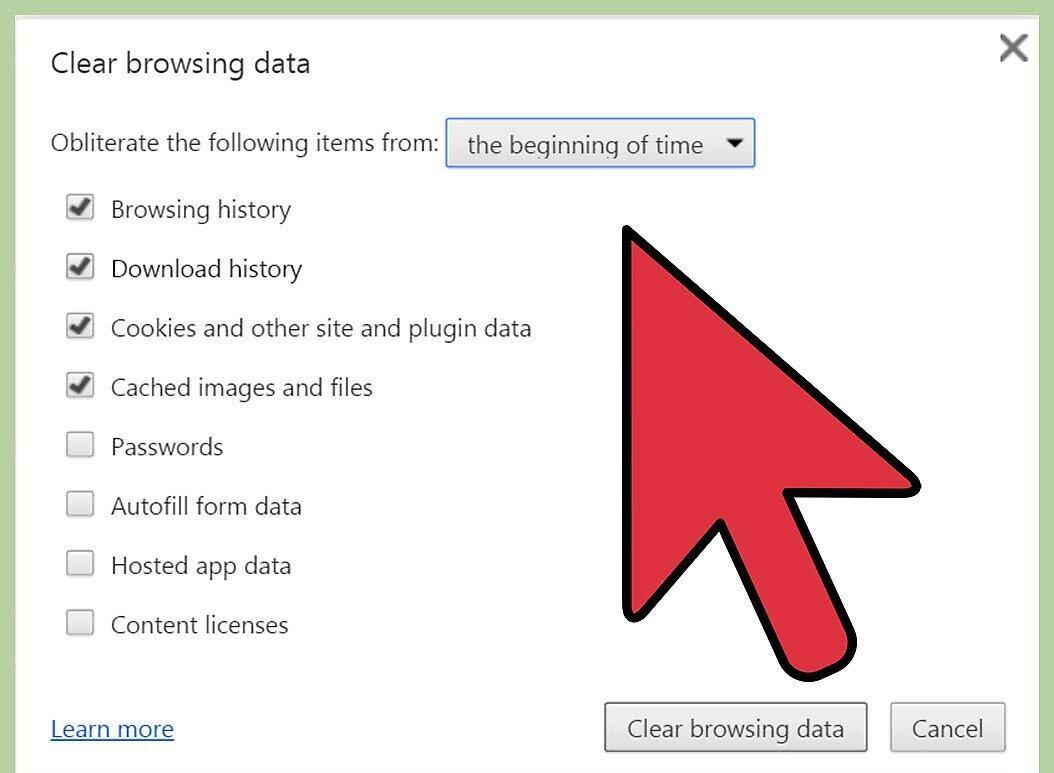
Check the boxes next to the items you want to delete. By clicking "Clear browsing data," you will remove data associated with the selected items. You can delete browsing history, downloads, cookies, cache, passwords, autofill data, etc. It is recommended to delete browsing history, downloads, and cookies. For more detailed information about each item, see the next section.
Step 6. Click "Clear Browsing Data."
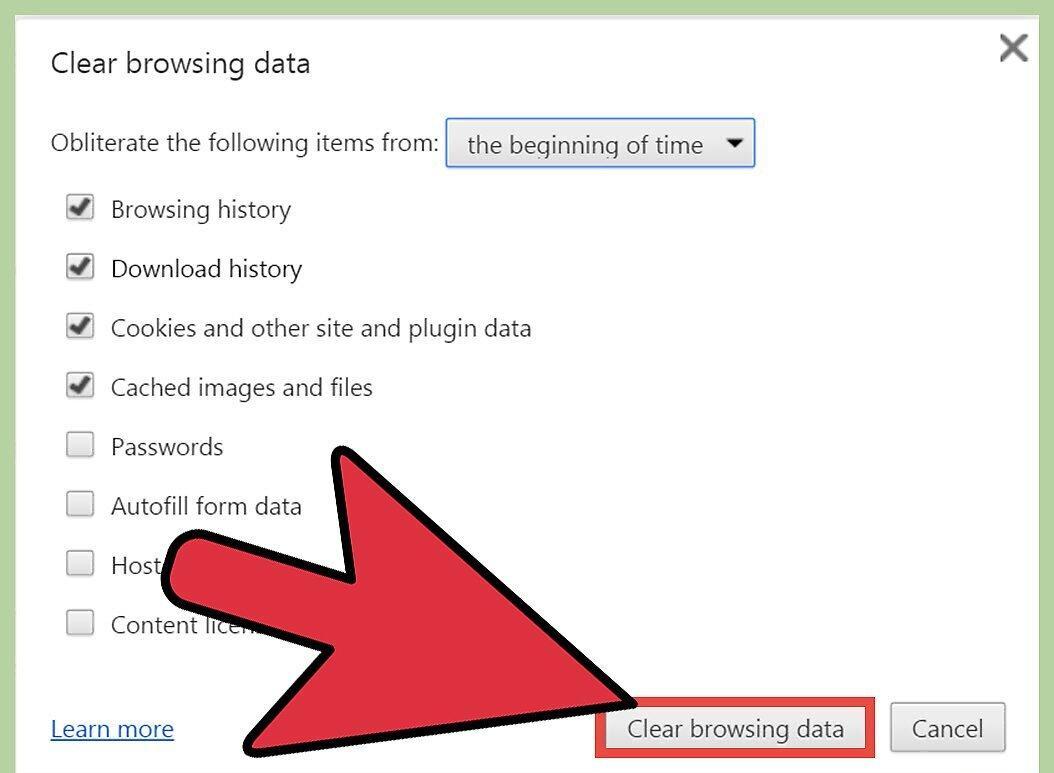
After selecting the necessary items, click "Clear browsing data." Make sure you have selected the right data before deletion.
Breakdown of Browser History Items
Step 1. Identify What Can Be Deleted.
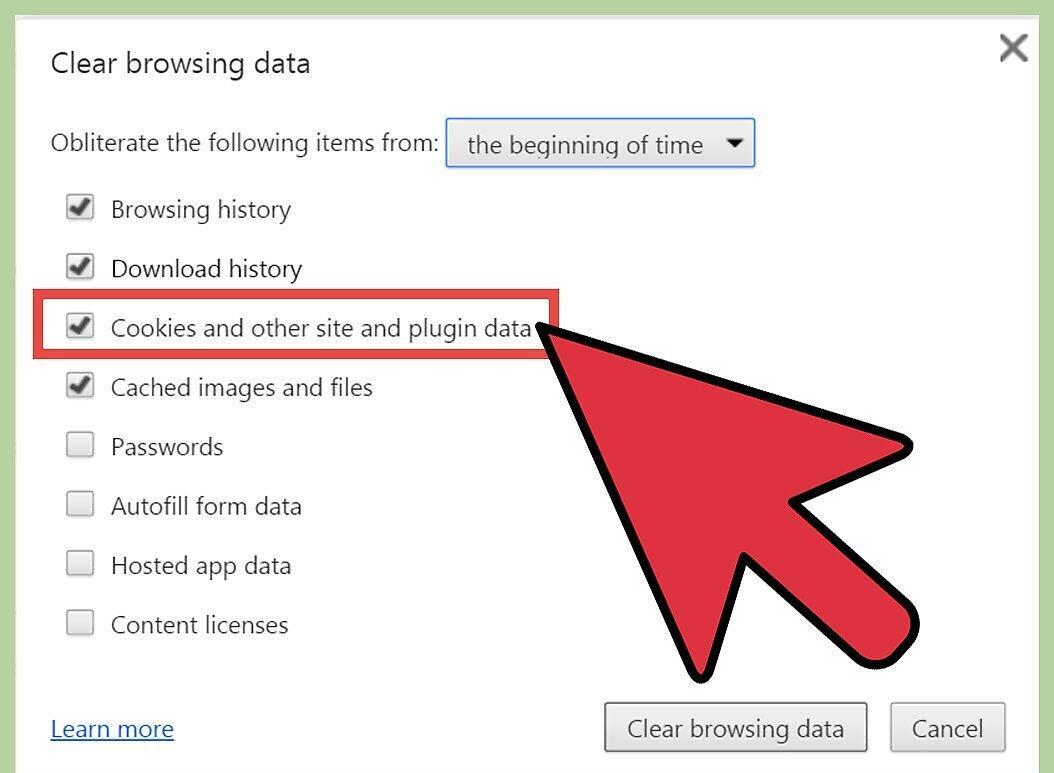
In Chrome, you can clear browsing history, downloads, cookies, cache, passwords, and other data. You don't have to delete everything at once – choose items based on your needs. Most users only need to delete browsing history, downloads, and cookies.
Step 2. Clear Browsing History.
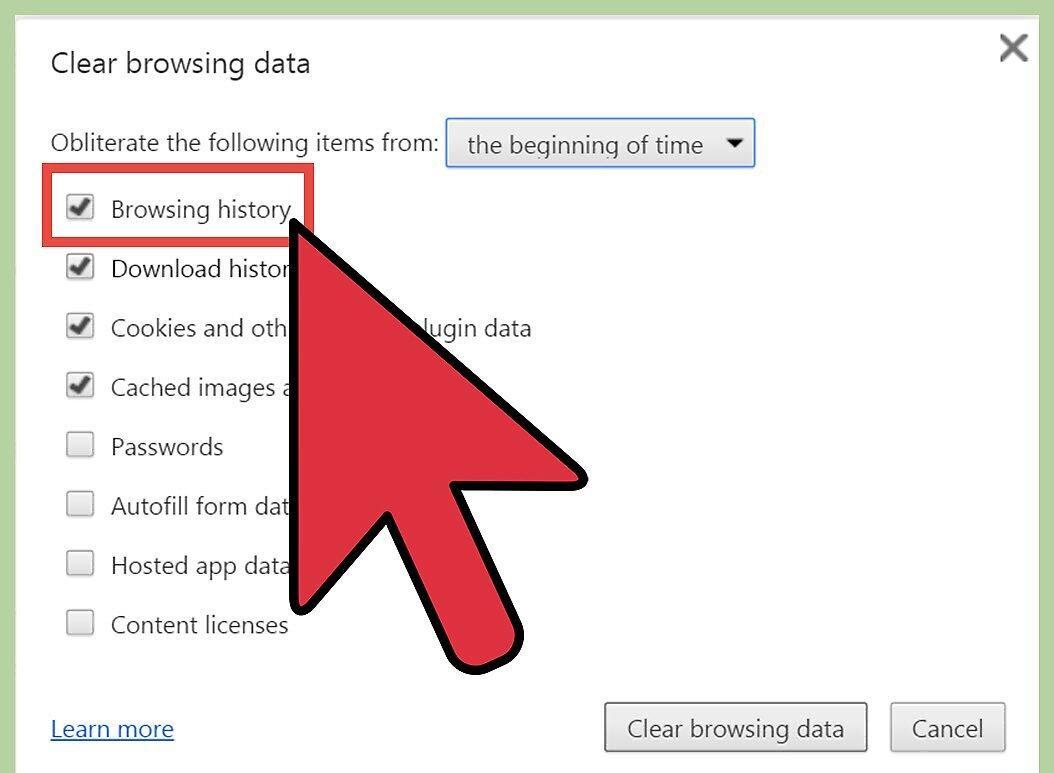
By clearing your browsing history, you will remove the list of visited sites, cached texts, and IP addresses you interacted with.
Step 3. Clear Download History.
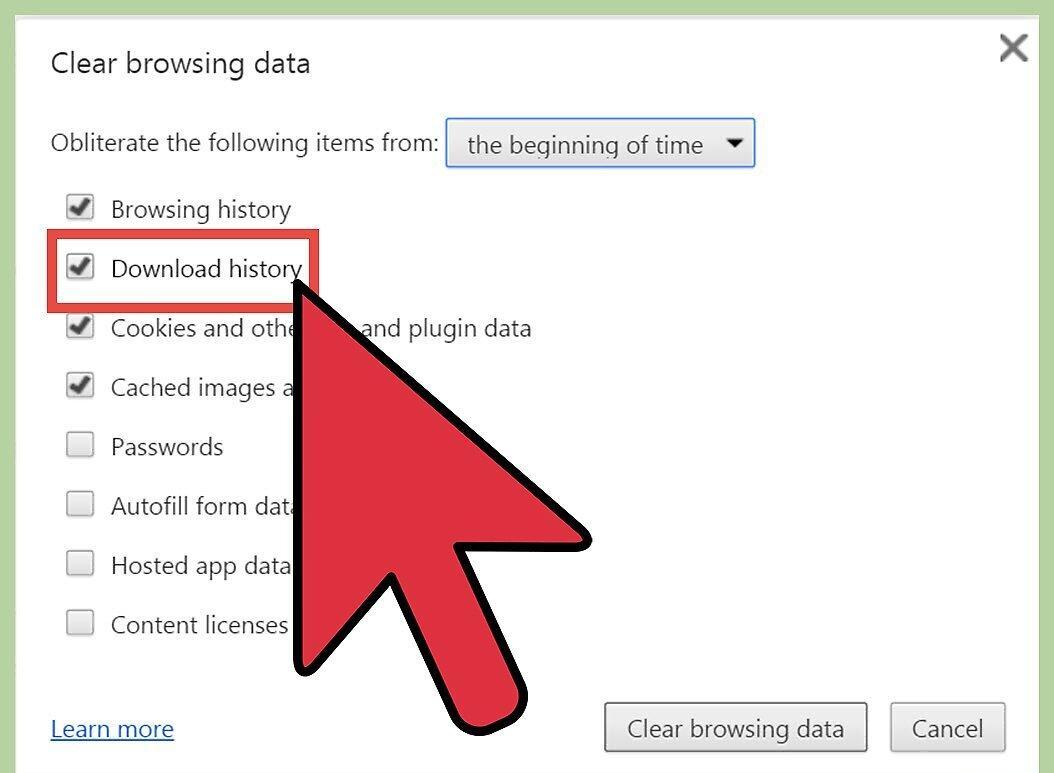
When you clear your download history, you will only remove the list of downloaded files, not the actual files. This enhances the security of files that may have been hidden and also frees up disk space.
Step 4. Remove Cookies and Site Data.
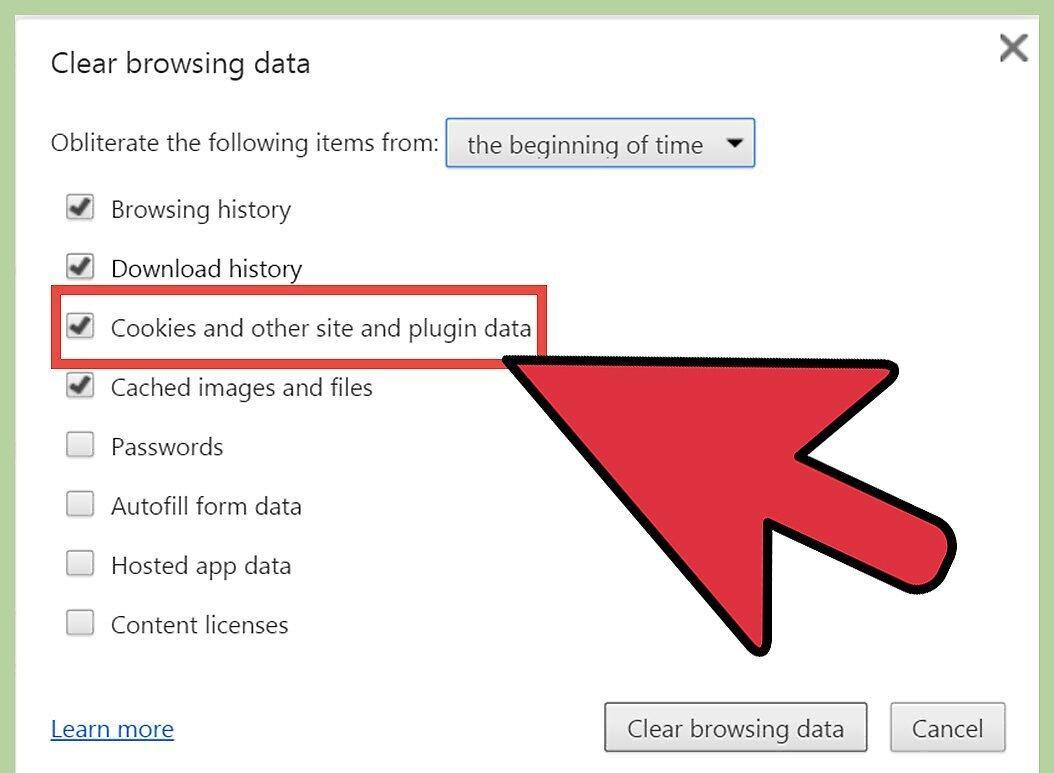
- Cookies are small files that websites send to your computer, including user profile information.
- "Site data" is information stored in HTML5 storage, such as DOM data, WebSQL, and IndexedDB.
- Plugin data is information recorded by plugins installed on your computer that use the NPAPI ClearSiteData API.
Step 5. Clear Cached Images and Files.
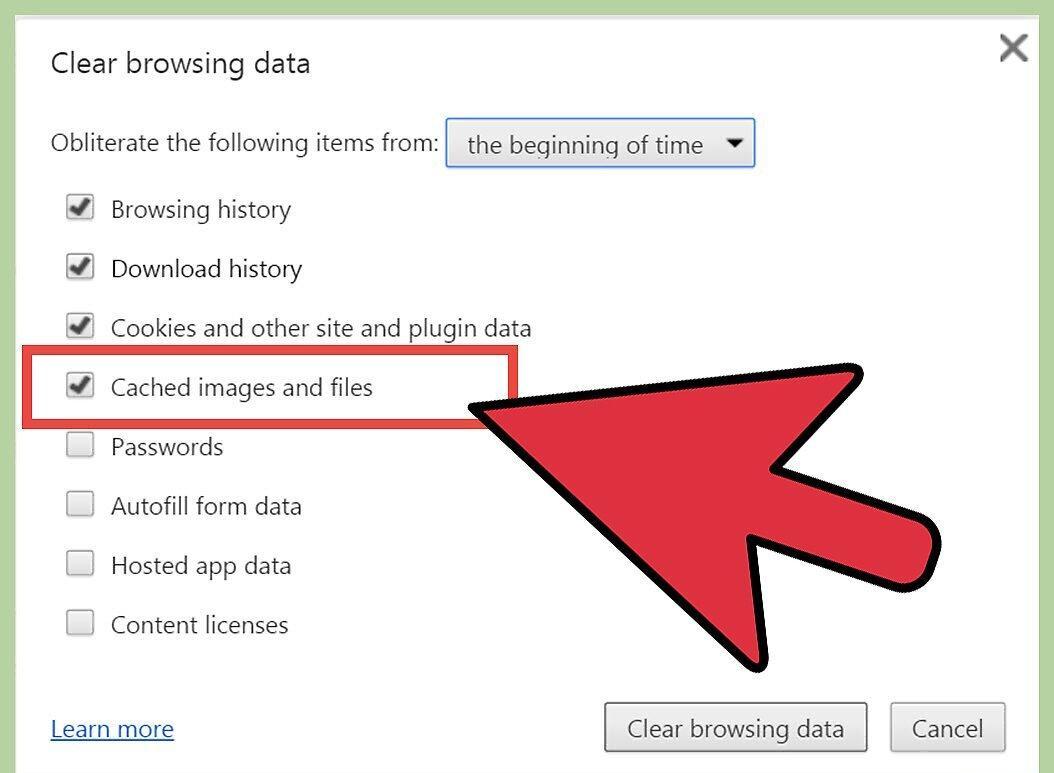
By clearing the cache, you will remove all text and graphic elements from the sites you visited. Keep in mind that this may slightly slow down loading times for your favorite pages.
Step 6. Delete Passwords.
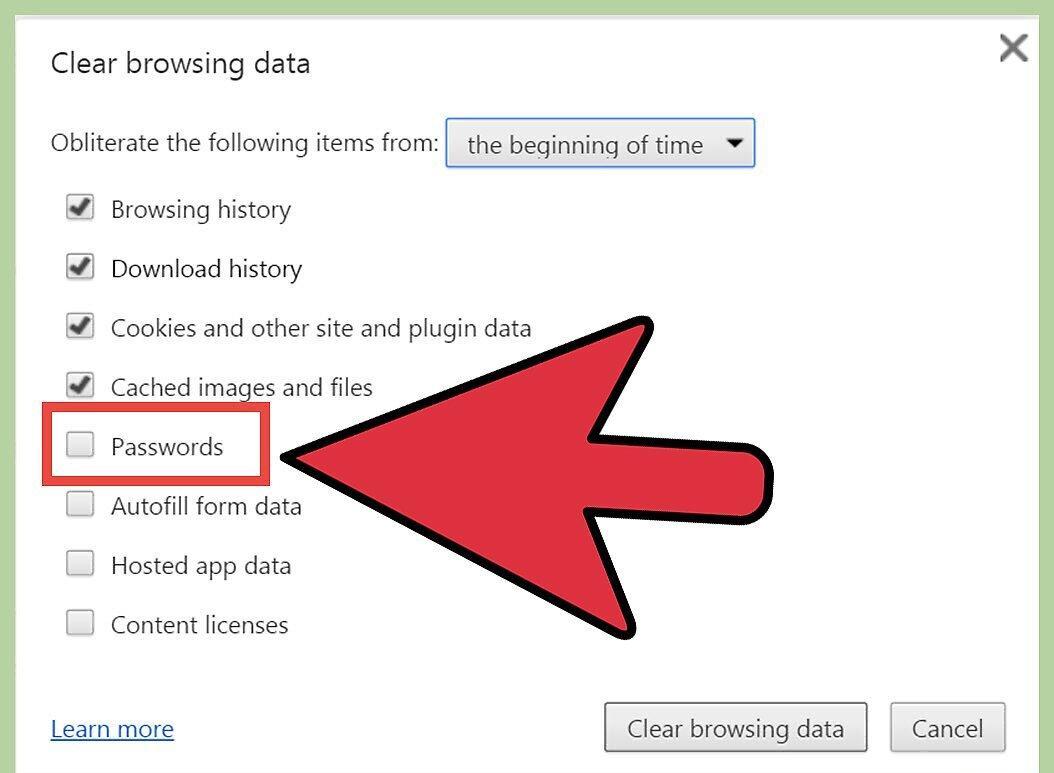
When you delete passwords, you will lose access not only to the passwords but also to the usernames. On macOS, they will also be erased from Keychain Access. Before deletion, make sure to write down important passwords, as they cannot be recovered.
Step 7. Clear Autofill Data.
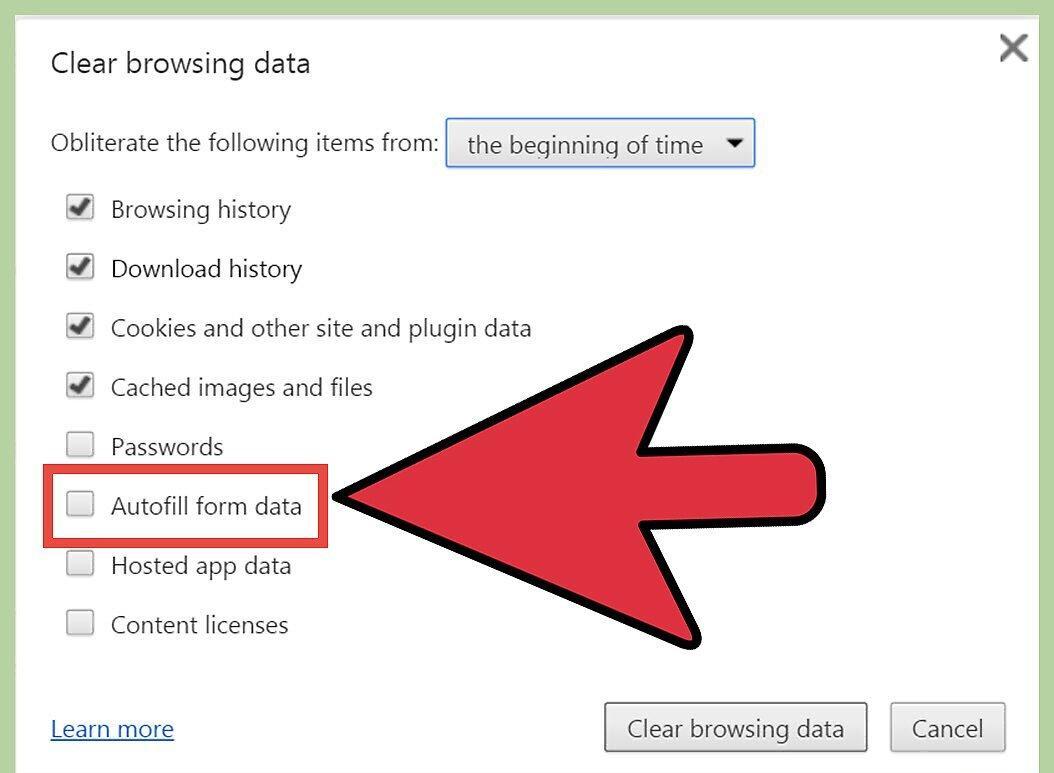
By deleting autofill data, you will remove not only autofill information but also data entered in web forms. Keep in mind that this may cause inconvenience if addresses or card numbers were filled in automatically.
Step 8. Delete App Data.
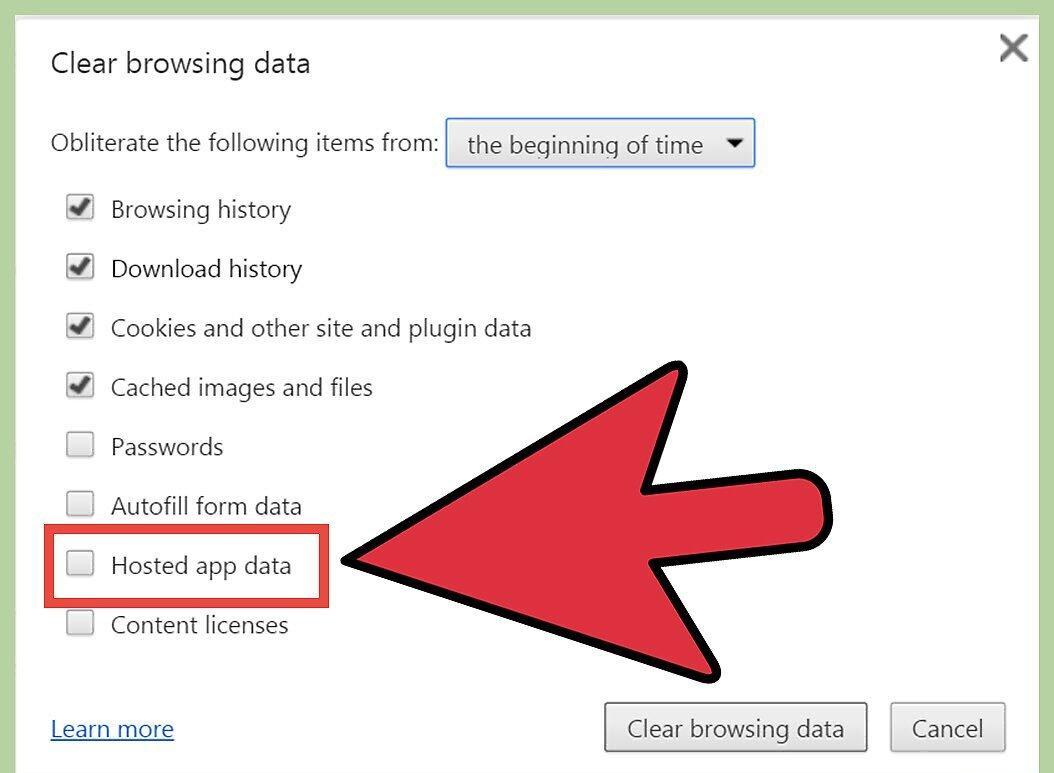
Deleting app data will result in the loss of information from apps downloaded from the Chrome Web Store, as well as local data used in Gmail Offline.
Step 9. Remove Content Licenses.
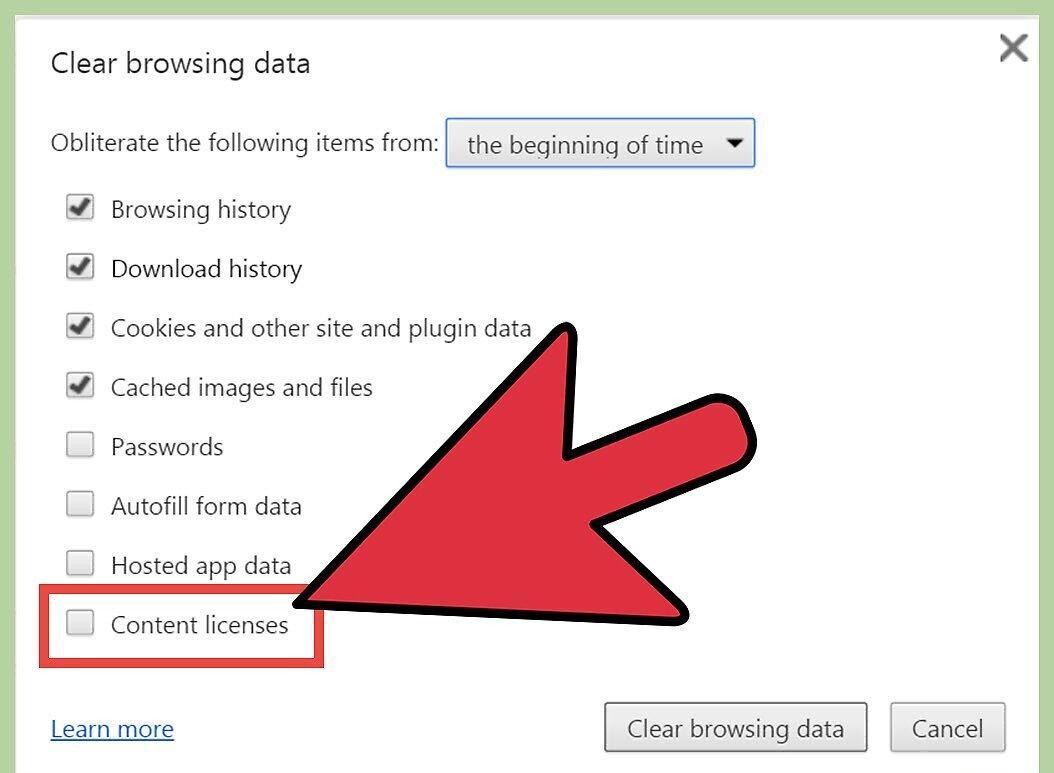
If you don’t want Flash Player to play media content like purchased movies or music, remove content licenses. Google Chrome recommends disabling licenses when selling or giving away your computer.
Removing Individual History Entries
Step 1. Delete Specific Pages from Browsing History.
If you've visited unwanted sites but don't want to delete all your history, you can remove specific pages. This will allow you to keep the information you need.
Step 2. Open the "History" Section.
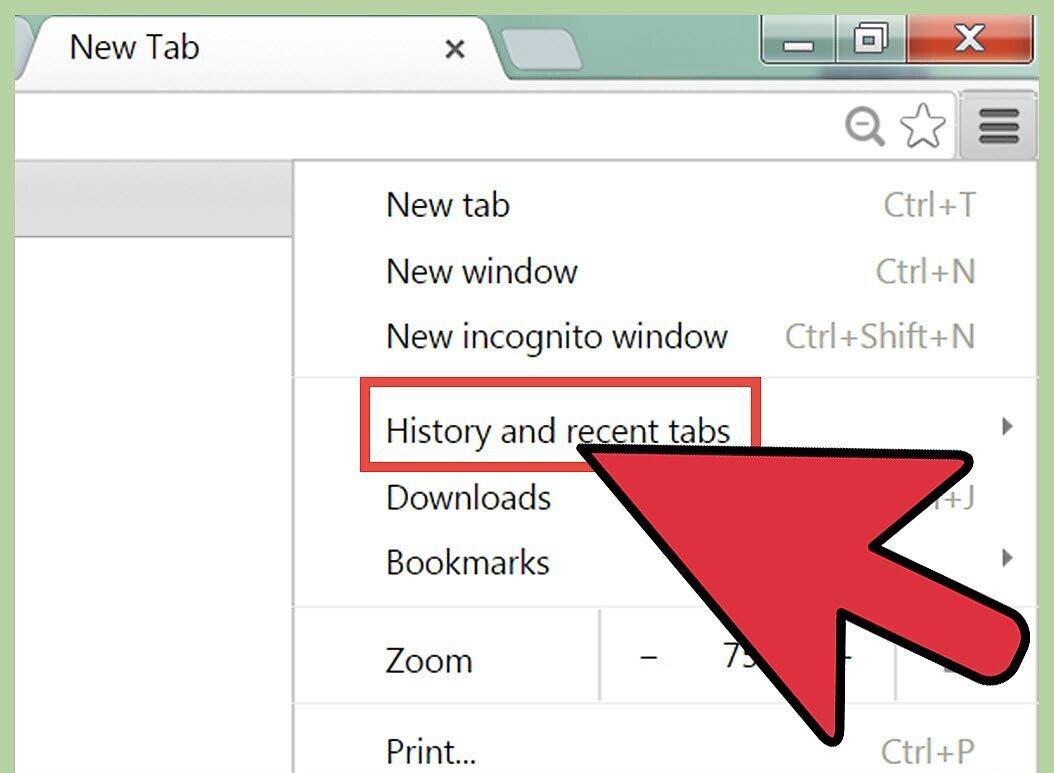
Go to the "History" section through the Chrome menu or press Ctrl+H.
Step 3. Select Pages to Delete.
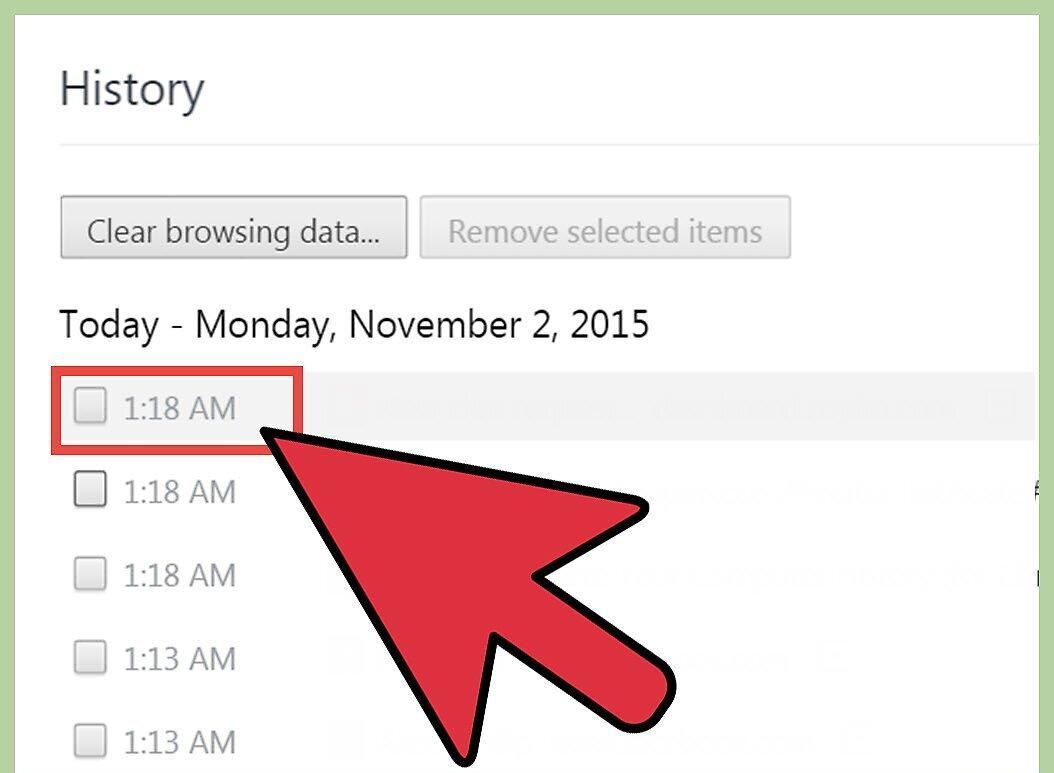
Check the boxes next to the pages you want to remove from history. You can select multiple pages by holding Shift to highlight consecutive pages. You can also use the keyword search to find specific entries.
Step 4. Click "Delete Selected Items."
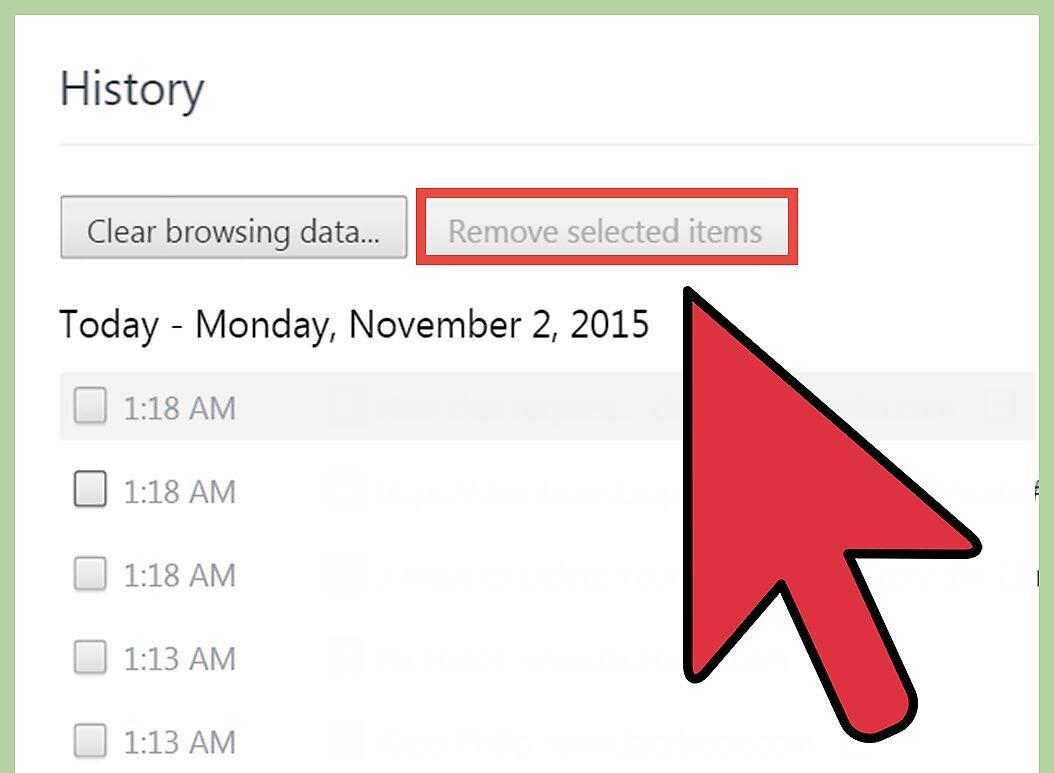
The "Delete selected items" button will become active as soon as you select at least one page.
Step 5. Verify Your Selection of Pages.
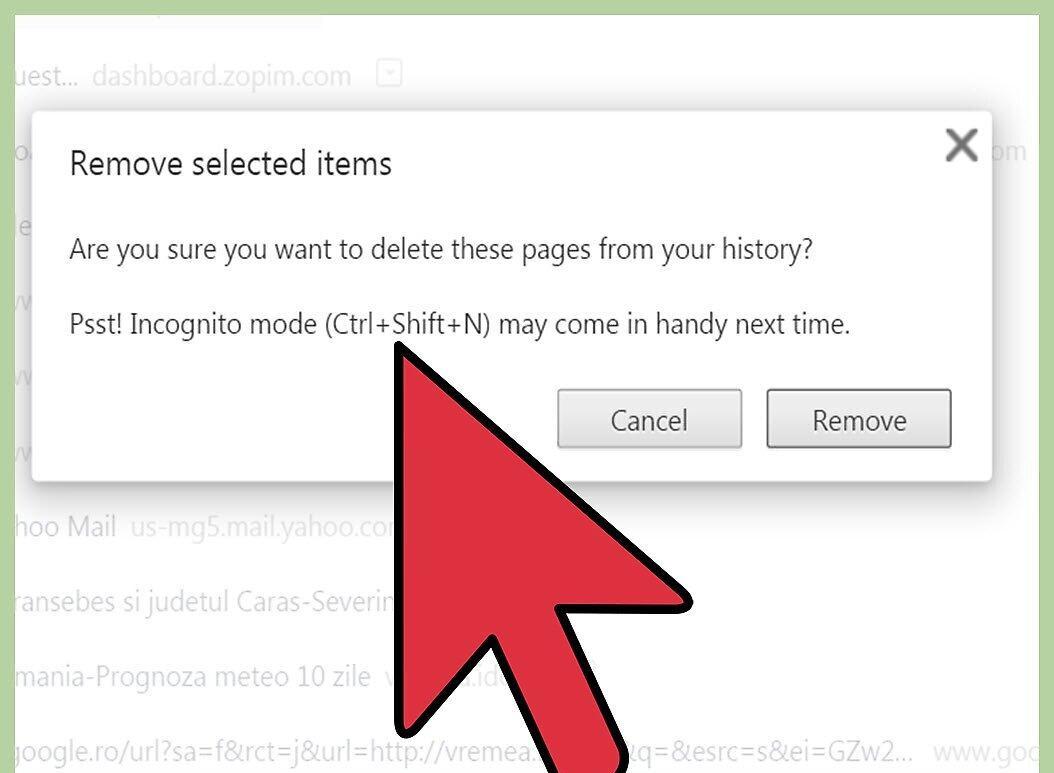
Before clicking "Delete selected items," make sure you have selected the pages you really want to remove to avoid losing important information.
Step 6. Click "Delete."

Confirm the deletion by clicking "Delete." The selected pages will be permanently removed from your browsing history.


