
AirDrop offers an excellent way to instantly transfer files such as photos, contacts, and documents between Apple devices. You don’t need to connect to the same network, as AirDrop creates its own temporary network that automatically disconnects after the transfer is complete. Use this simple, fast, and secure method for data sharing!
Troubleshooting AirDrop
Step 1. Keep Devices Close Together.
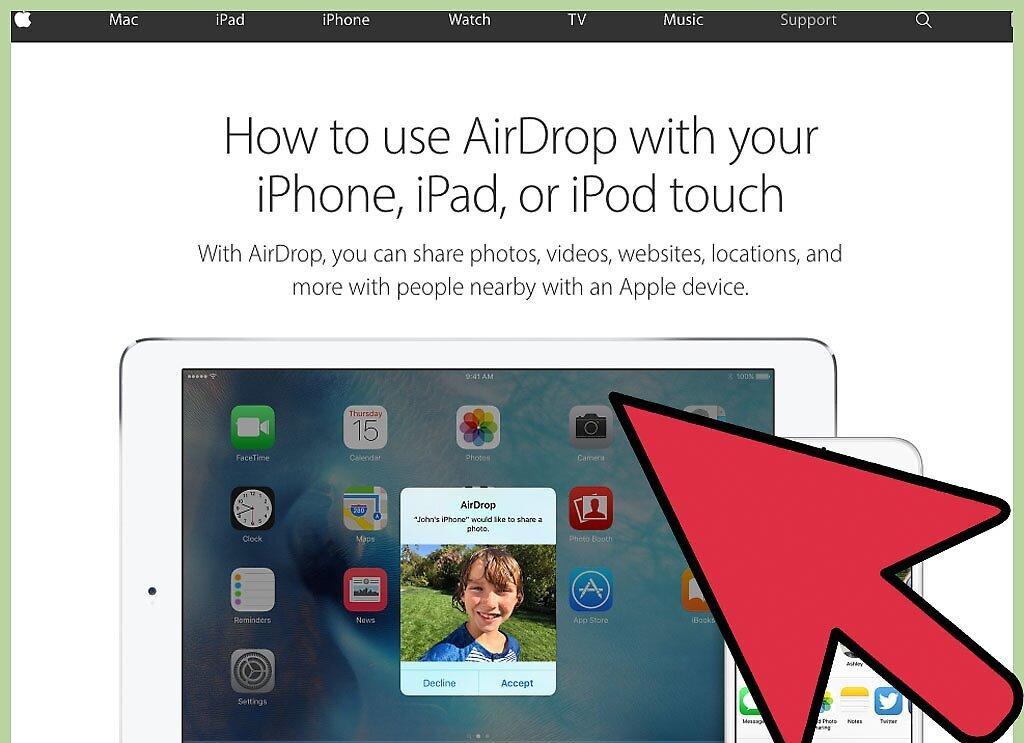
Keep your devices nearby. AirDrop uses its own transfer technology, so it’s important that they are no more than 10 meters apart for optimal performance.
Step 2. Check Device Compatibility.
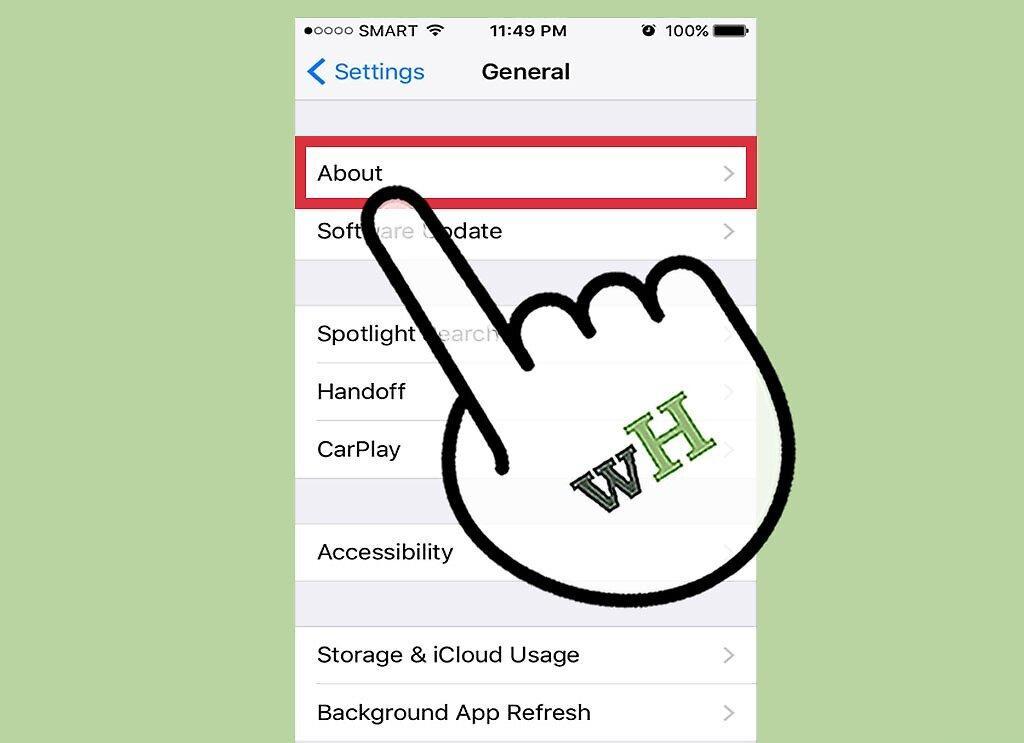
Make sure your devices are compatible. AirDrop allows file sharing between iOS and macOS devices, but they must meet certain requirements:
- For iOS devices: iPhone 5 and later, iPad mini, iPad 4th generation and later, iPod Touch 5th generation and later. You need to have iOS 7 or later installed. To transfer files between iPhone and Mac, iOS 8 is required.
- For Mac computers: OS X Yosemite (10.10) or later. Compatible Macs include MacBook from 2012 and later, and iMac from late 2012 and later.
Step 3. Check Visibility Settings.
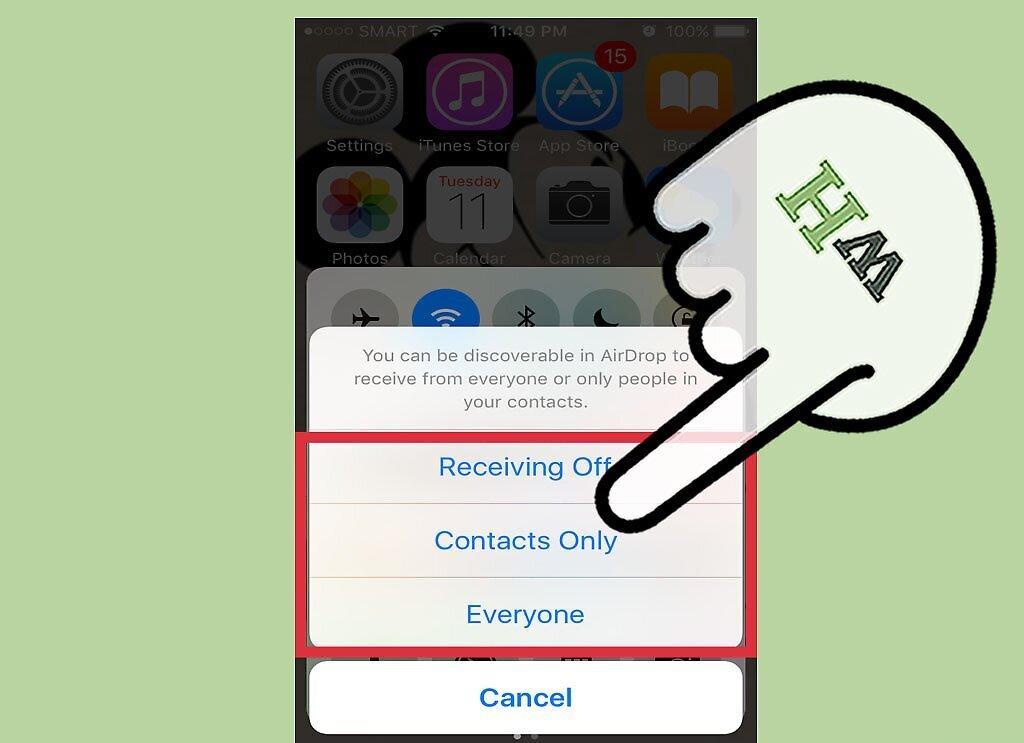
Ensure that AirDrop visibility is turned on. If it’s off, other devices won’t be able to see you.
- On iOS — open Control Center and tap on “AirDrop.” Choose the “Everyone” option for maximum accessibility. You can rest assured about security since you’ll need to confirm each transfer.
- On macOS — open Finder and select “AirDrop” from the left side of the screen. Under “Allow me to be discovered by,” select “Everyone.” Keep the AirDrop window open to connect with other devices.
Step 4. Restart Bluetooth.
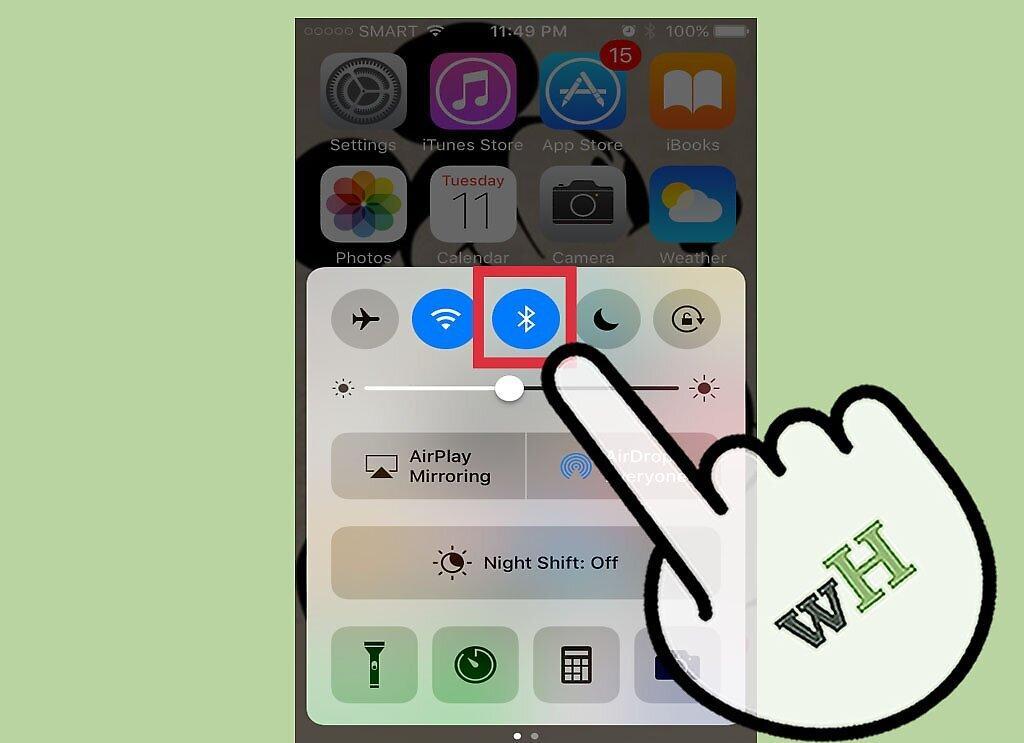
Turn Bluetooth off and back on to resolve potential connection issues.
- On iOS — swipe up from the bottom to open Control Center, then tap on “Bluetooth.”
- On macOS — open the Bluetooth menu, turn Bluetooth off and then back on.
Step 5. Ensure Bluetooth and Wi-Fi Are Enabled.
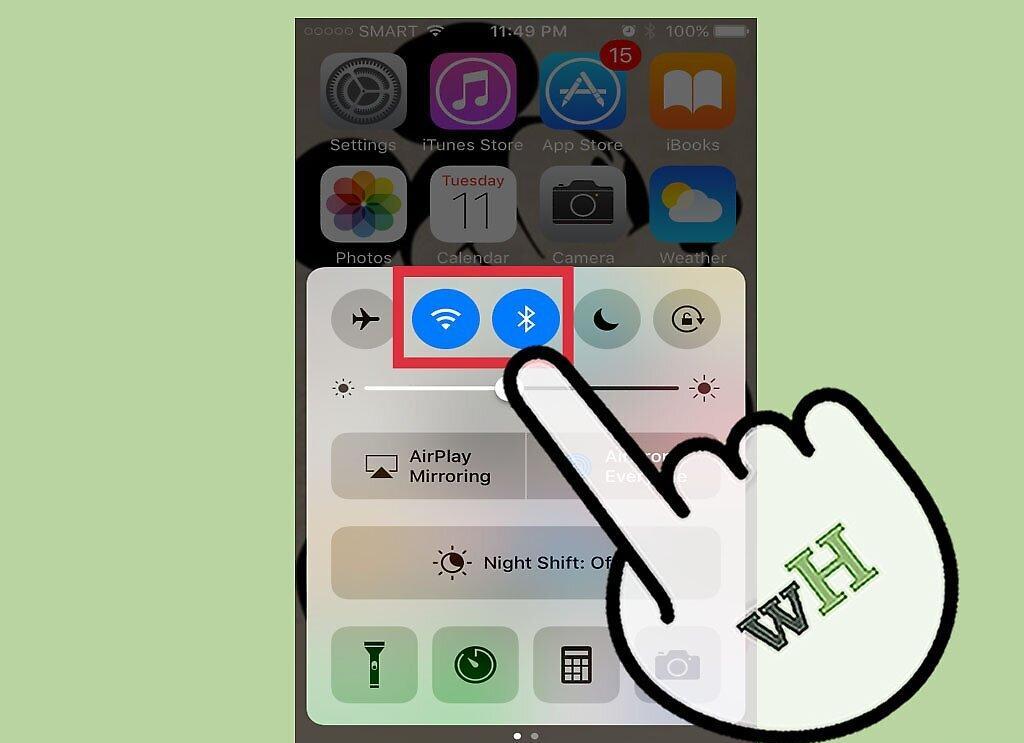
Check that Bluetooth and Wi-Fi are active. AirDrop uses these networks to function. Make sure both features are enabled on your devices.
Step 6. Update All Devices.
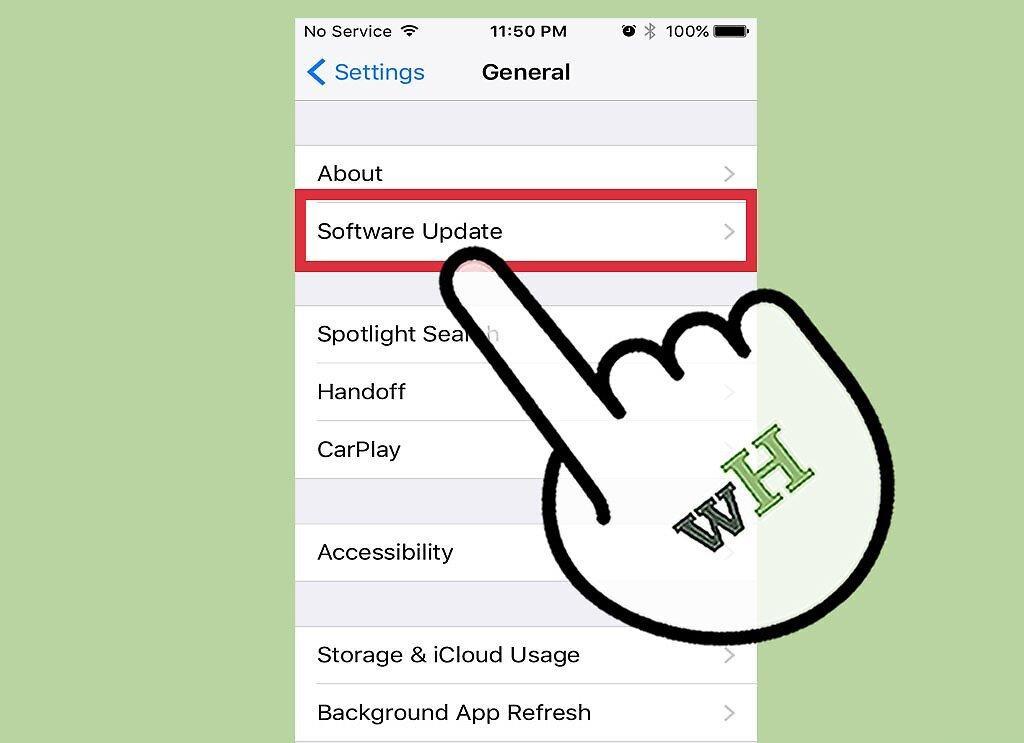
Try updating the firmware on all devices. Sometimes issues with AirDrop are resolved through updates.
- On iOS — go to “Settings,” select “General,” tap “Software Update,” and follow the prompts to install available updates. This usually takes about 30 minutes.
- On macOS — go to the Apple menu and open “App Store.” Look for the latest version of macOS and follow the instructions to update.
Step 7. Sign Out and Back into iCloud (on Mac).
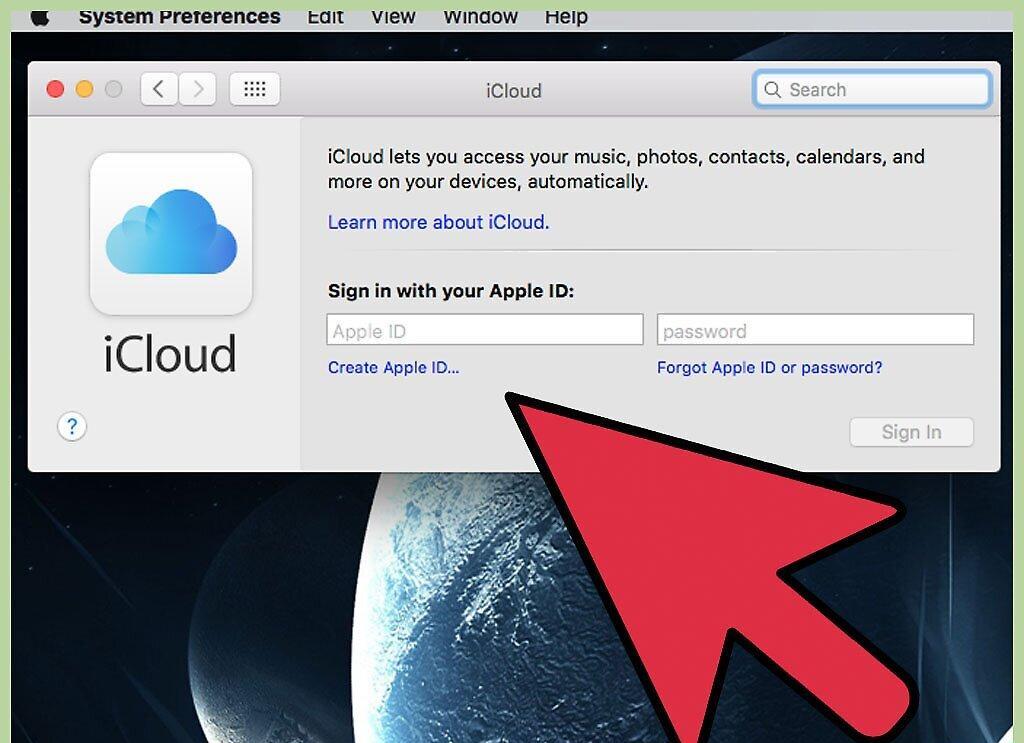
If you’re having trouble connecting, try signing out of iCloud on your Mac and signing back in.
- To do this, open the Apple menu, select “System Preferences,” then “iCloud,” and click “Sign Out.” Once done, log back in with your Apple ID.
Step 8. Check Your Apple ID (on iOS 8.1 and below).
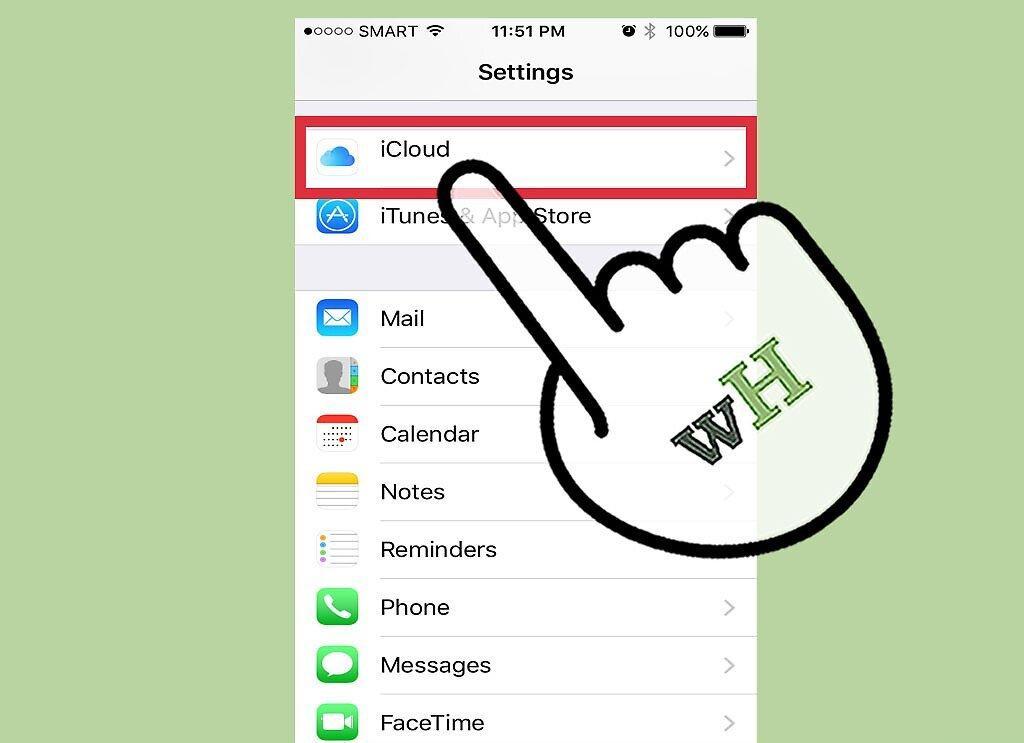
If you’re using iOS 8.1, be aware of potential Apple ID errors that can cause issues. Check the settings under “iCloud” in “Settings.” If your Apple ID contains uppercase letters, it may cause glitches. Sign out and sign back in with the same address but enter it in lowercase. This issue was fixed in iOS 8.2.
How to Use AirDrop
Step 1. Enable Wi-Fi and Bluetooth on Your iOS Device.
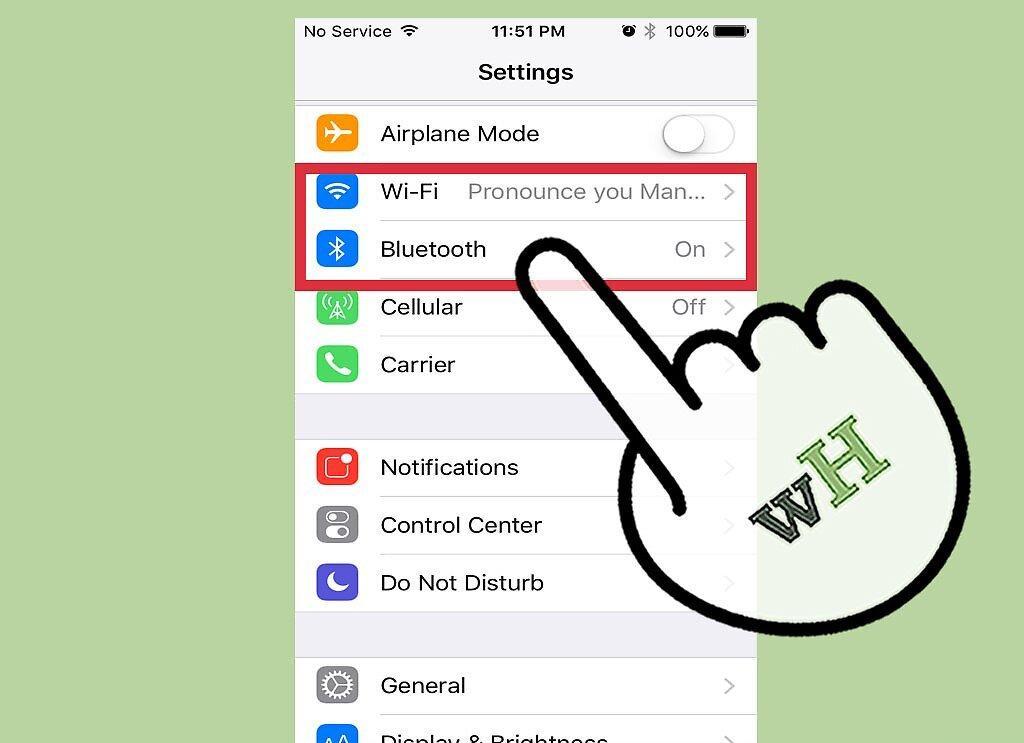
For AirDrop to work, you need active Wi-Fi and Bluetooth.
- To activate, swipe up from the bottom to open Control Center and tap on “Wi-Fi” and “Bluetooth.”
- If you’re transferring files between an iOS device and a Mac, make sure these features are also enabled on your computer.
Step 2. Open Control Center.
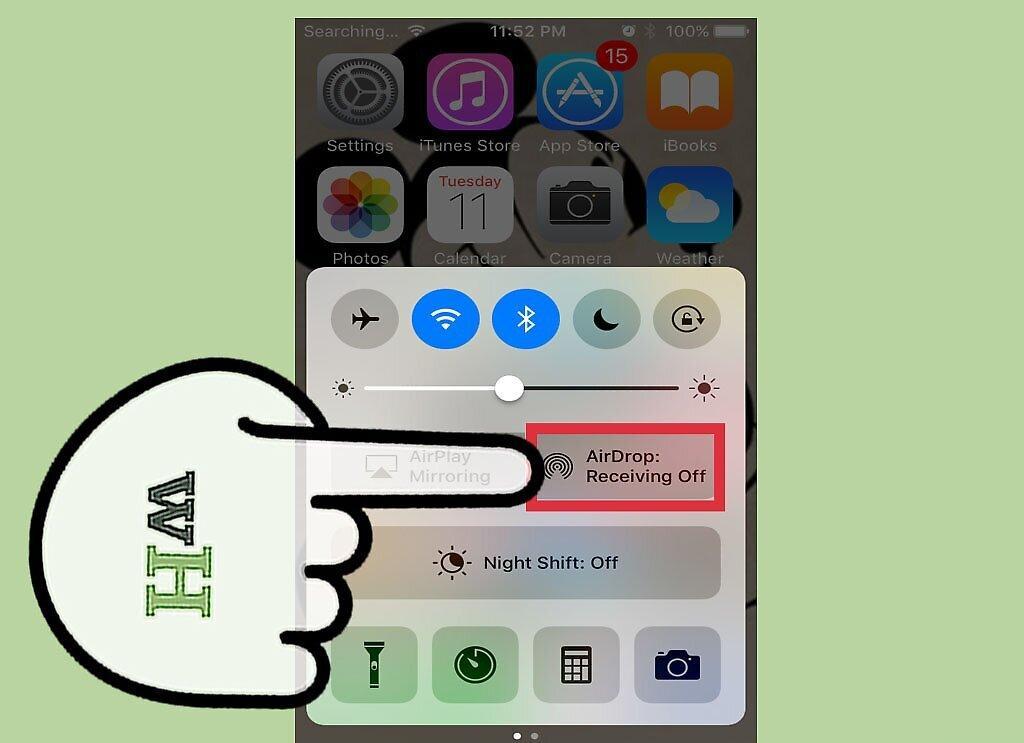
Swipe up from the bottom to open Control Center and activate AirDrop.
Step 3. Hold the Connection Sliders.
Hold the connection sliders where the Wi-Fi, cellular, airplane mode, and Bluetooth options are located. This will reveal additional options including AirDrop.
Step 4. Configure AirDrop Settings.
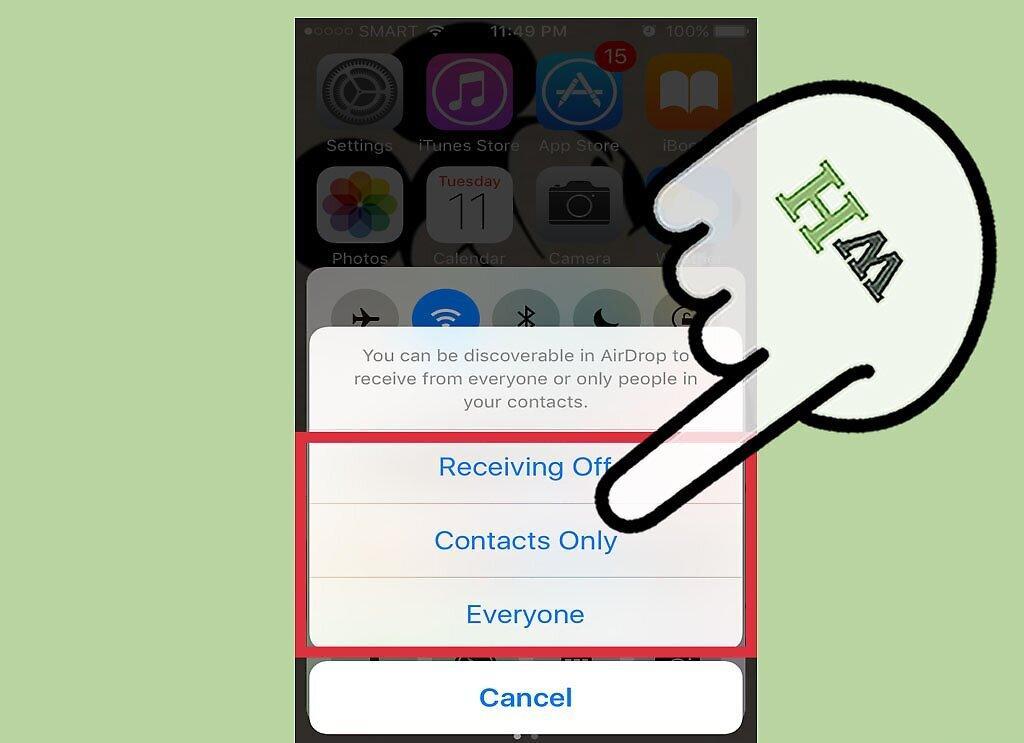
Tap “AirDrop” and select your visibility level:
- “Receiving Off” — AirDrop is disabled.
- “Contacts Only” — your device will only be visible to those in your contacts.
- “Everyone” — any nearby device can see yours.
Step 5. Open AirDrop on Your Mac.
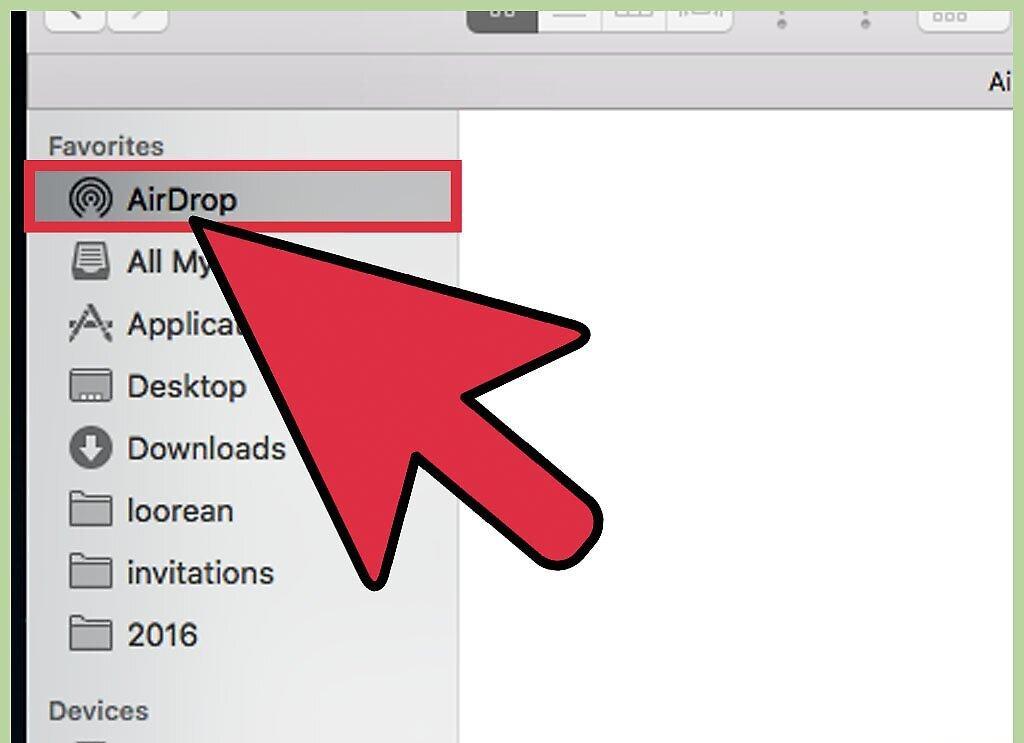
If you’re sending files to a Mac, open the Finder window and select “AirDrop” in the left column.
Step 6. Select the File to Transfer.
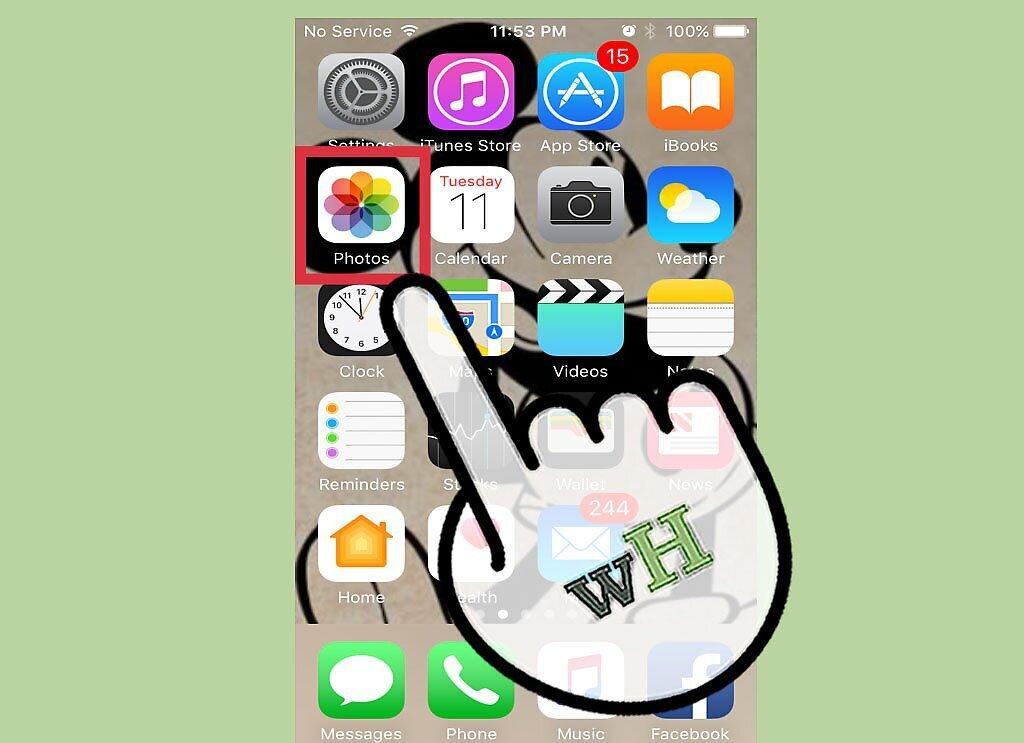
Open the file you want to send in the appropriate application. For example, to transfer a photo, open it in “Photos.”
Step 7. Tap Share.

Tap the “Share” button, which looks like a square with an upward arrow.
Step 8. Choose the Recipient.
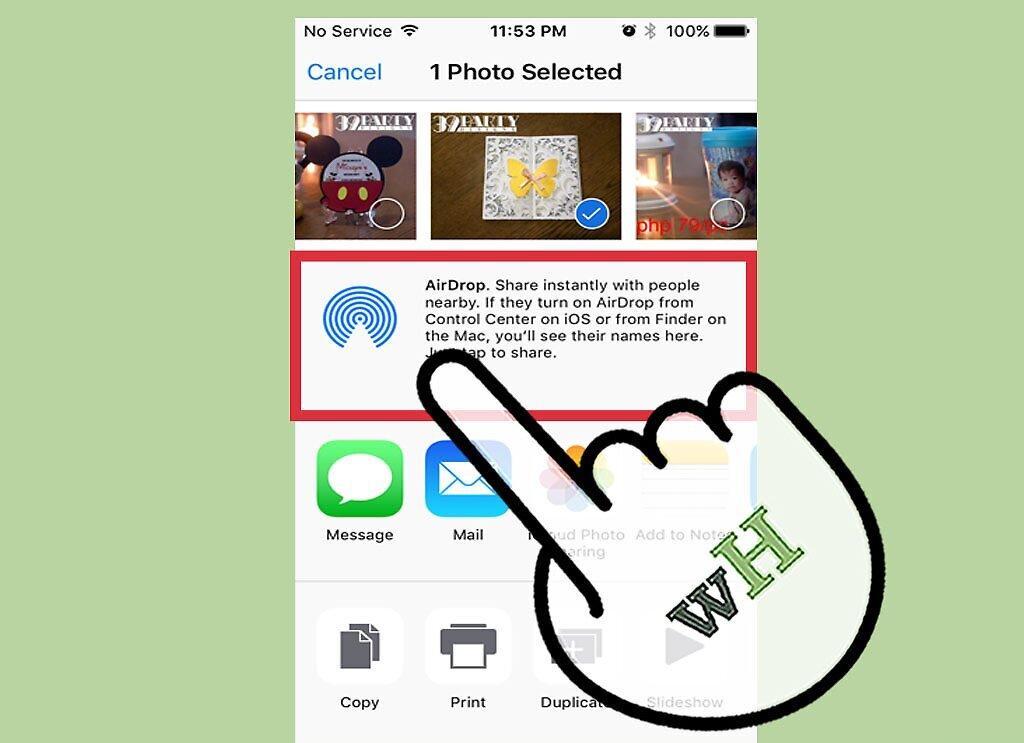
Tap the name of the person you want to share the file with via AirDrop. The list of AirDrop users will be displayed at the top of the “Share” panel. Tap the person's name to send the file.
- AirDrop allows for quick sharing of files, photos, and URLs with friends and contacts nearby.
Step 9. Wait for Confirmation of File Receipt.
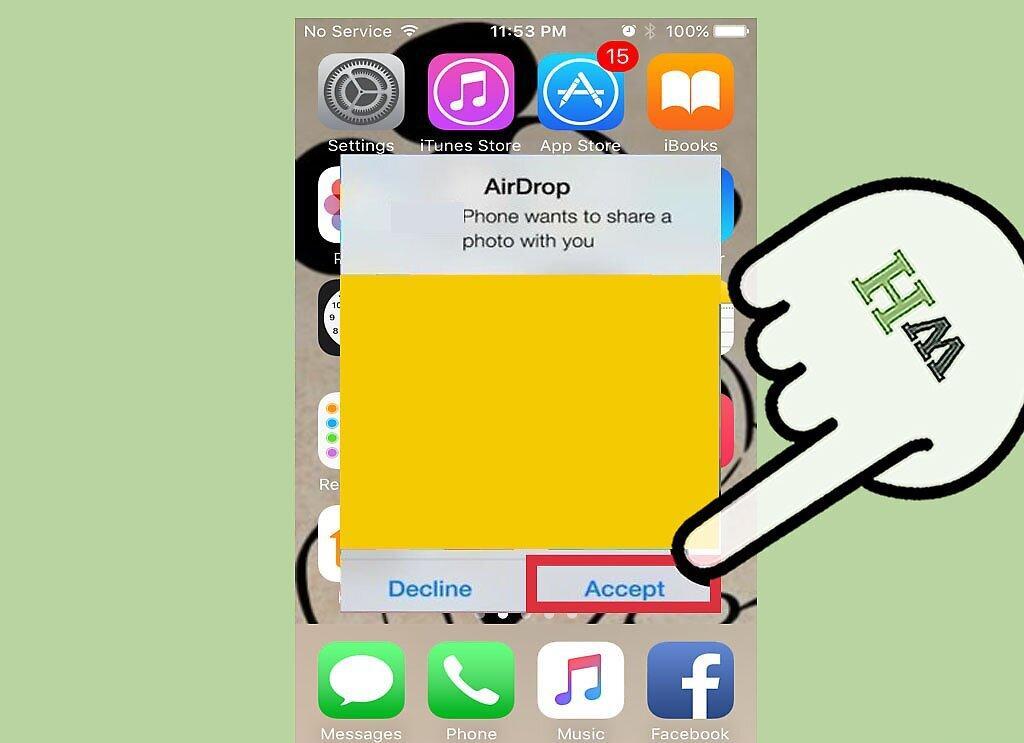
Wait for the recipient to confirm your transfer.


