
Windows Movie Maker doesn't have a built-in subtitle feature, but we'll show you how to do it using the Title Overlay function or the option to create titles and credits. You can customize the size and placement of titles to make them look like subtitles. Read on to find out how to do this.
Part 1
Step 1: Import Your Video.
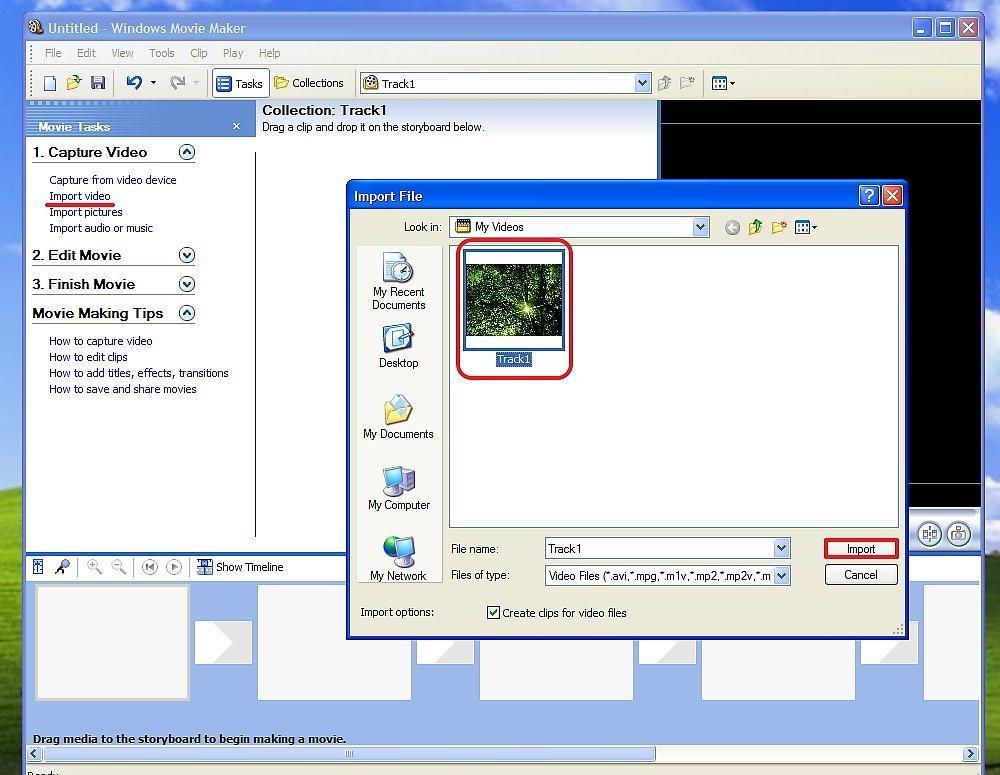
Import your video. Open Windows Movie Maker and click on the Import Video button on the left. A new window will pop up for video file upload.
- Select the drive where your video is located and the directory. Choose your file and click OK or Open to import into Movie Maker. Your video will appear in the Collections category, which is located above the timeline.
Step 2: Change the Timeline View by Clicking the Timeline View Button.
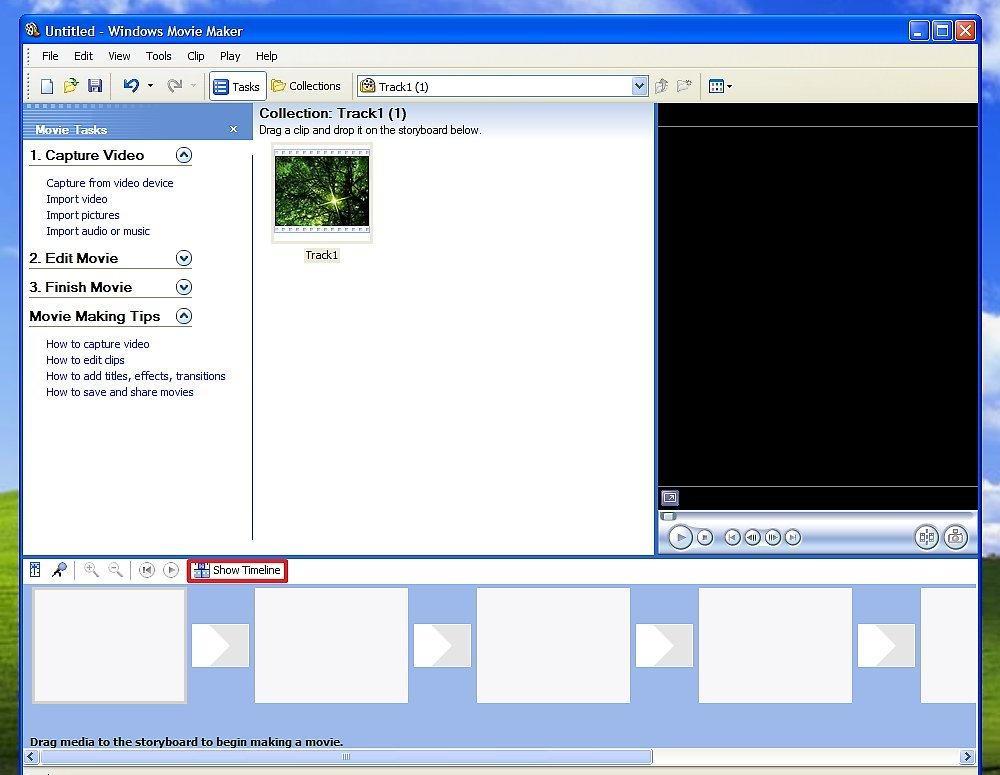
Change the timeline view by clicking the Timeline View button. This will help you adjust the placement and duration of the subtitles. You can also select the timeline from the View menu at the top.
Step 3: Drag Your Video to the Timeline.
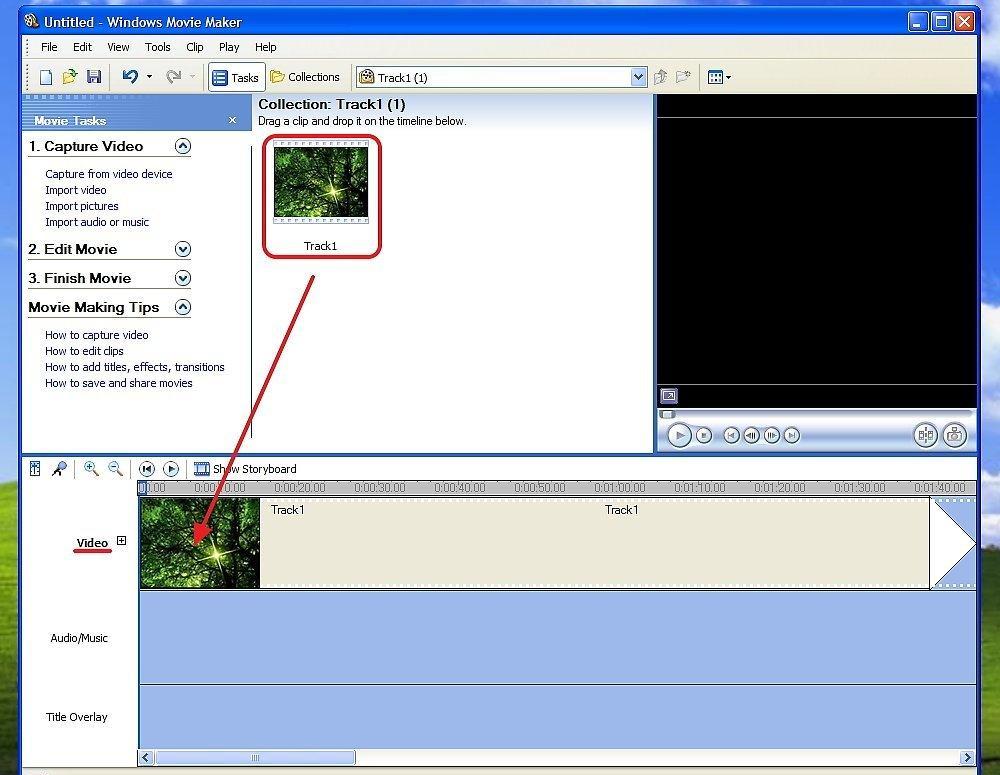
Drag your video to the timeline. The timeline has three tracks: the top is Video, the middle is Audio or Music, and the bottom is Title Overlay. You need to drag your video from the Collections to the track labeled Video. Now it will be displayed on the timeline.
Step 4: Choose the Title Addition Option.
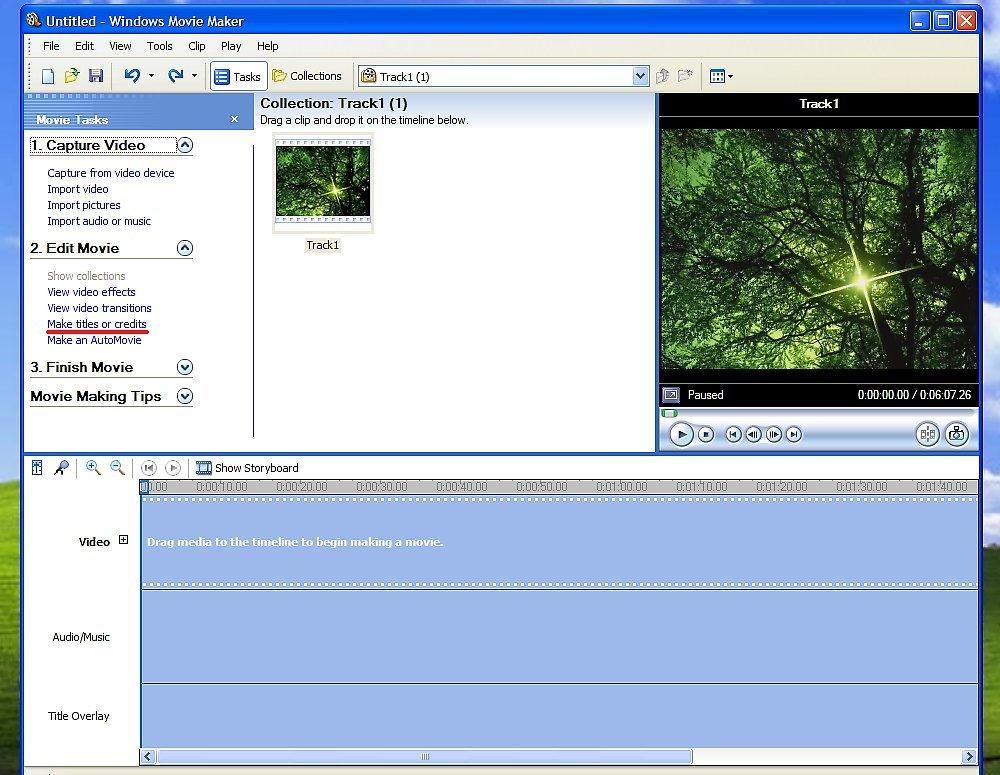
Choose the option to add a title. Add the subtitle text, and it will appear on the Title Overlay track. Select the Title option on the selected clip. Drag it to the desired position on the timeline. You can adjust the duration of the titles.
- After adding the titles, select the "Change Animation" option. An animation selection menu will appear. Find the "Subtitles" option. Choose the additional options menu to select the font and text color, such as "Arial" or "Times New Roman."
- Change the font, size, and color of the text. You can also set the text transparency. Choose the options you need in the text settings. When you're done customizing the subtitles, click Add Title or Add Credits. They will now appear on the timeline.
Step 5: Position the Titles Where They Should Appear in the Video.
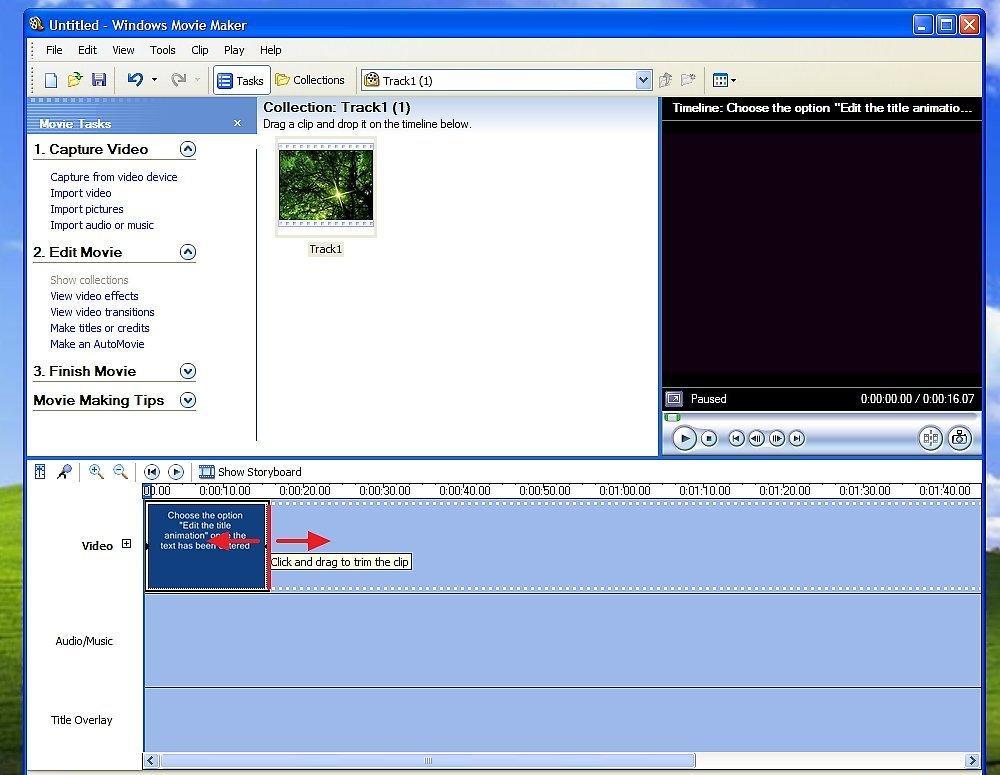
Position the titles where they should appear in the video. Play the video to check if the subtitles are in the right place. You can drag the subtitles left and right according to the timing.
Step 6: Adjust the Duration of the Titles.
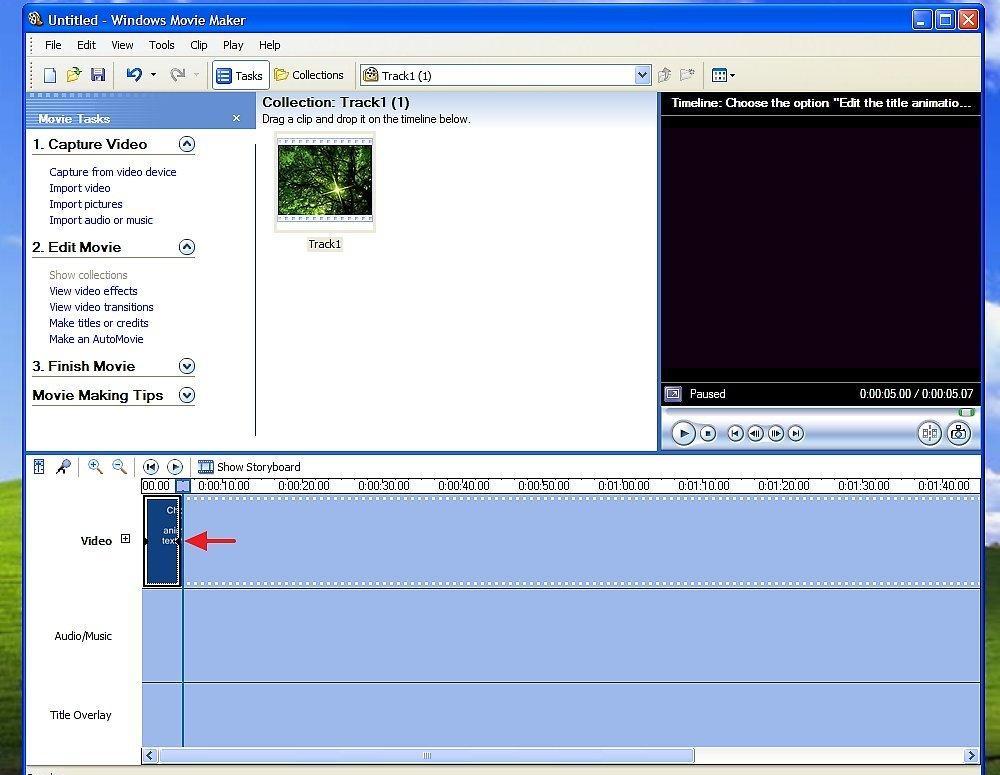
Adjust the duration of the titles. Stretch the subtitles at the edges to make them longer or pull them in to shorten them. You can make them as long or as short as you want. Play the video to check if everything is set correctly.
Step 7: Create the Next Set of Subtitles the Same Way.
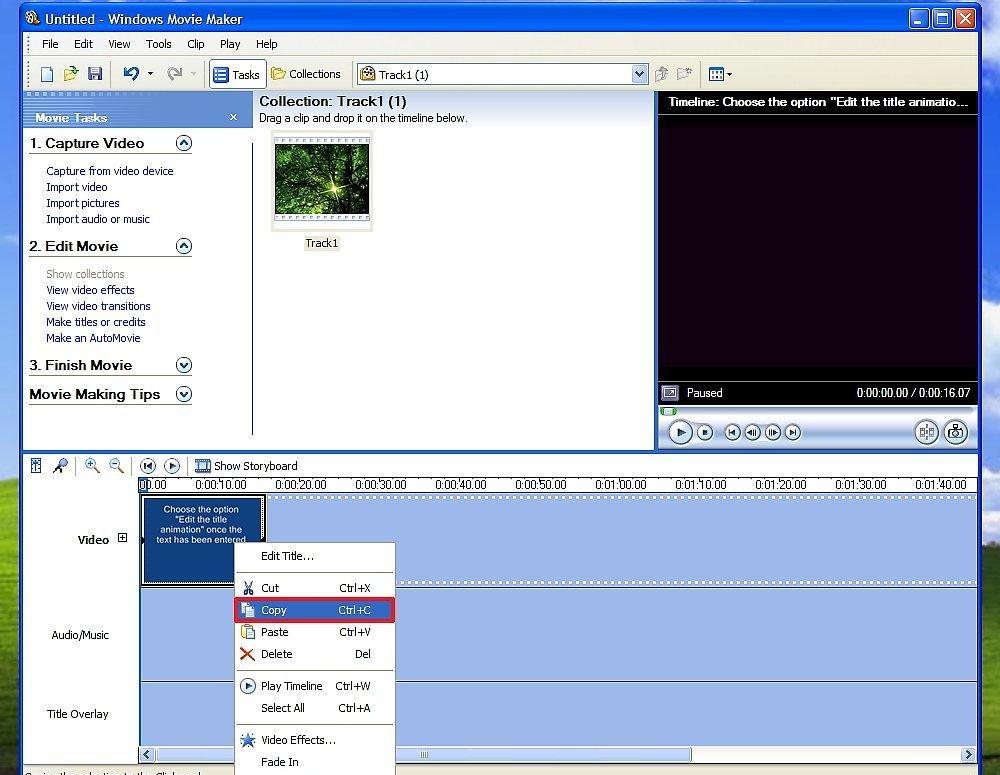
Create the next set of subtitles the same way. Or simply right-click on already created subtitles and click Copy. Now right-click where you want to paste the subtitles. Click Paste. Change the subtitle text by double-clicking on them.
- Delete the text and enter new text. After that, click Add. Now you can edit their length and placement.
Step 8: Add as Many Subtitles as You Need.
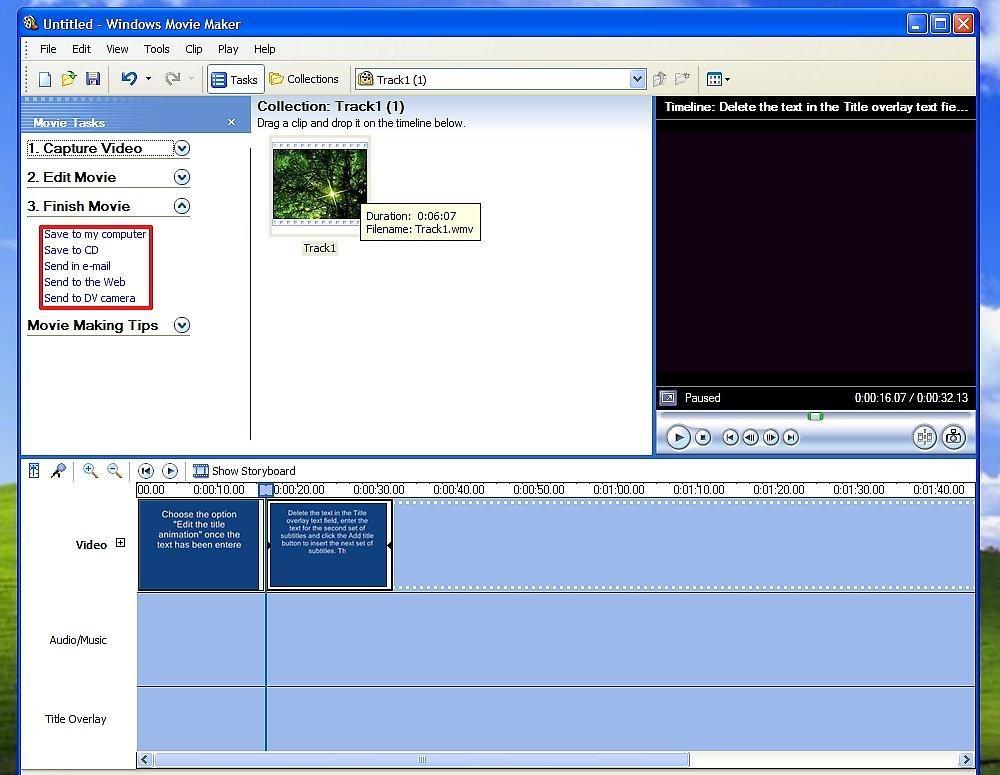
Add as many subtitles as you need. Play the video to ensure everything is done correctly. Save the video file on your computer. The video will be saved in WMV format.


