
Your toilet does its job, but do you sometimes notice water leaking from the tank? It might happen for a while and then start leaking again, resulting in water constantly being in the bowl. This not only leads to unnecessary expenses but can also disrupt your sleep. Don’t worry! If you understand how a toilet and its tank work, fixing a leak is typically not a complicated task and doesn’t require much expense. Approach the problem systematically. The flush tank has many components that may start malfunctioning.
Part 1
Step 1. Familiarize Yourself with the Tank's Design.
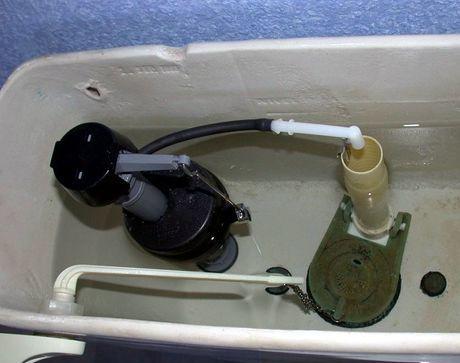
Study how your tank is constructed. While the mechanisms may vary, they all operate on the same basic principle. Remove the tank lid, press the flush button a few times, and observe what happens inside.
- When you press the button, a chain lifts the flapper, allowing water from the tank to flow into the bowl through the bottom opening. When the water drains, the flapper drops back down, closing the passage.
- A plastic float drops when water is flushed. It is connected to a valve: when the float drops, the valve opens to let water into the tank, and when the float rises, the water supply stops (in theory).
- In the center is an overflow tube that prevents the tank from overflowing by draining water into the bowl if the water level gets too high.
Step 2. Identify the Cause of the Leak.
If you wait a while after flushing and the water continues to leak, lift the tank lid and look inside.
Step 3. Close the Flapper.
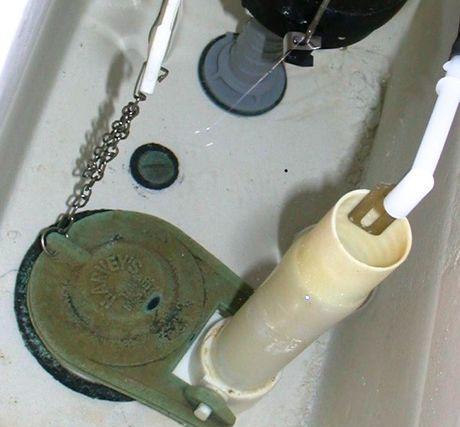
Make sure the flapper is closed. If the tank isn’t filling and remains empty, the flapper may be stuck in the open position.
- Try closing it manually. If the flapper keeps sticking, try to figure out why. Check if the chain is snagging on other components or if the flapper is snagging the chain. To avoid sticking, you can thread the chain through a plastic straw or replace it with a loop of dental floss of the same length.
- Is the flapper getting stuck at the mounting point?
- Ensure the flapper fits the opening correctly.
- Check for a ballcock float and ensure the wire lifting the ball is not obstructed so it can move freely.
Step 4. Check the Water Level in the Tank.
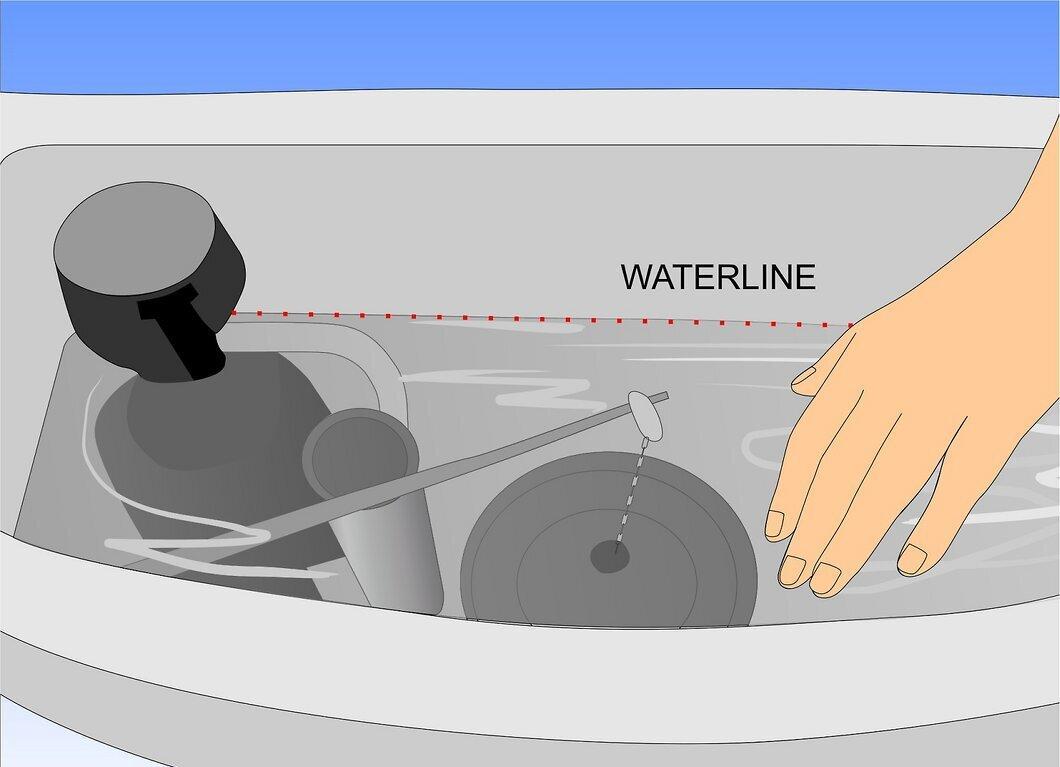
Check if the water in the tank is at the required level. Insufficient water can also cause leaks.
- If the water level is low, check the supply valve—it should be fully open. If it’s closed, open it manually, and the tank will start filling to the correct level (unless the fill valve or float needs adjustment). Conduct this check before replacing the flapper or other components.
Step 5. Adjust the Valve or Float.
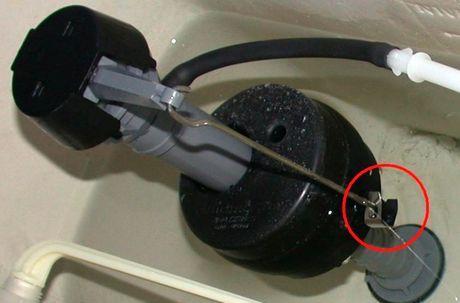
- Try manually lifting the float. If this stops the leak, adjust it so the tank stops filling when the water level is 1 inch below the top of the overflow tube. A high water level can create excess pressure and cause leaks even with a new flapper.
- If the float is near the valve, squeeze the metal clip and move the float down the rod.
- If the float is a ball on a rod, try tightening the screws at the top of the valve. Sometimes you can bend the rod slightly downward.
- Ensure the float ball doesn’t touch other parts. Adjust it so it doesn’t get caught on the tank walls or overflow tube.
- Remember, the float should not be submerged, as this can cause overflows (even if the valve is working correctly). If the float takes on water, it needs to be replaced.
- If the valve and mechanism have limescale buildup, try cleaning them (after removing them from the tank). This won’t take long, and the results can be surprising. If you manage to remove the valve but it doesn’t disassemble to access the washers, the cause may be limescale buildup.
- If lifting the float doesn’t stop the leak and all previous methods fail, you may need to replace the entire fill valve. Replacing the valve is a separate topic, so check other possible causes and solutions first. If you need to replace the valve, you can do it yourself without much expense. Seek advice at your local hardware store.
Step 6. Clean or Replace the Flapper and/or Valve.
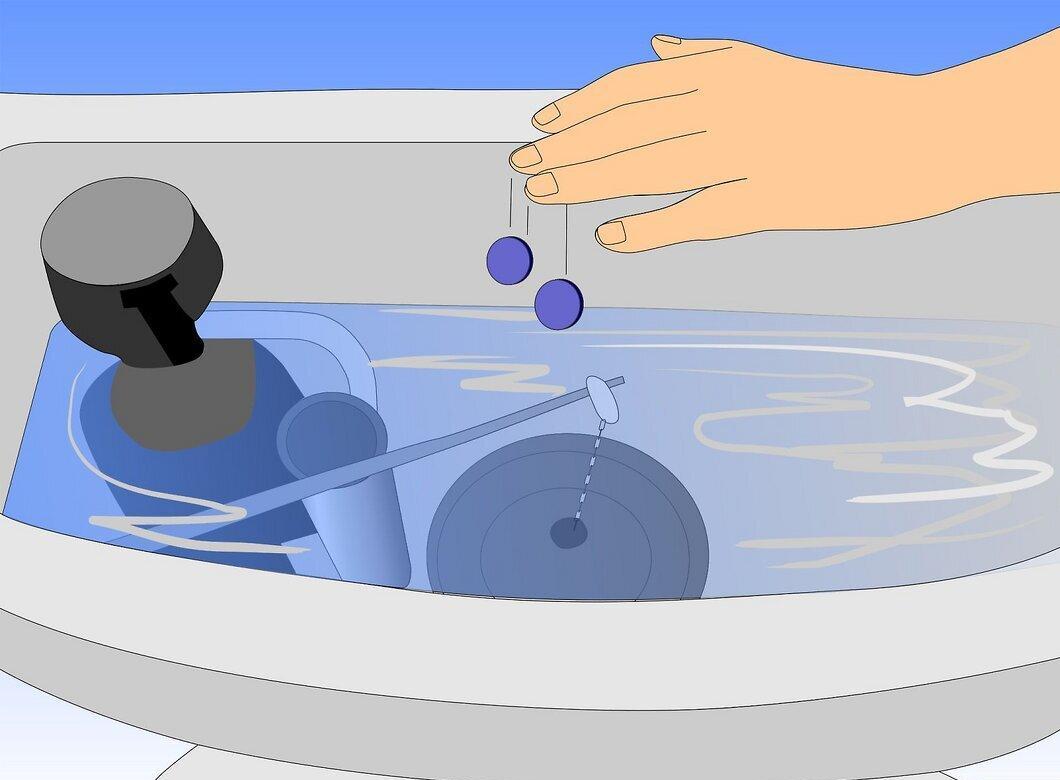
Clean or replace the flapper and/or valve. If the tank isn’t filling and then the water starts coming in intermittently or continuously drains into the bowl, this may indicate a slow leak from the tank to the bowl. Add dye to the tank or a few drops of food coloring. Your local hardware store may have free tablets for this purpose. If you see color in the bowl after a few hours without flushing, it indicates a slow leak. Cleaning may help, but more often than not, it’s best to replace the entire part. Various types of flappers are available in stores, so it’s best to take the old part with you for comparison.
- The most common cause of leaks is a worn flapper. Over time, this inexpensive rubber part can become less flexible and need replacement. Mineral deposits may also form on the flapper or the rim of the flush valve.
- If the flapper is in good condition, it just needs to be cleaned of deposits both on the flapper itself and on the rim it drops onto. Gently wipe the underside of the flapper and the valve rim. Remove minerals that could cause leaks. Use a bleach sponge, steel wool, or waterproof sandpaper.
- Shut off the water supply and drain the tank. If the valve is closed, remove the old flapper from its hinges, disconnect it from the chain, and install a new one.
- After installation, don’t forget to reopen the valve.
- Flush a few times to determine the right chain length for the new flapper. It should open when the button is pressed and close completely when the tank empties. Use trial and error to adjust the chain length accordingly. Also, ensure the flapper fits the opening.
Step 7. Consider Other Possible Issues.
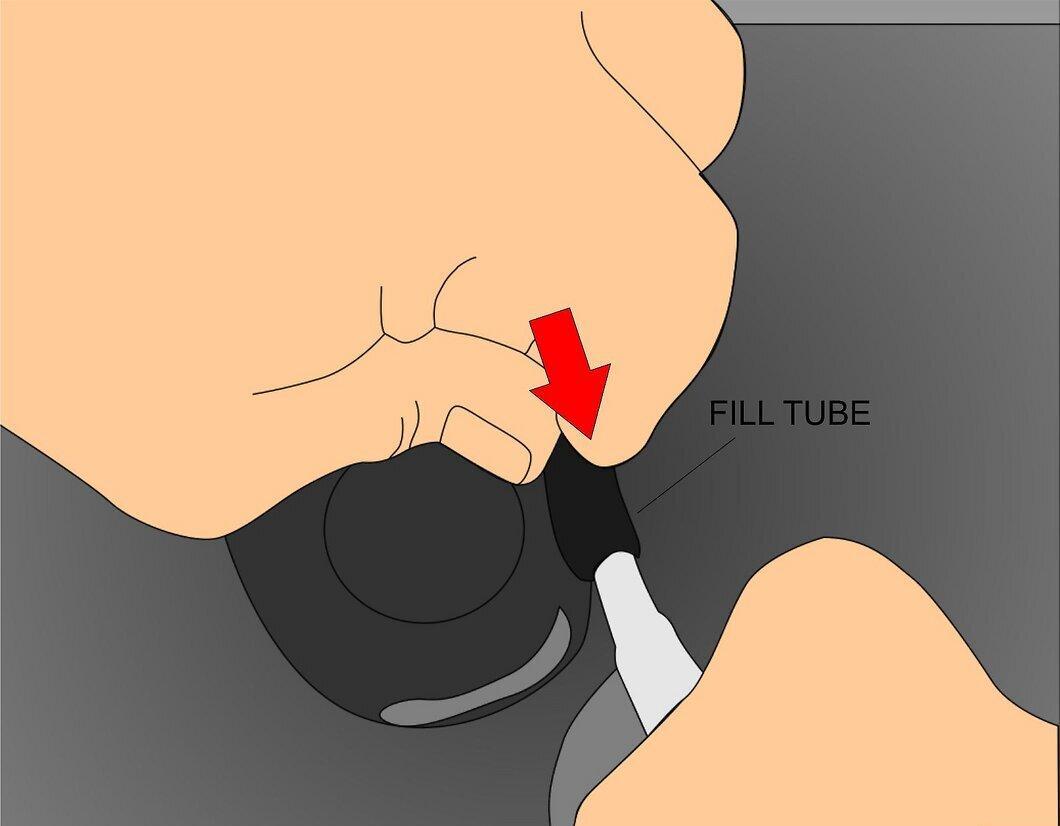
Consider other possible problems. Sometimes there are other reasons for slow water drainage from the tank.
- A small rubber refill tube connecting the valve and overflow tube can act like a siphon. In this case, you need to raise the height of the valve or tube or lower the water level.
- The valve itself may not completely shut off the water supply. In serviceable valves, rubber washers can be replaced. If the valve is non-serviceable, a complete replacement may be necessary.
- Damage to valve mechanism components, such as the lever that presses on the plastic ball, can cause leaks. In this case, it’s best to purchase a replacement part. For a temporary fix, superglue can be used.
- The problem could also be too high water pressure at the inlet to the refill tube, preventing the flapper from settling into place. In this case, partially close the shut-off valve on the wall.


