
Formatting a hard drive allows you to use it on your computer for installing software and storing files. The compatibility of the drive will depend on its file system format. Formatting deletes all information available on the drive, so make sure to back up your data before formatting. You can format a secondary (third, fourth, etc.) drive on your computer or even the boot drive using the operating system installation disk. If you want to completely erase your data (without the possibility of recovery), there are free tools mentioned in the last section of this article.
Formatting a Secondary Drive (Windows)
Step 1. Back up the data you want to keep.
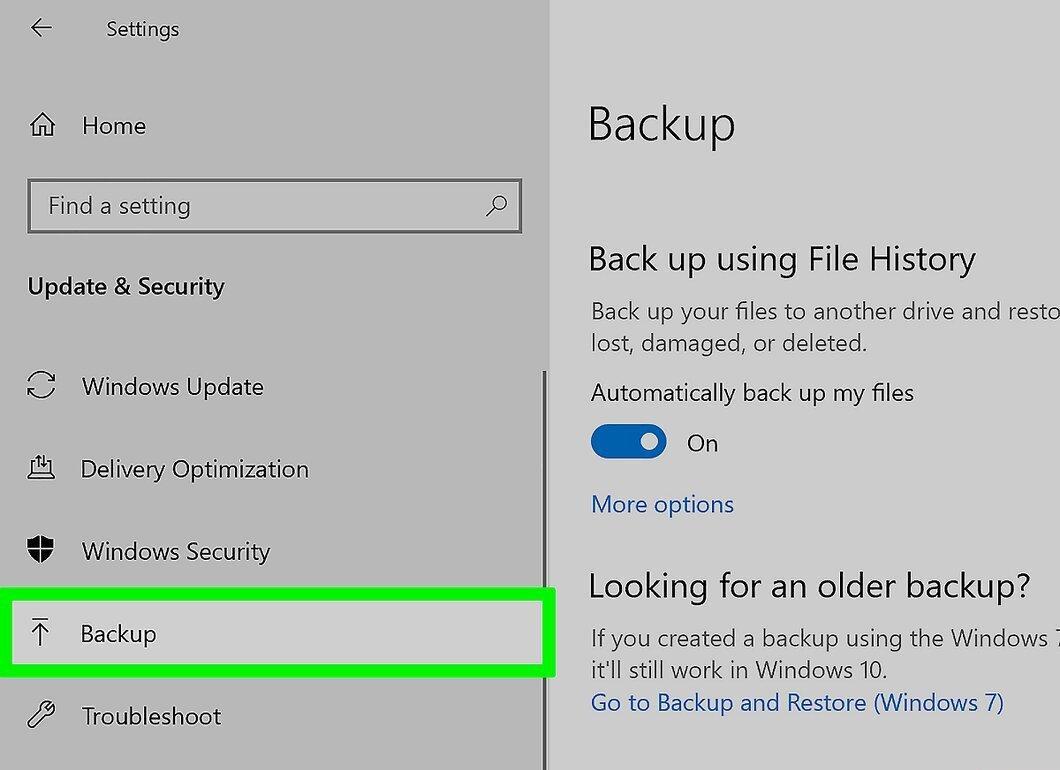
Back up the data you want to keep. Formatting will delete all data from the drive, so ensure you have a backup of important information. In the future, you can restore it to a new drive.
- You cannot back up installed programs. You will have to reinstall programs on the new drive. However, you can back up settings and configuration files.
- Look up information online about how to back up your data.
Step 2. Install the hard drive.
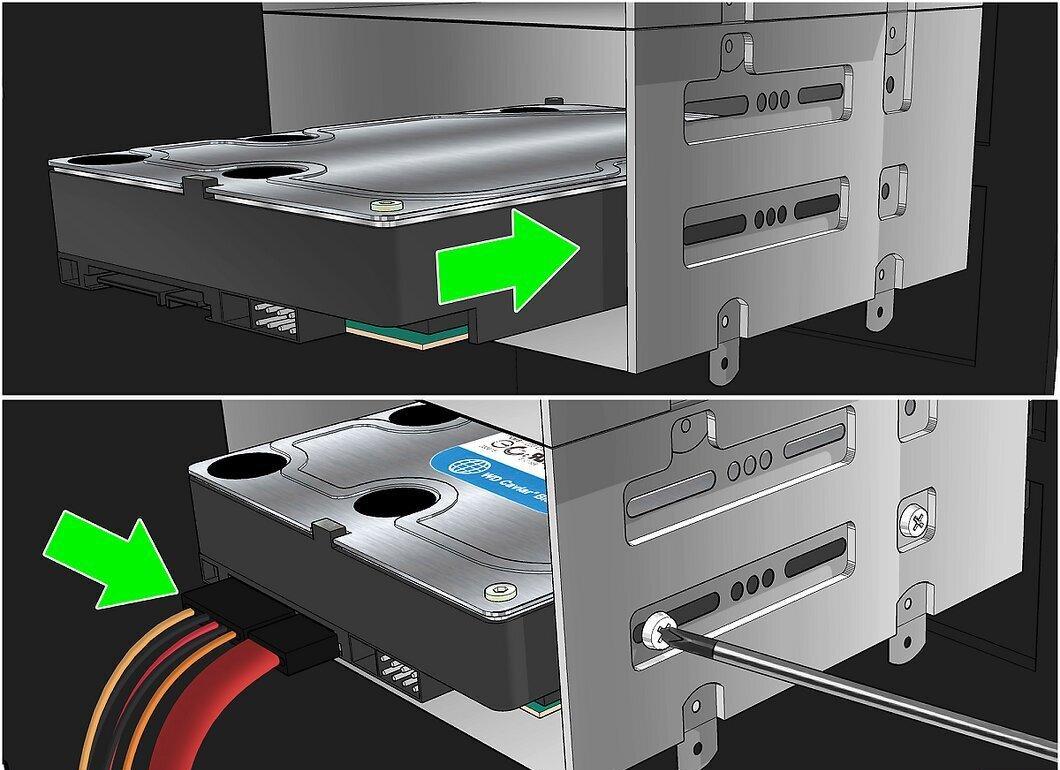
Install the hard drive. If you are formatting a new disk, you need to install it first. Look up information online about how to install a hard drive. If the drive is external, use your computer's USB port.
Step 3. Open My Computer.
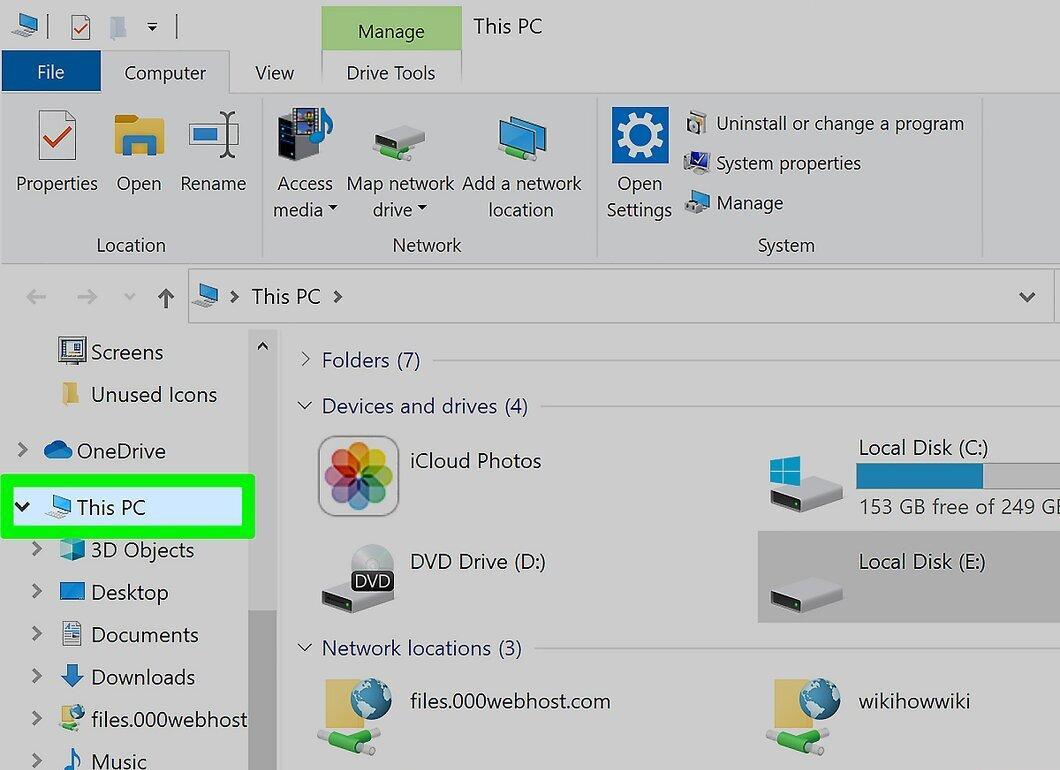
Open My Computer. You can find the My Computer shortcut in the Start menu. Alternatively, you can press Win+E to open this folder directly. In My Computer, you will see a list of available hard drives.
Step 4. Right-click on the selected drive.
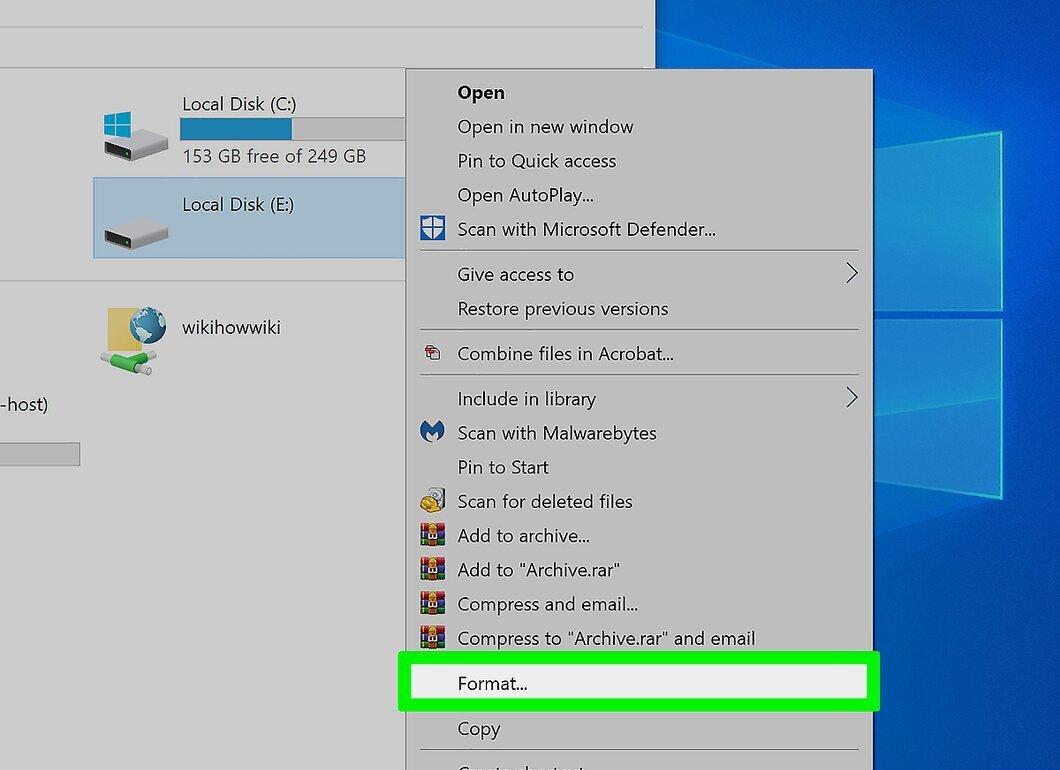
Right-click on the selected drive. Choose Format... The disk formatting tool will open.
- Make sure you have selected the correct drive. After formatting, all data will be deleted.
Step 5. Choose the file system type.
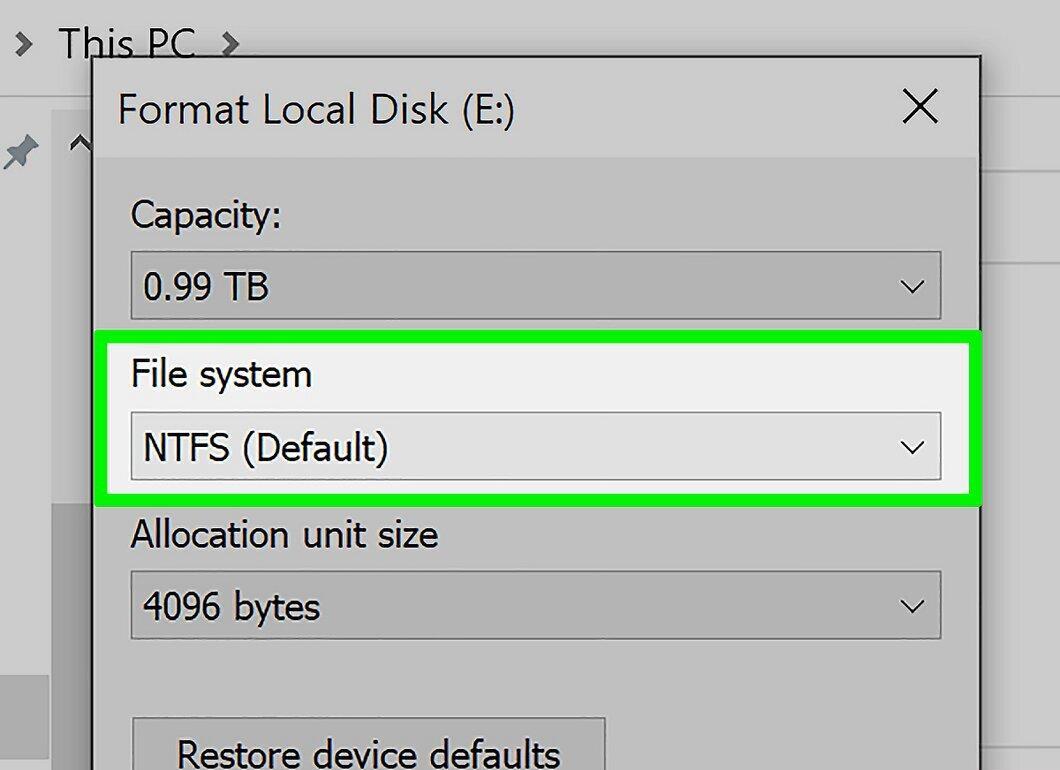
Choose the file system type. The file system determines how files are stored and written on the hard drive, as well as its compatibility with the OS. If the drive is internal and you are using it only on a Windows computer, choose NTFS. If the drive is external, choose FAT32 or exFAT.
- FAT32 and exFAT can be read by any operating system. FAT32 is an older file system and does not support files larger than 4GB, but it can be read by any OS. exFAT has no file size restrictions but does not work on older operating systems like Windows 95.
- Overall, exFAT is the best choice for an external drive. It is compatible with most operating systems and can store files of any size.
Step 6. Name the drive.
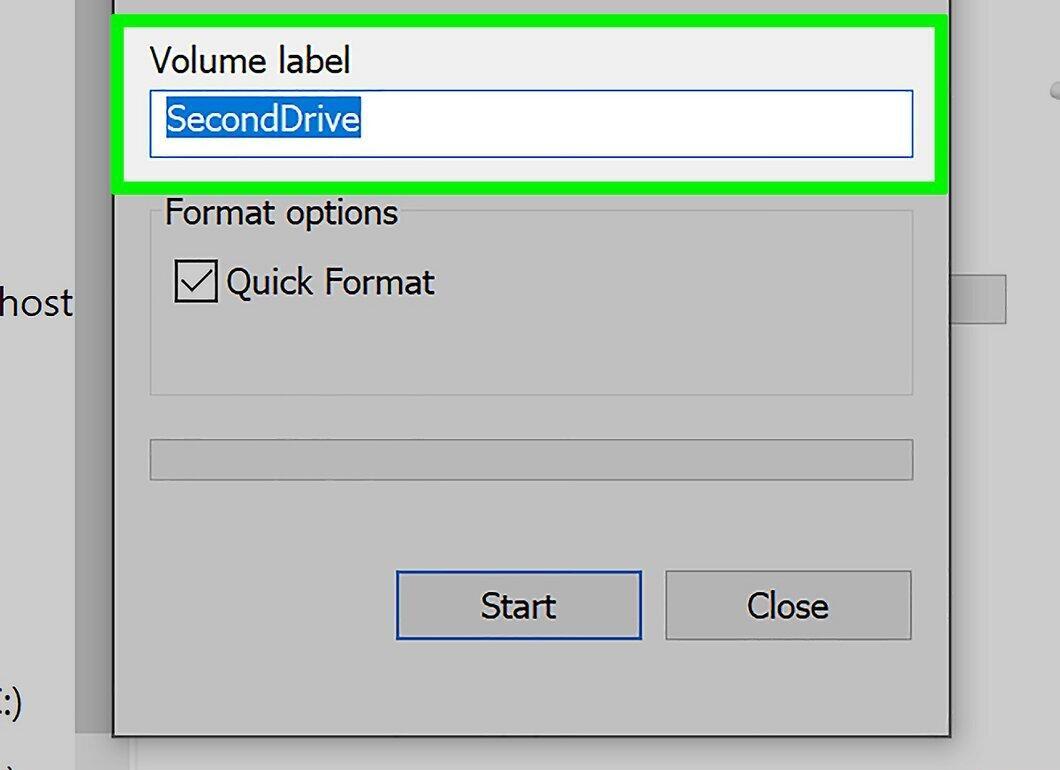
Name the drive. If you are using the drive for a specific purpose, name it accordingly. For example, if you use the secondary drive for music, movies, and pictures, naming it "Media" will help you easily identify its contents.
Step 7. Decide whether to perform a Quick Format.
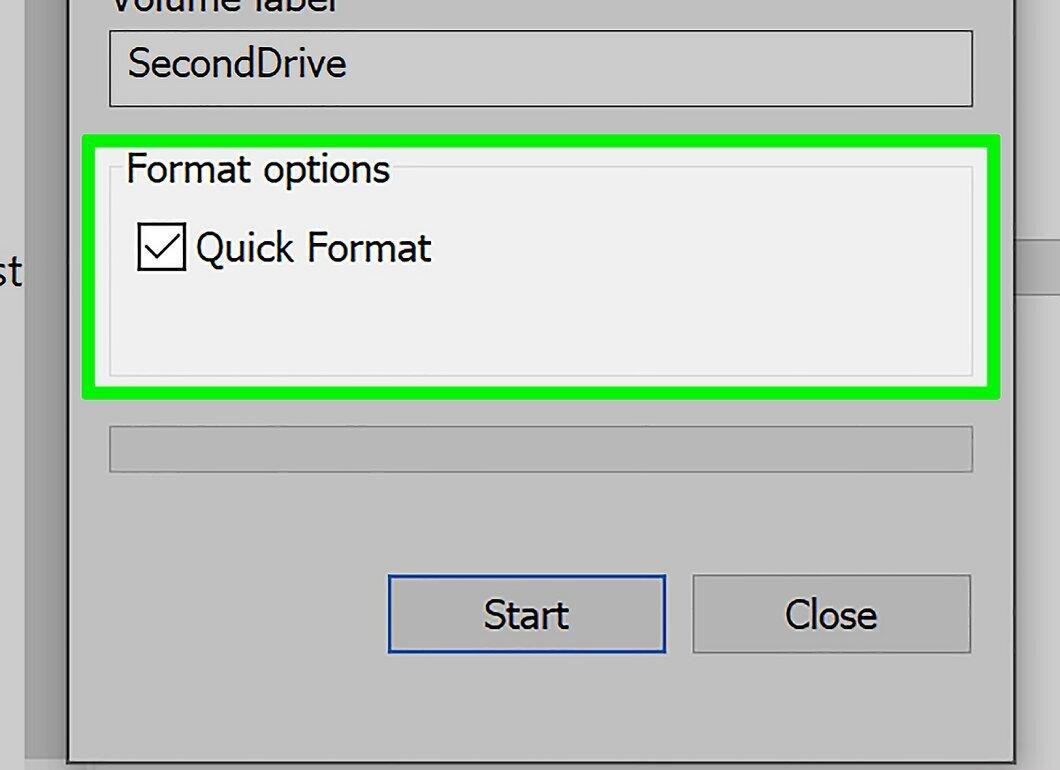
Decide whether to perform a Quick Format. Quick Format is a fast process and will be sufficient for most users. Only perform a standard format if there could be errors on the hard drive. Standard formatting can fix some errors but will take longer than a quick format.
- Quick Format does not affect secure data deletion. If you want to completely erase data from the drive, check the last section of this article.
Step 8. Start the formatting process.
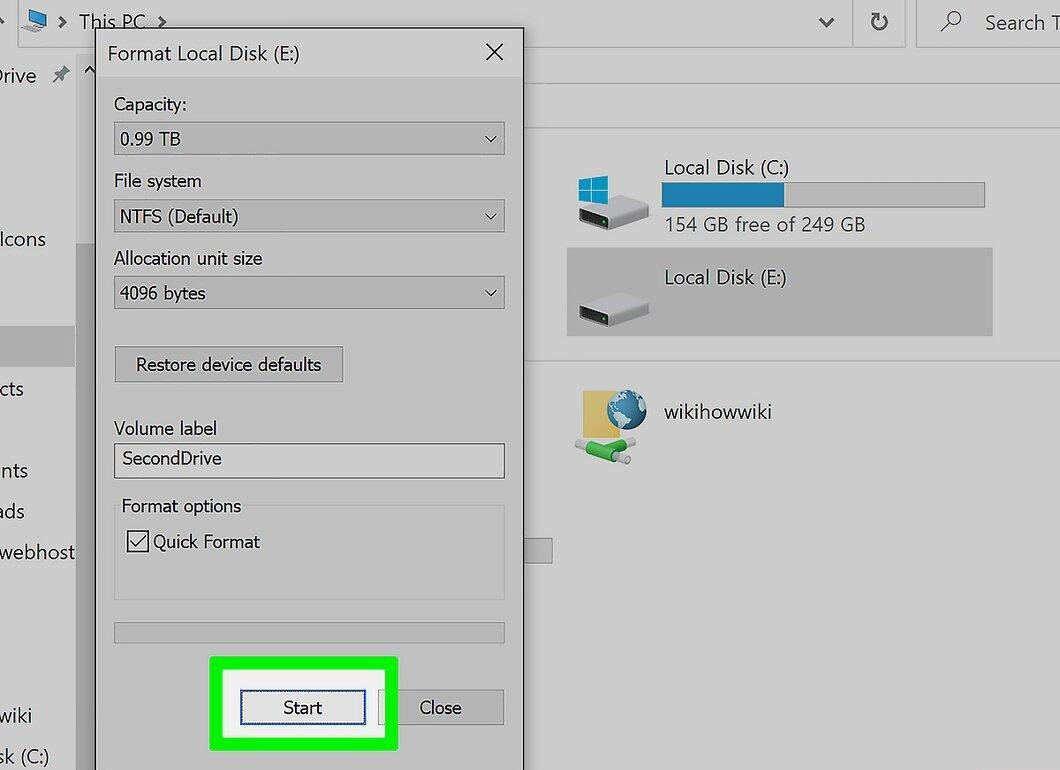
Start the formatting process. Click Start to begin formatting. Click OK to confirm the action, after which all data on the selected hard drive will be deleted. If you chose Quick Format, the process will take only a few seconds.
Formatting a Secondary Drive (OS X)
Step 1. Back up the data you want to keep.
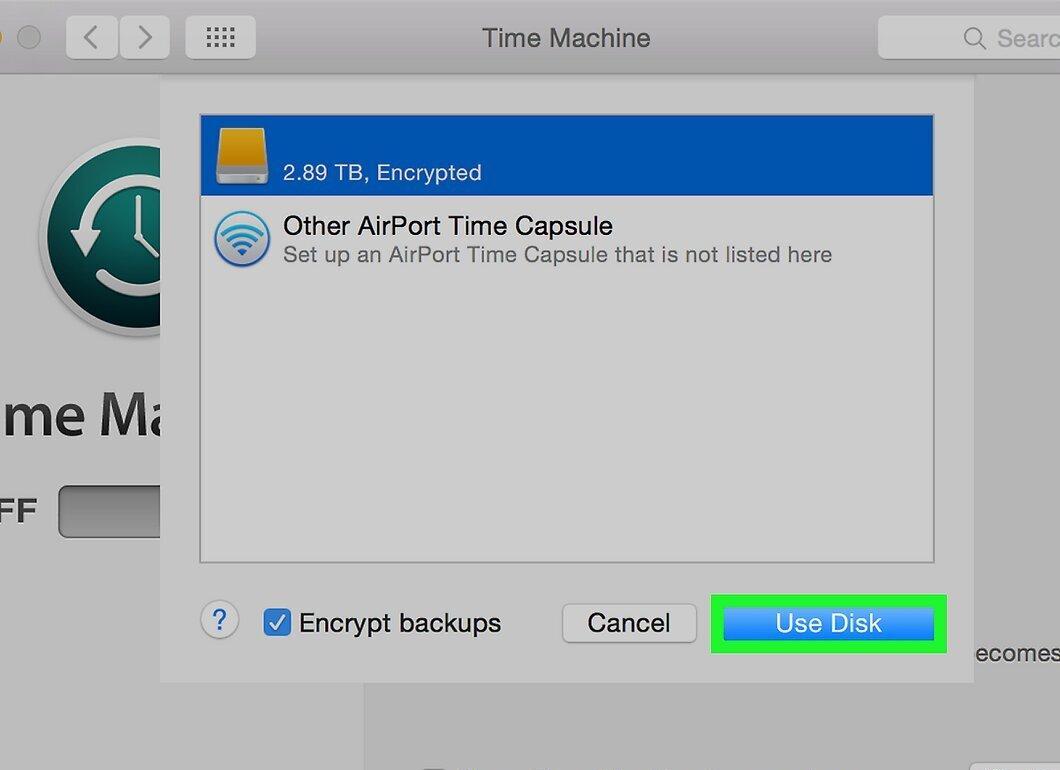
Back up the data you want to keep. Formatting will delete all data from the drive, so ensure you have a backup of important information. In the future, you can restore it to a new drive.
- You cannot back up installed programs. You will have to reinstall programs on the new drive. However, you can back up settings and configuration files.
Step 2. Install the hard drive.
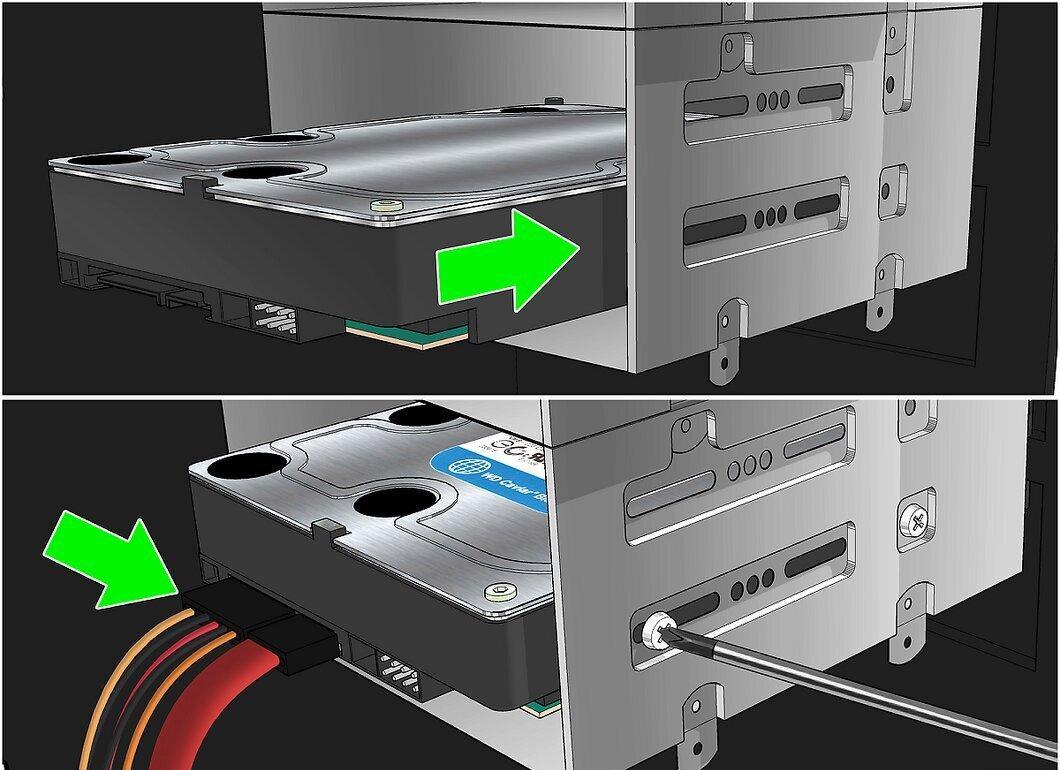
Install the hard drive. If you are formatting a new disk, you need to install it first. Look up information online about how to install a hard drive. If the drive is external, use the USB, FireWire, or Thunderbolt port.
Step 3. Open Disk Utility.
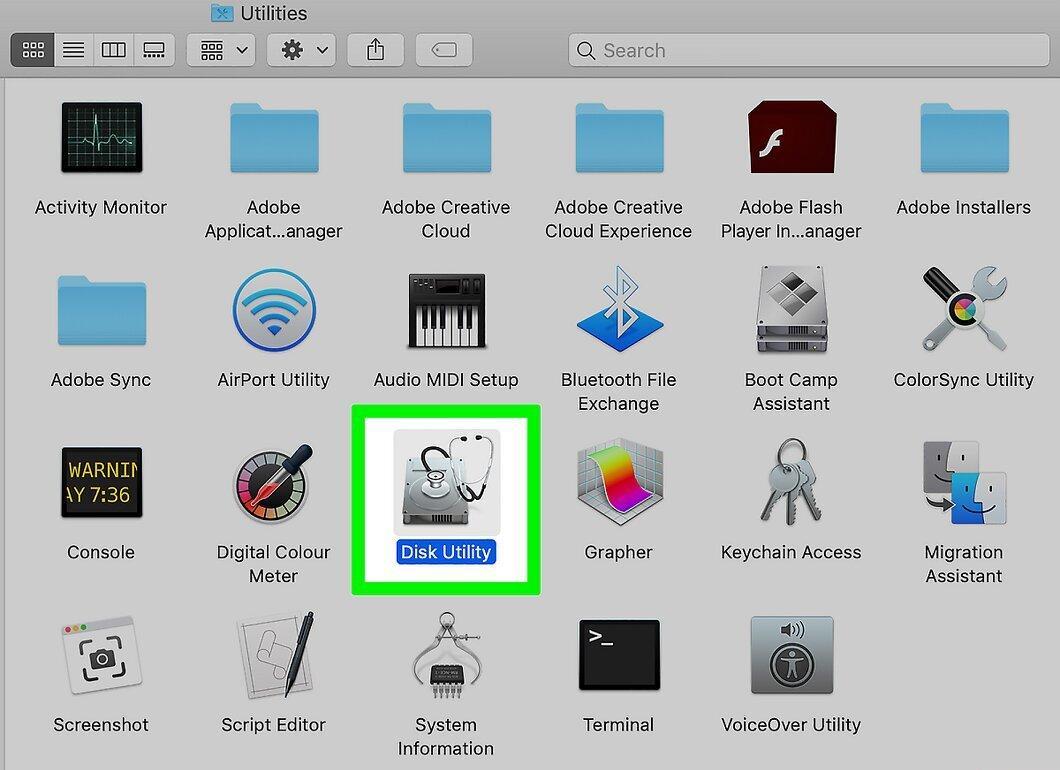
Open Disk Utility. Click Go and select Utilities. If you don’t see the Utilities option, select Applications and then double-click on the "Utilities" folder. Open the Disk Utility program.
Step 4. Select the drive from the left panel.
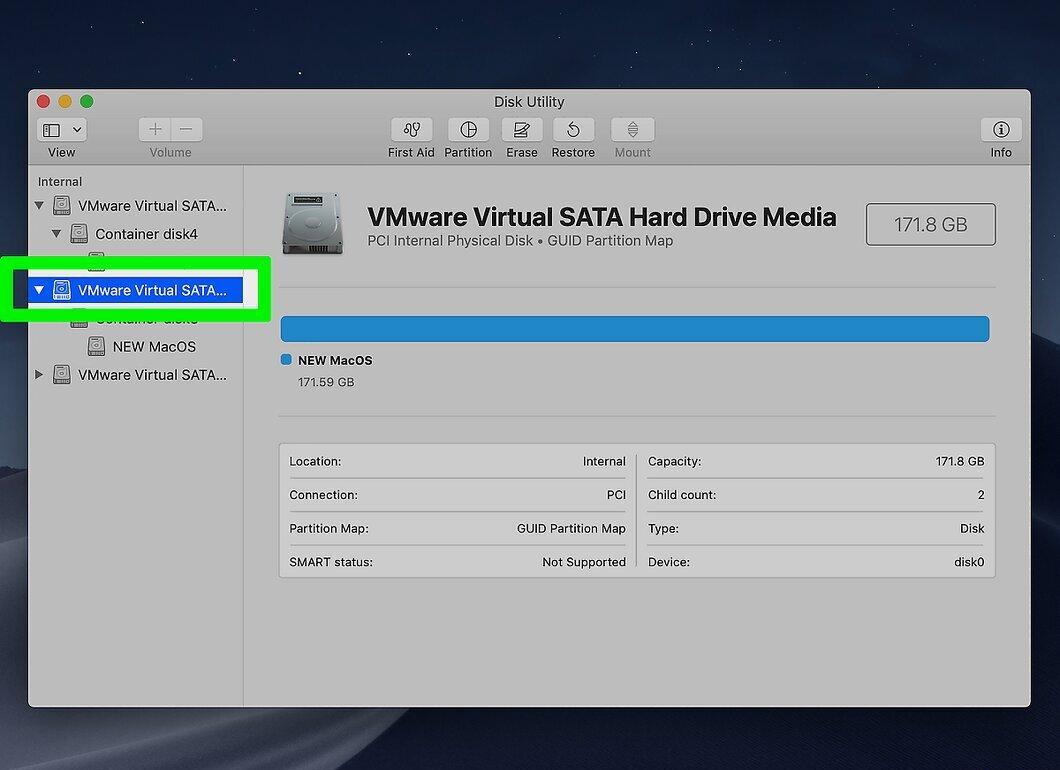
Select the drive from the left panel. All connected drives will be displayed on the left panel of the Disk Utility program. Select the desired drive.
Step 5. Click on the "Erase" tab.
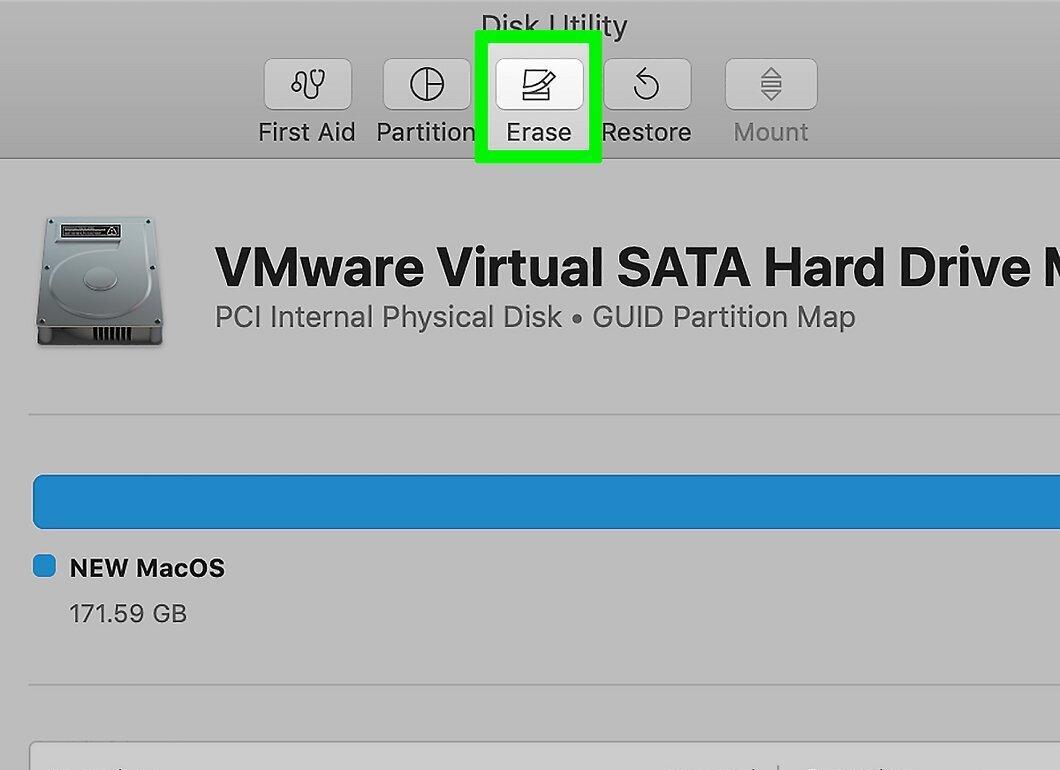
Click on the "Erase" tab. The disk formatting options will open.
Step 6. Choose the file system type.
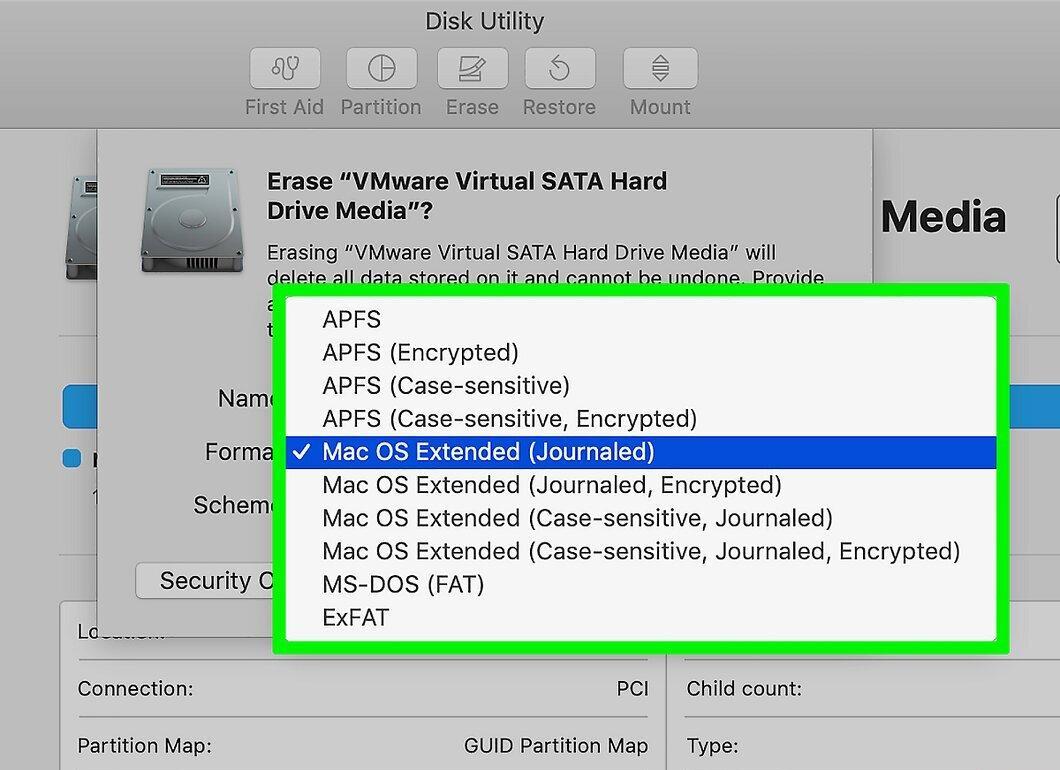
Choose the file system type. The file system determines how files are stored and written on the hard drive, as well as its compatibility with the OS. Use the Volume Format dropdown menu to select the file system type. If the drive is internal and you are using it only for OS X, choose "Mac OS Extended (Journaled)". If the drive is external, select "exFAT".
- FAT32 and exFAT can be read by any operating system. FAT32 is an older file system and does not support files larger than 4GB, but it can be read by any OS. exFAT has no file size restrictions but does not work on older operating systems like Windows 95.
- Overall, exFAT is the best choice for an external drive. It is compatible with most operating systems and can store files of any size.
Step 7. Name the drive.
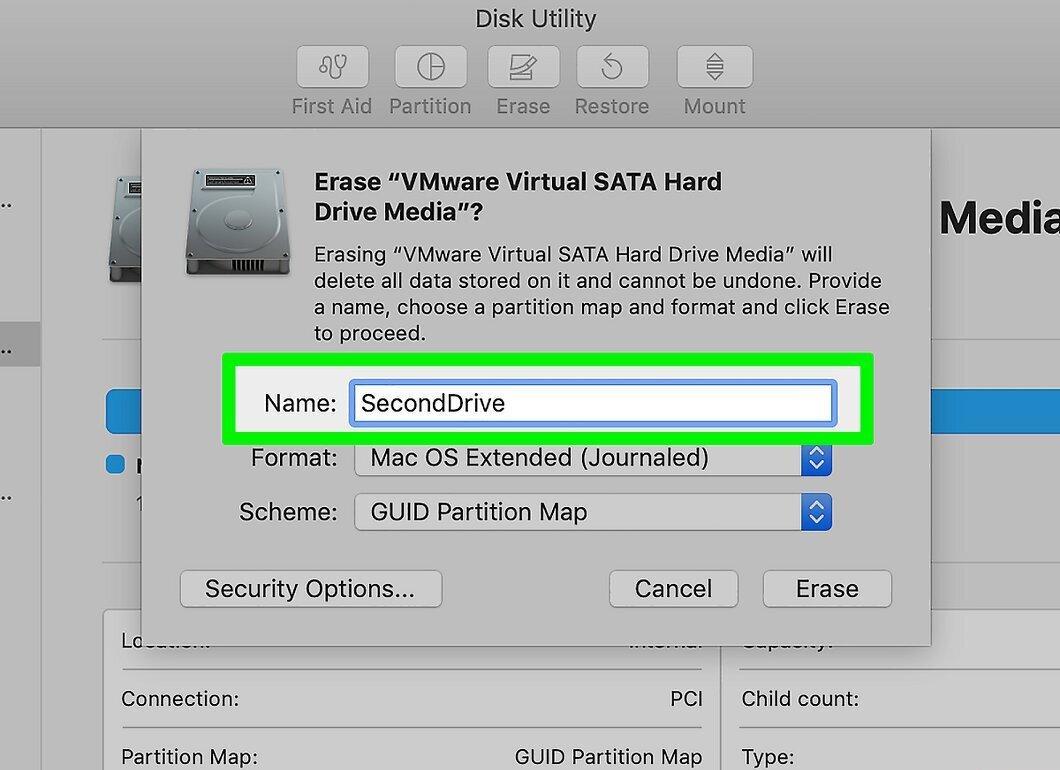
Name the drive. If you are using the drive for a specific purpose, name it accordingly. For example, if you are using the secondary drive for music, movies, and pictures, naming it "Media" will help you easily identify its contents.
Step 8. Start the formatting process.
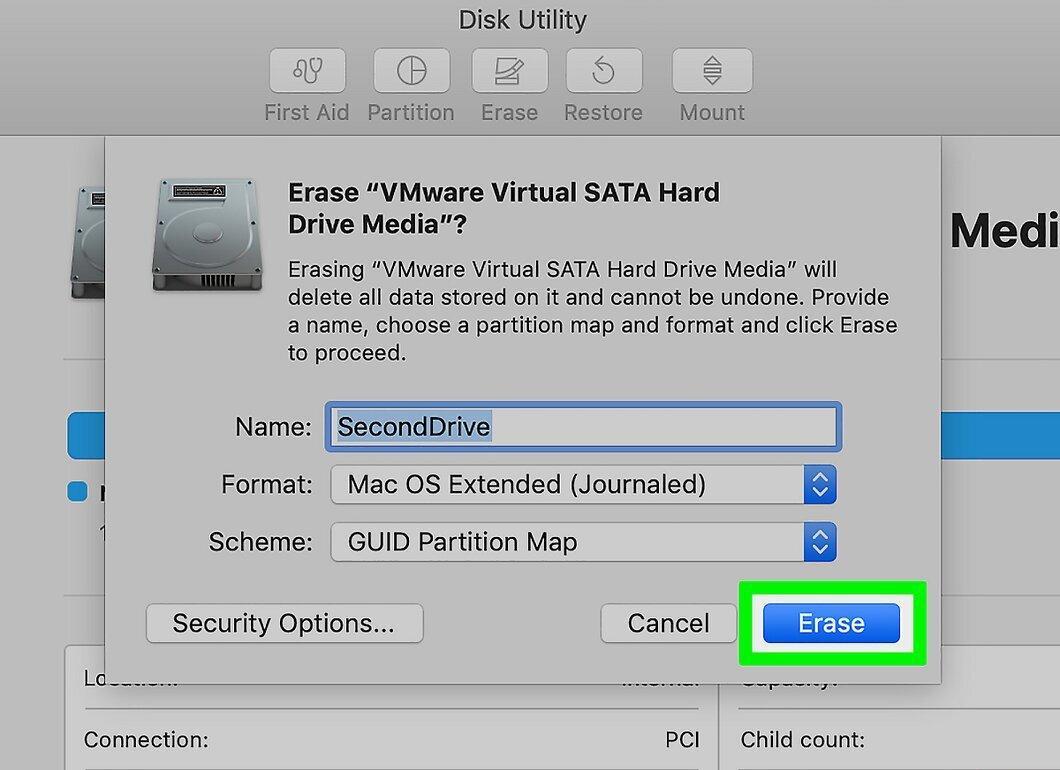
Start the formatting process. Click the Erase button to start formatting the drive. The process should only take a few seconds.
- Formatting your drive does not permanently delete data. To ensure that data has been completely and irretrievably removed from the drive, see the last section of this article.
Formatting the Boot Drive (Windows)
Step 1. Back up the data you want to keep.
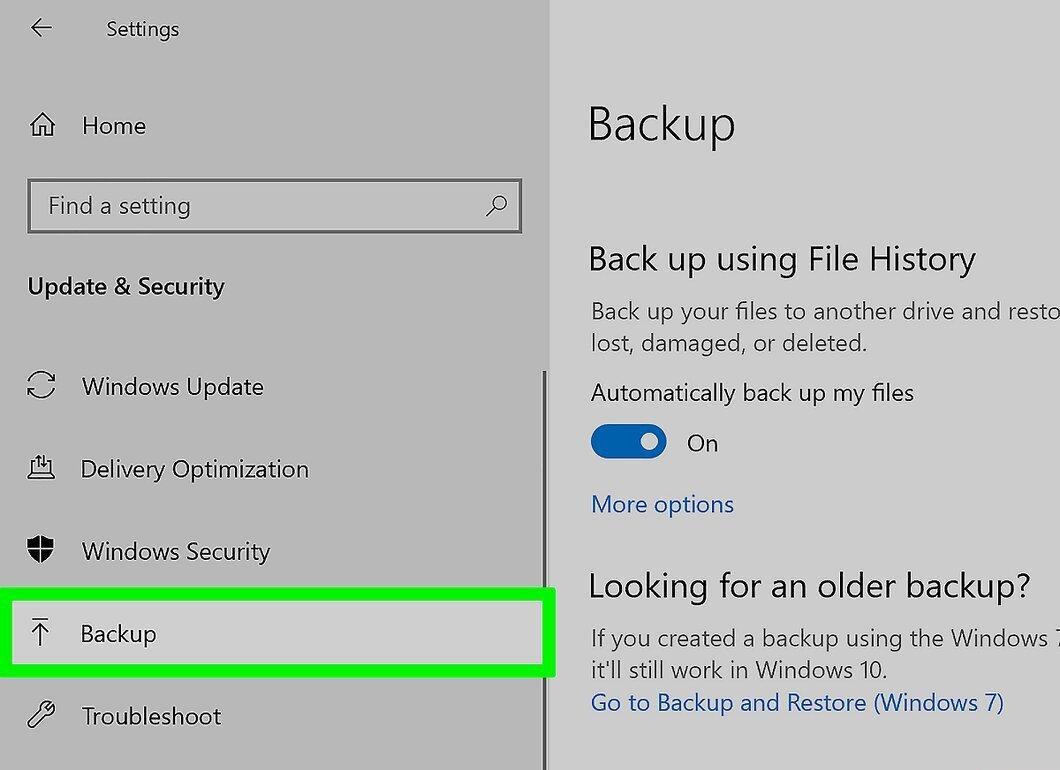
Back up the data you want to keep. Formatting will delete all operating system data from your drive, so prepare for the reinstallation of the system. Having a backup of important data will simplify the task of formatting the boot drive.
- Look up information online or on wikiHow about how to back up your data.
Step 2. Insert the Windows installation disk.
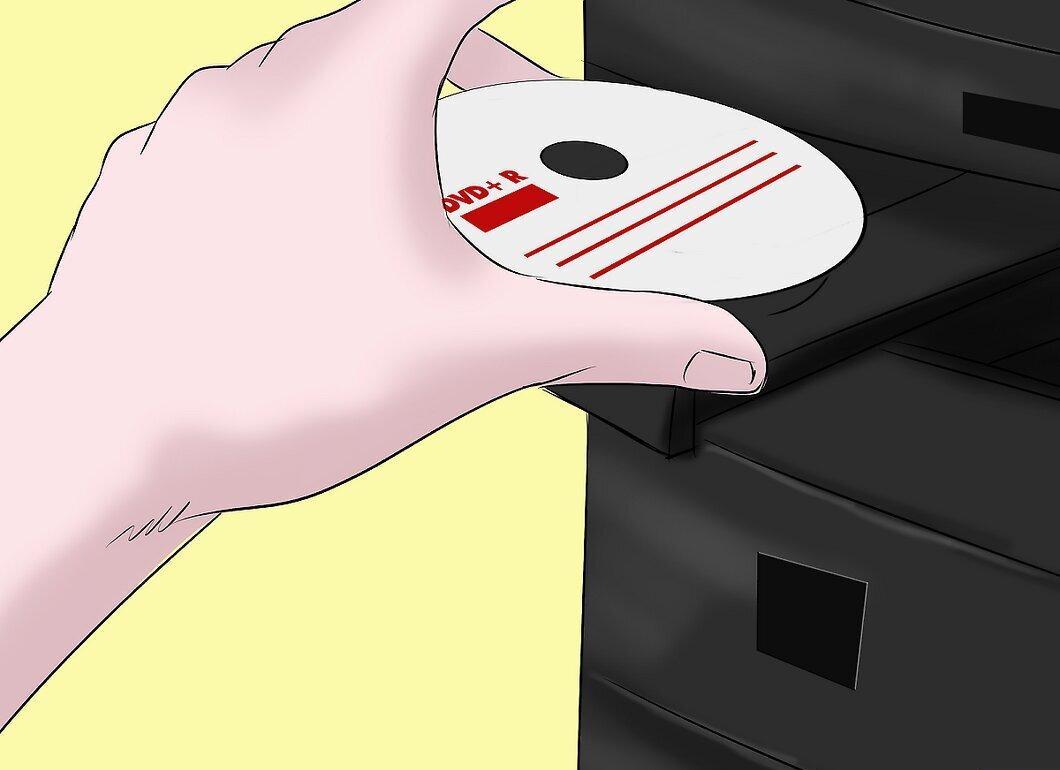
Insert the Windows installation disk. You can use a bootable disk or LiveCD. This way, you will be able to boot from the CD instead of the hard drive.
Step 3. Set the computer to boot from the CD.
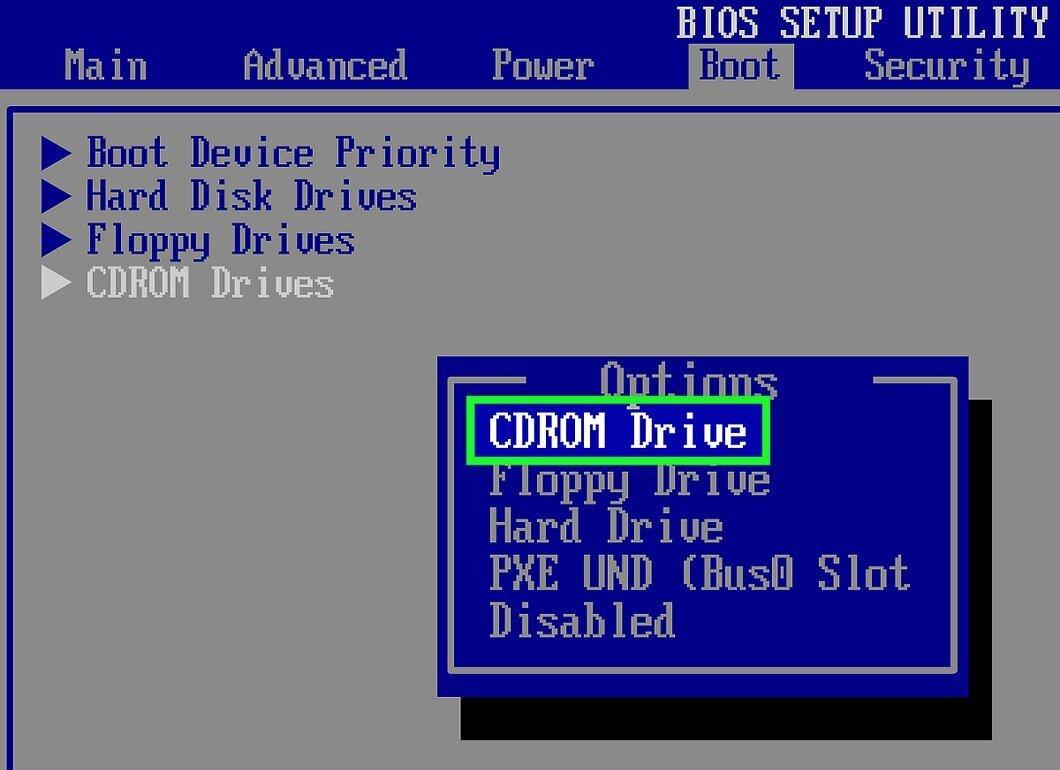
Set the computer to boot from the CD. Change the boot order in the BIOS to boot from the disk. Look up information online or on wikiHow about how to change the boot order in the BIOS.
- To open the BIOS, restart your computer and press the required key. Common keys are DEL, F10, F12, etc.
Step 4. Follow the installation process.
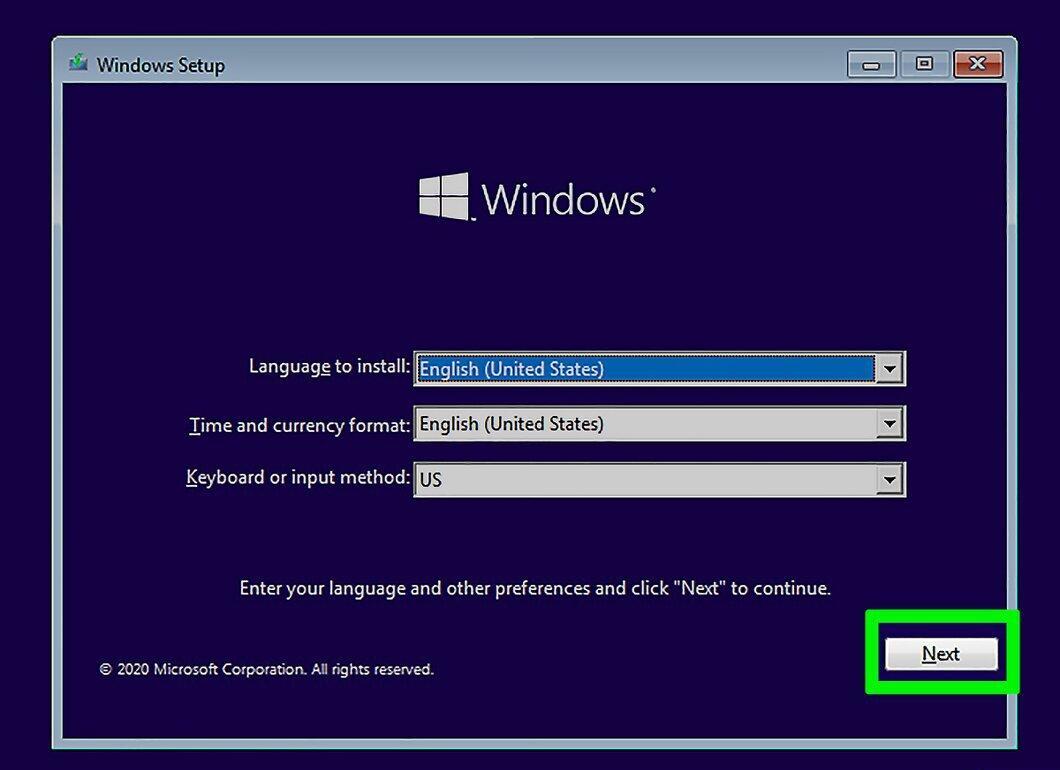
Follow the installation process. You need to reach the option to select the hard disk for the new operating system installation.
Step 5. Choose the disk to format.
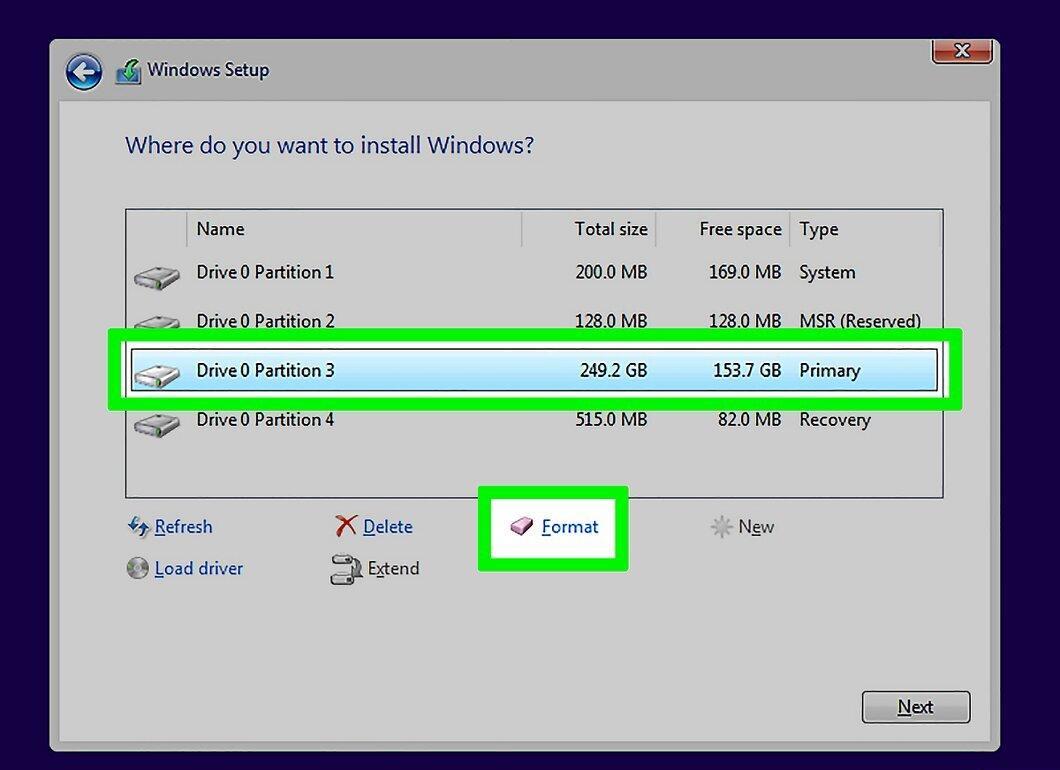
Choose the disk to format. You will see a list of available hard drives for formatting. Select or create a disk for the operating system installation and click Format. Note that the disk will be formatted to NTFS, and all data on the hard drive will be deleted.
- Formatting the boot drive is only possible in NTFS format.
Step 6. Reinstall Windows.
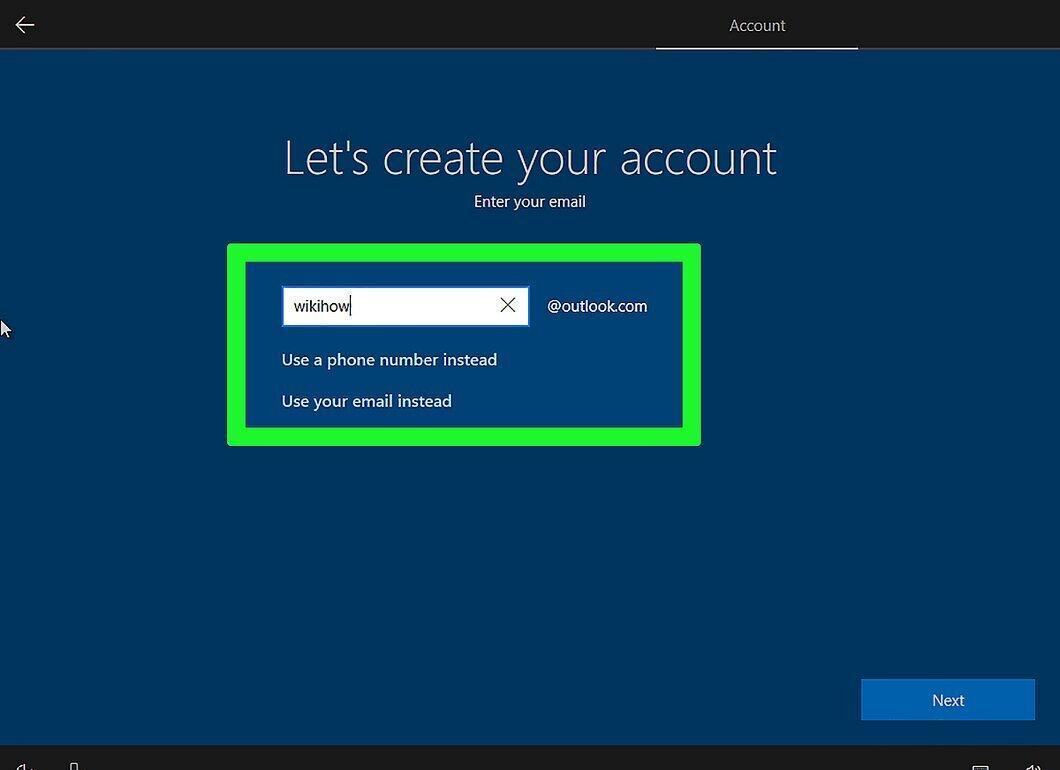
Reinstall Windows. Once the disk is formatted, you can reinstall Windows or install Linux. To use your computer, you will need an operating system.
- Look up information online or on wikiHow about how to install various types of operating systems on your computer.
Formatting the Boot Drive (OS X)
Step 1. Back up the data you want to keep.
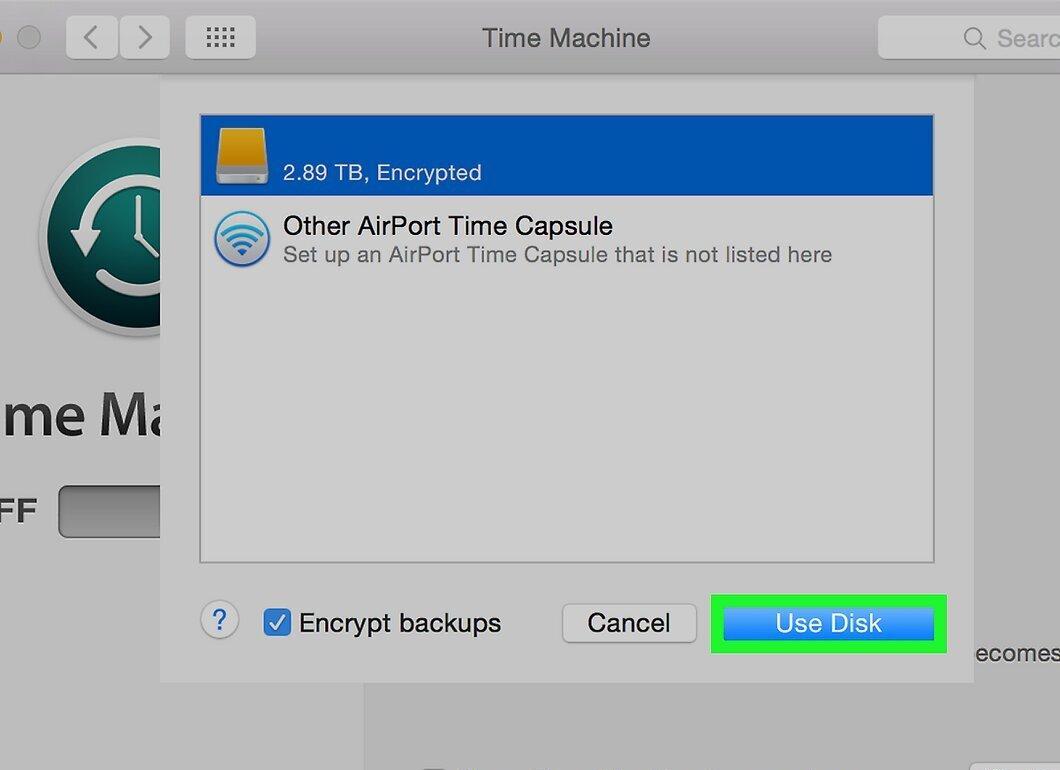
Back up the data you want to keep. Formatting will delete all operating system data from your drive, so prepare for the reinstallation of the system. Having a backup of important data will simplify the task of formatting the boot drive.
- You cannot back up installed programs. You will have to reinstall programs on the new drive. However, you can back up settings and configuration files.
- Look up information online or on wikiHow about how to back up your data.
Step 2. Ensure you are connected to the internet.
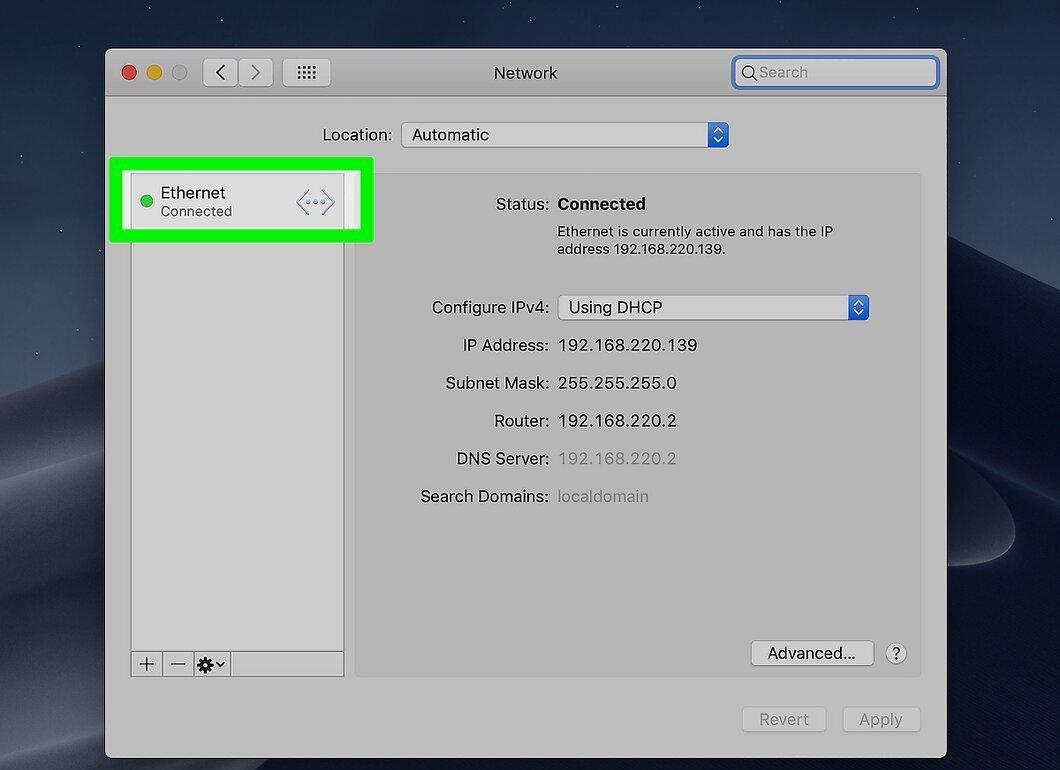
Ensure you are connected to the internet. You will need an internet connection to reinstall the operating system at the end of the formatting process. Look up information online or on wikiHow about how to connect to the internet on OS X.
Step 3. Restart your computer.
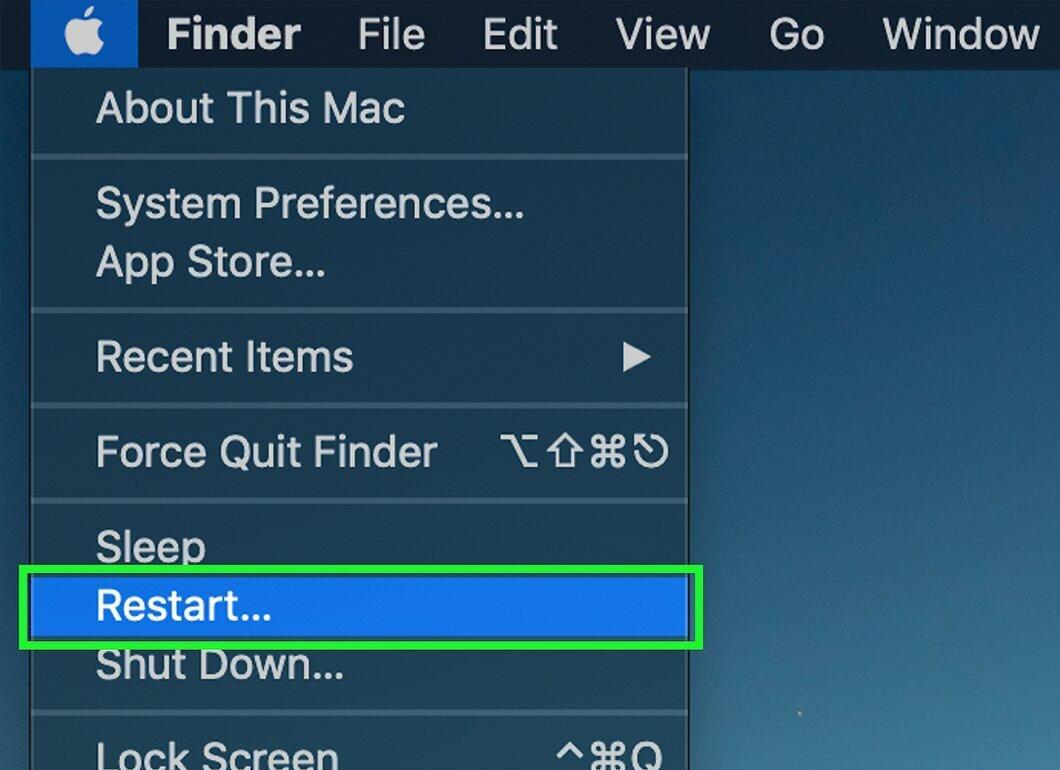
Restart your computer. Click on the Apple icon and select Restart. Hold Command+R during the restart. The boot menu will open.
Step 4. In the boot menu, select "Disk Utility".
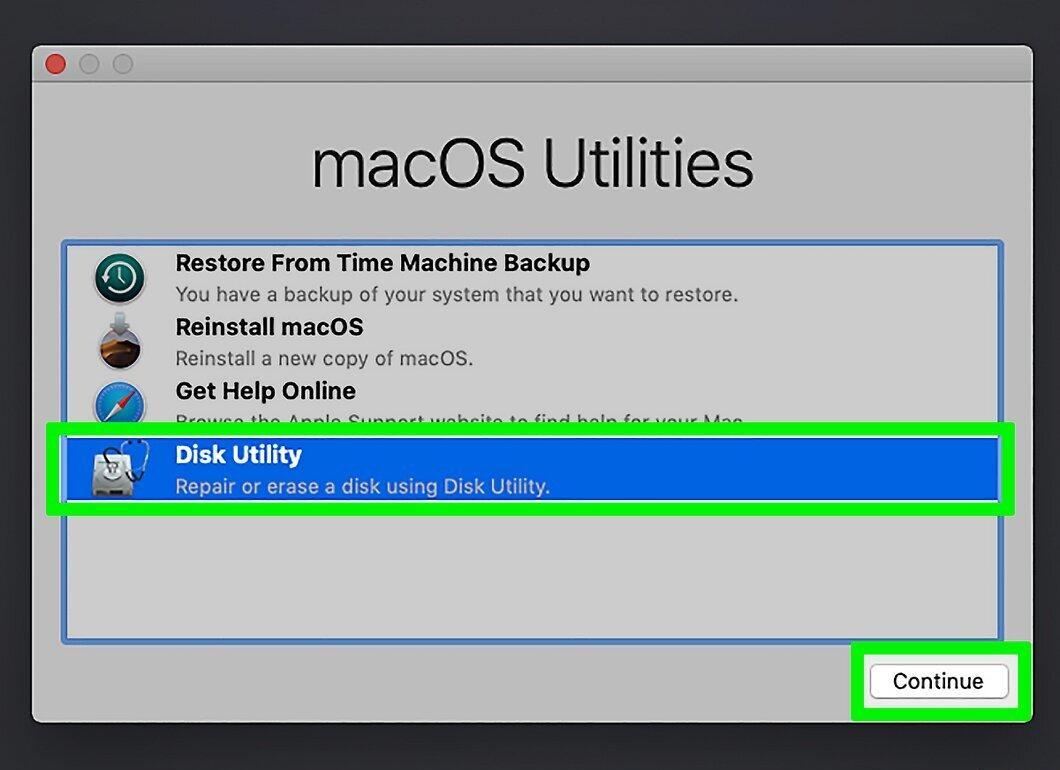
In the boot menu, select "Disk Utility". The boot version of the Disk Utility program will open.
Step 5. Select the drive from the left panel.
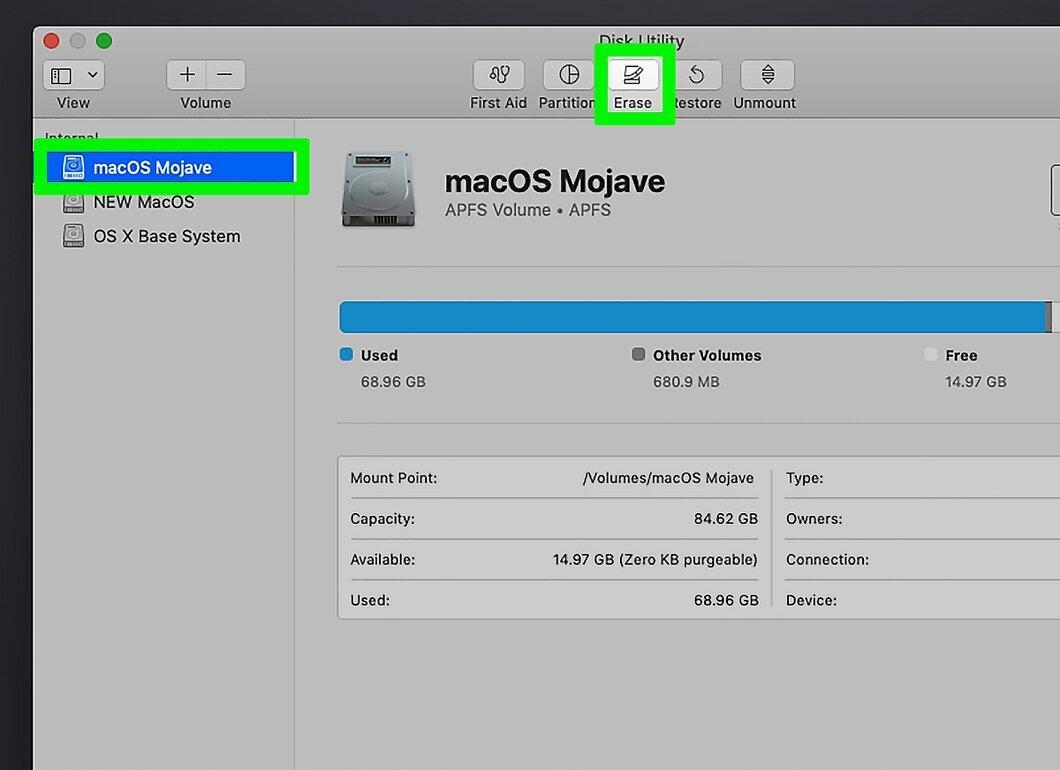
Select the drive from the left panel. All connected drives will be displayed on the left panel of the Disk Utility program. Select the desired drive.
Step 6. Choose the file system type.
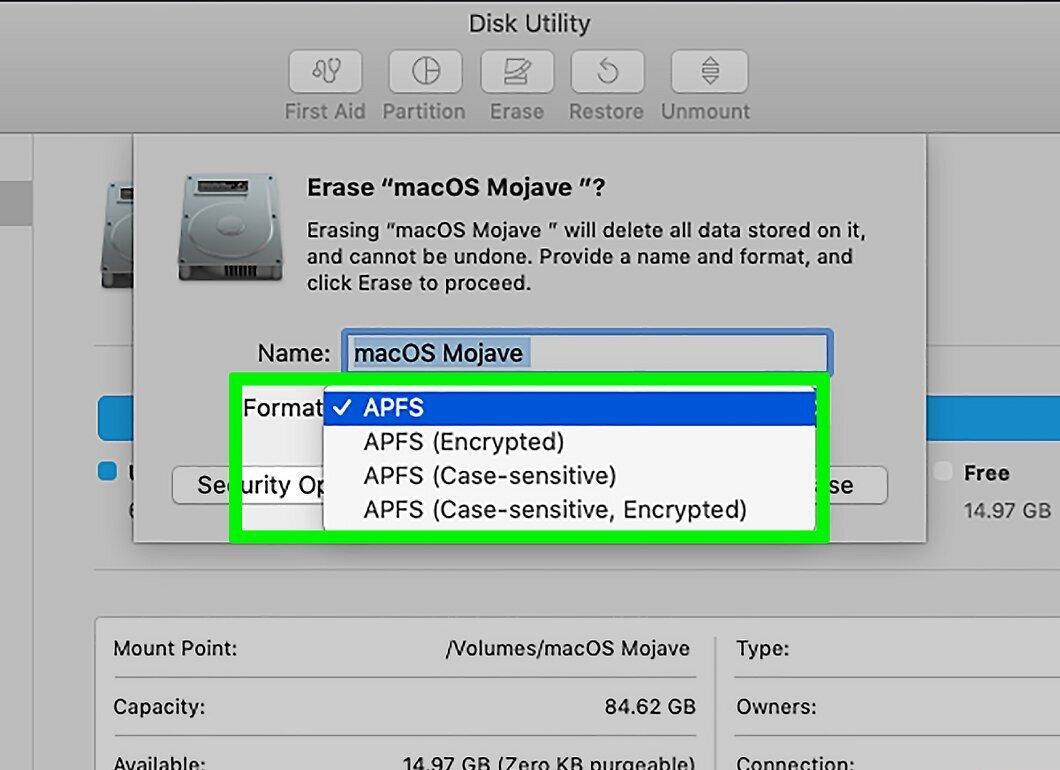
Choose the file system type. The file system determines how files are stored and written on the hard drive, as well as its compatibility with the OS. Since the drive is a boot drive, select "Mac OS Extended (Journaled)".
Step 7. Enter a name for the drive.
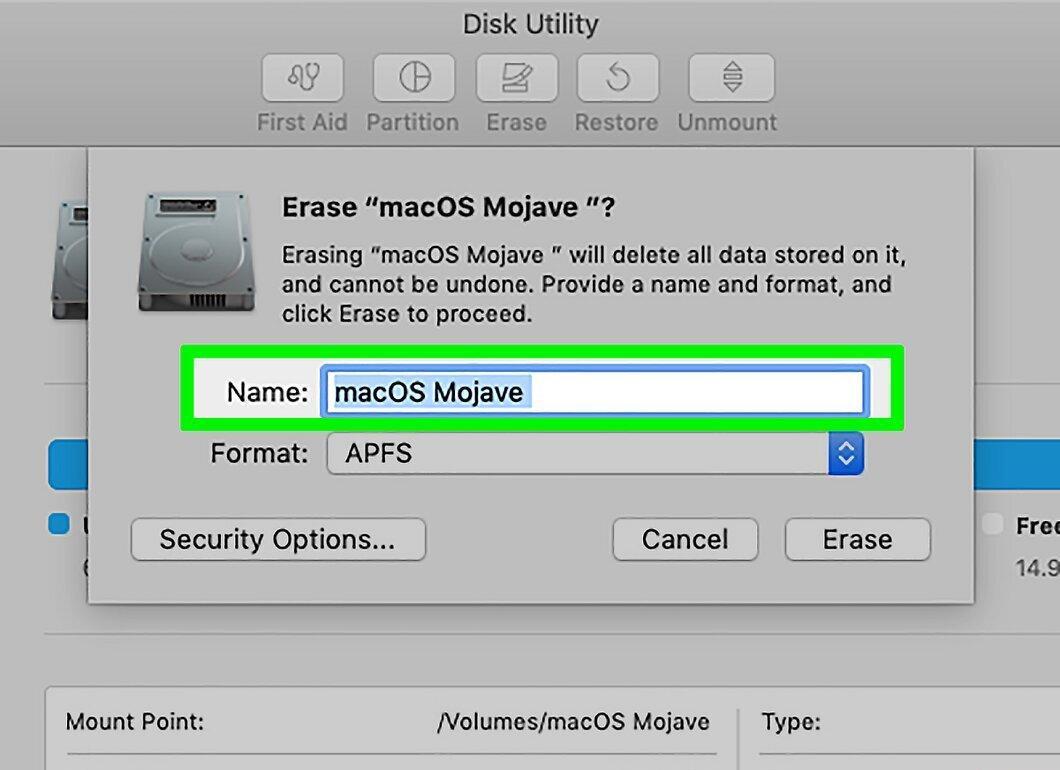
Enter a name for the drive. For example, if you are installing an operating system, name it "OS X".
Step 8. Format the drive.
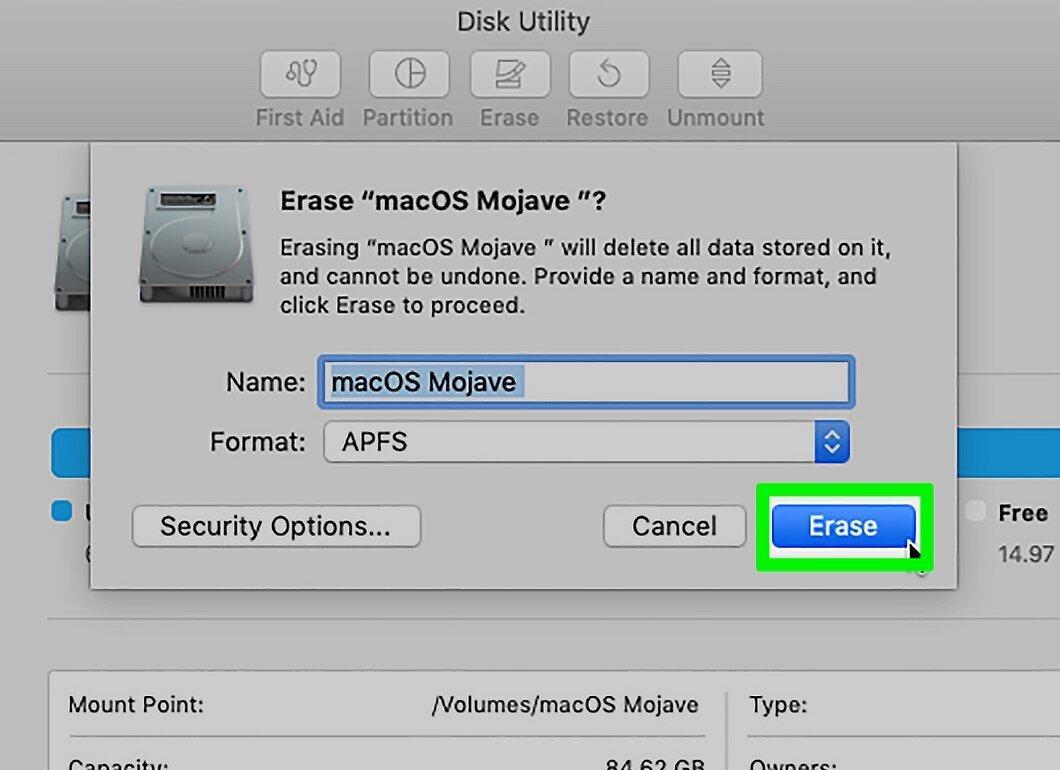
Format the drive. Click Erase to start formatting. The formatting process should only take a few seconds.
Step 9. Close Disk Utility.
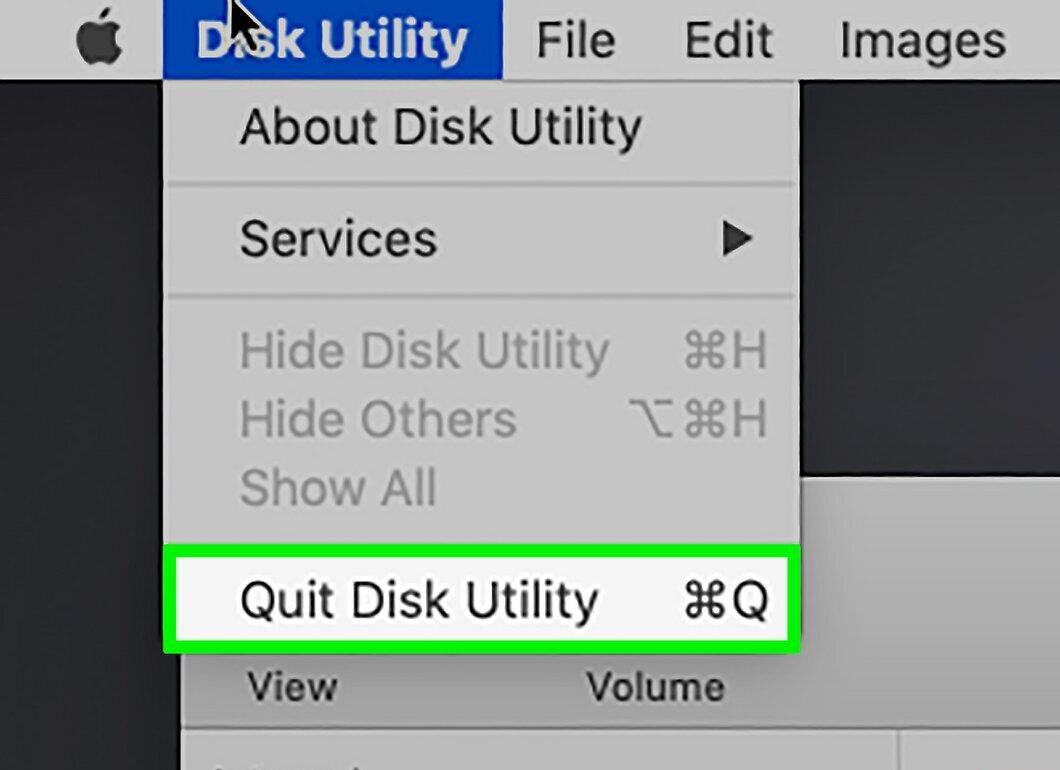
Close Disk Utility. You will return to the boot menu.
Step 10. Reinstall OS X.
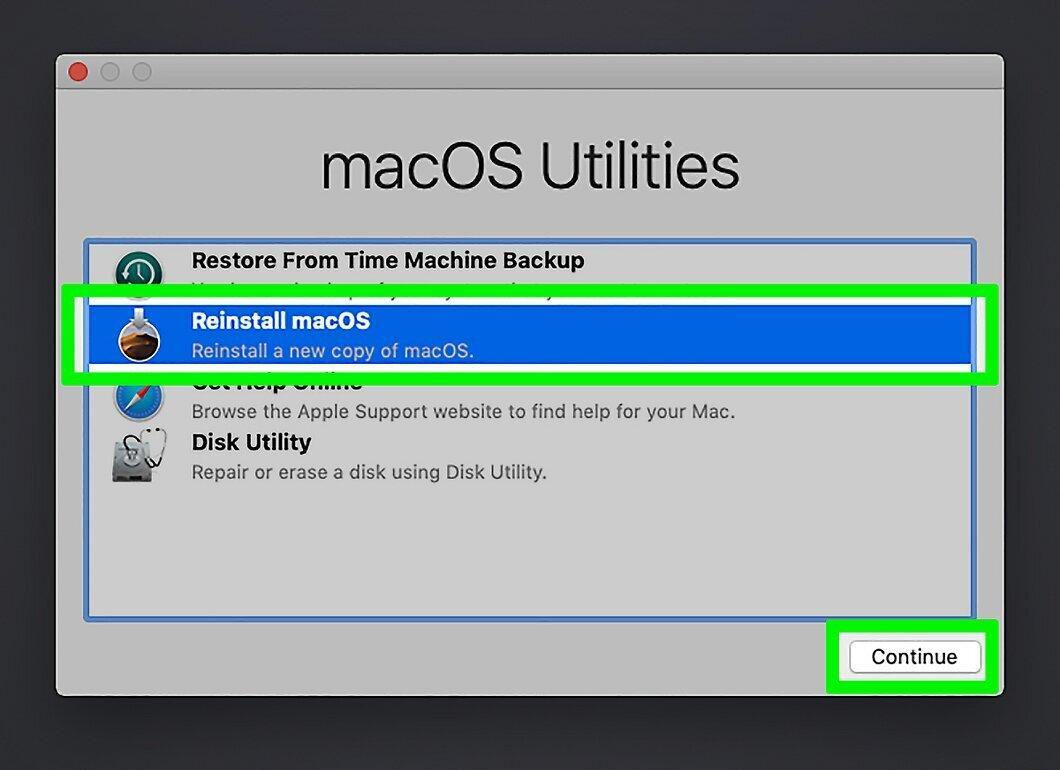
Reinstall OS X. Select "Reinstall OS X" to start the operating system reinstallation process.
Permanently Deleting Data from a Drive
Step 1. Back up the data you want to keep.
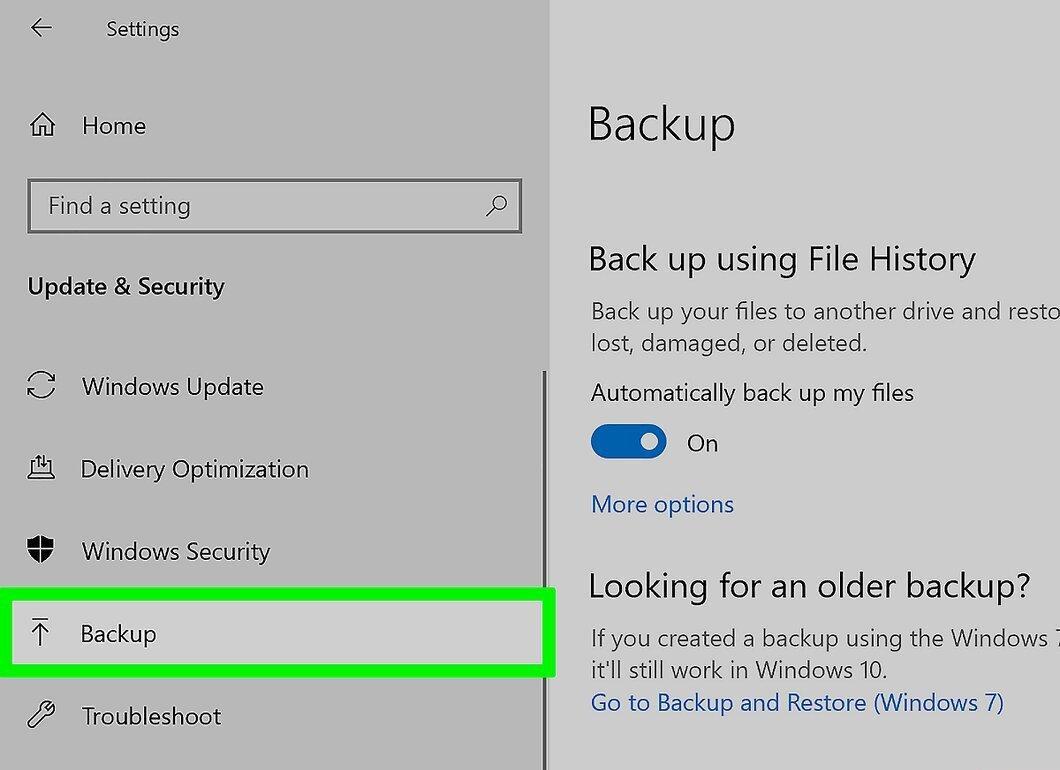
Back up the data you want to keep. During secure formatting, all data on the hard drive will be permanently deleted. As a result, only government supercomputers may recover some parts of the data from your drive.
- Look up information online or on wikiHow about how to back up your data.
Step 2. Download DBAN.
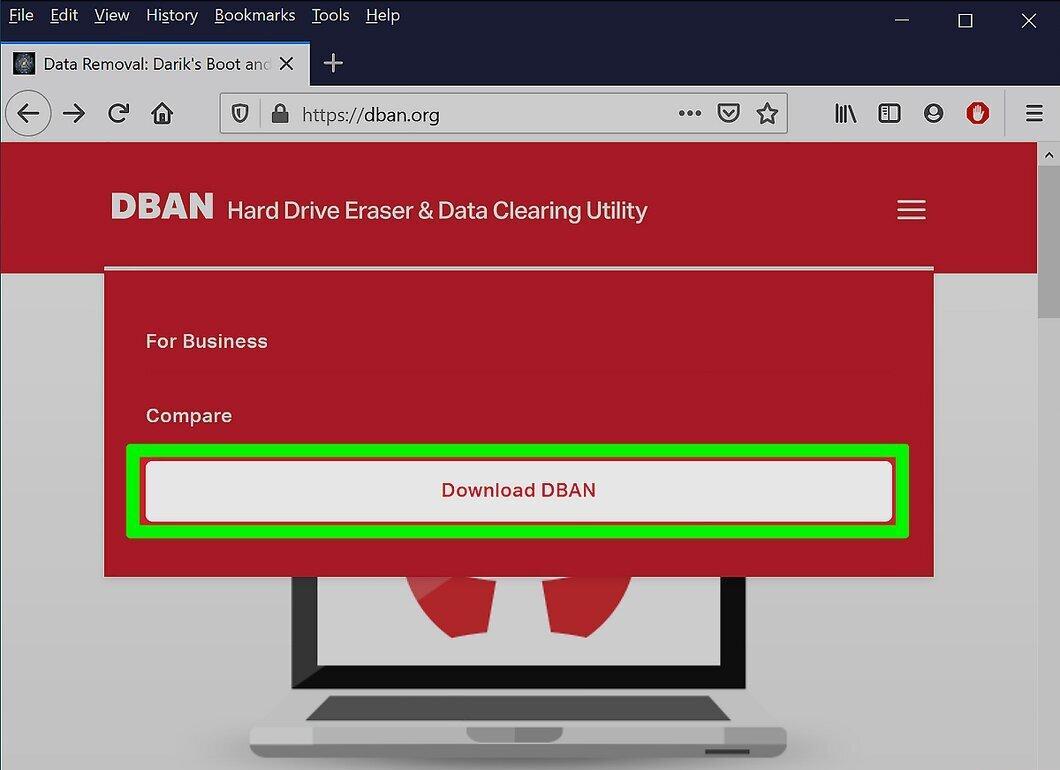
Download DBAN. DBAN is a program for securely formatting hard drives that performs the process by overwriting the hard drive multiple times. This way, information cannot be recovered by data recovery software.
- DBAN does not work on solid-state drives (SSDs). You will need another program, such as Blancco.
Step 3. Burn DBAN to a CD.
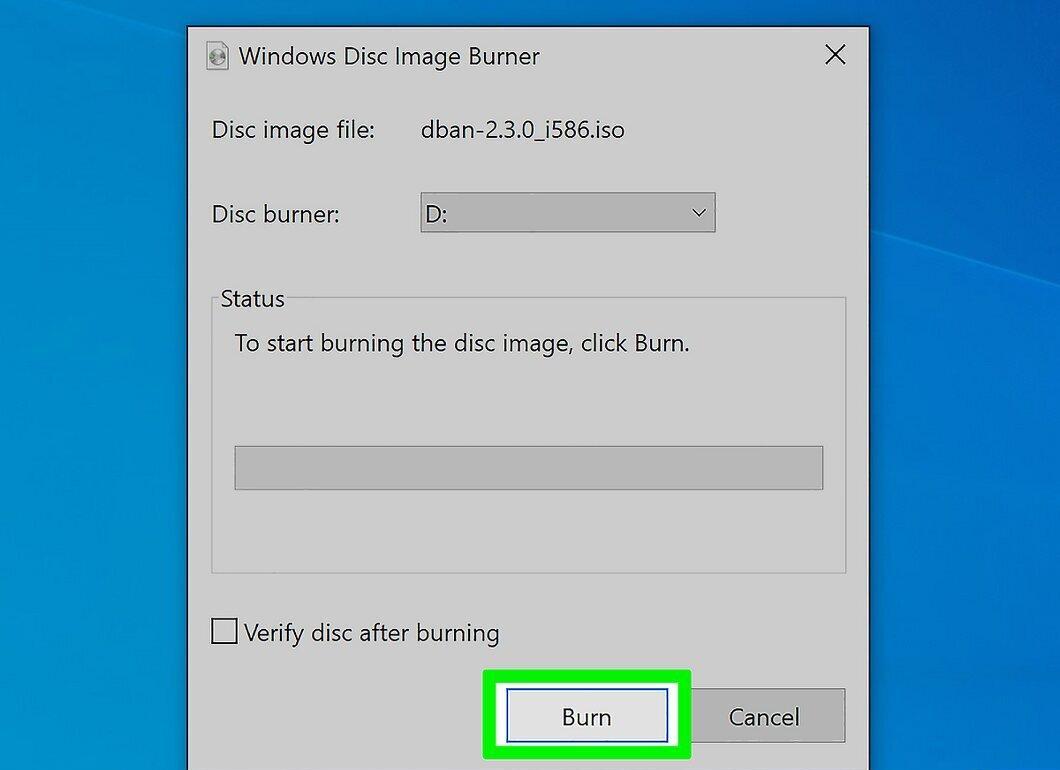
Burn DBAN to a CD. DBAN is downloaded as an ISO file that can be burned to a CD, functioning as a bootable disk.
- Look up information online or on wikiHow about how to burn data to a CD or DVD.
Step 4. Boot from the DBAN disk.
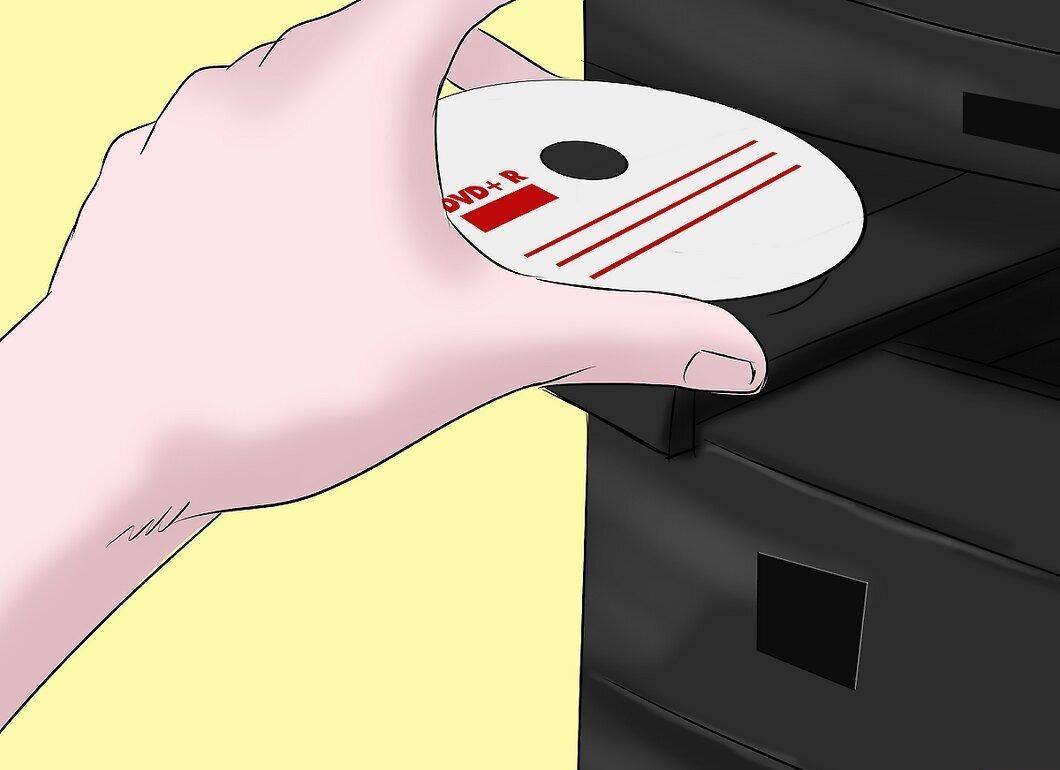
Boot from the DBAN disk. Insert the DBAN disk and restart your computer. Select the CD drive as the primary boot method.
- Windows – you need to set the CD disk as the first boot option in the BIOS boot menu. Look for additional information online or on wikiHow.
- OS X – hold down C during the computer restart. DBAN will load automatically.
Step 5. Select the hard drive.
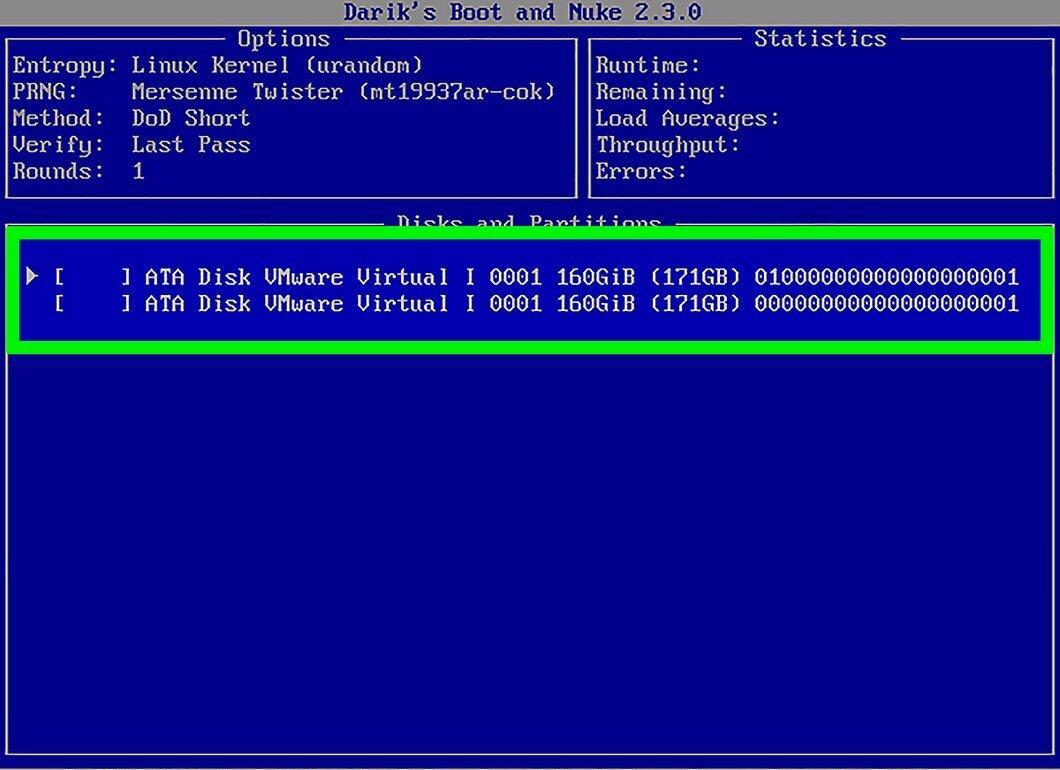
Select the hard drive. Press Enter in the DBAN window, then select the hard drive using the arrow keys. Choose the correct drive if multiple options are displayed.
Step 6. Choose the wiping method.
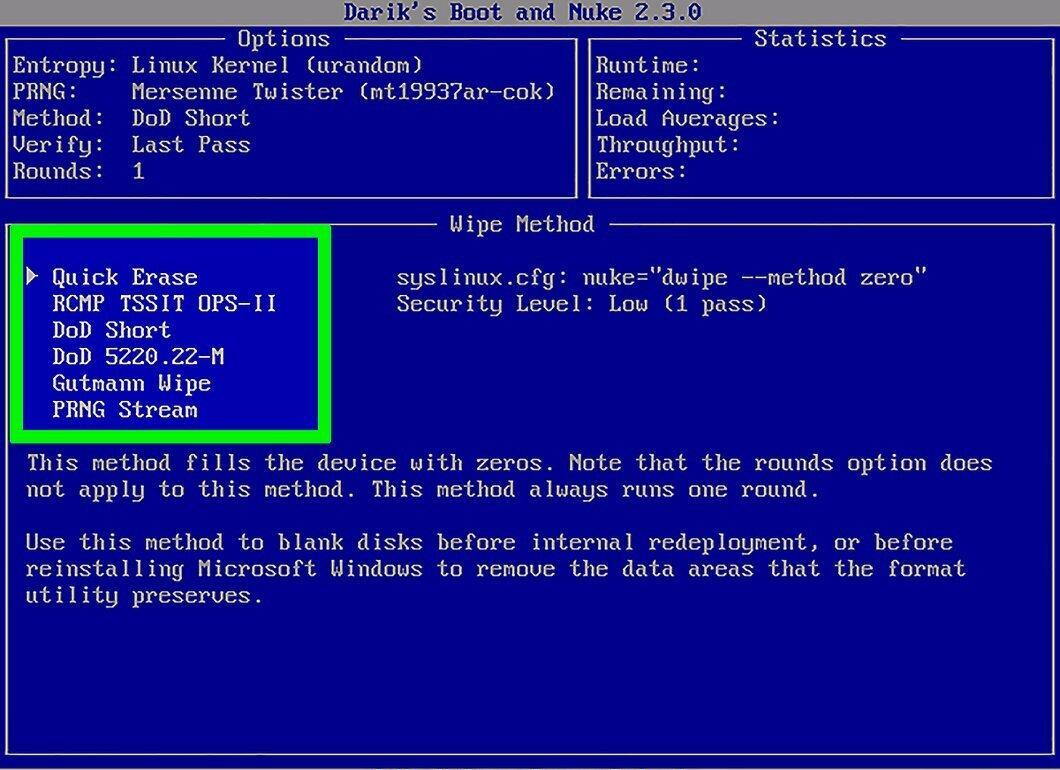
Choose the wiping method. "DoD" will securely erase your data and is sufficient for most users. If you possess highly secret information, choose "8-Pass PRNG Stream". This method will wipe your disk 8 times using random numbers, completely removing the data.
Step 7. Start the formatting process.
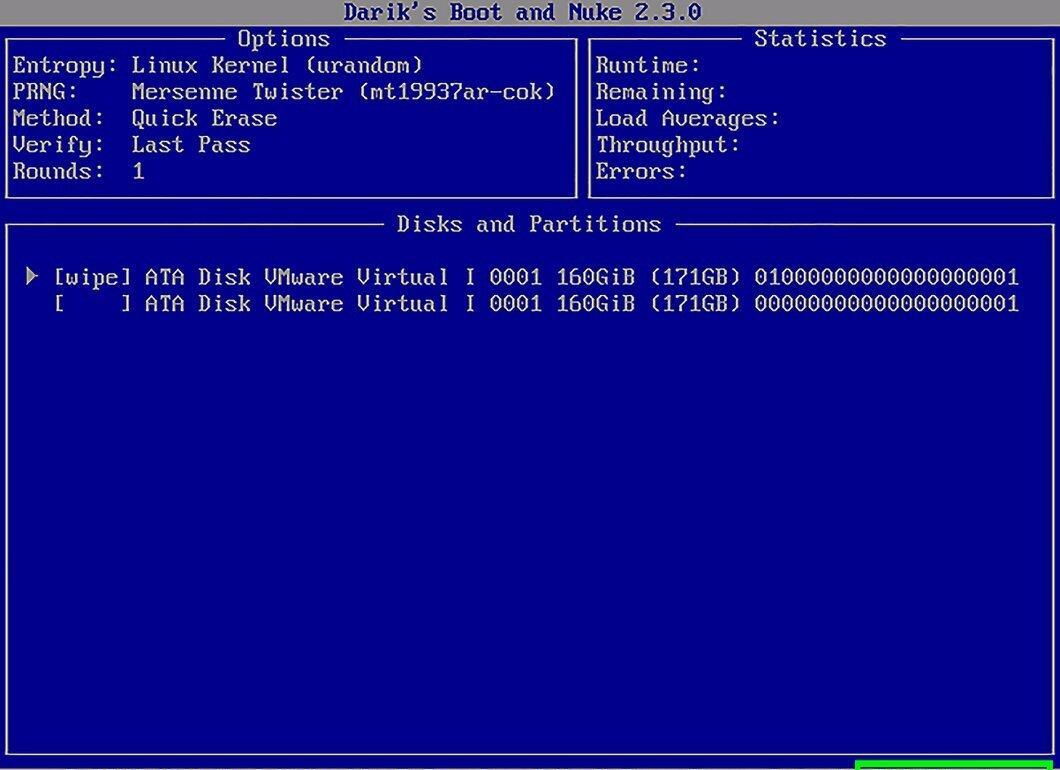
Start the formatting process. After selecting the wiping method, the formatting process will begin accordingly. Formatting with DBAN can take anywhere from several hours to several days, depending on the wiping method and the size of the hard drive.


