
Formatting your computer involves erasing all data on the hard drive and reinstalling the operating system, effectively restoring your computer to its factory settings. This can be useful in cases of unstable operating system performance, before selling the computer, or if you plan to donate it. Follow these instructions to format a computer running Windows 7 or Mac OS X.
Windows
Step 1. Back Up Your Data.
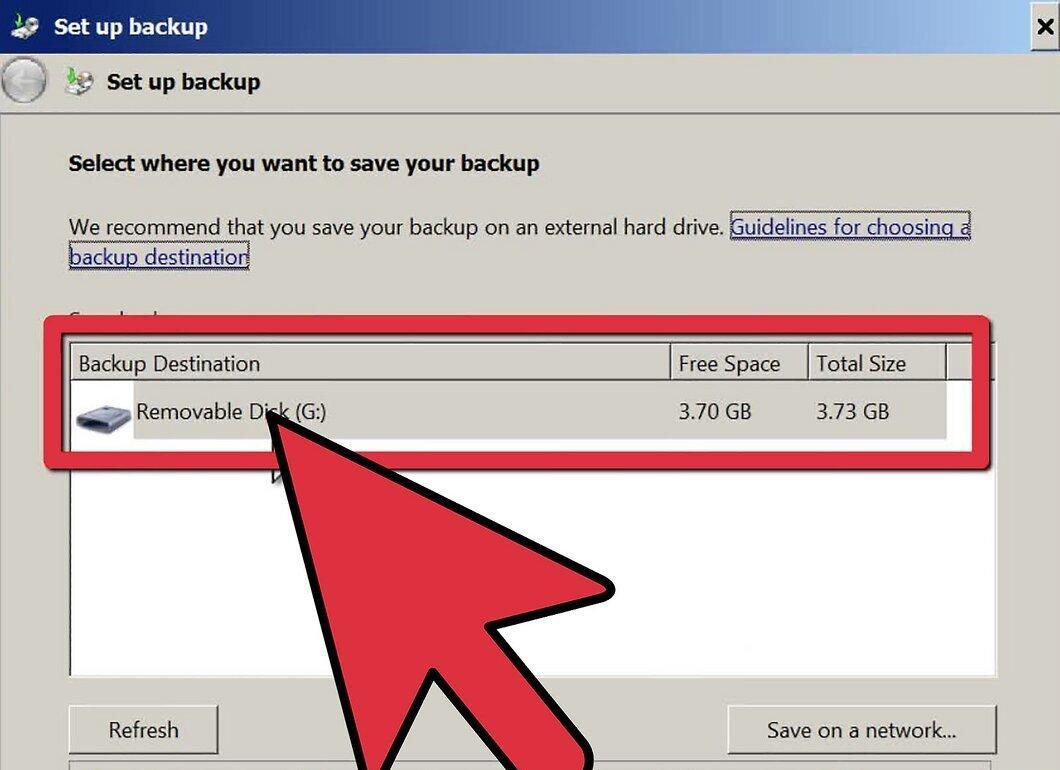
Back up your data. Formatting your computer will delete all files and data. Programs cannot be backed up; you will need to reinstall them later. All files, including documents, music, images, and videos you want to keep, should be copied to a separate storage device.
- You can use DVD and CD discs, external hard drives, flash drives, or cloud storage, depending on how much data you need to back up.
Step 2. Set Boot from CD in BIOS.
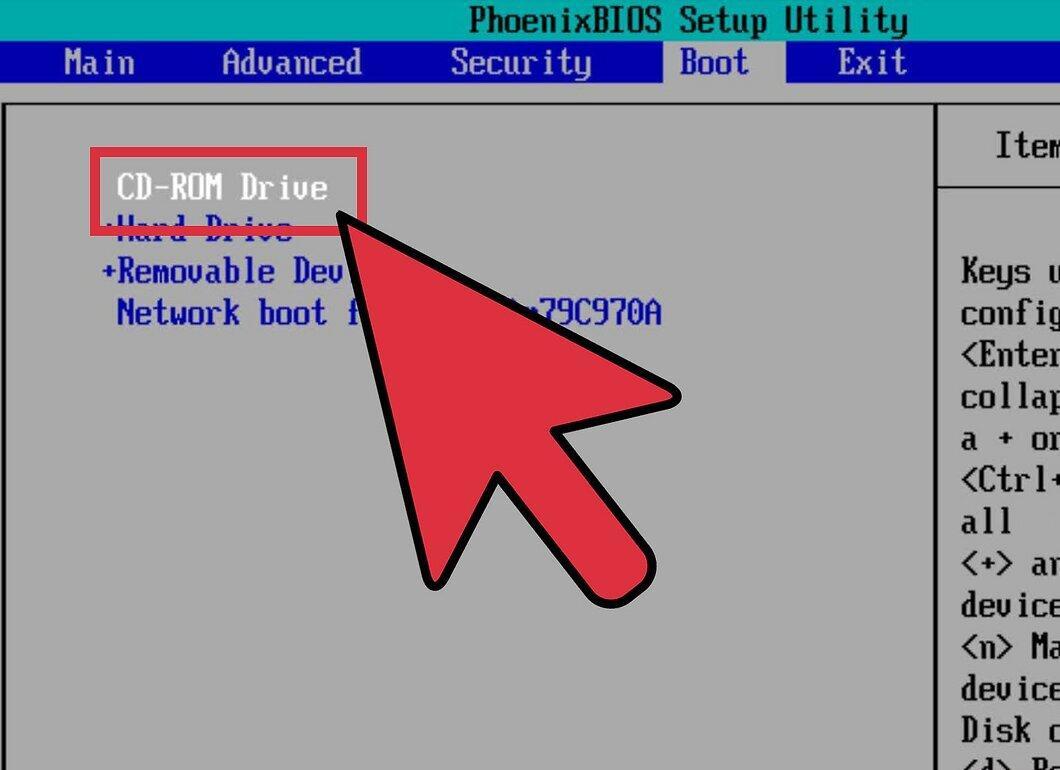
Set the boot from CD in BIOS. To do this, restart your computer and enter the BIOS setup screen as soon as the manufacturer's logo appears. The keys needed to enter will be displayed on the screen and may vary by manufacturer. The most commonly used keys are F2, F10, F12, and Del.
- Once in the BIOS menu, select the Boot menu option. Change the order of devices in the list so that your computer boots from CD (Boot from CD) before booting from the hard drive (Boot from hard drive). Save the changes and exit. Your computer will restart.
- If you are installing from a flash drive, you will need to set the boot from removable storage in the BIOS settings.
Step 3. Start the Installation.
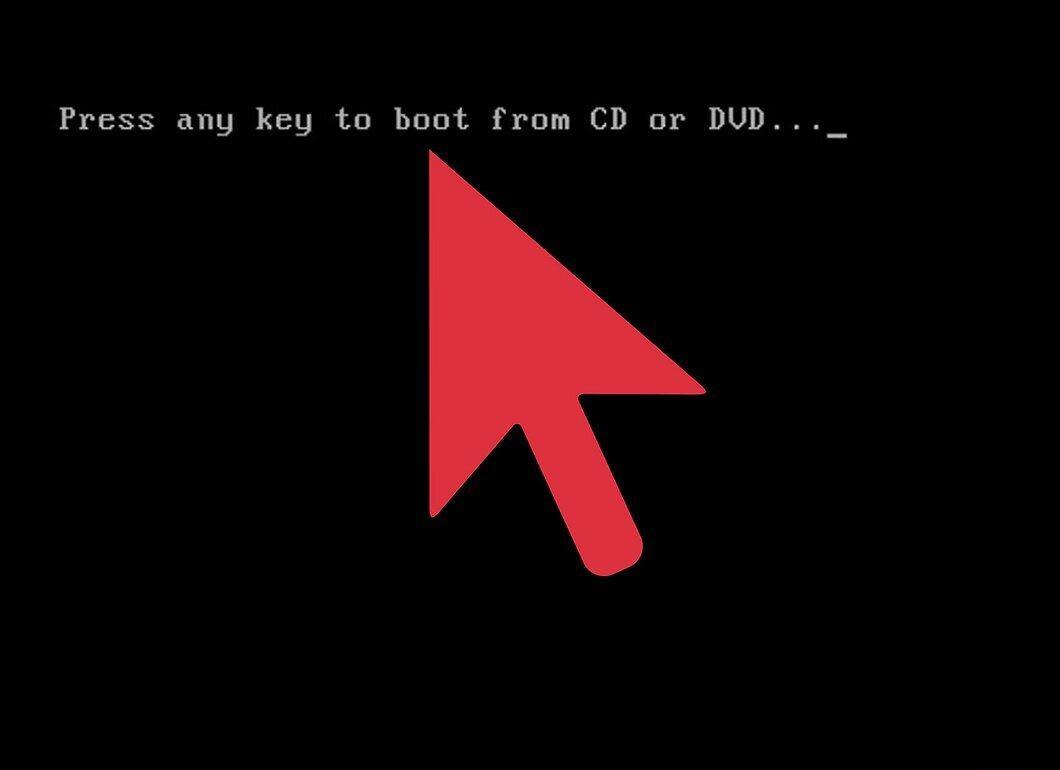
Start the installation. If the CD is already inserted and the BIOS settings are correct, you will see the message “Press any key to boot from CD…”. Press any key on the keyboard to begin the Windows 7 installation process.
- The system may automatically launch the installation program without prompting you to press any key.
Step 4. Wait for Windows Files to Load.
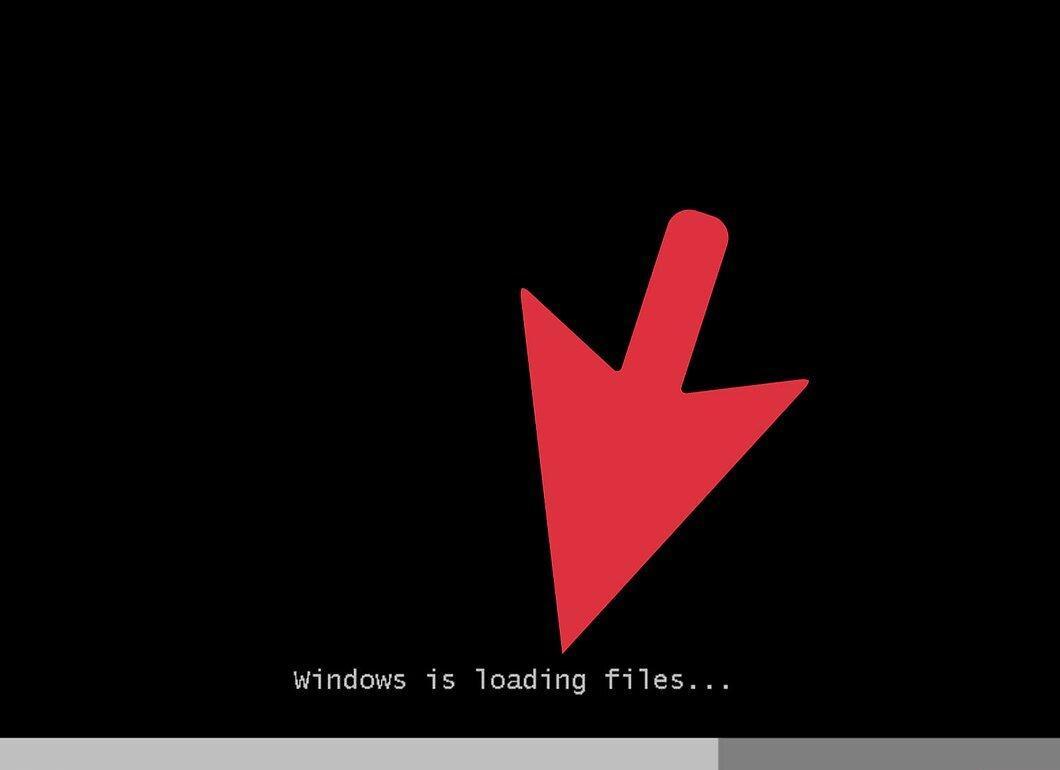
Wait for the Windows files to load. After loading, the Windows 7 logo will appear. Your files have not yet been altered. Your data will be deleted in the following steps.
Step 5. Choose Global Settings.
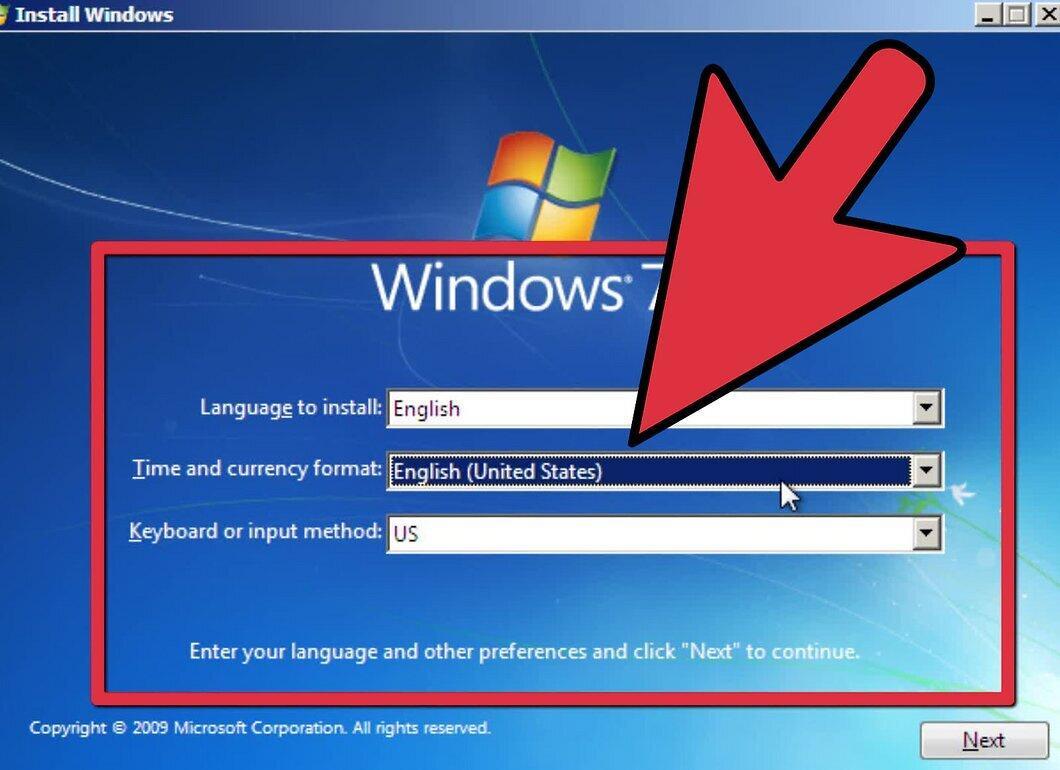
Choose global settings. You will be prompted to enter basic settings such as language, time and currency format, keyboard, or input method. Select the options you need and click Next.
Step 6. Click Install Now.
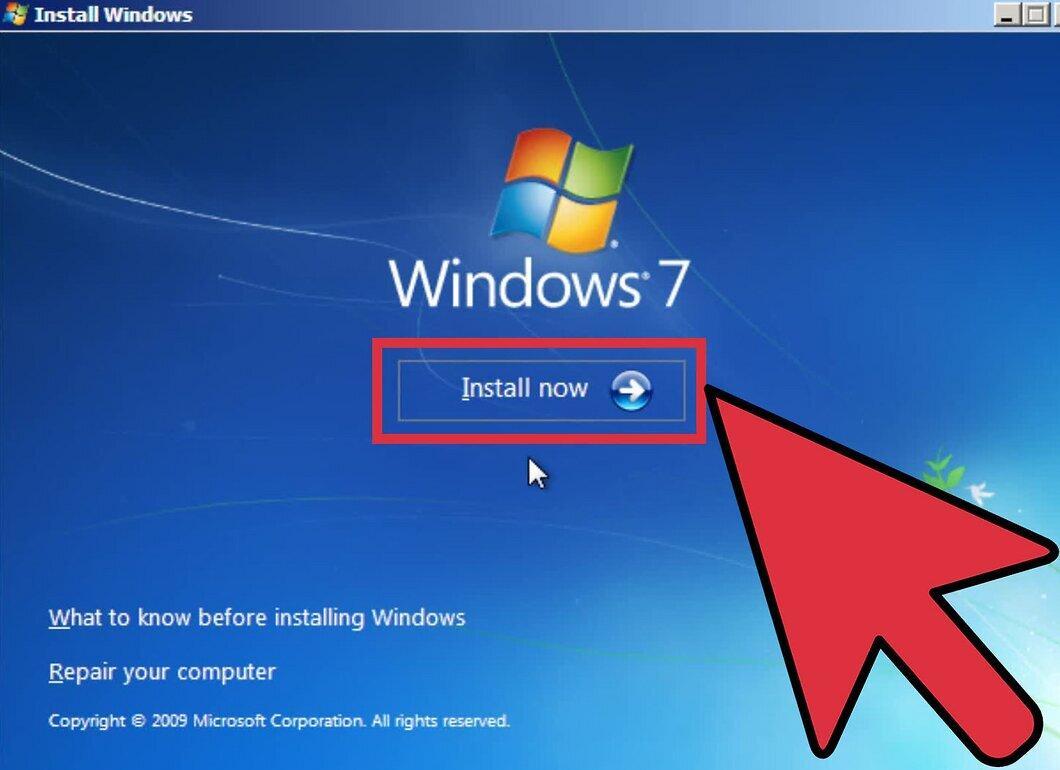
Click Install Now. There is no need to select the Repair your computer option, even if you want to fix your computer by reinstalling Windows. Once you click Install Now, the installer will load the necessary files to proceed.
Step 7. Read and Accept the Terms.
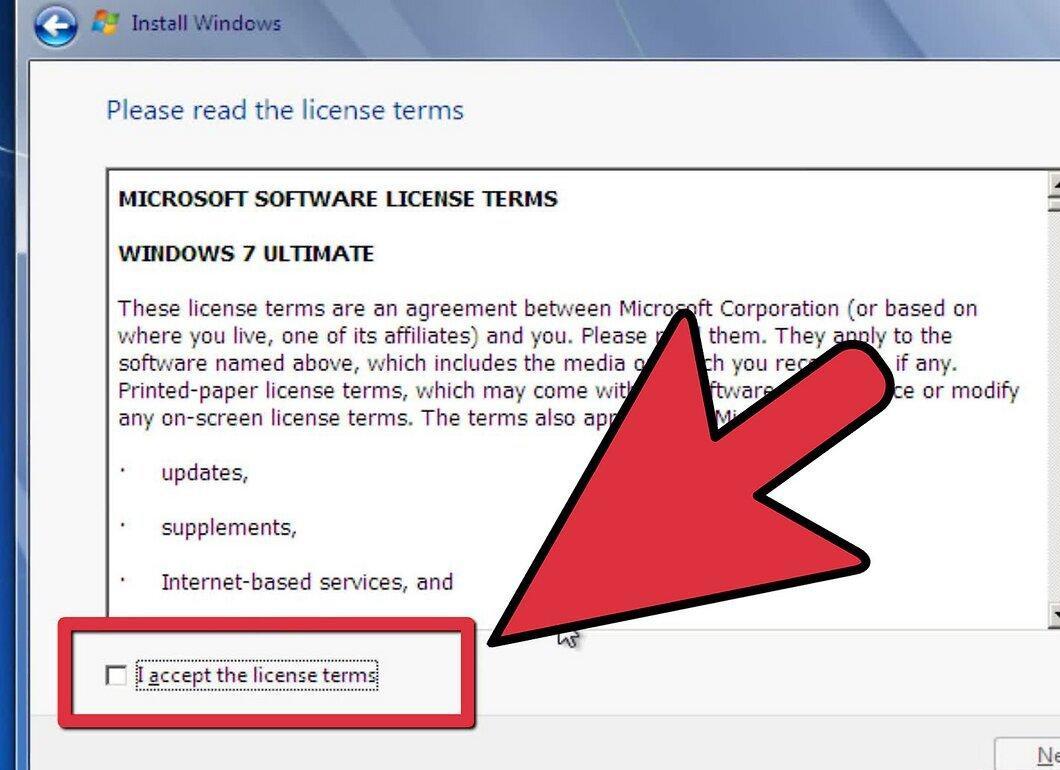
Read and accept the terms. To continue the installation process, you must indicate that you have read and agree to the Microsoft End User License Agreement. Familiarize yourself with the terms so you know your user rights and limitations.
Step 8. Choose Custom Installation.
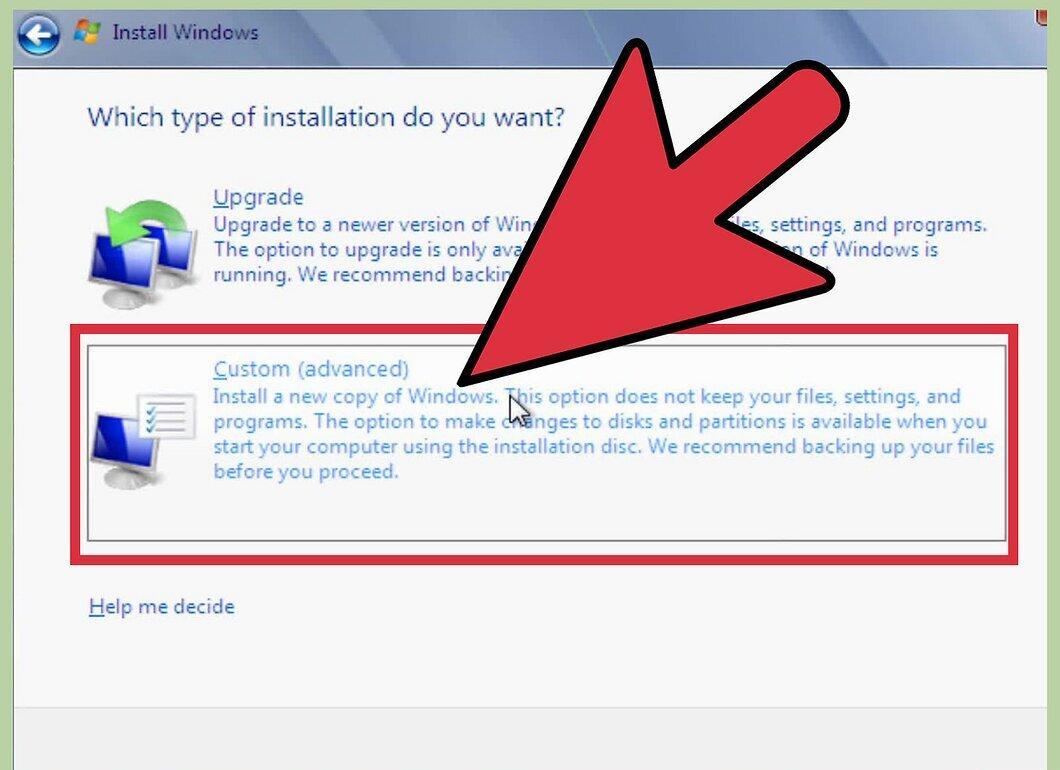
Choose Custom Installation. This will allow for a new installation. Formatting your computer means erasing all the data on it. During the new installation process, you will be offered the option to format the disk.
Step 9. Delete the Partition.
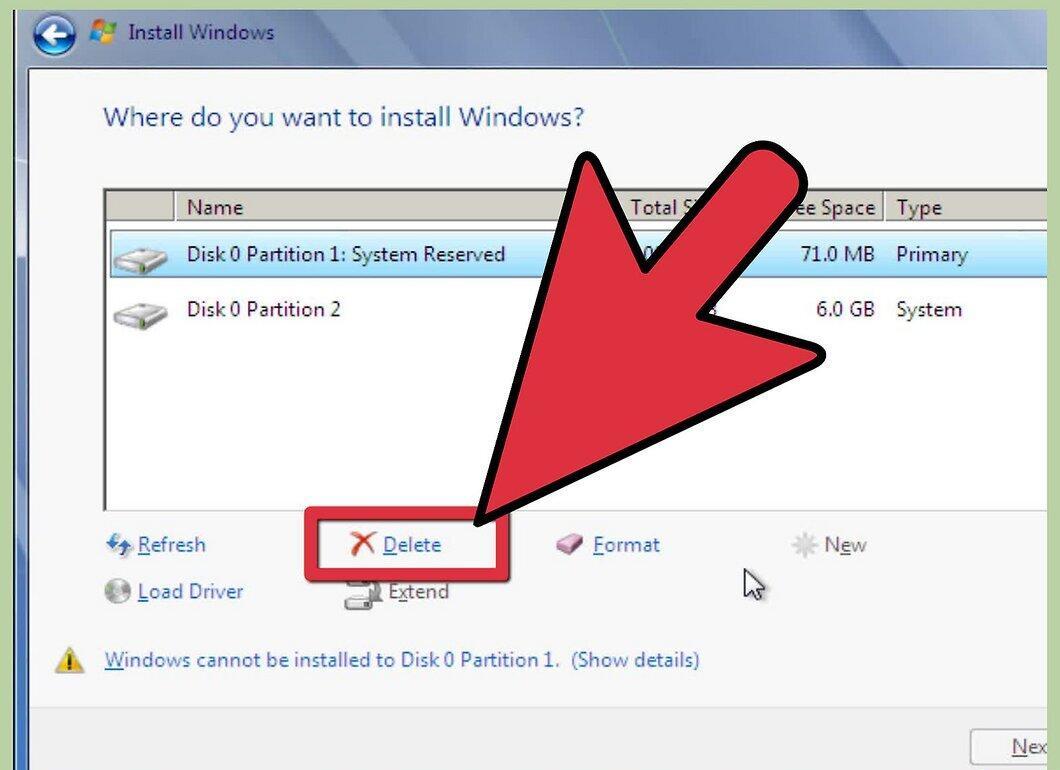
Delete the partition. A window will appear allowing you to select where to install Windows. For a "clean" installation, you need to delete the old disk partition and start fresh. Click “Drive Options”. Here you can delete and create partitions.
- Select the partition with the current operating system and click the Delete button.
- If your hard drive has multiple partitions, make sure you delete the correct one. All data on the deleted partition will be permanently erased.
- Confirm the deletion process.
Step 10. Select Unallocated Space and Click Next.
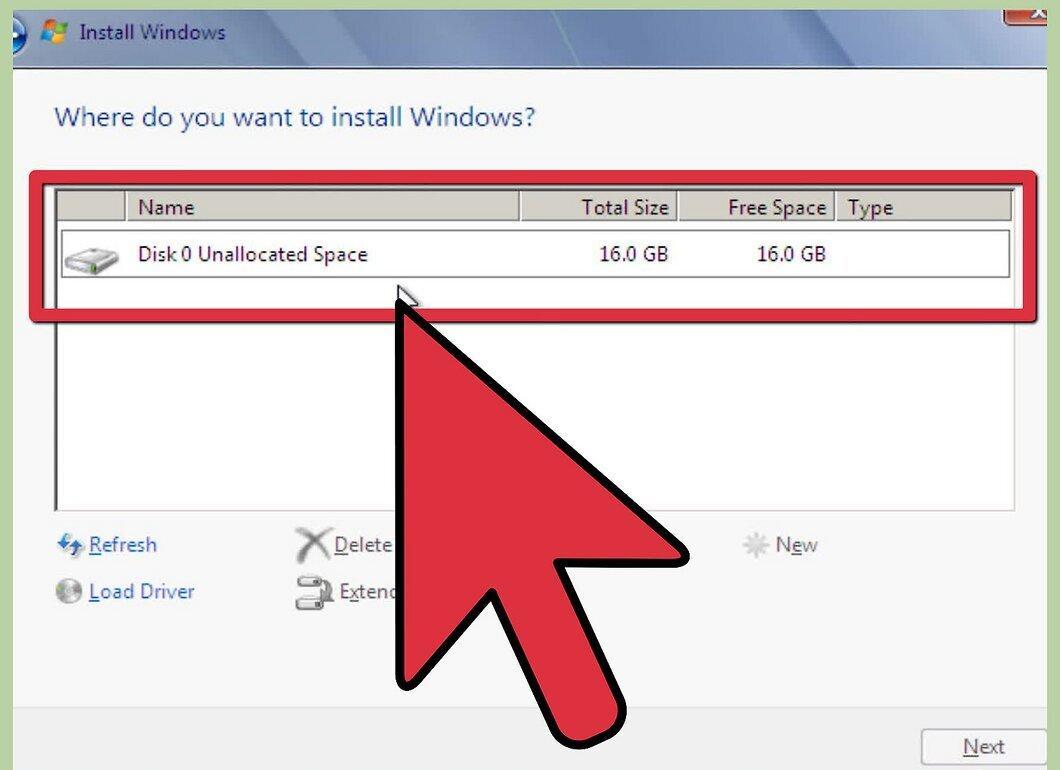
Select Unallocated Space and click Next. There is no need to create a partition before installing Windows 7, as this will be done automatically.
Step 11. Wait for Windows Files to Install.
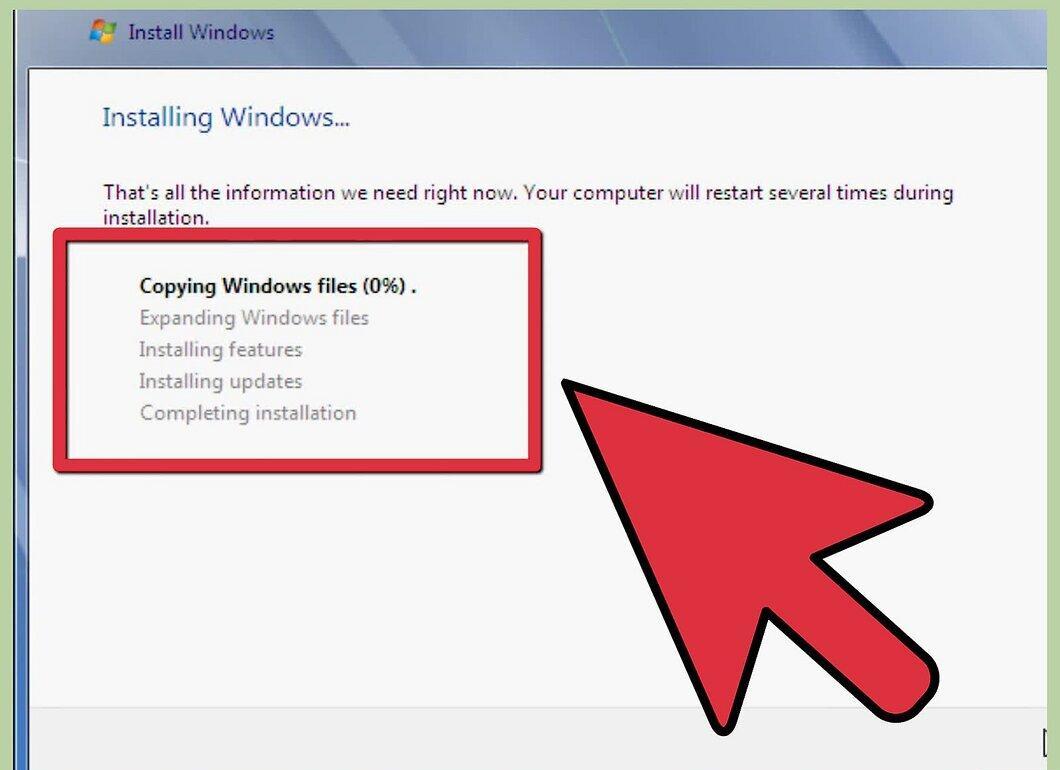
Wait for the Windows files to finish installing. The installation progress indicator will steadily rise until all files are installed. This process can take up to 30 minutes.
- Windows will automatically restart your computer once the installation is complete.
- The installation will restart, and you will see a message that the installer is updating the registry settings.
- Then the installer will configure computing services. This happens every time Windows starts, but runs in the background.
- A window will open notifying you that Windows installation is complete. After this, your computer will reboot again.
- The installer will then load drivers and check video settings. Your participation is not required during this process.
Step 12. Enter Your User Name and Computer Name.
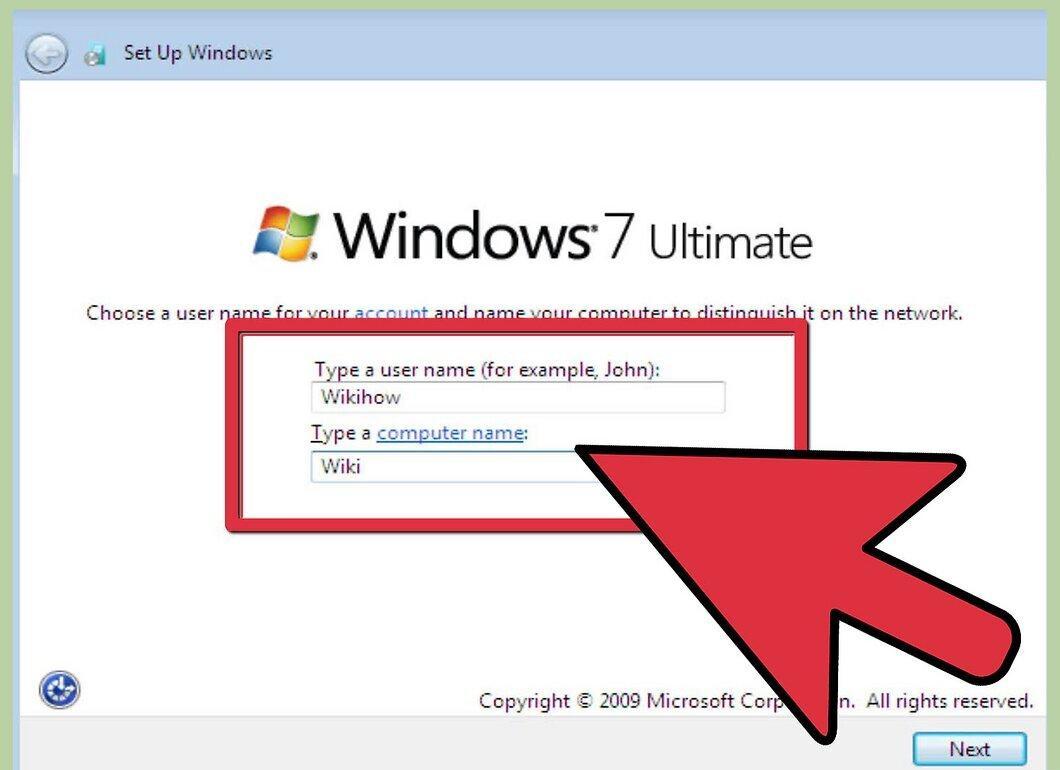
Enter your user name and computer name. The user name is used for logging into the system and personalizing the account. The computer name will be displayed on the network.
- You can add new users later through the Windows 7 Control Panel.
- Windows will ask you to enter a password. This is optional, but highly recommended, especially if others will have access to your computer. If you don’t want to set a password, just leave the field blank and click Next.
Step 13. Enter Your Product Key.
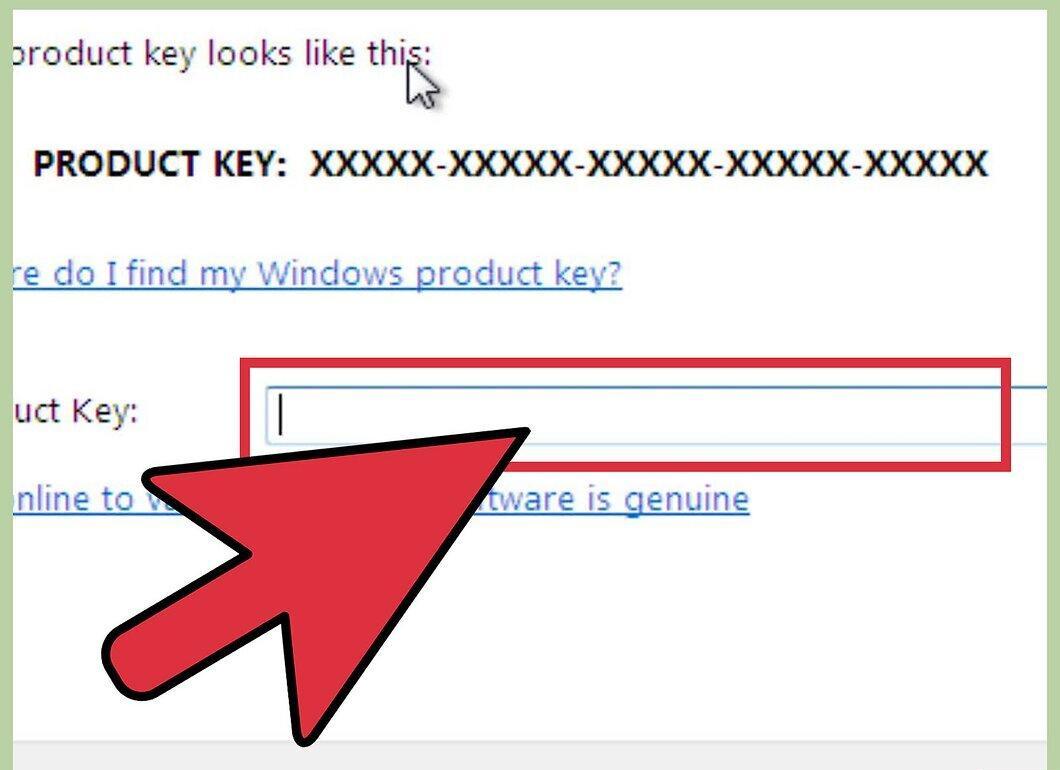
Enter your product key. The product key, which consists of 25 characters, comes with your copy of Windows. Check the box to “Automatically activate Windows when I’m online”.
Step 14. Choose Windows Update Settings.
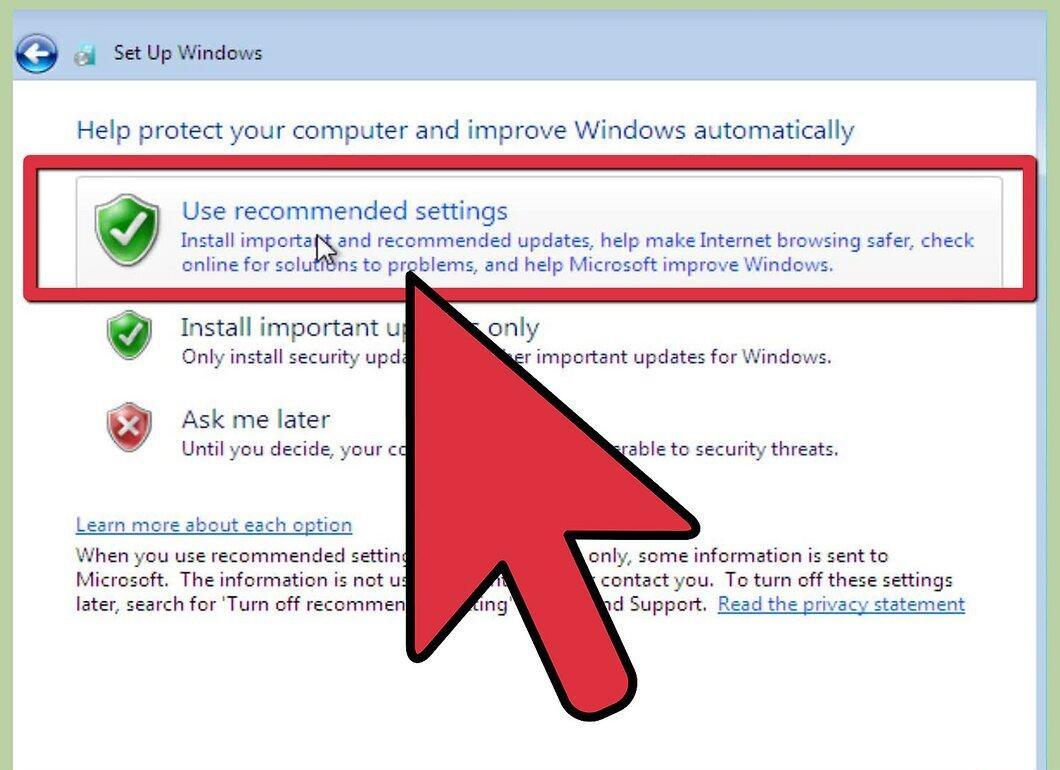
Choose Windows Update settings. To ensure your copy of Windows operates safely and reliably, it is recommended to select one of the first two options. If you choose the first option, all updates will happen automatically. The second option will notify you of important updates.
Step 15. Set the Date and Time.
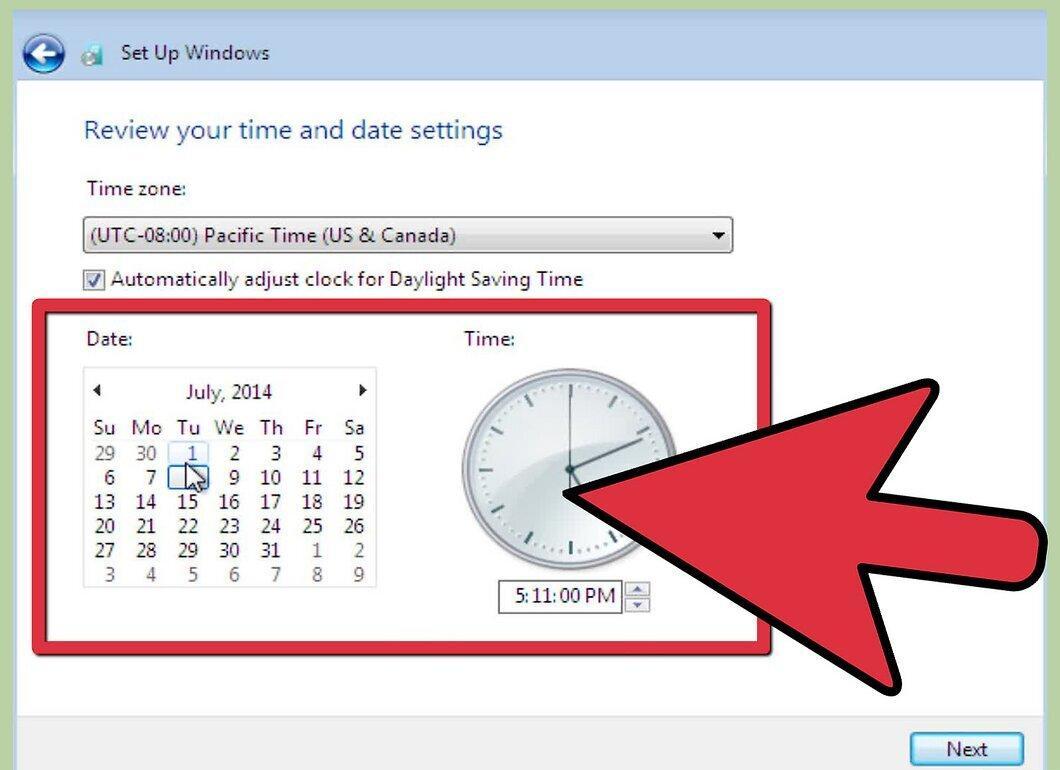
Set the date and time. These settings should be correct, as they are tied to the BIOS system. However, you can change them now if they are incorrect. Check the box for Automatic Daylight Saving Time if applicable to your region.
Step 16. Choose Your Network Location.
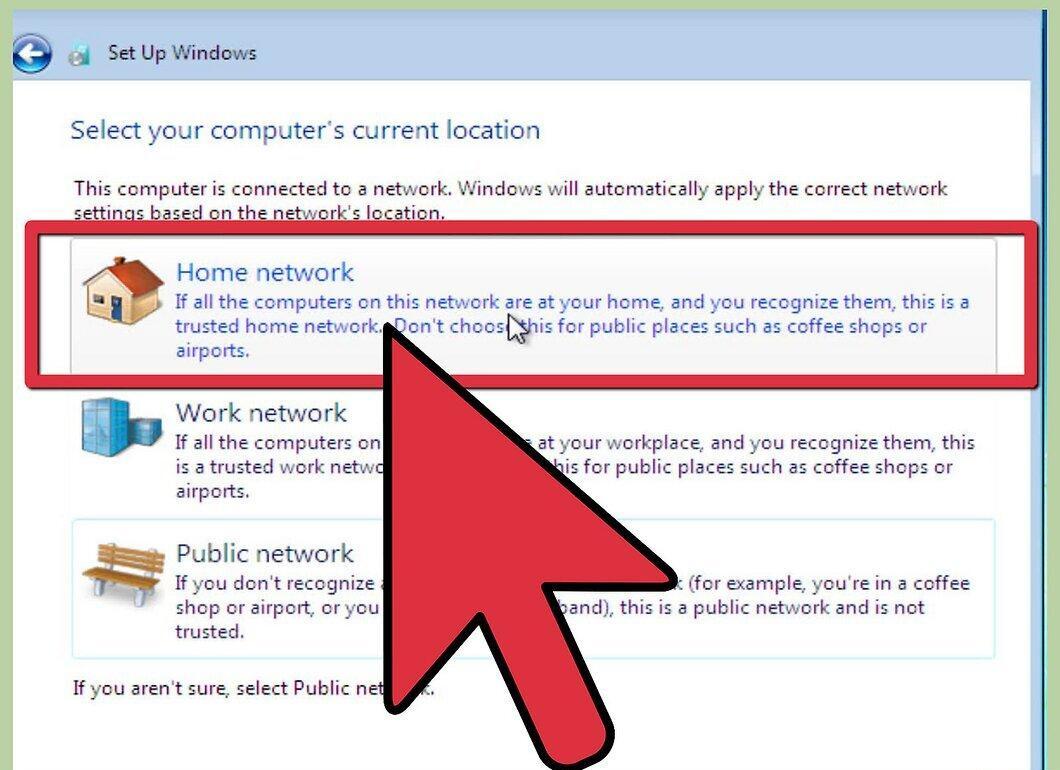
Choose your network location. If your computer is connected to a network, you will be prompted to define the type of network. In most cases, you can choose Home network or Work network. If your computer is in a public place, select Public network. Mobile internet users are advised to always use the Public network option.
- Windows will now attempt to connect to the network. This process occurs automatically.
Step 17. Explore Your Desktop.
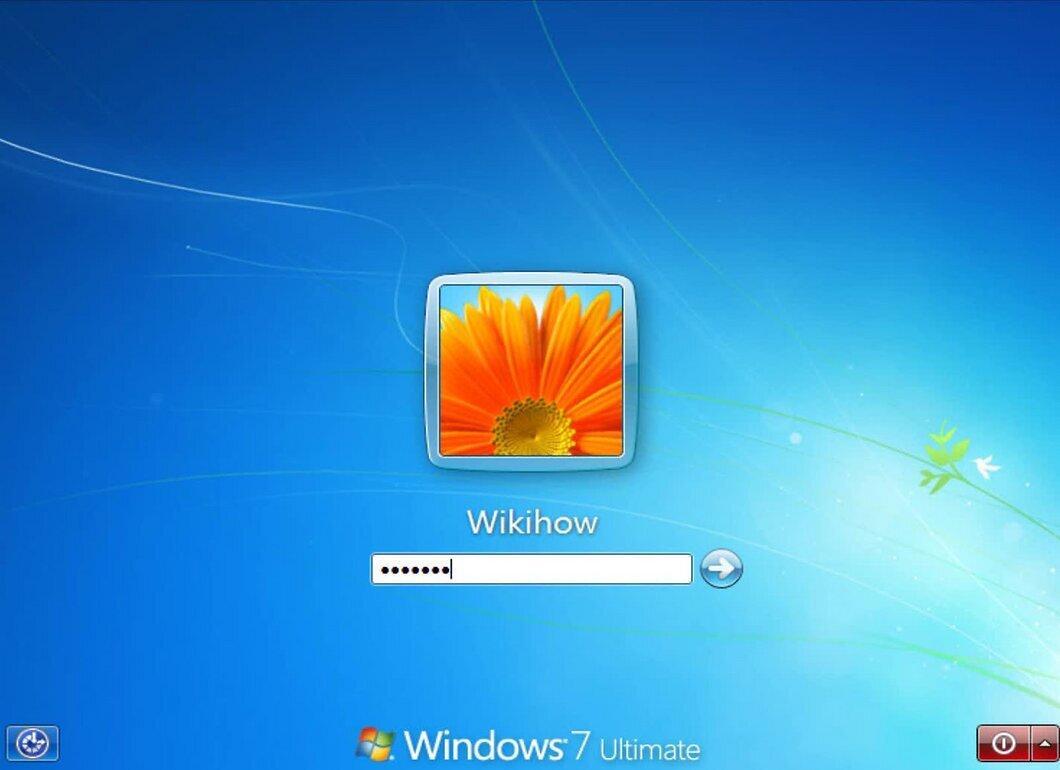
Explore your desktop. After another loading screen, you will see the new Windows 7 desktop. The installation is now complete.
Mac OS X
Step 1. Back Up Your Data.
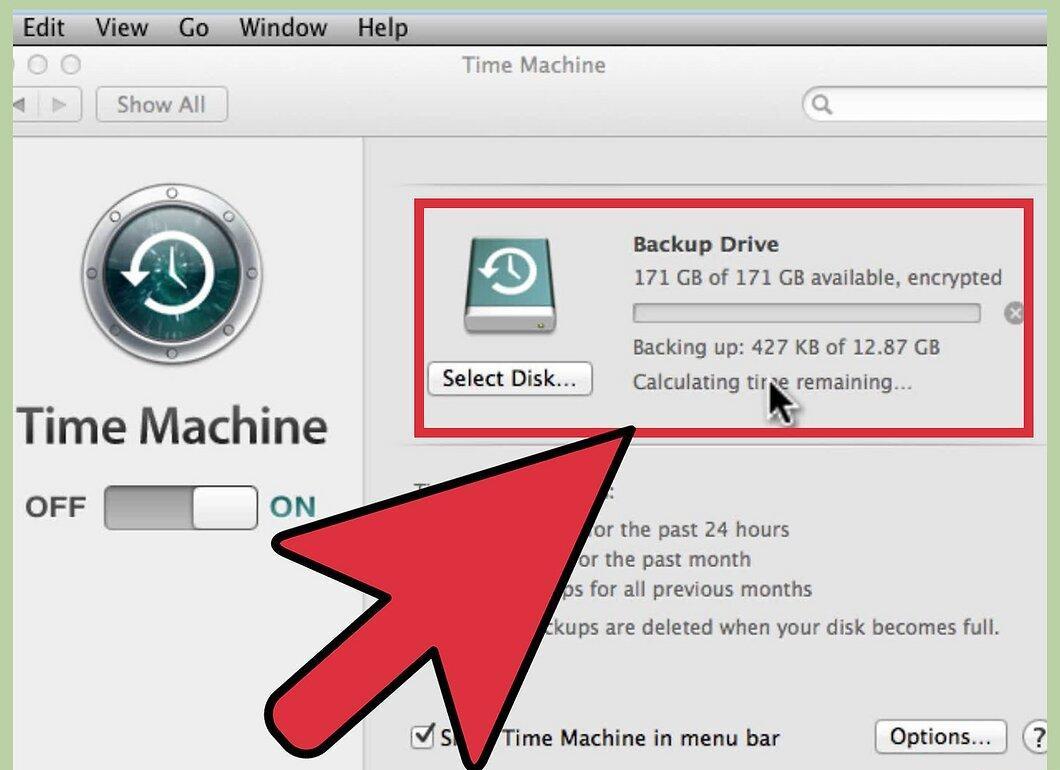
Back up your data. Formatting your computer will delete all files and data. Programs cannot be backed up; you will need to reinstall them later. All files, including documents, music, images, and videos you want to keep, should be copied to a separate storage device.
- You can use DVD and CD discs, external hard drives, flash drives, or cloud storage, depending on how much data you need to back up.
Step 2. Restart Your Mac.
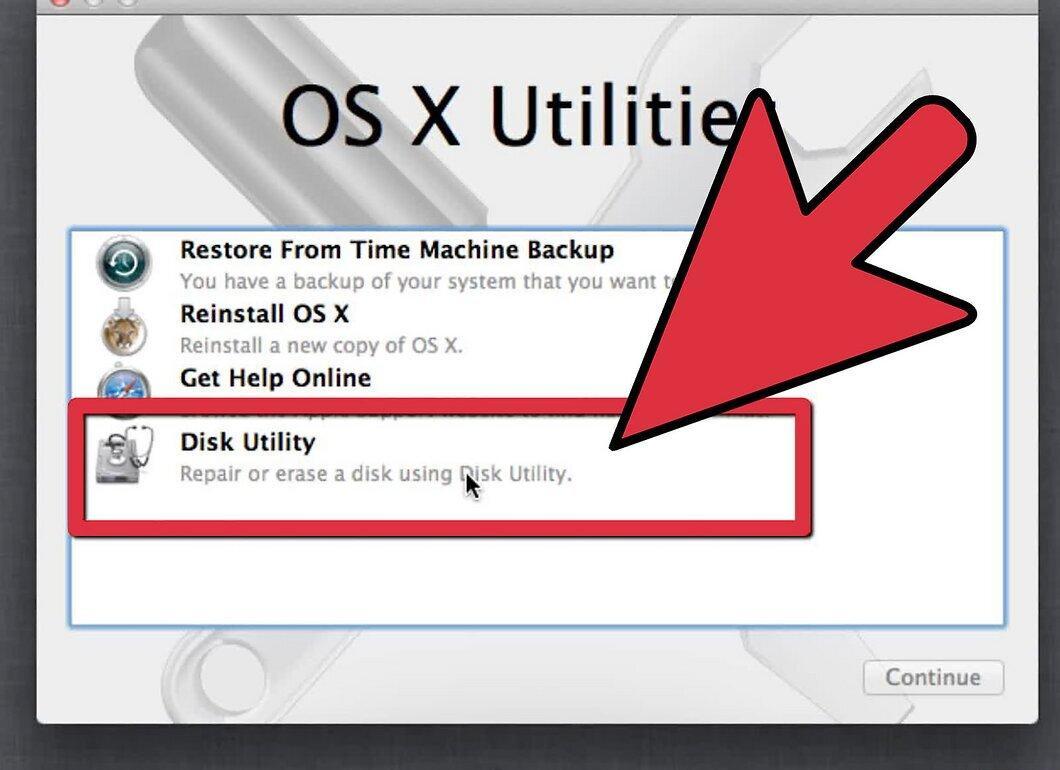
Restart your Mac. When the computer restarts, hold down the Command + R key combination. This will open the Recovery Menu. Select Disk Utility and click Continue.
Step 3. Format the Disk.
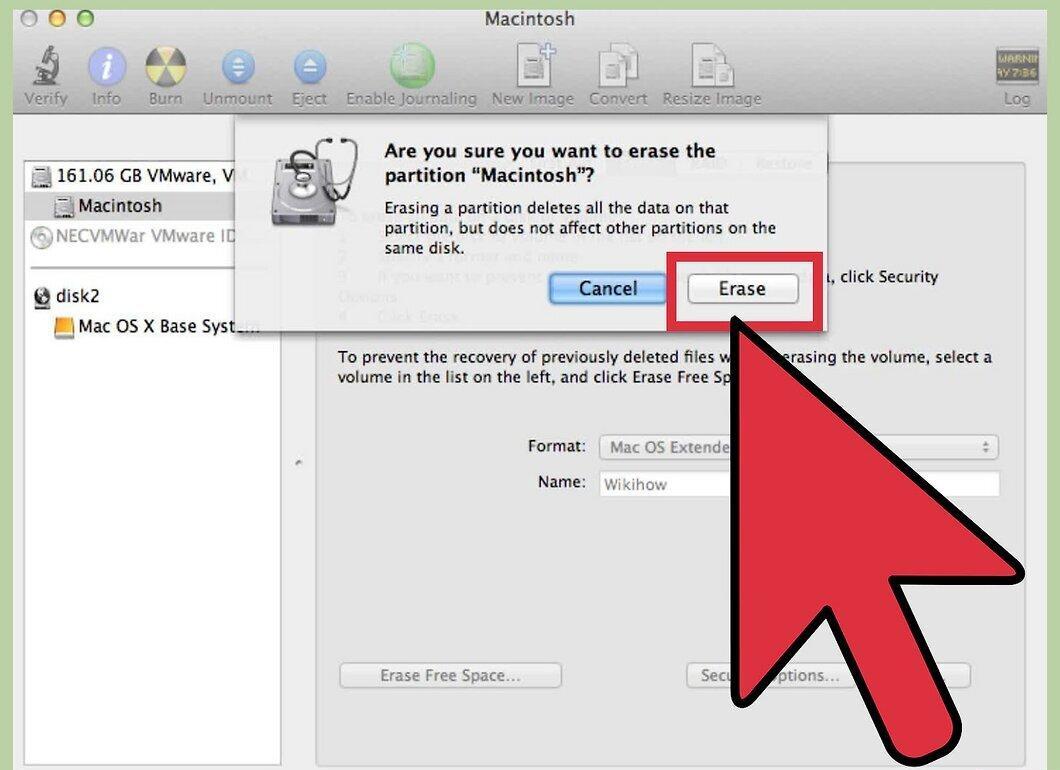
Format the disk. Select the desired hard drive from the left panel of Disk Utility. Click the Erase tab. From the Format dropdown menu, select Mac OS Extended (Journaled). Enter any name and click Erase.
- All data on the disk is now deleted. Make sure you have backed up important files.
- Close Disk Utility after the erasure process is complete.
Step 4. Start the Mac OS X Installation Process.
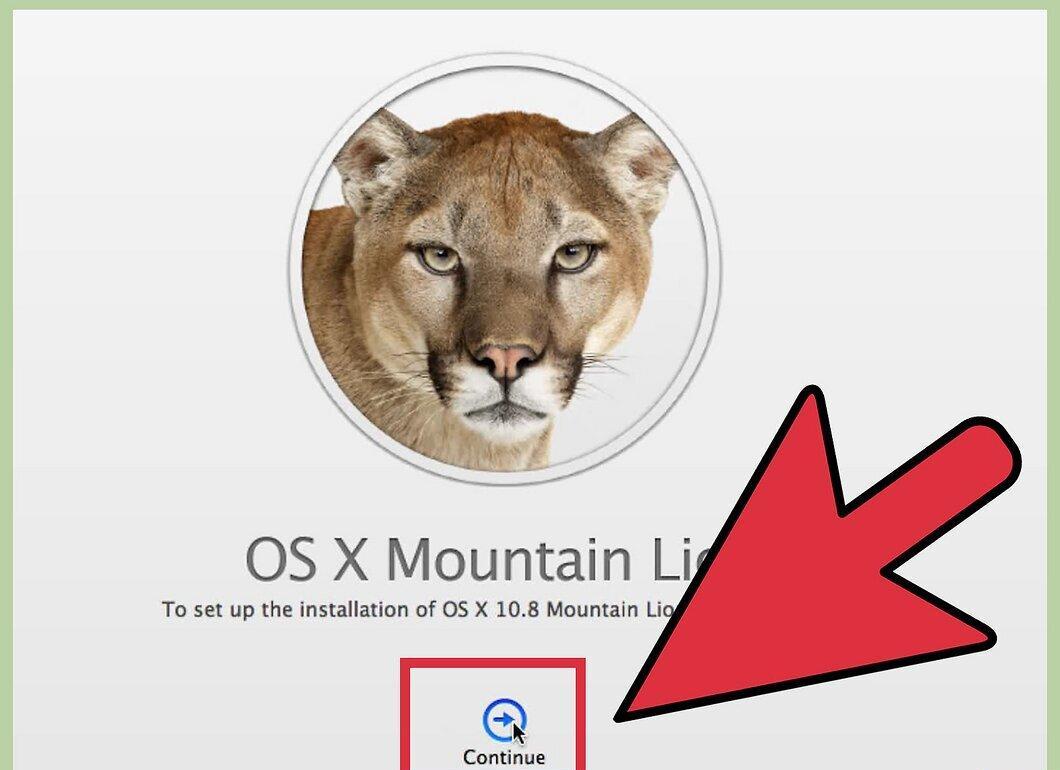
Start the Mac OS X installation process. Make sure you are connected to the internet and select Reinstall Mac OS X. You will need to confirm the license by entering your Apple ID and password. You will also need to accept the license agreements.
Step 5. Choose the Disk for Installation.
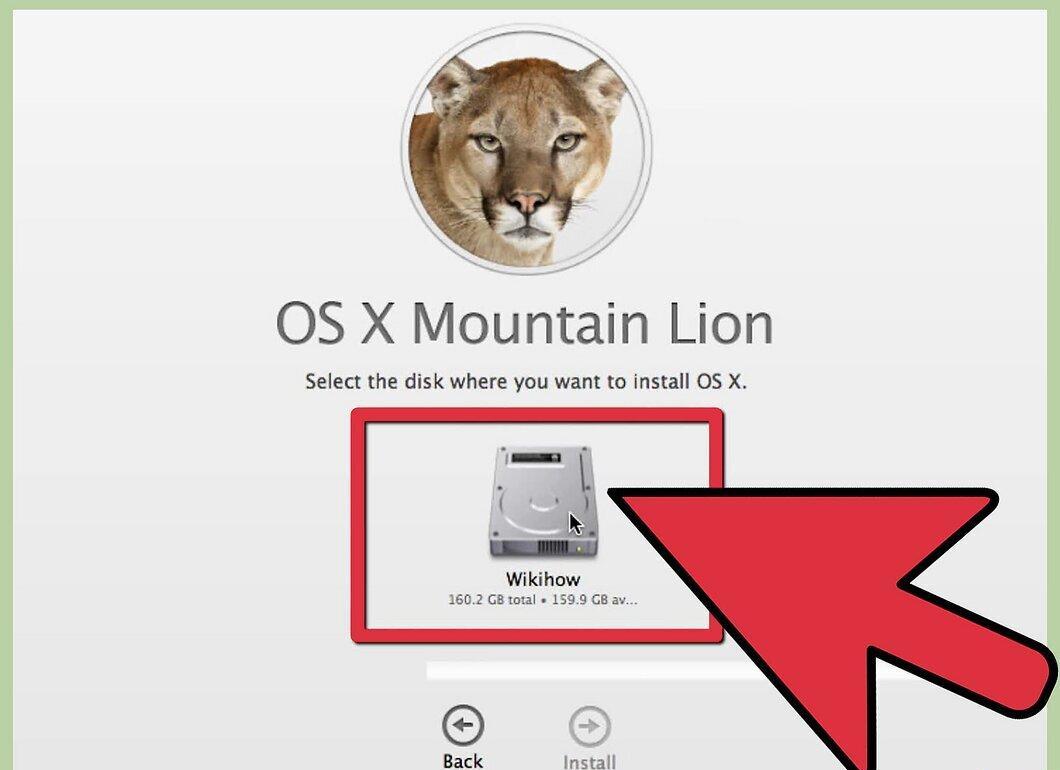
Choose the disk for installation. The installer will ask you to specify the disk for the operating system installation. Select the disk you just erased using Disk Utility.
Step 6. Wait for the Installation Process to Complete.
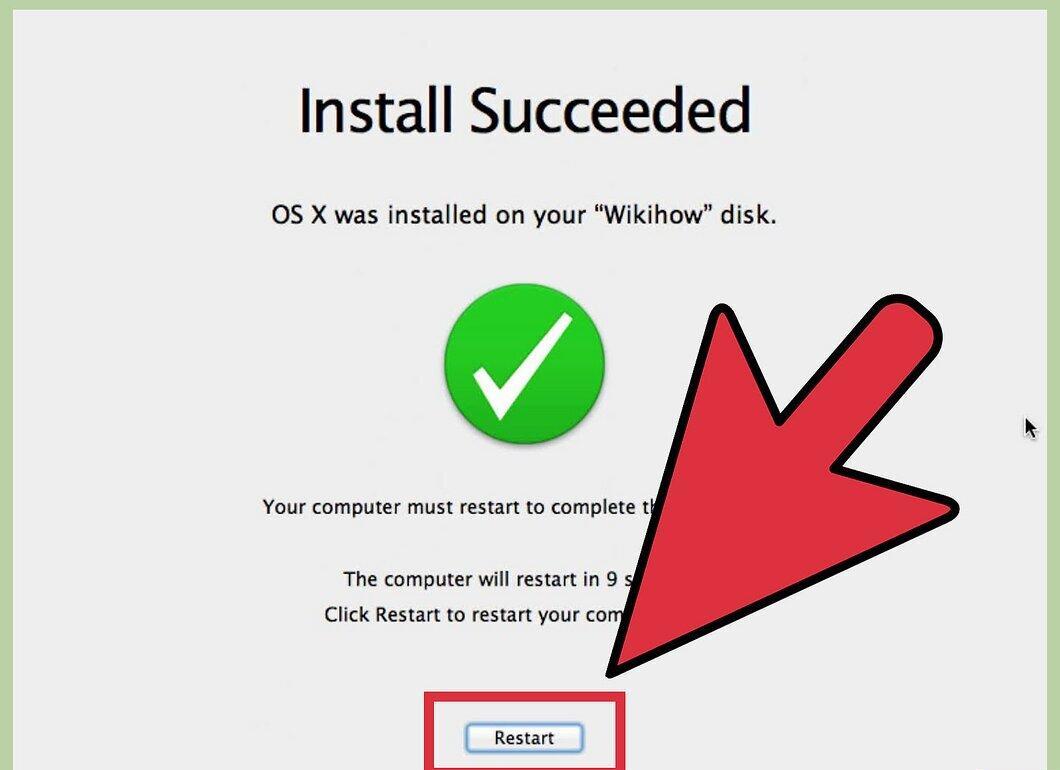
Wait for the installation process to complete. The installation of Mac OS X is fully automatic and requires no user intervention. The computer may restart during the installation process. Once the installation is complete, you will see the desktop.


