
Increasing the number of plants is a great way to diversify your garden. By propagating chrysanthemums from cuttings, you get exact replicas of the parent plant, ensuring the variety is preserved. If you choose to grow flowers from seeds, the results can be quite unpredictable. Chrysanthemums thrive best when young, so it’s advisable to take fresh cuttings every year rather than trying to maintain older plants that have already entered their second season.
How to Root Chrysanthemum Cuttings
Step 1. Collect Chrysanthemum Cuttings in Spring.
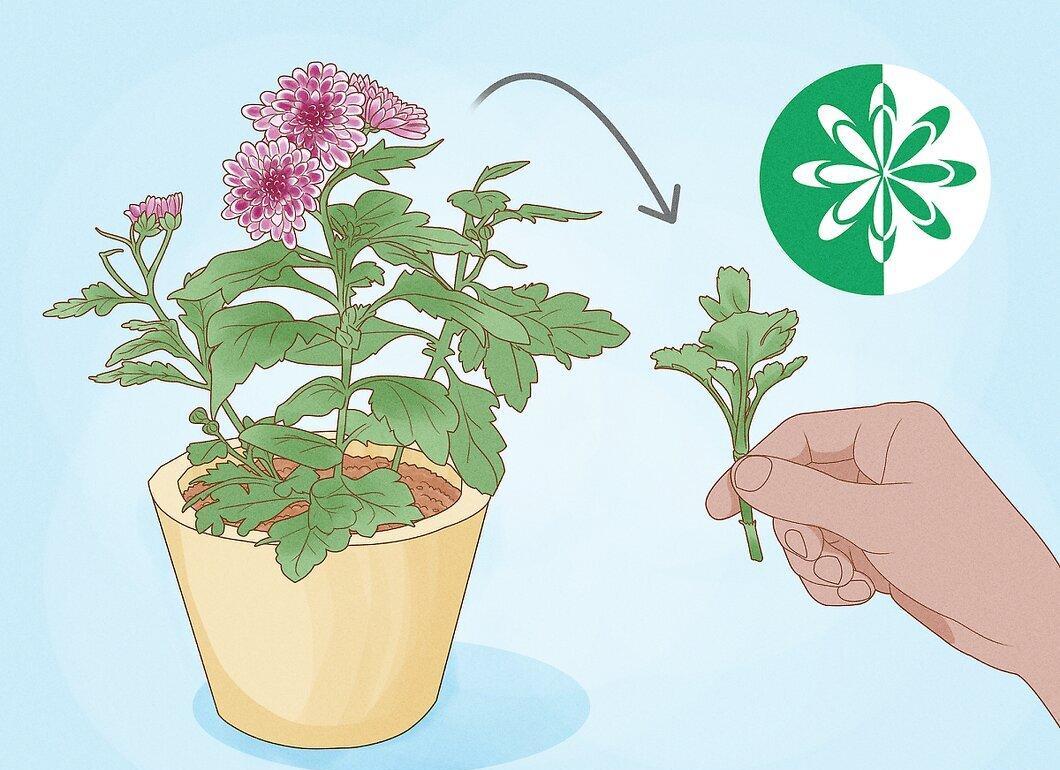
Start by collecting chrysanthemum cuttings in the spring. This period is considered the best time to trim cuttings from last year’s chrysanthemums. It’s important to cut them after they have flowered in the fall to keep them short and sturdy.
Step 2. Move Plants Indoors a Few Months Before Cutting.
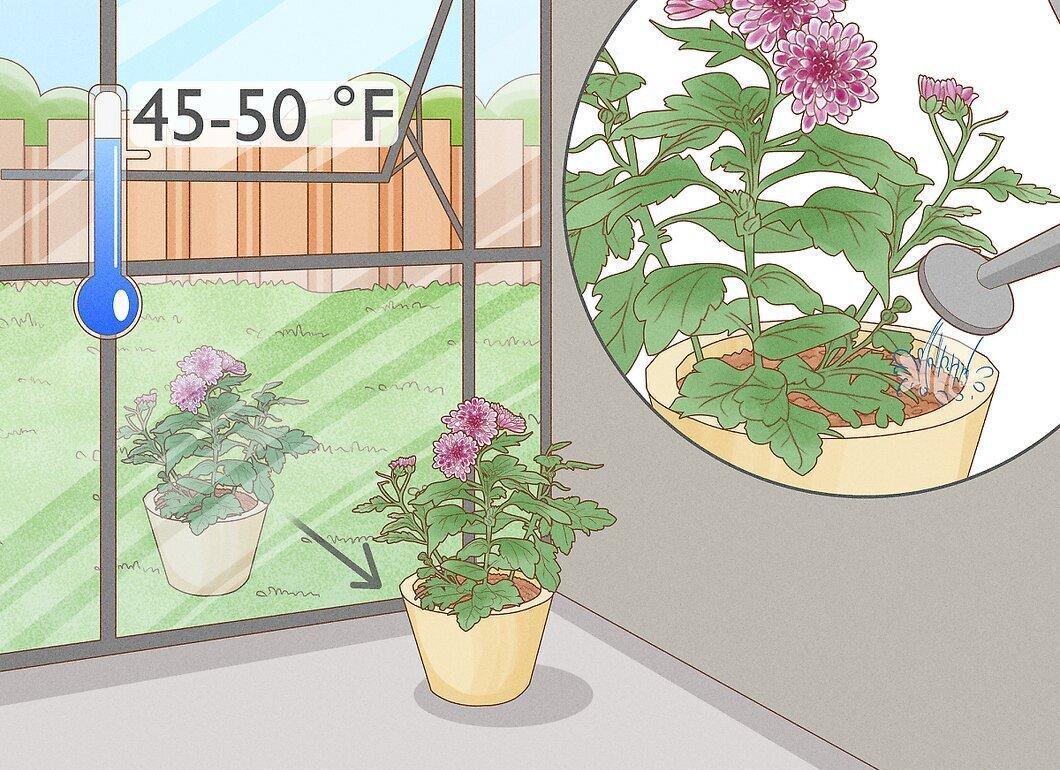
A couple of months before taking cuttings, move your outdoor chrysanthemums to a cool indoor location, such as an unheated greenhouse, where temperatures do not drop below freezing.
- The ideal temperature for this is around 7°C (45°F). It’s best to do this in the middle of winter, around January.
- Water the plants after moving them, so they start to grow actively within a month if you keep the soil moist and the temperature around 9-10°C (48-50°F).
Step 3. Cut Several Stems 7-8 cm Long.
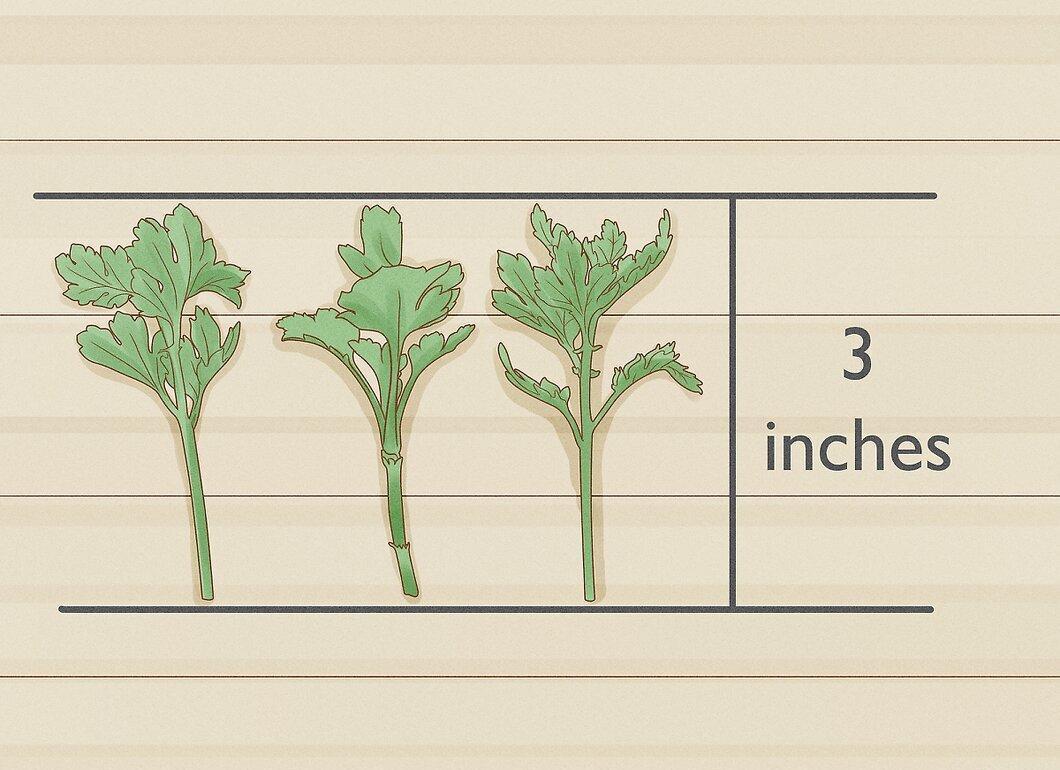
Take several stems about 3 inches (7-8 cm) long from the desired chrysanthemum. You can gently pull the cuttings from the roots or cut them with a clean knife.
- Choose fresh and healthy stems, aiming to keep them uniform in length.
- Typically, only a third of the cuttings will take root, so it’s best to take three times more than you plan to grow.
- Remove the lower leaves, leaving only the top part.
Step 4. Prepare the Compost Mix.
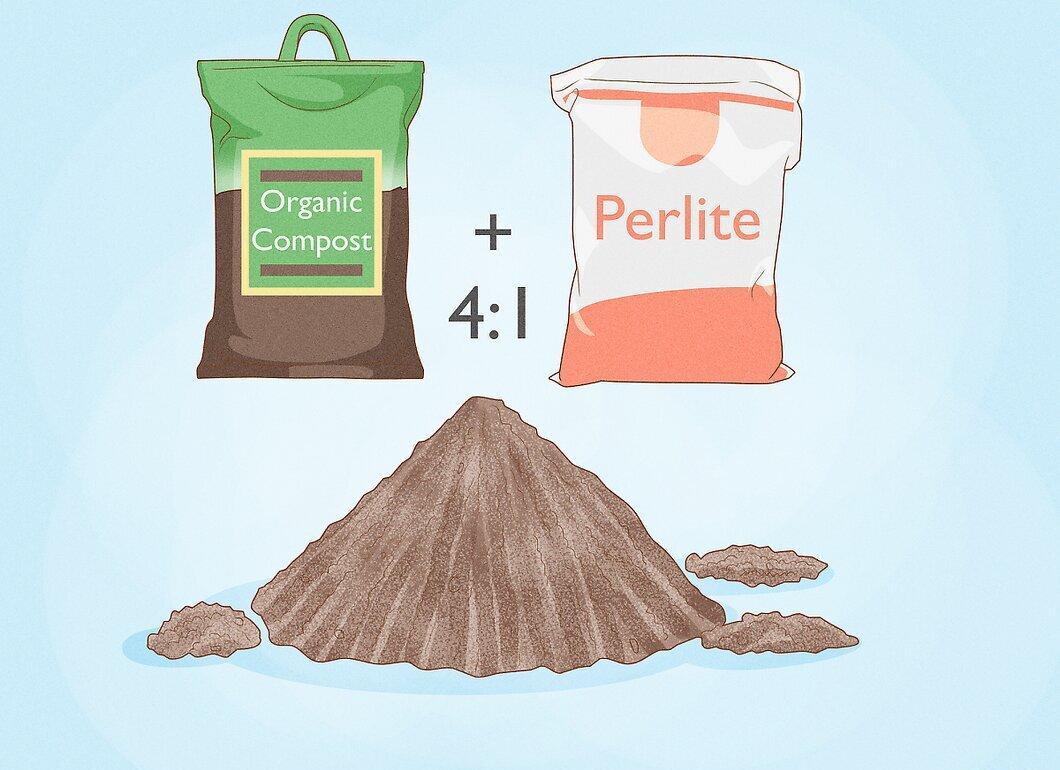
Prepare a compost mix. Use a tray or individual pots, filling them with compost or a mixture of compost and perlite. For the mix, use 4 parts compost to 1 part perlite.
Step 5. Plant the Cuttings.
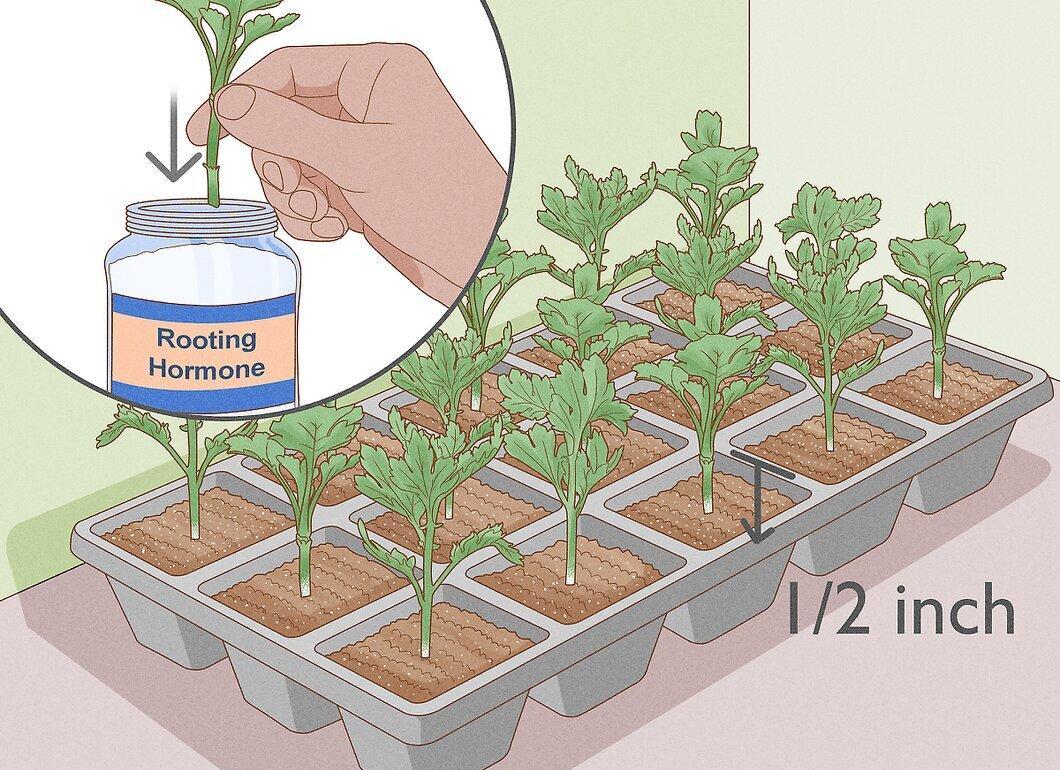
Before planting, dip each cutting in rooting hormone powder to a depth of about 1.2 cm (0.5 inches). Gently shake off any excess powder.
- Use a stick, pencil, or skewer to make a small hole in the compost. Insert the cutting into this hole to a depth of about 2.5 cm (1 inch) and gently firm the soil around it.
- Don’t forget to label the tray with the plant name and date, then water it.
Step 6. Cover the Trays with a Plastic Bag.
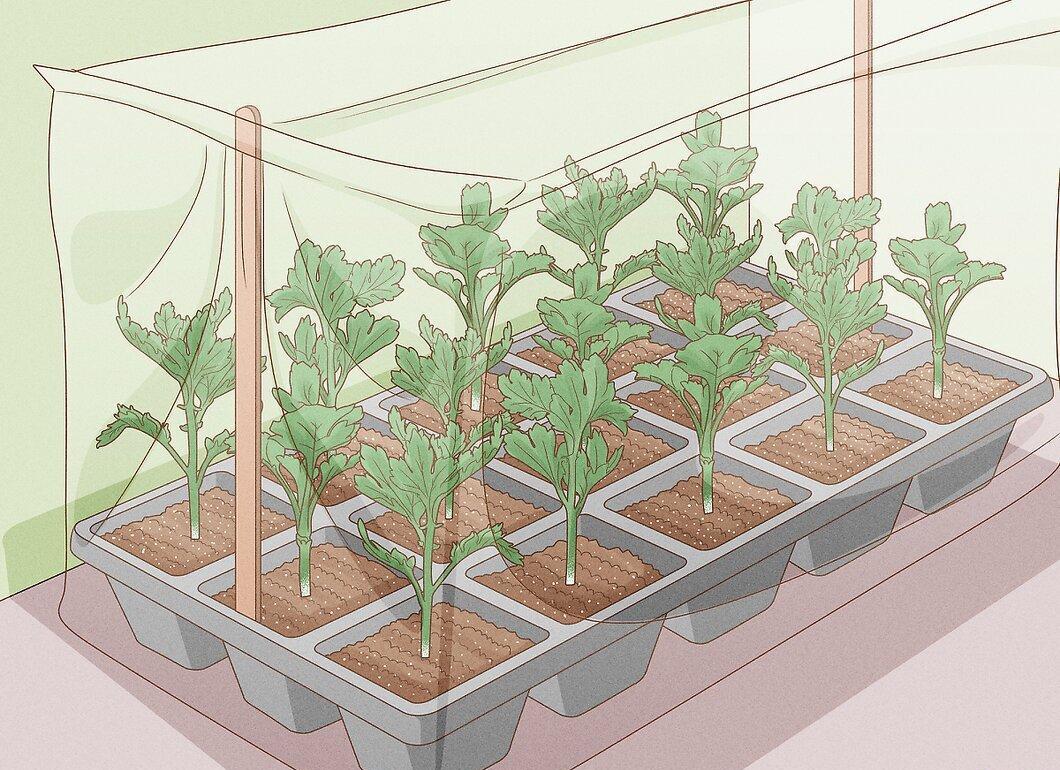
To create a mini greenhouse, cover the trays with a clean plastic bag. Insert a few sticks into the soil to keep the bag from touching the cuttings.
- You can also use a cut bottle to create protection from the environment.
- Alternatively, place the trays in a heated propagator to provide bottom heat.
Step 7. Keep the Cuttings in a Cool, Light Place.
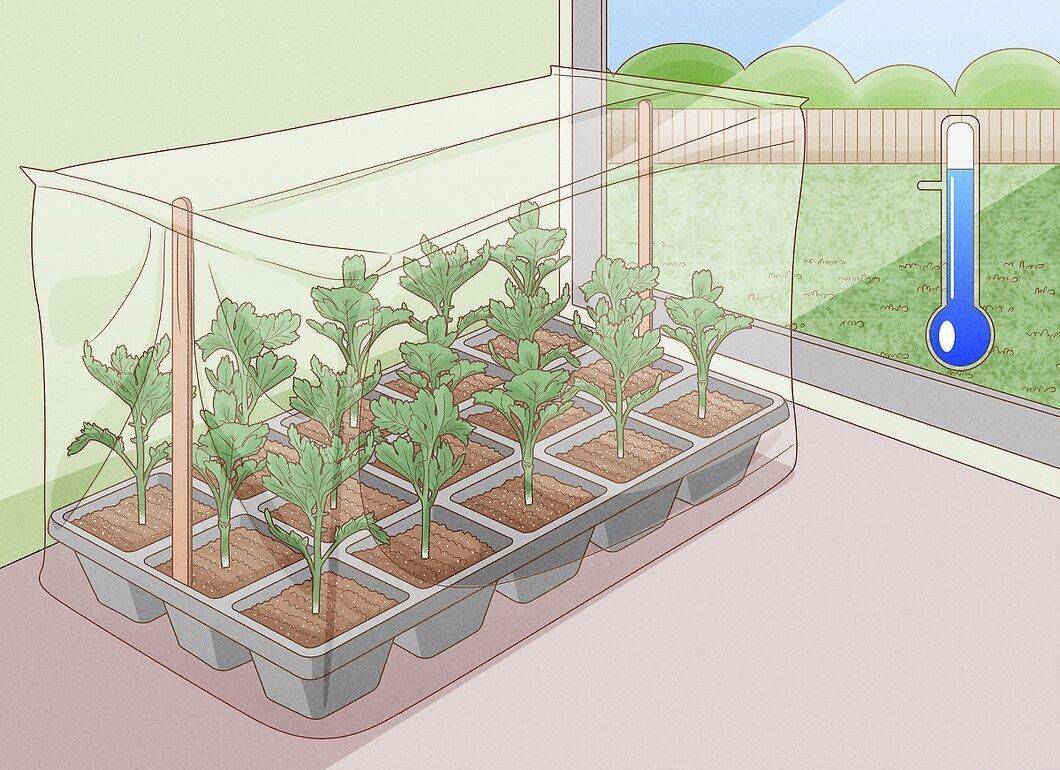
Ensure the cuttings are in a cool, well-lit area until they root. Choose a spot with protection from direct sunlight, such as a windowsill with filtered light. The temperature should be above freezing but not too hot.
- Roots typically appear within 4 weeks. Once you see roots, transplant the plants into individual pots.
Transplanting Rooted Cuttings Outdoors
Step 1. Stake the Rooted Plants for Support.
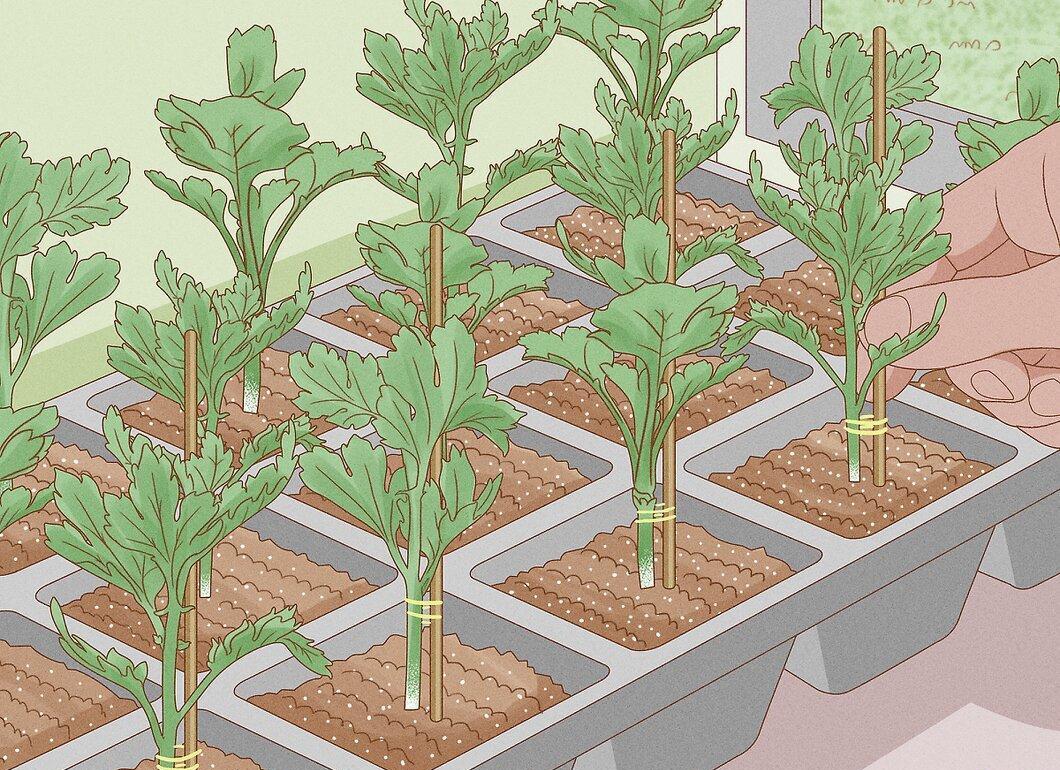
Once your cuttings have rooted, stake them for additional support using a thin stick, such as a wooden skewer or chopstick. Gently attach the main stem to the stick using string or a clip.
Step 2. Harden Off the Cuttings Before Planting.
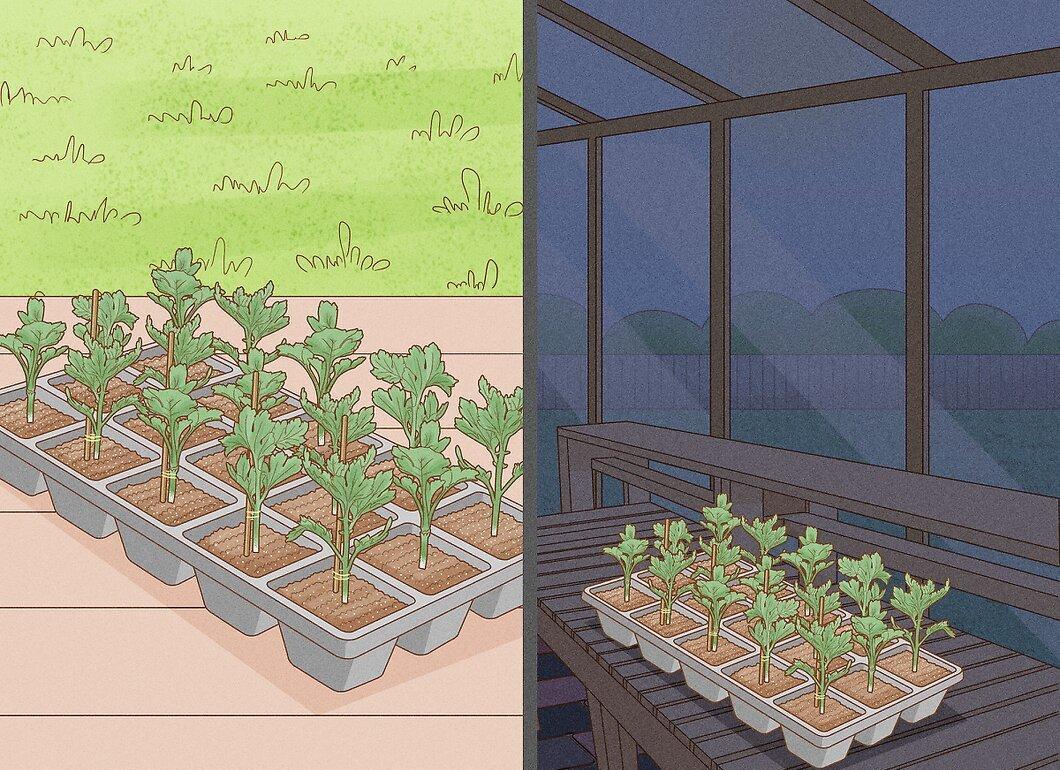
Before planting the cuttings outdoors, allow them time to acclimate to their new conditions. This is important to help them adjust to air movement and temperature changes, preventing shock.
- Move the plants outdoors during the day but return them to a cooler place, such as an unheated greenhouse, at night.
- Cuttings grown in a greenhouse should also acclimatize to outdoor conditions and can remain outside once the frost threat has passed.
Step 3. Prepare the Planting Site in the Garden.
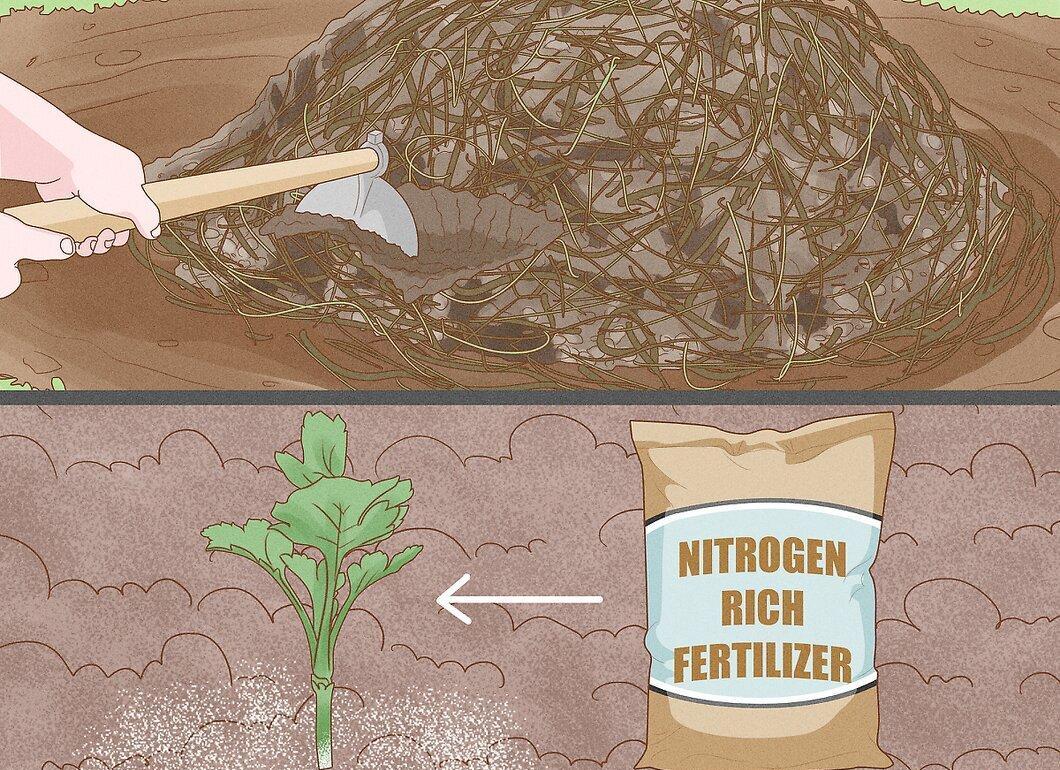
A few weeks before planting, prepare the site for the new chrysanthemums:
- Incorporate well-rotted manure or compost into the soil and add standard fertilizers such as blood, fish, and bone meal.
- After planting, use nitrogen-rich fertilizers, such as chicken manure pellets, sprinkling them on the soil surface.
Pruning Young Chrysanthemums
Step 1. Pinch Young Chrysanthemums to Encourage New Growth.
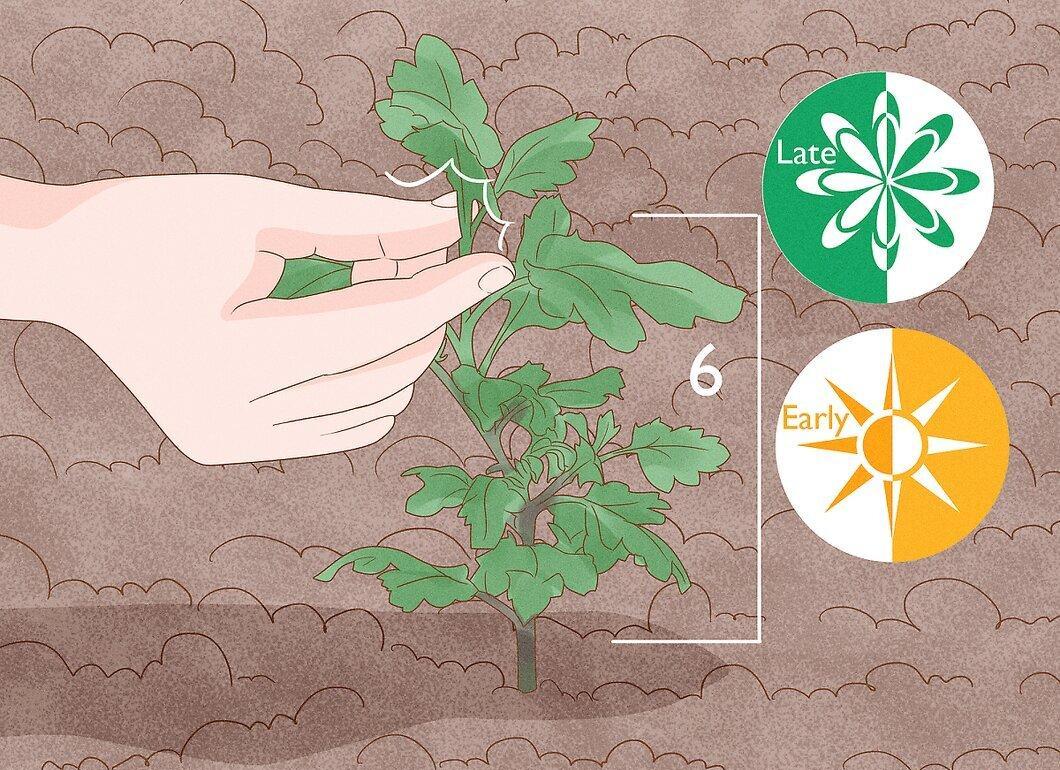
Pinch young chrysanthemums to stimulate new stem formation. Once your cuttings have rooted and developed into young plants (usually by the end of spring), pinch them to encourage the growth of new shoots and increase flowering.
- This is typically done on June 1st or anytime in early summer when the plant has formed more than six leaves on the stem. Count the lower 6-leaf stems on the main stem.
- Cut the main stem a quarter inch (0.8 cm) above the upper stems, leaving only the 6-leaf stems.
Step 2. Use Cut Stems as New Cuttings.
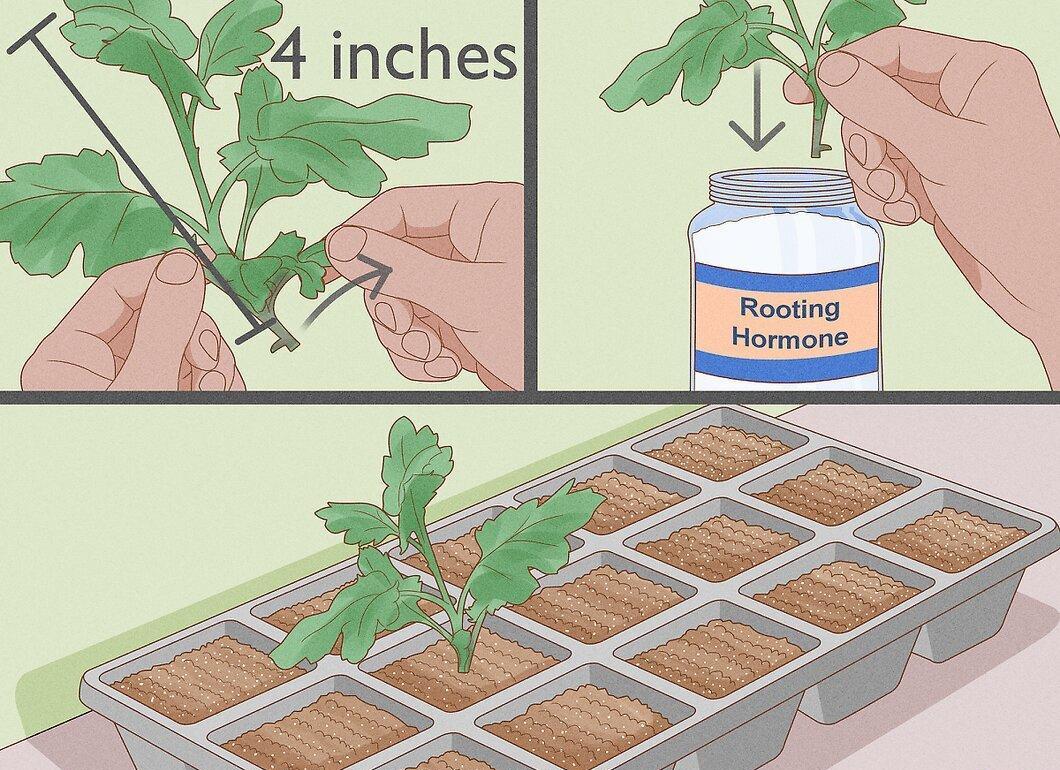
Don’t hesitate to use the cut stems as new cuttings. Remove the lower leaves and cut the stem to 10 cm (4 inches), then follow the rooting instructions described earlier.
Step 3. Remove Buds After Pinching.
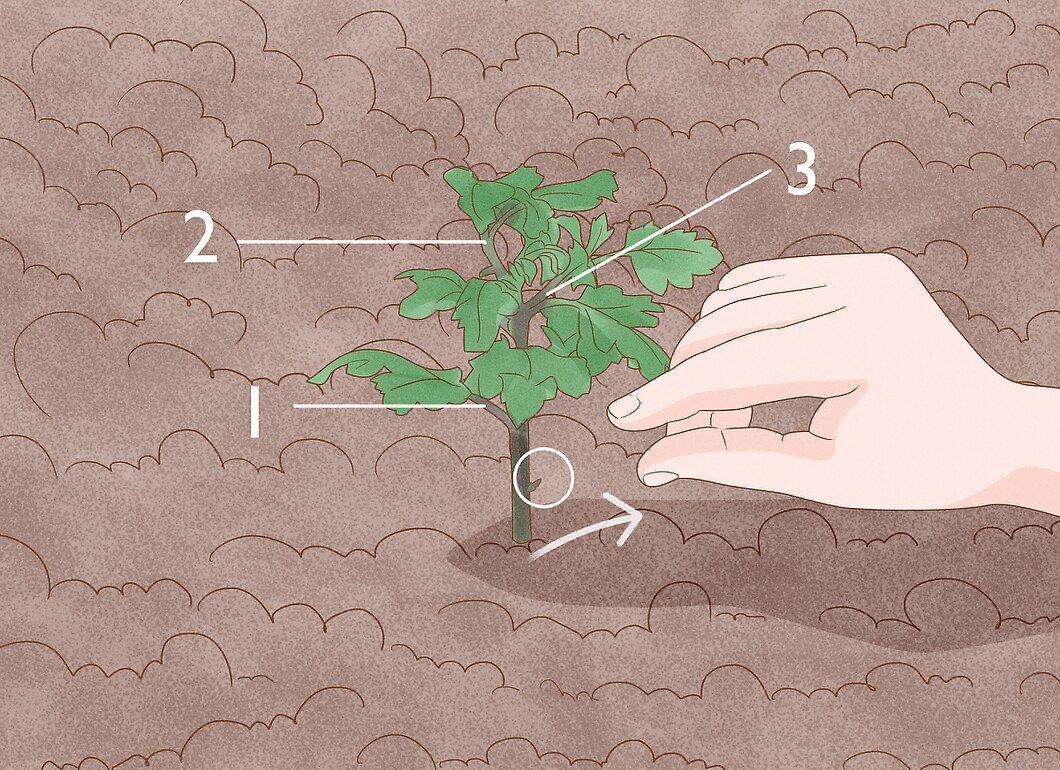
A few weeks after pinching, remove the buds on the plants. You will see strong stems forming below where you pinched. At this stage, remove the developing stems at the base of the trunk.
- Leave 3-4 healthy stems at the top of the plant when removing the lower ones.
Step 4. Cut Back Chrysanthemums After Flowering.
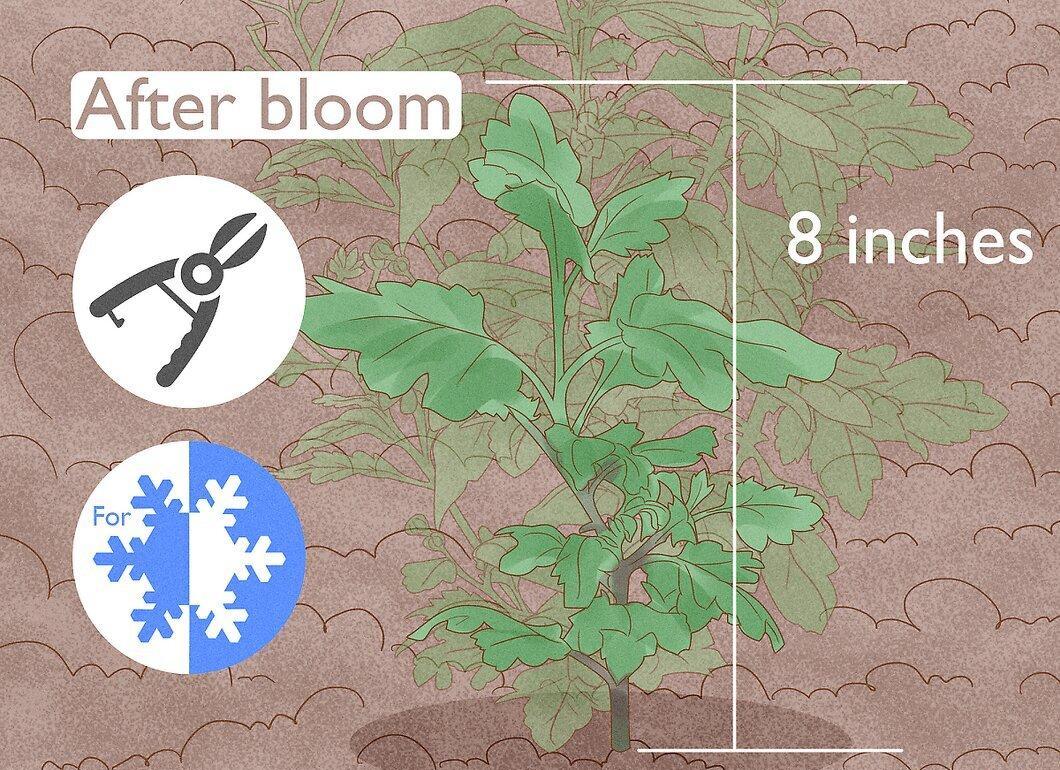
After flowering has finished, cut the chrysanthemums back again, leaving about 20 cm (8 inches) above the ground. This will help the plant conserve more energy during the winter months.
Caring for Chrysanthemums in Winter
Step 1. Cover Chrysanthemums with a Layer of Compost in Mild Climates.
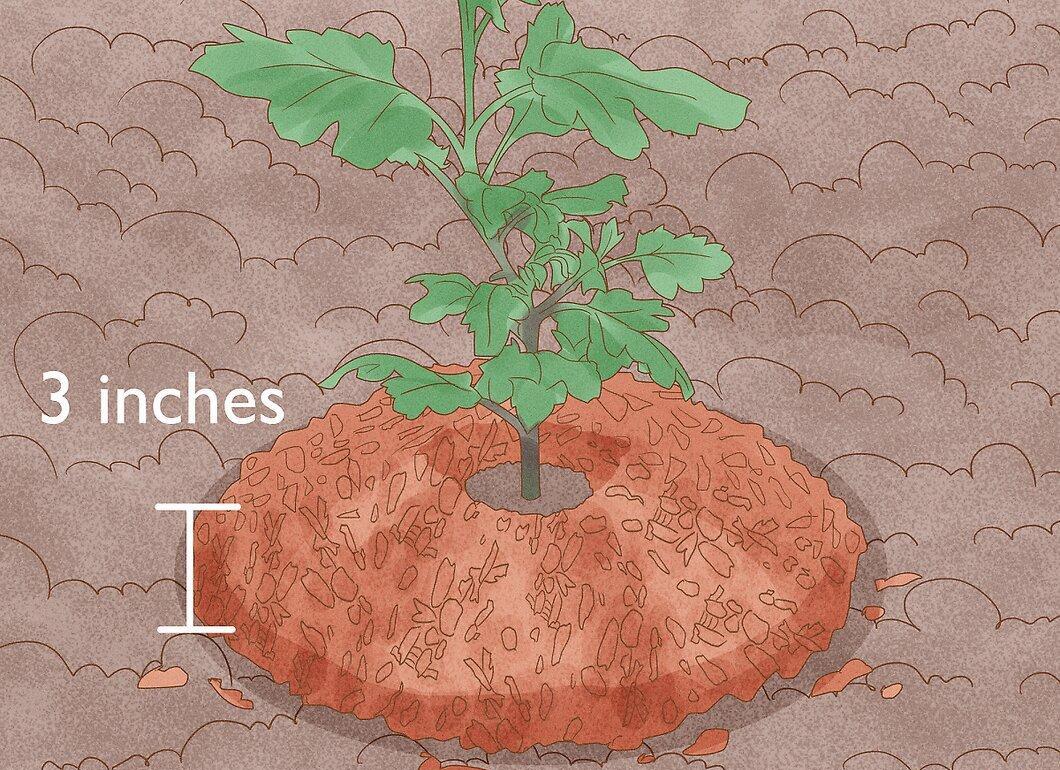
In milder climates, cover chrysanthemums with a layer of compost. Some varieties can survive outdoors even in winter if protected with a layer of compost and well-rotted manure.
- A few weeks before the cold sets in, add 7-8 cm (3 inches) of compost around the base of the plant.
Step 2. Move Chrysanthemums Indoors in Cold Climates.
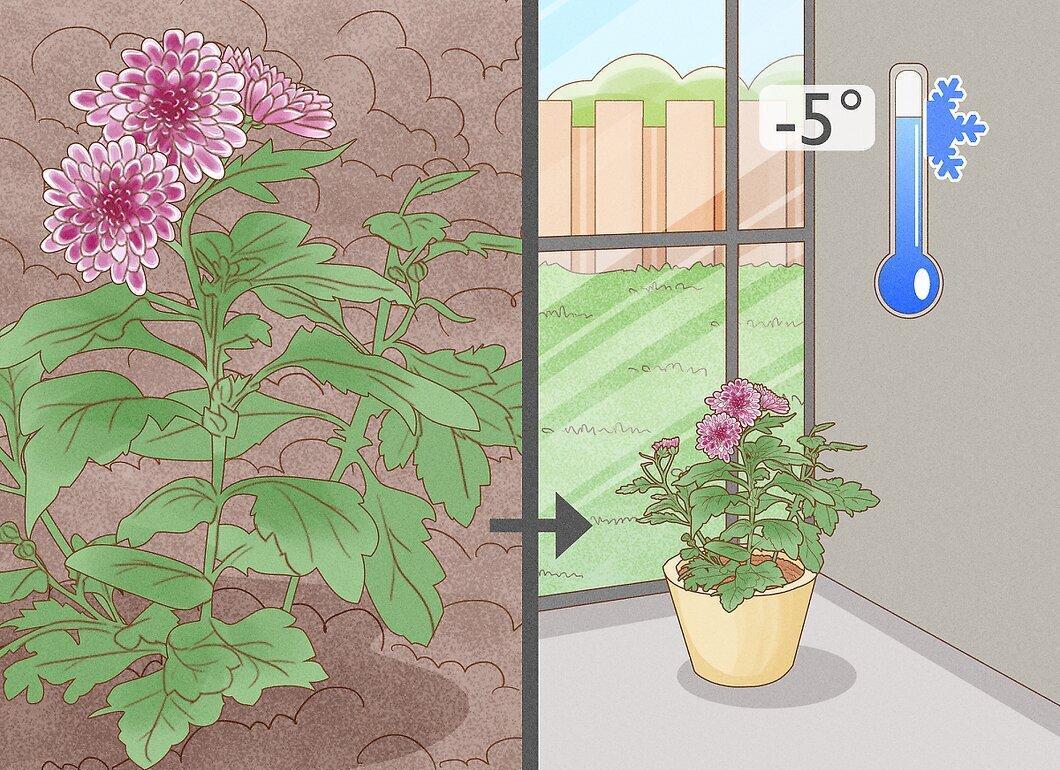
If you expect frosty winters with temperatures below -5°C (23°F), dig up the chrysanthemums and move them indoors.
- Remove all foliage and gently shake off the soil from the roots. Place them in a tray with dry compost.
- Store the plants in a frost-free environment, such as an insulated shed or a cool greenhouse near the home. The compost should remain slightly moist but not wet.


