
How to Remove Write Protection: A Step-by-Step Guide
In this article, you will discover simple steps that will help you disable write protection on files and removable drives, allowing you to modify their contents. First, you will need to log in as an administrator. However, keep in mind that some devices, such as CD-Rs, have built-in write protection that cannot be disabled.
Key Steps
Step 1. Check for a Write Protection Switch on the Drive
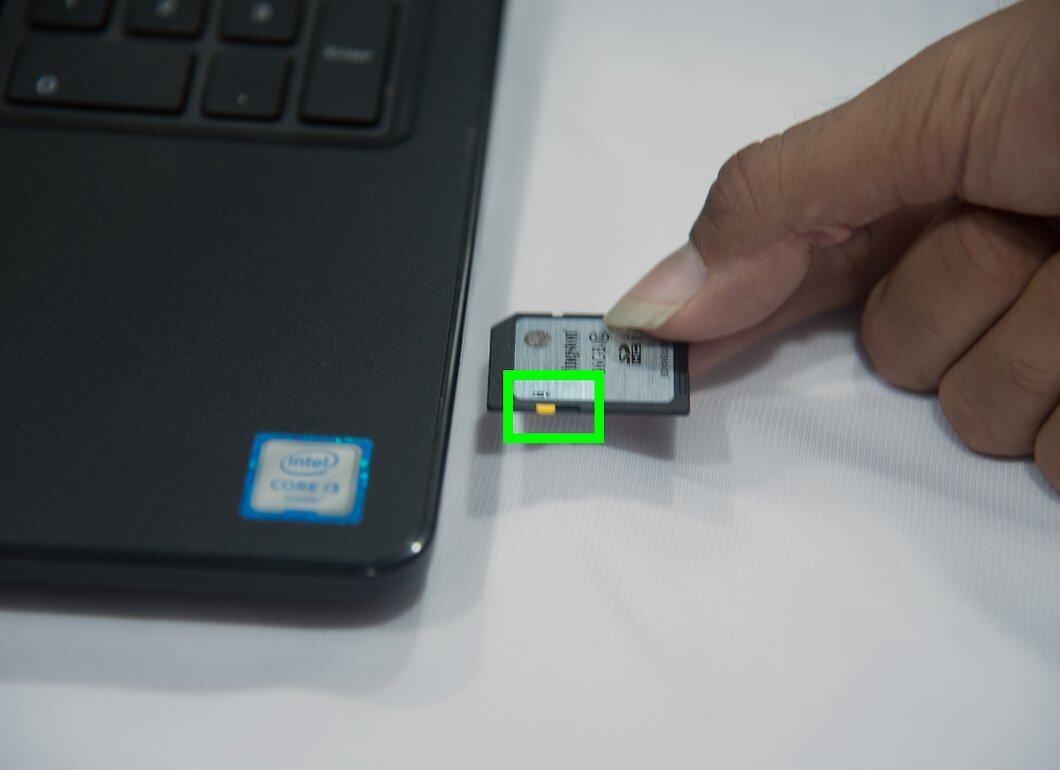
First, check if your removable drive has a write protection switch. Many SD cards and USB drives have small switches that prevent new data from being written. If such a switch exists, ensure it is set to allow writing.
- Remember, you cannot disable write protection on an SD card until you change the position of the switch.
- If the switch is damaged, it needs to be repaired.
Step 2. Check the File System
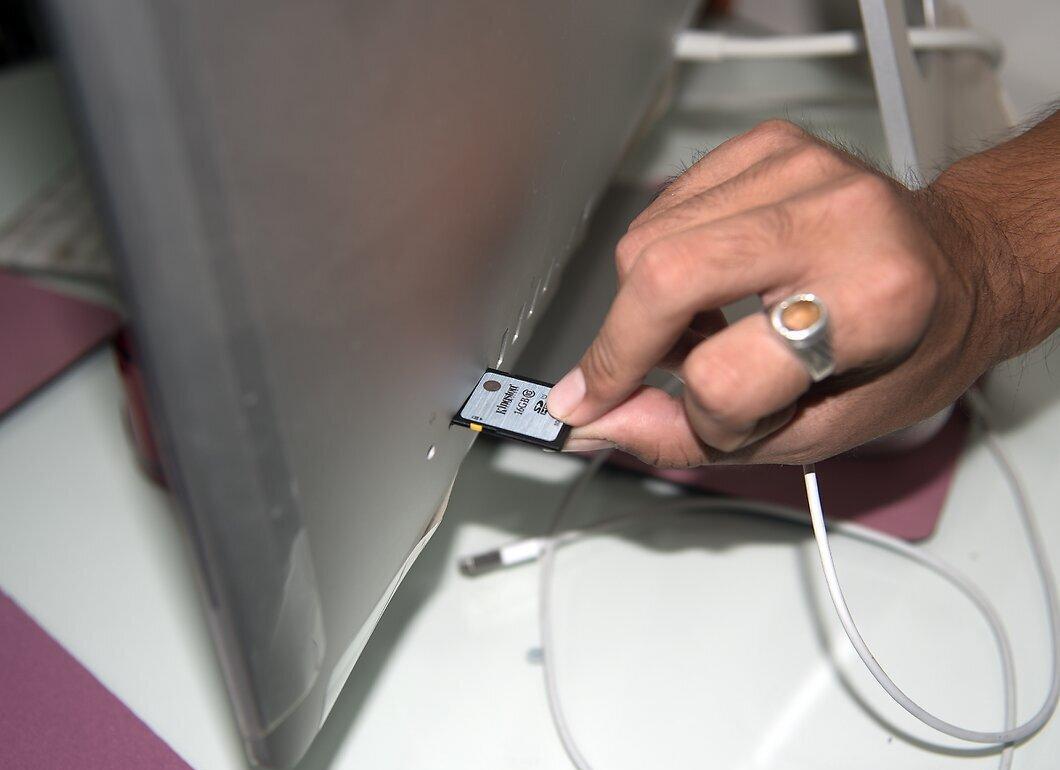
Make sure the file system you are using is correct. Windows and Mac OS X use different default file systems (Windows uses NTFS, which is not supported by Mac OS X). Most USB drives, external hard drives, and SD cards are usually formatted for Windows. If you tried using the drive on a Mac and it didn’t work, reformat it:
- First, back up the data on the drive to a Windows computer, as formatting will erase all contents.
- Connect the drive to the Mac.
- Choose “Mac OS Extended (Journaled)” as the file system.
Step 3. Check Free Space on the Drive
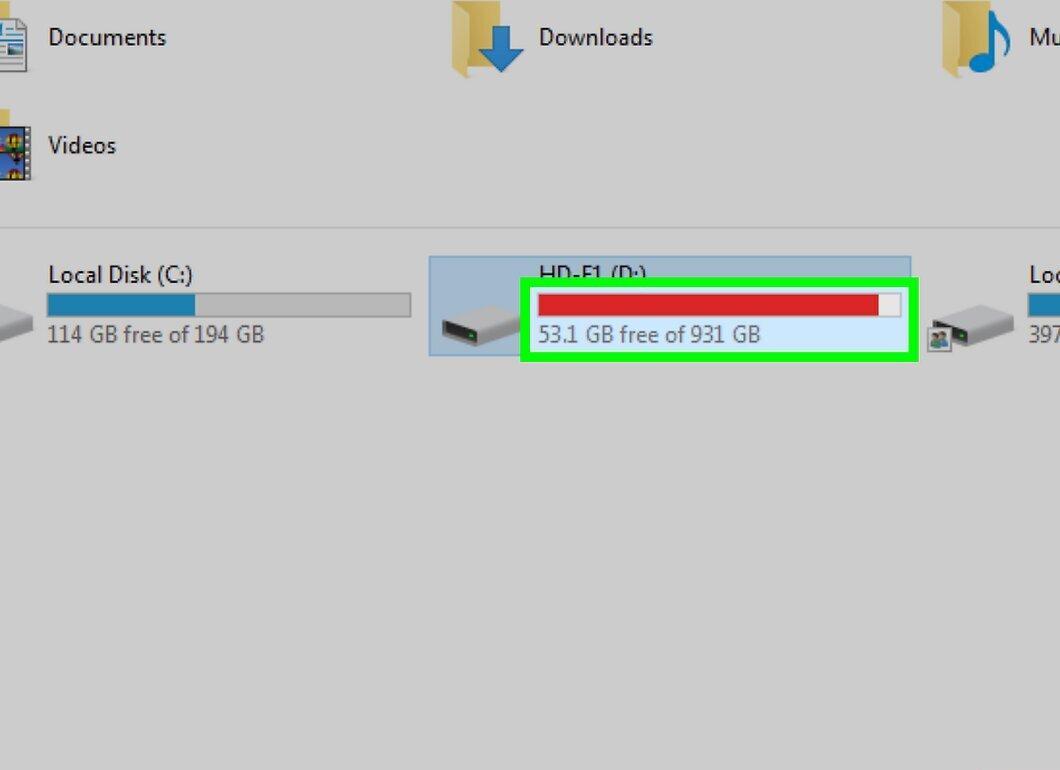
Ensure there is enough free space on your drive. Sometimes, a write protection message appears due to lack of free space. To check, open File Explorer (Windows) or Finder (Mac OS X) and see how much space is available.
Step 4. Run an Antivirus Scan
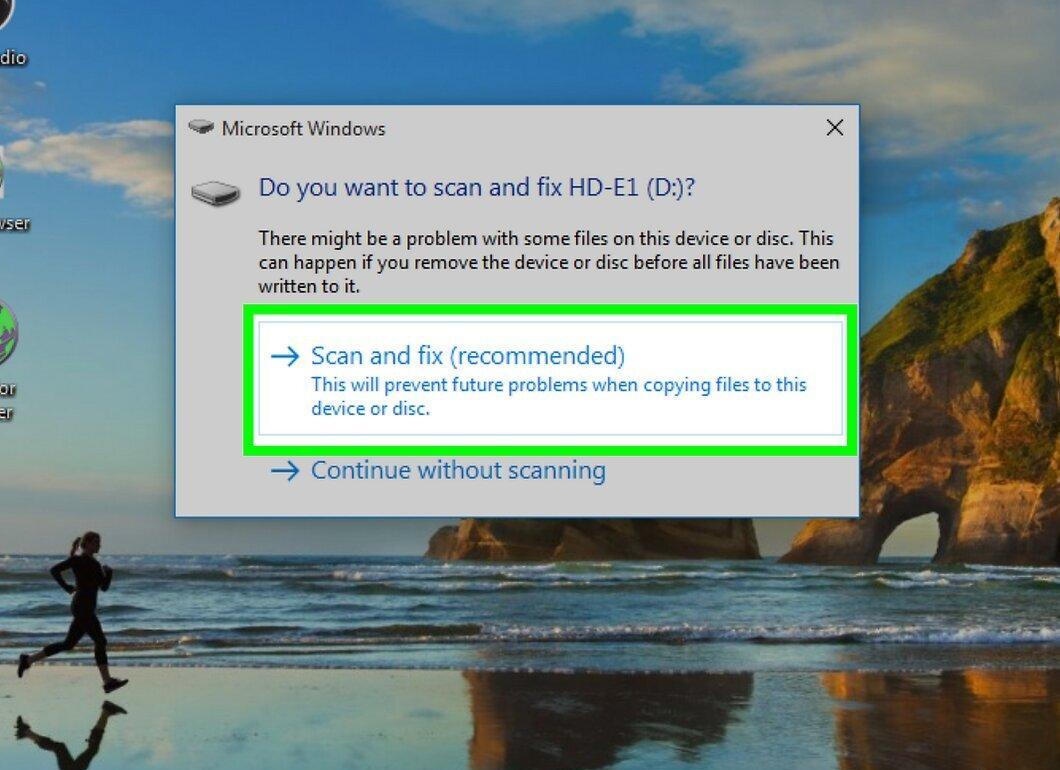
Scan your computer for viruses. Malicious software can alter the system’s behavior regarding removable drives and impose write protection on them. Check your computer for malware.
Step 5. Format the USB Drive
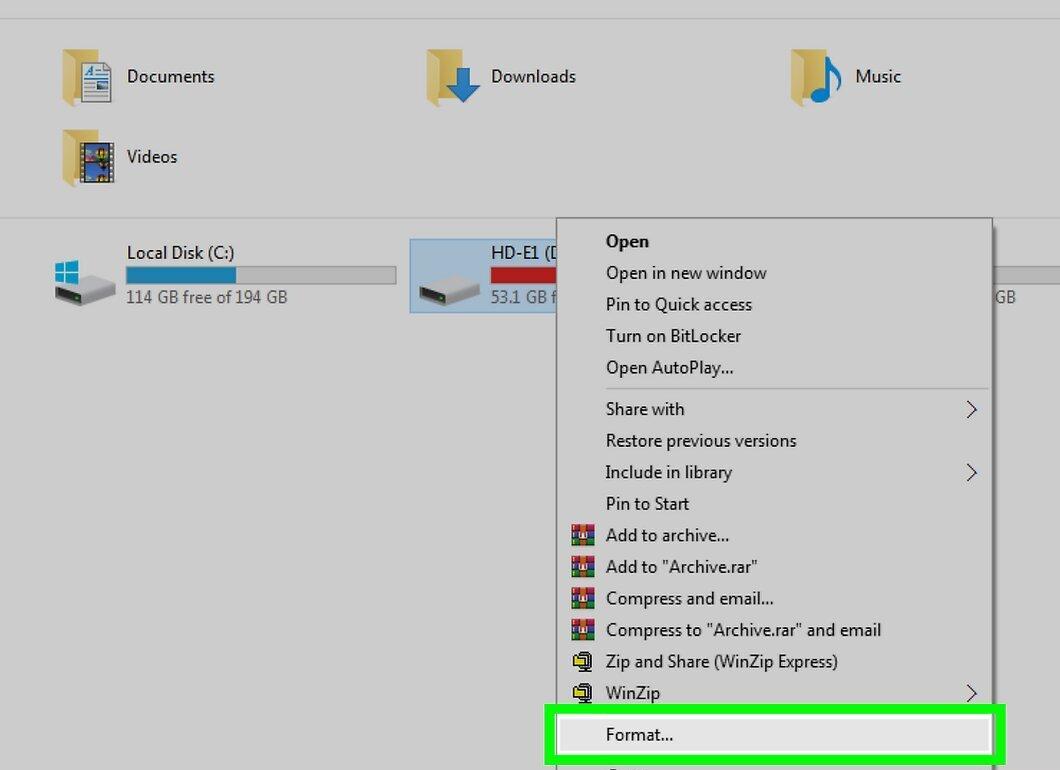
If none of the previous steps worked, format the USB drive or CD. Keep in mind that formatting will erase all data, so use this step only as a last resort. Choosing formatting options will also change the file system.
How to Remove Write Protection from a File in Windows
Step 1. Open the Start Menu
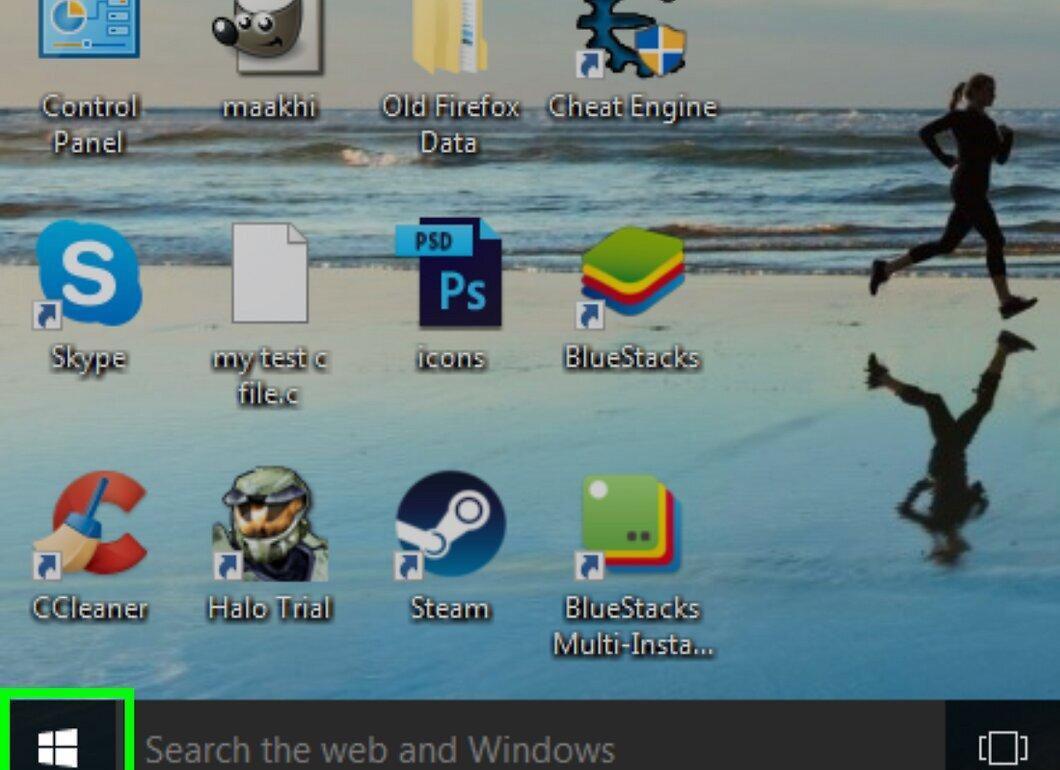
Click on the Windows logo in the bottom left corner of your screen to open the Start menu.
Step 2. Open File Explorer
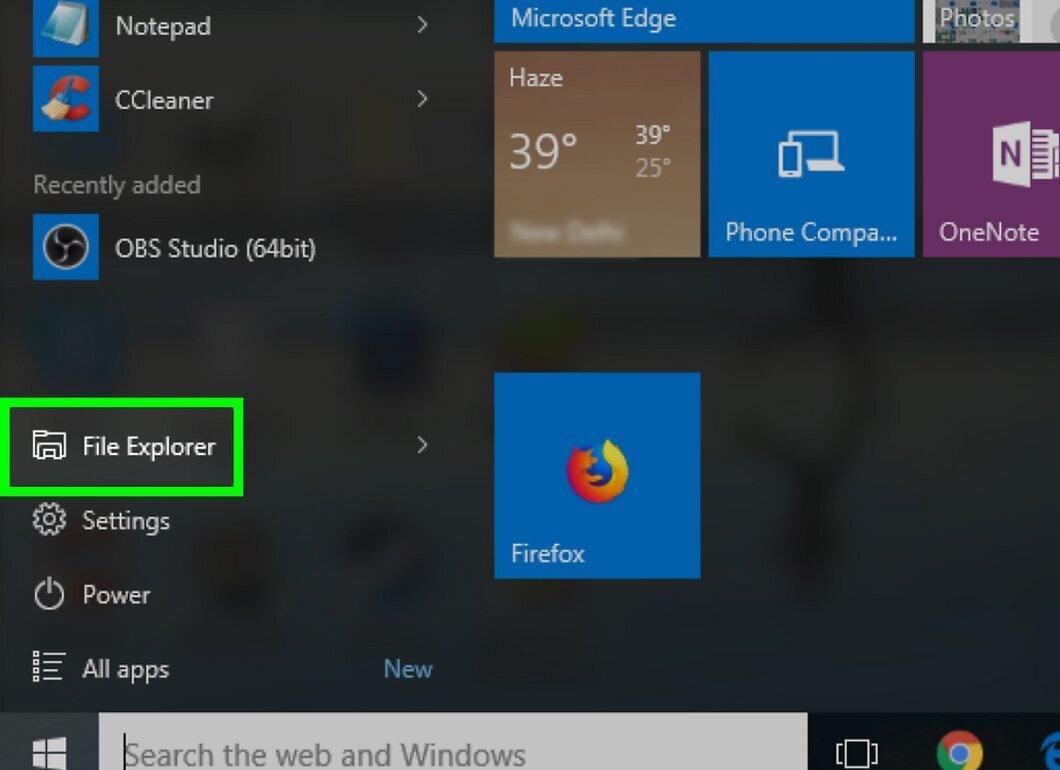
Click the folder icon at the bottom of the Start menu to open File Explorer.
Step 3. Navigate to the Folder with the File
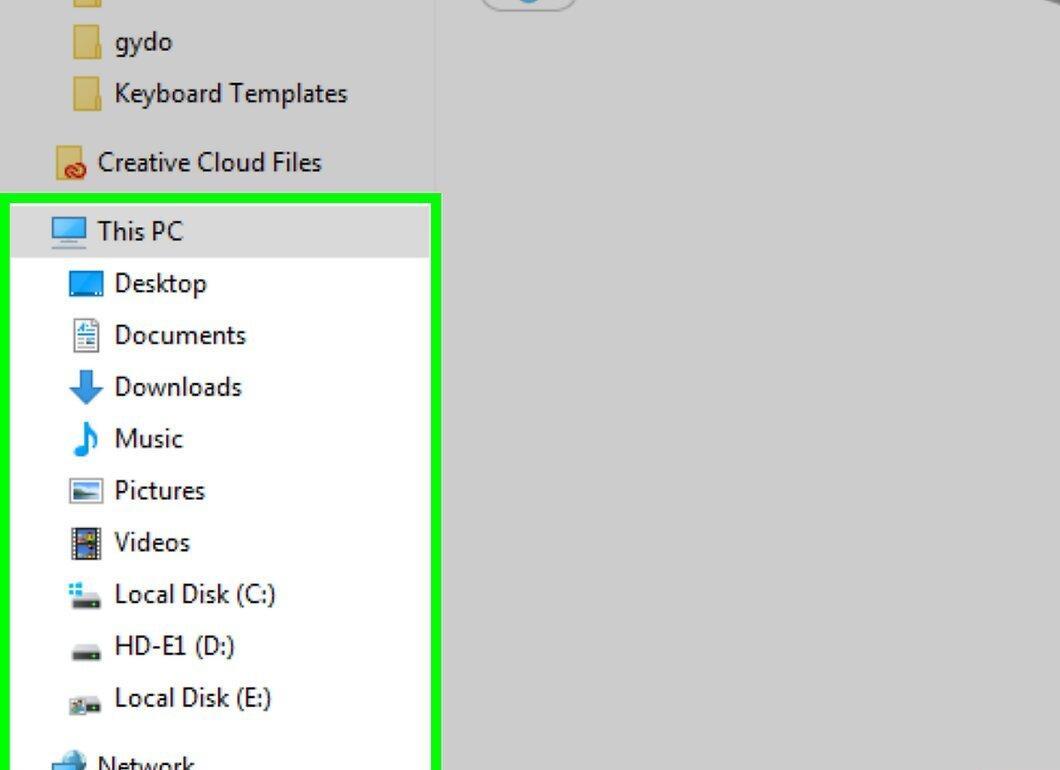
Navigate to the appropriate folder by clicking on it in the left pane of File Explorer.
- You may need to open several subfolders to find the file.
Step 4. Select the File
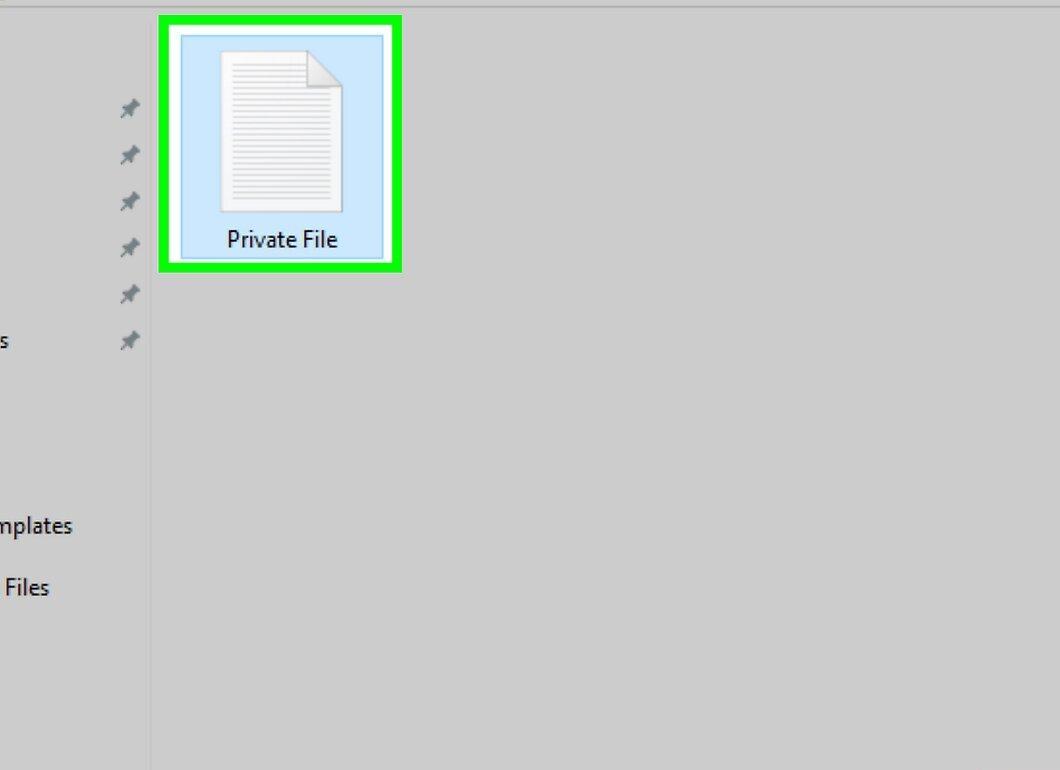
Click on the file you want to remove write protection from.
Step 5. Open the Home Tab
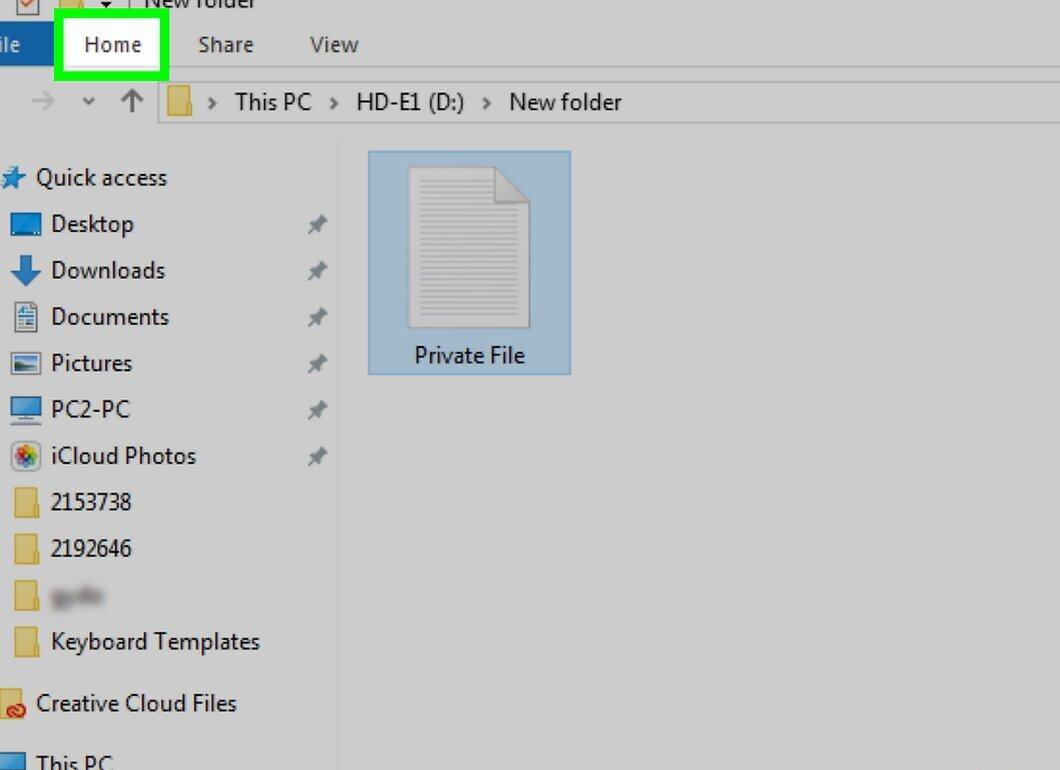
At the top of the window, select the Home tab. You will see the toolbar.
Step 6. Click on Properties
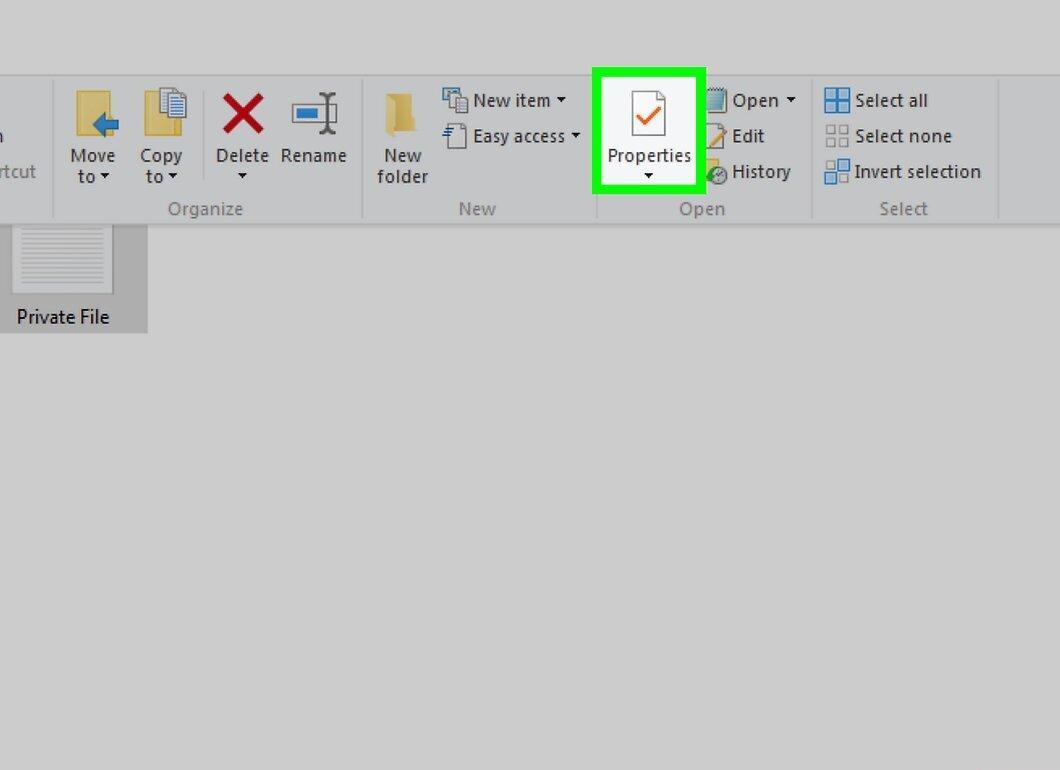
Click on the Properties icon, which looks like a red checkmark. A window with options will open.
Step 7. Uncheck Read-Only
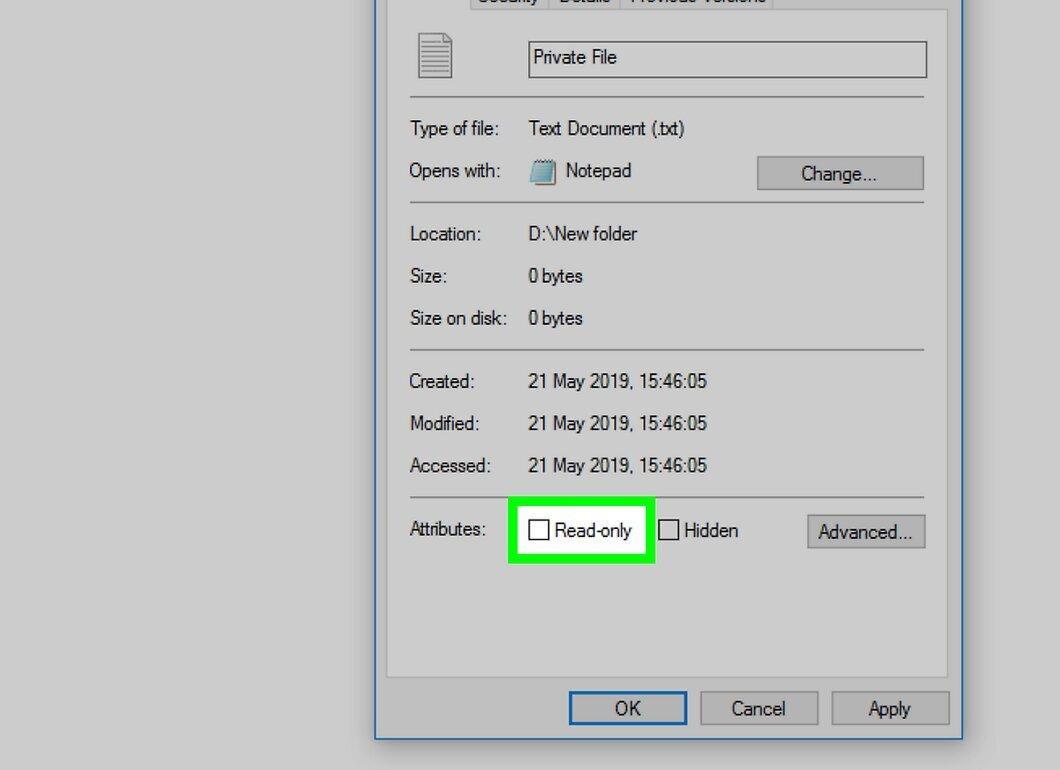
In the Properties window, uncheck the box next to “Read-only.”
- If you do not see this option, go to the “General” tab in the Properties window.
Step 8. Click Apply
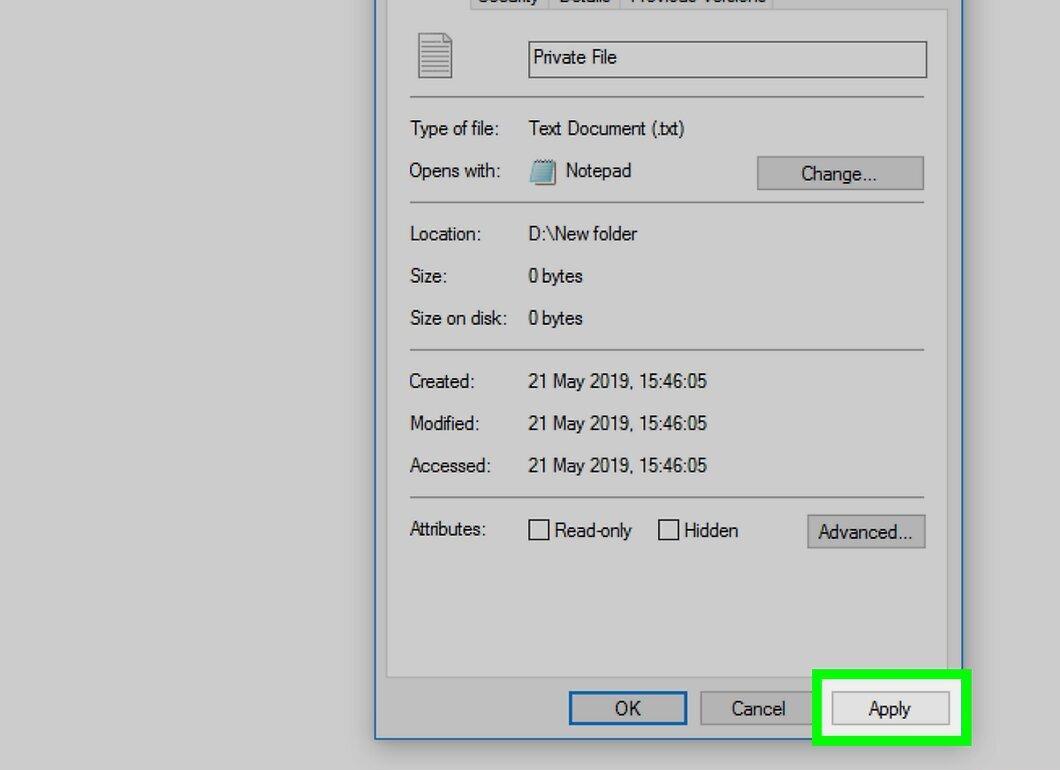
Click “Apply” and then “OK.” The changes will be saved, and the window will close. The file is now editable.
How to Remove Write Protection from a File in Mac OS X
Step 1. Open Finder
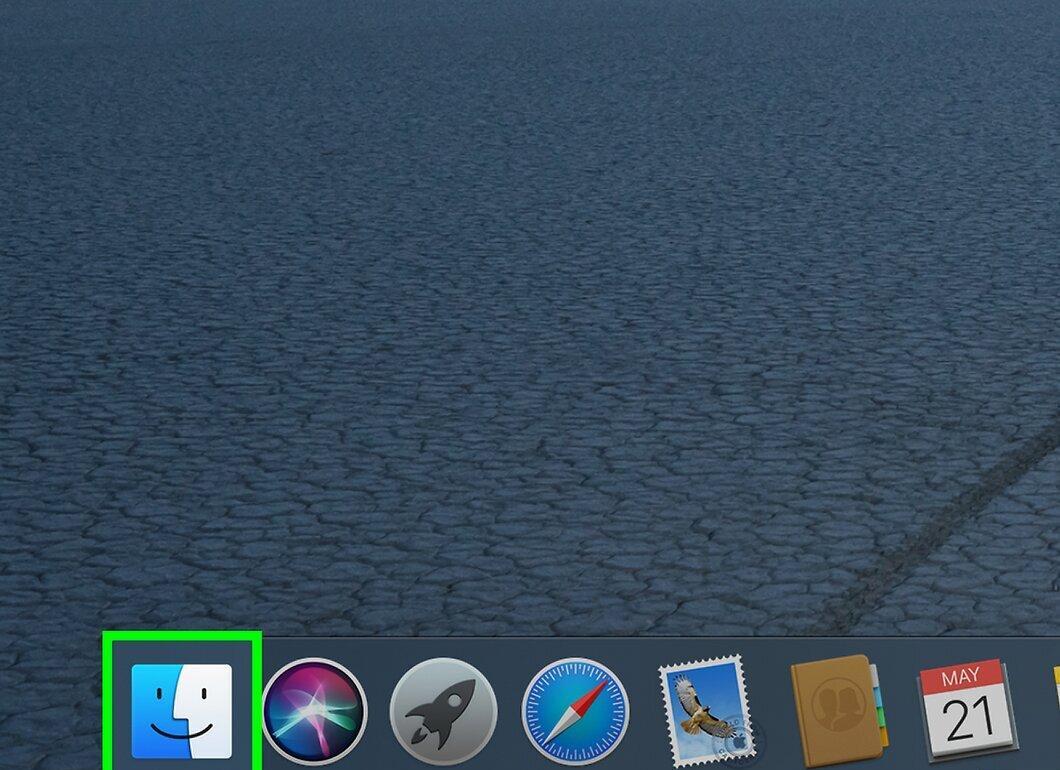
Launch Finder by clicking on the blue face icon in the dock.
Step 2. Locate the Folder with the File
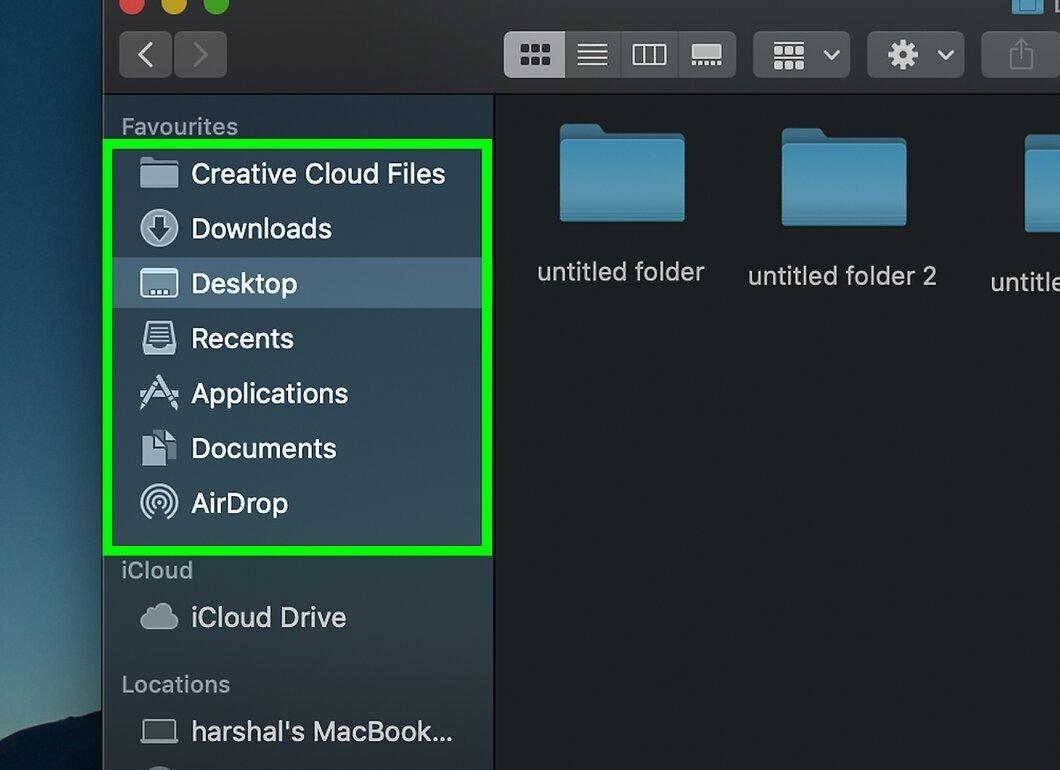
Navigate to the folder where your file is stored by clicking on it in the left pane of Finder.
- You may need to open additional subfolders.
Step 3. Select the File
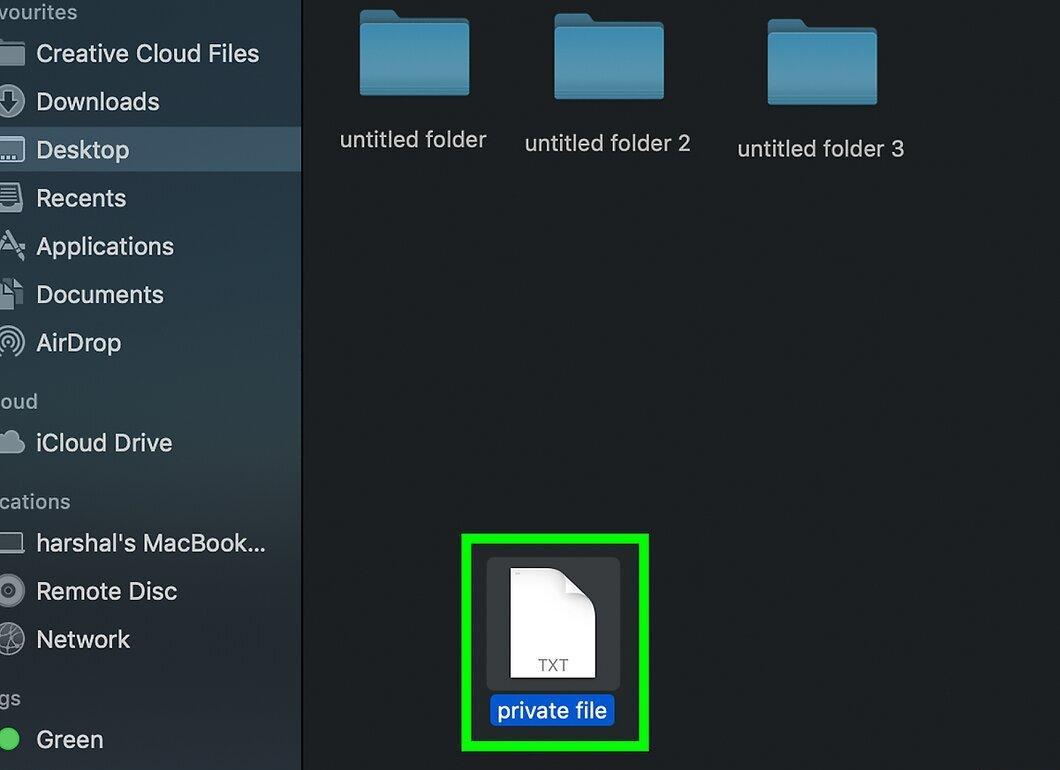
Click on the file from which you need to remove write protection.
Step 4. Go to the File Menu
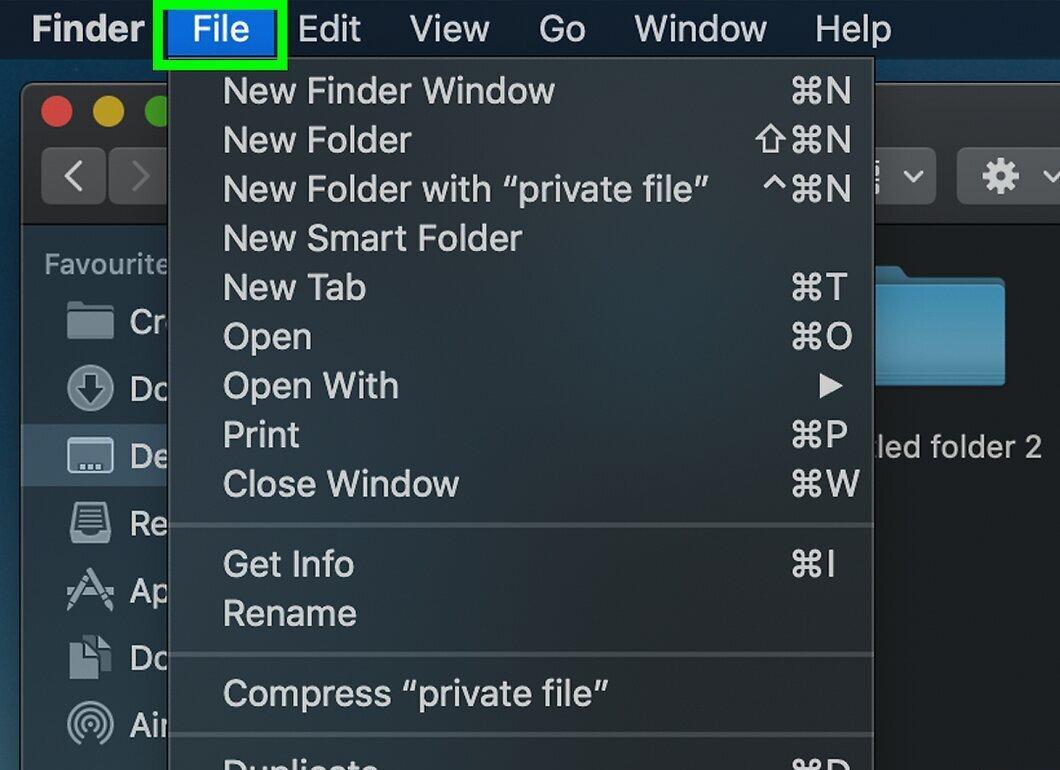
Select the File menu at the top of the screen.
Step 5. Select Get Info
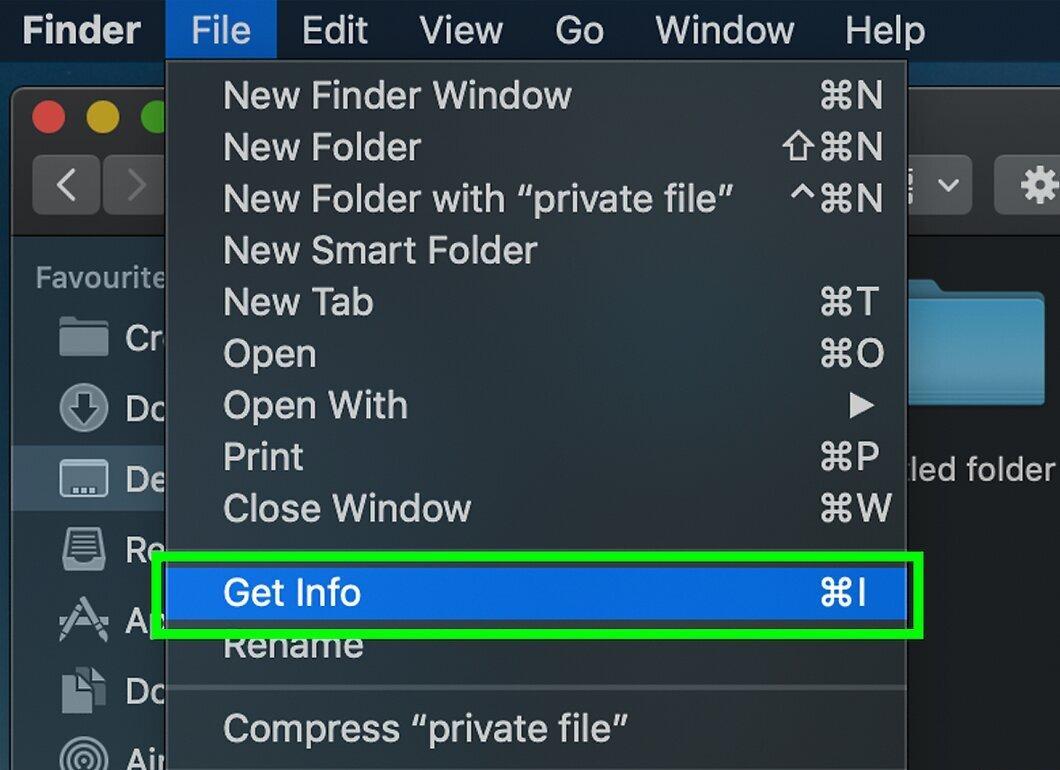
Click on “Get Info” from the dropdown menu.
Step 6. Unlock File Access
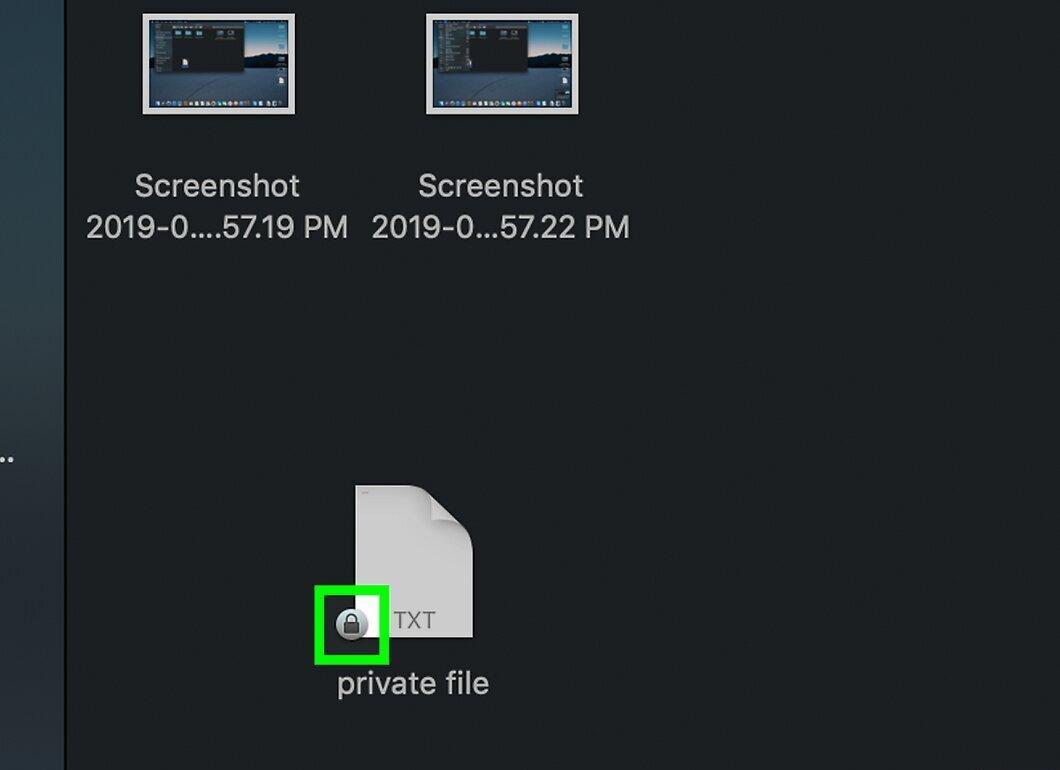
If you see a lock icon in the bottom right corner of the window, click on it and enter your administrator password.
Step 7. Go to Sharing & Permissions
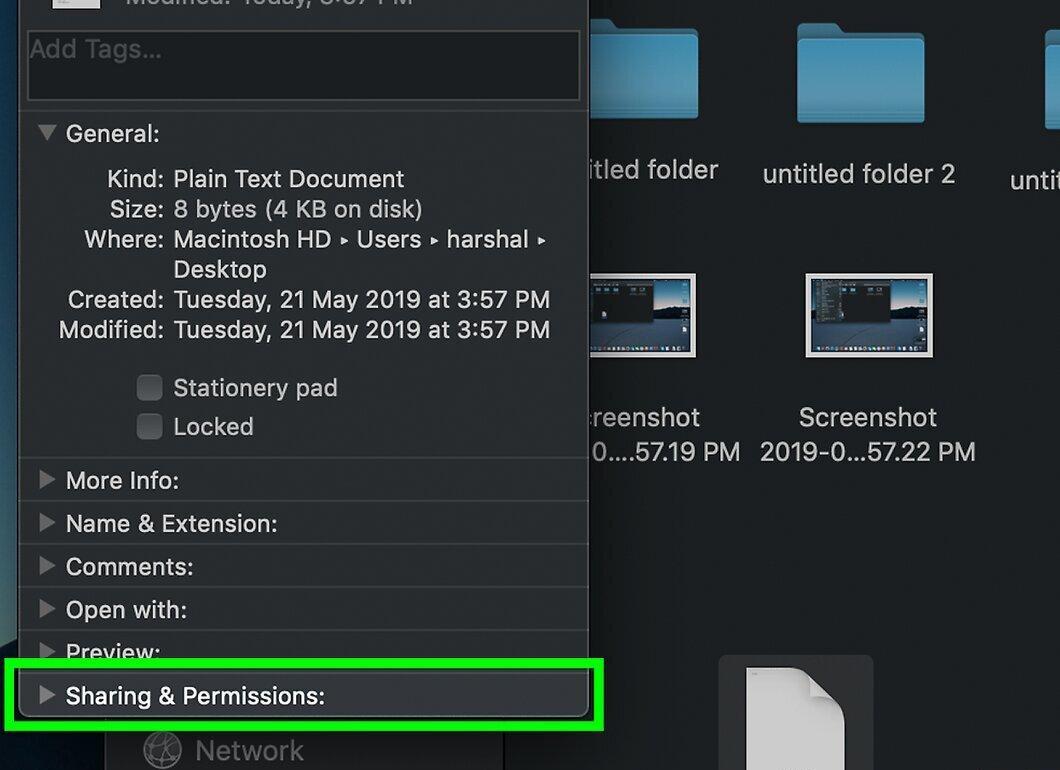
Click on the “Sharing & Permissions” option at the bottom of the window.
- If you already see usernames and permissions such as “Read only,” skip this step.
Step 8. Find Your Username
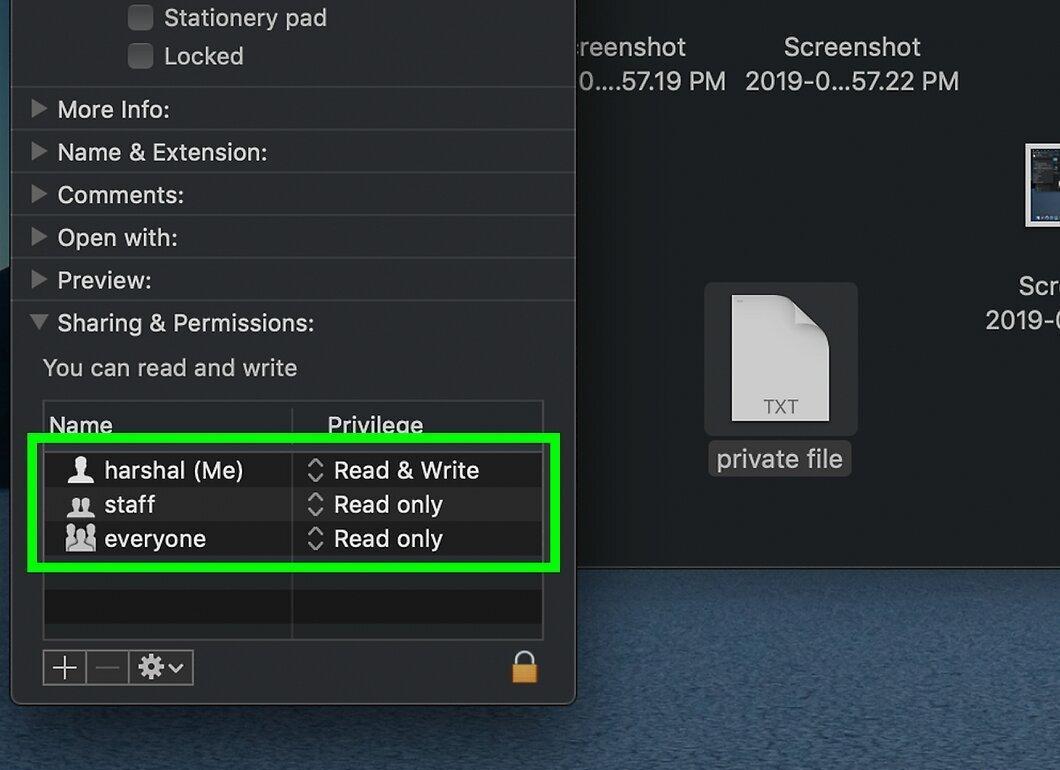
In the Sharing & Permissions section, locate your username.
Step 9. Change Access Rights
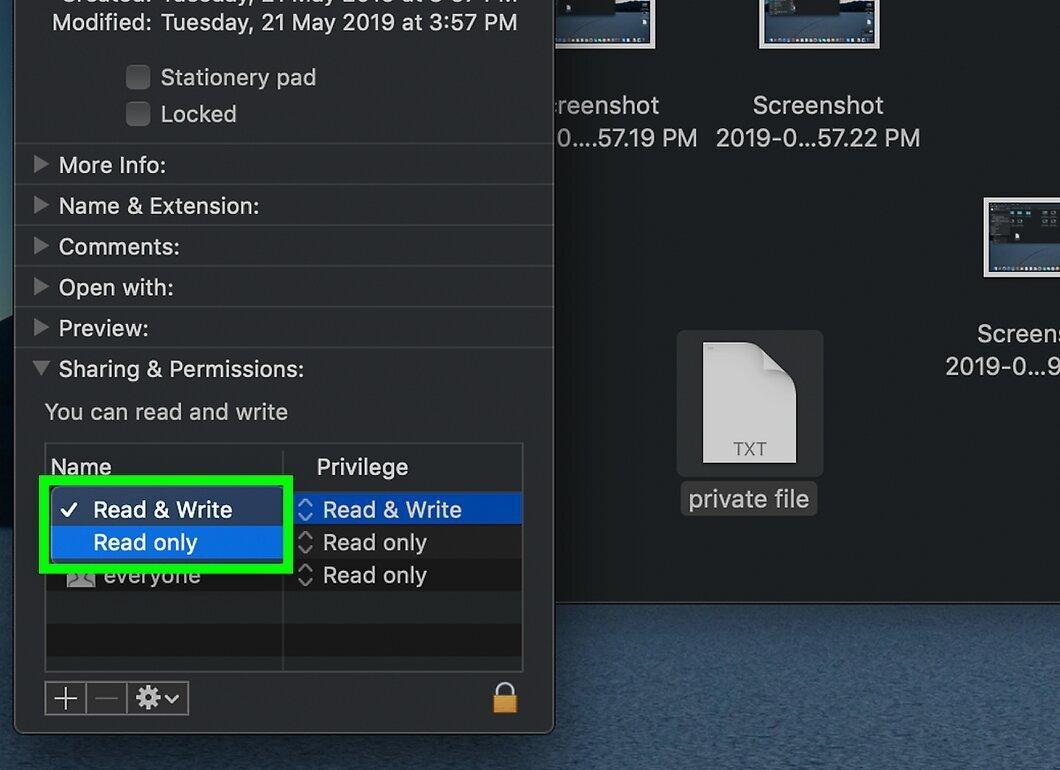
Click on the “Read only” option next to your name to change it to “Read & Write.” Close the Info window — the file is now available for editing.
How to Disable Write Protection on a Removable Drive in Windows
Step 1. Connect the Drive to Your Computer
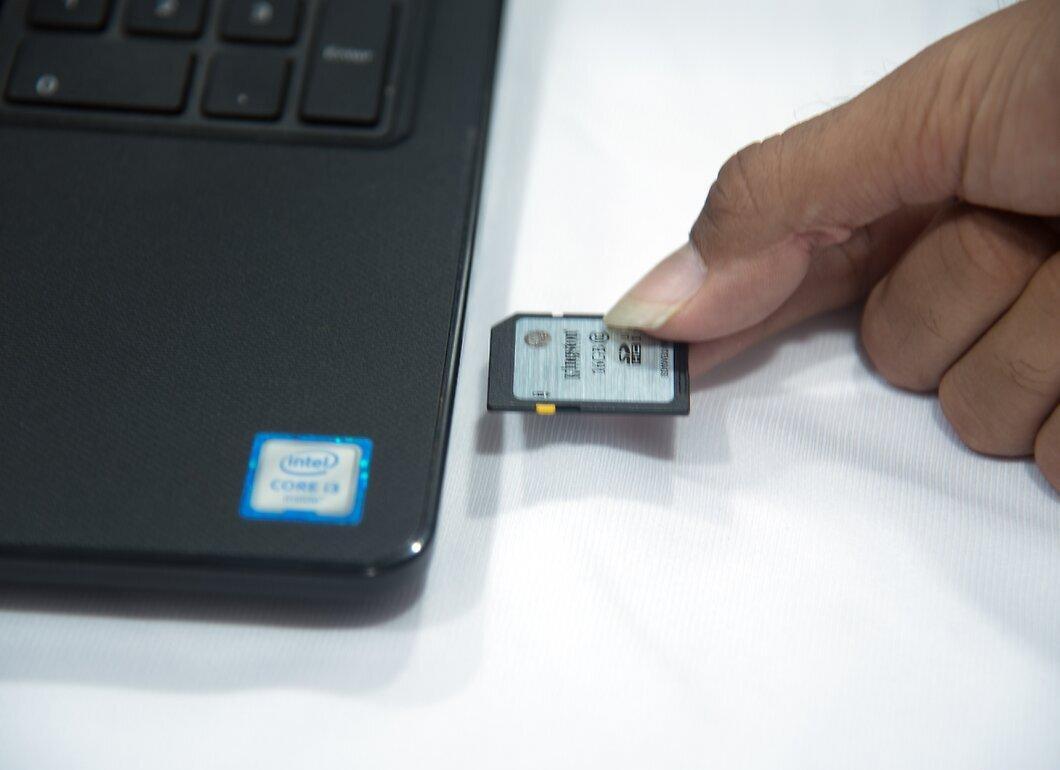
Step 2. Open the Start Menu
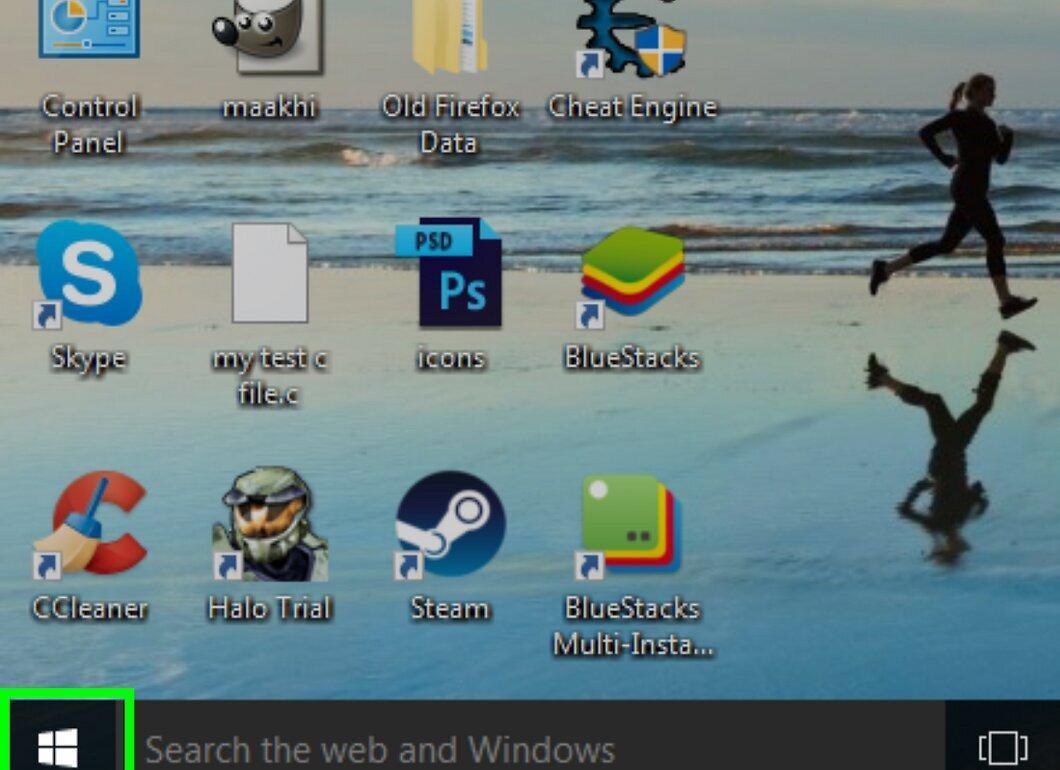
Click on the Windows logo in the bottom left corner of the screen.
Step 3. Type regedit in the Search Bar
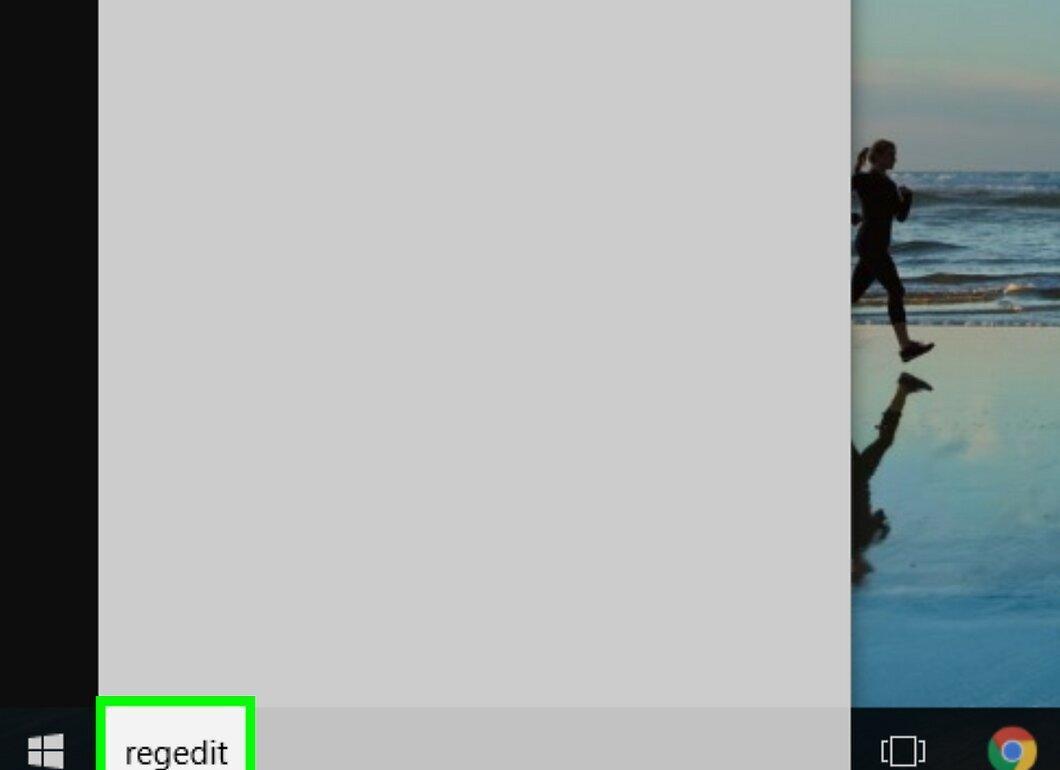
Type “regedit” in the search bar of the Start menu. The registry editor will open.
Step 4. Click on regedit
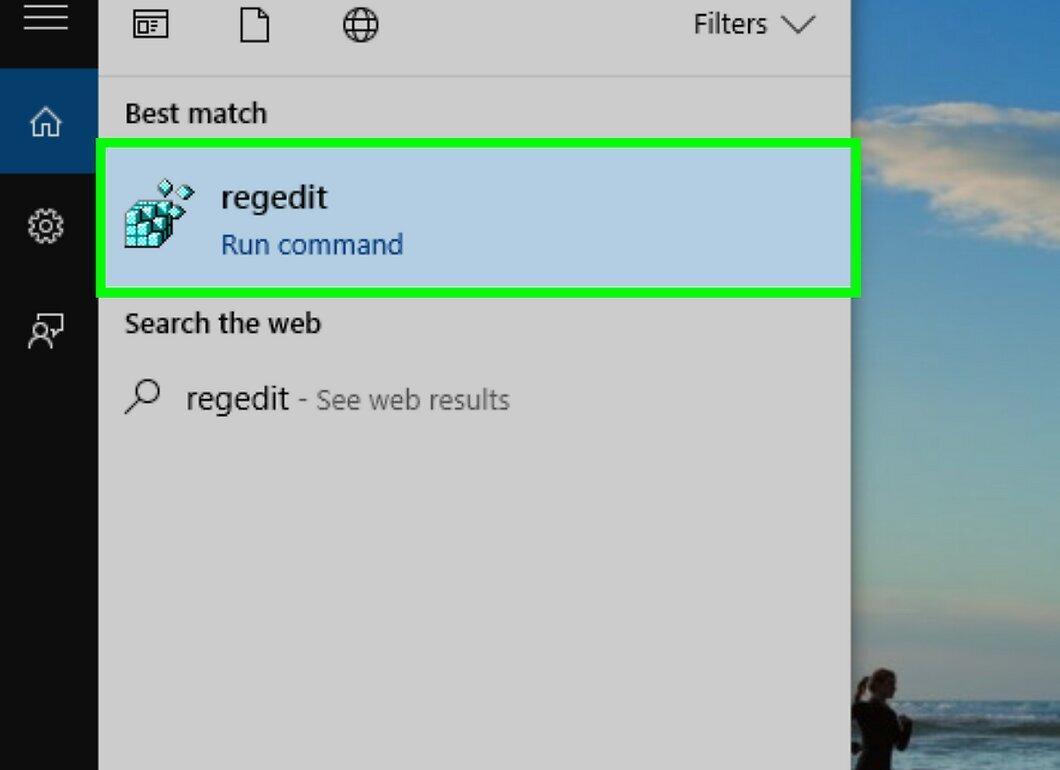
Click on the regedit icon to open the registry editor window.
Step 5. Find the HKEY_LOCAL_MACHINE Folder
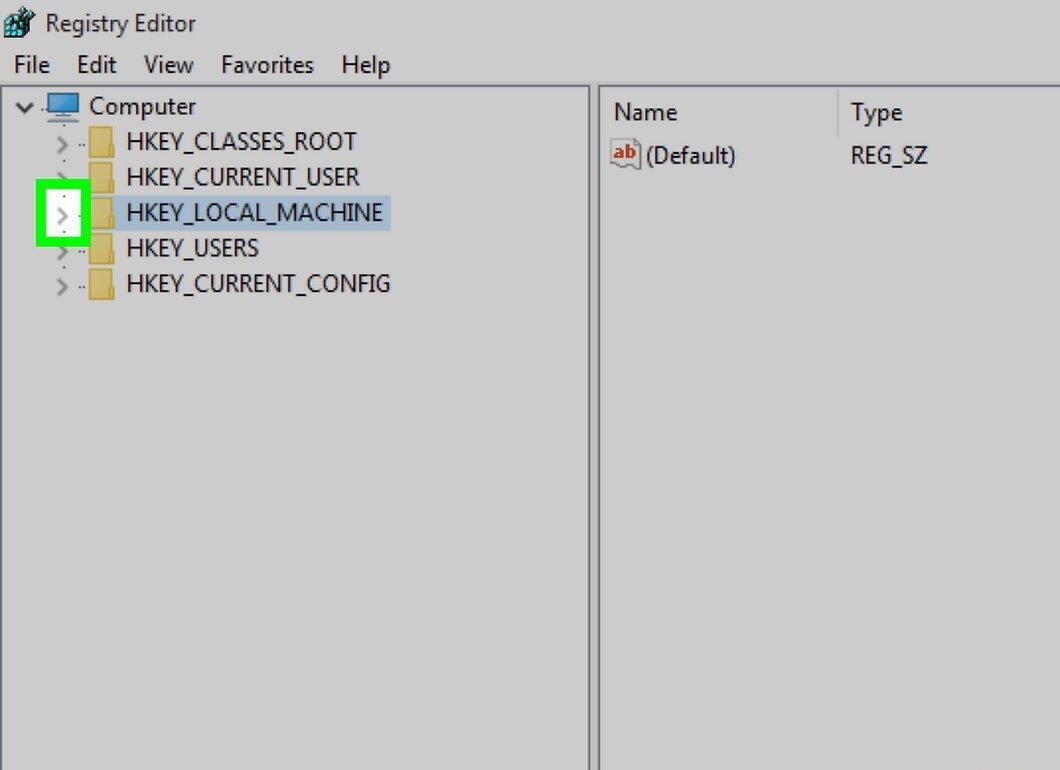
Expand the HKEY_LOCAL_MACHINE folder by clicking the arrow to the left of it.
Step 6. Open the SYSTEM Folder
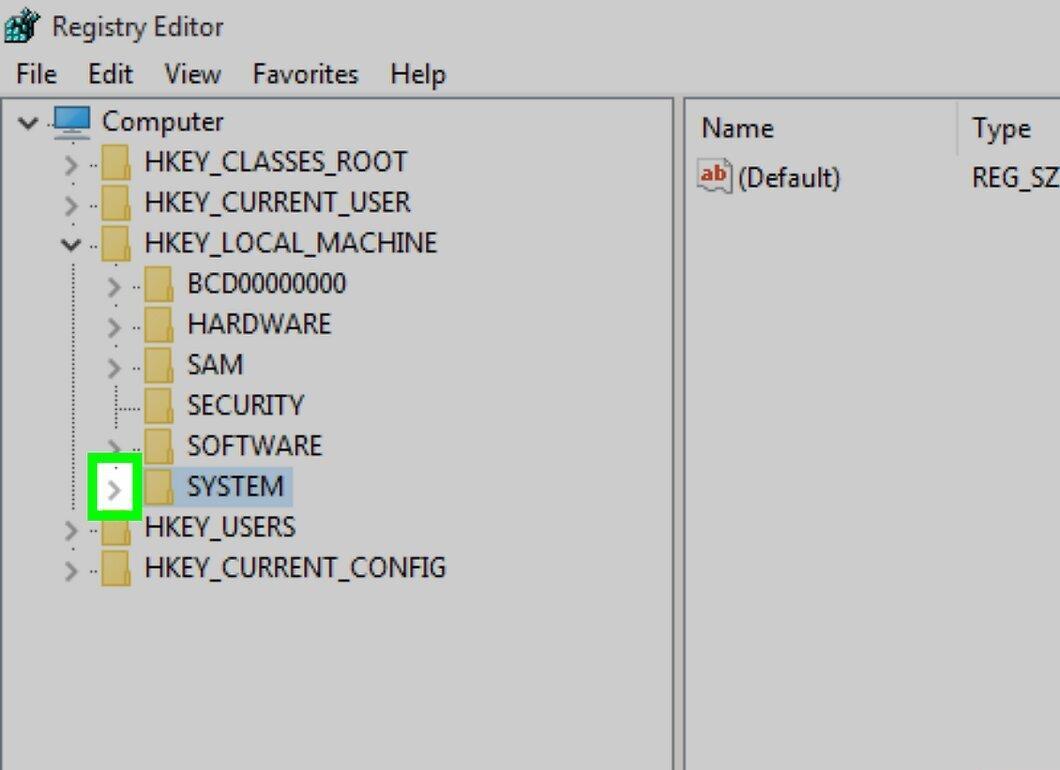
Step 7. Go to the CurrentControlSet Folder
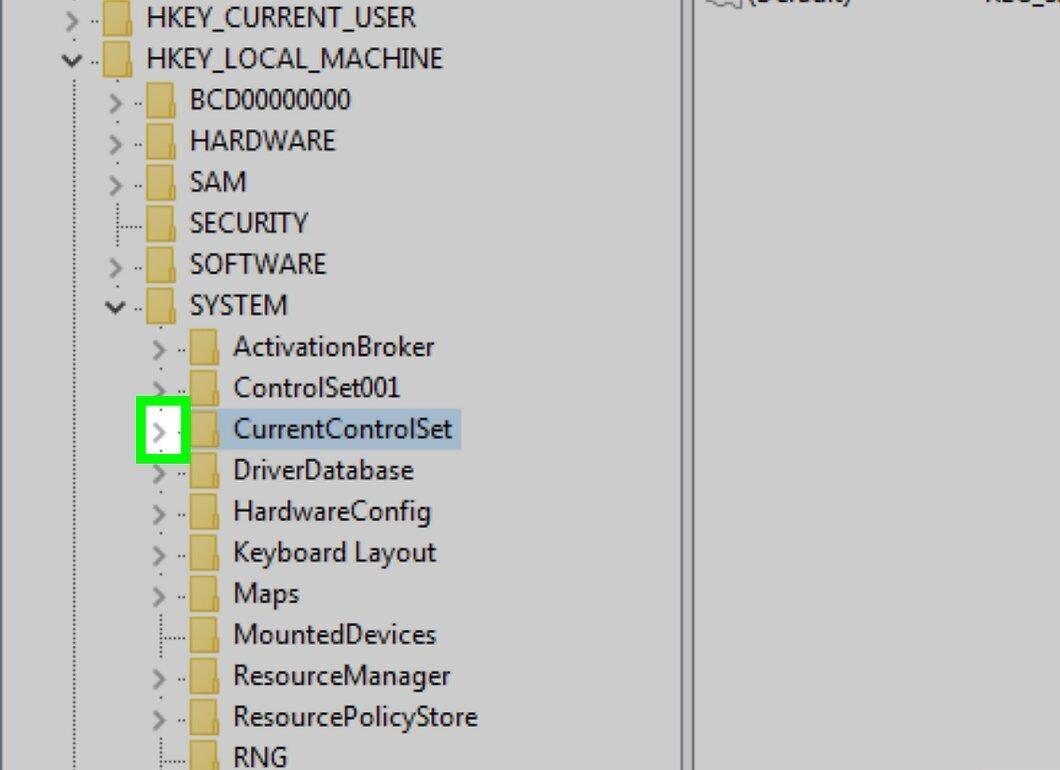
Step 8. Select the Control Folder
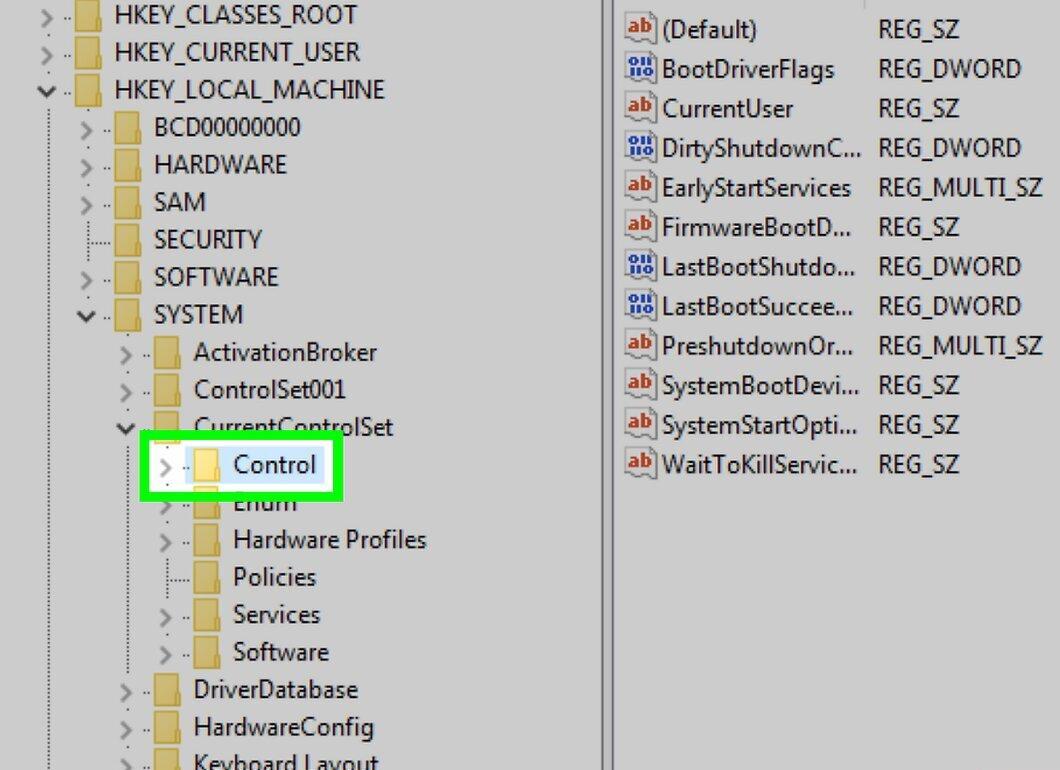
Click on the Control folder.
Step 9. Click Edit
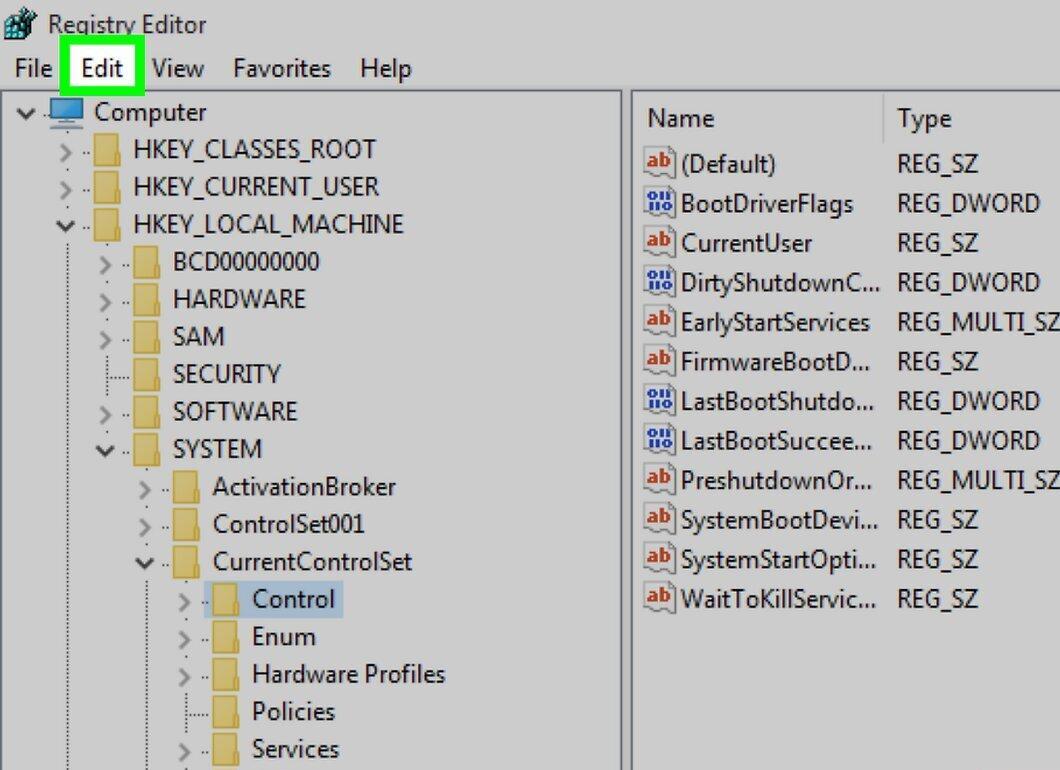
Select the Edit menu at the top of the window.
Step 10. Create a New Key
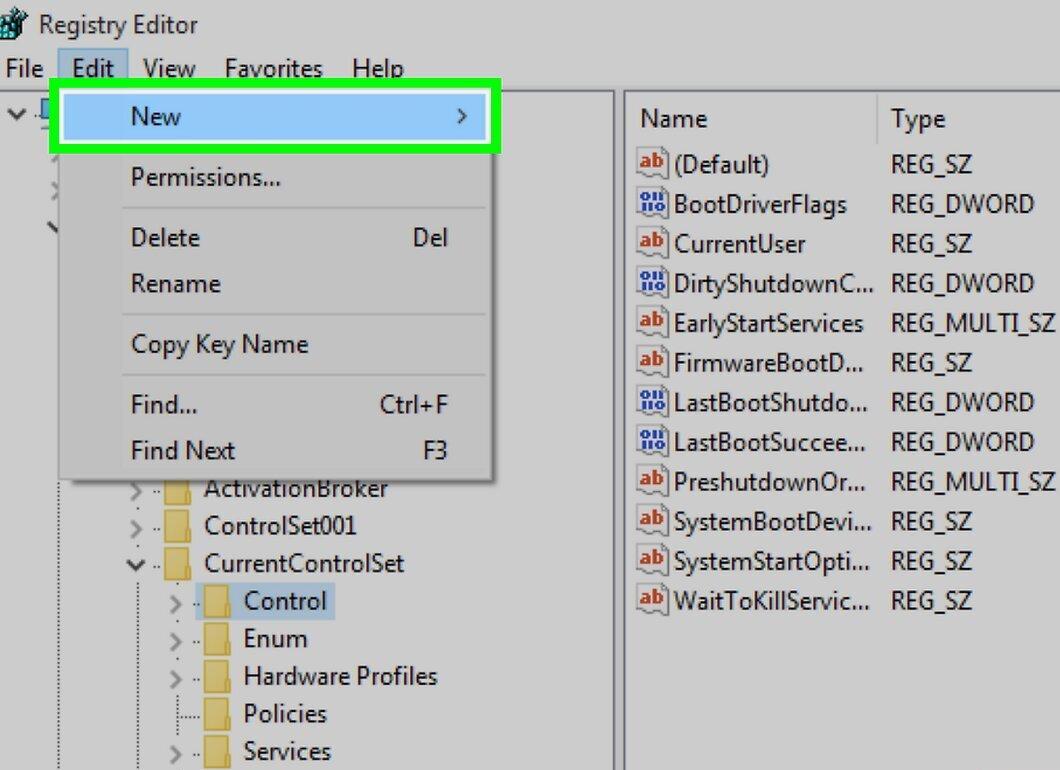
Click on “New.”
Step 11. Select Key
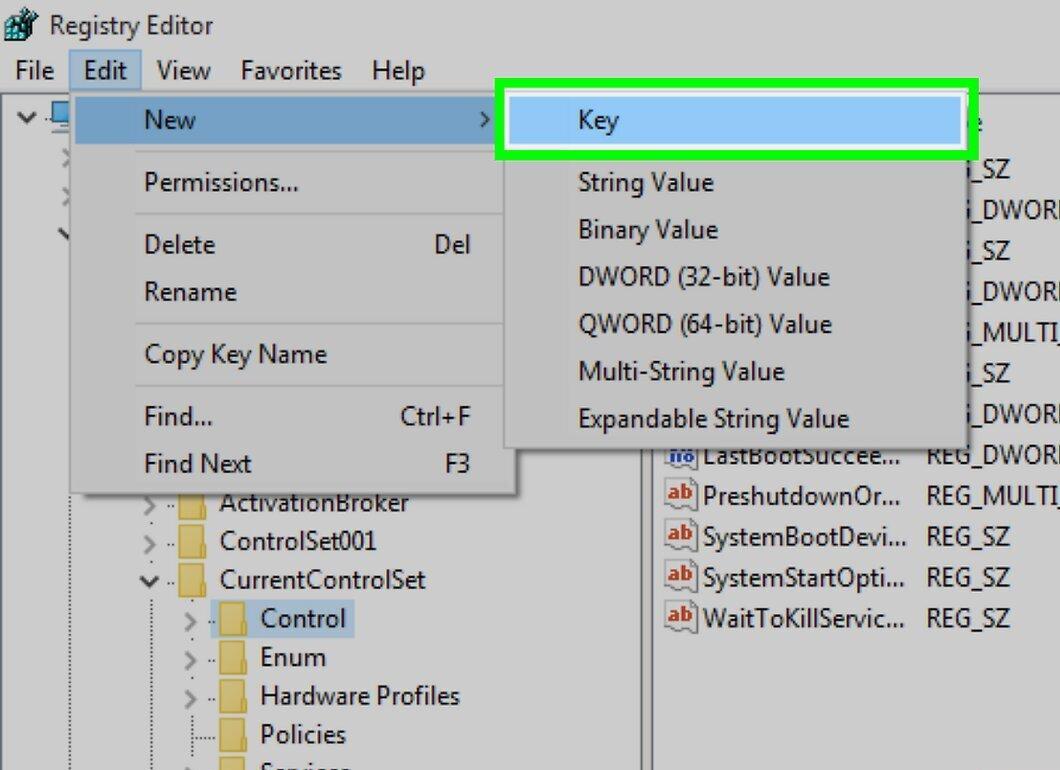
Click on “Key” to create a new key in the Control folder.
Step 12. Rename the New Key

Enter the name “StorageDevicePolicies” and press Enter.
Step 13. Create a New DWORD Value

Inside the created key, click “Edit,” then “New,” and choose “DWORD (32-bit) Value.” Name it “WriteProtect” and press Enter.
Step 14. Open the DWORD Value

Double-click the DWORD value. A new window will open.
Step 15. Enter the Value “0”

In the “Value” field, replace the current value with “0” (without quotes).
Step 16. Click OK

Click “OK” to confirm the changes and disable write protection on the drive.
- If the issue persists, contact a service center for diagnostics on the drive.
How to Disable Write Protection on a Removable Drive in Mac OS X
Step 1. Connect the Drive to Your Mac

- If you have a newer Mac, purchase an adapter to connect to the USB-C port.
Step 2. Open the Go Menu

At the top of the screen, select the Go menu.
- If the menu is not visible, click on the desktop or the face icon in the dock.
Step 3. Select Utilities

Click on “Utilities” at the bottom of the dropdown menu.
Step 4. Launch Disk Utility

Double-click the Disk Utility icon to open a new window.
Step 5. Select the Drive

Click on the name of the removable drive in the upper left corner of the window.
Step 6. Click First Aid

Select the First Aid tab to run a check.
Step 7. Wait for the Scan to Complete

Wait for the system to finish checking. If an error was causing the write protection, it will be resolved, and the drive will become usable.
- If the issue is due to hardware malfunctions, contact a service center for data recovery.


