
Install the Send Later 3 extension for Thunderbird version 3.1 and above. This handy add-on allows you to schedule emails to be sent at a specific time. All your emails will be saved in the Drafts folder, and as soon as the designated time arrives, they will be sent automatically.
Part 1
Step 1. Downloading the Thunderbird Extension 1-2
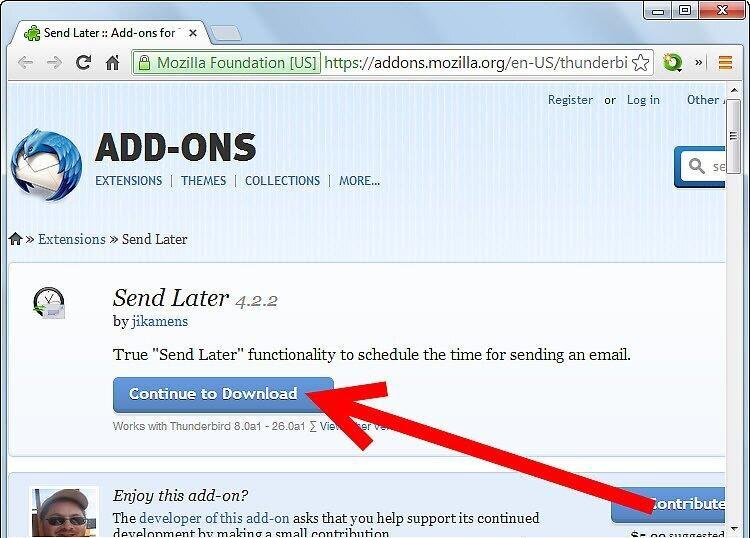
Download the extension for Thunderbird 1-2 or version 3.1 and above. Save the file to your hard drive, then install it using the Thunderbird add-ons manager.
Step 2. How to Install:
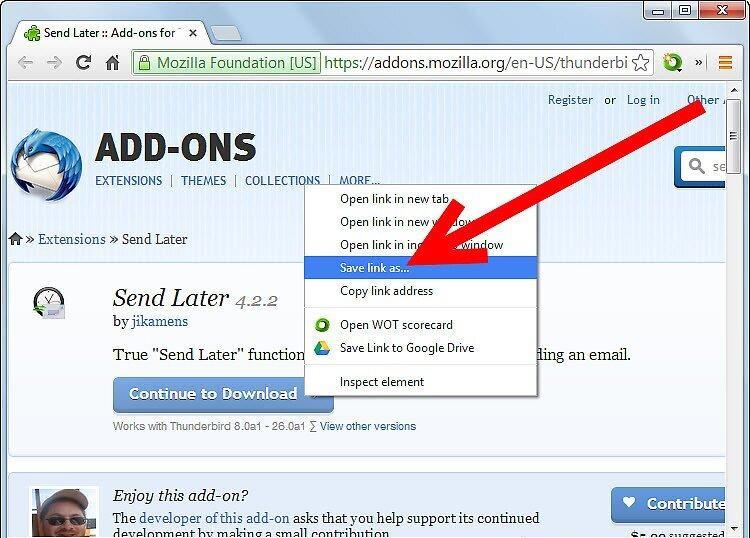
- Right-click the link and select "Save Link As" or "Save Target As."
- Choose a location on your hard drive to save the file.
- Open Thunderbird and go to the "Tools" menu - "Add-ons" or "Extensions."
- Click "Install" and select the downloaded XPI file.
- Restart Thunderbird.
- Wait for the installation to complete.
Step 3. How to Use:
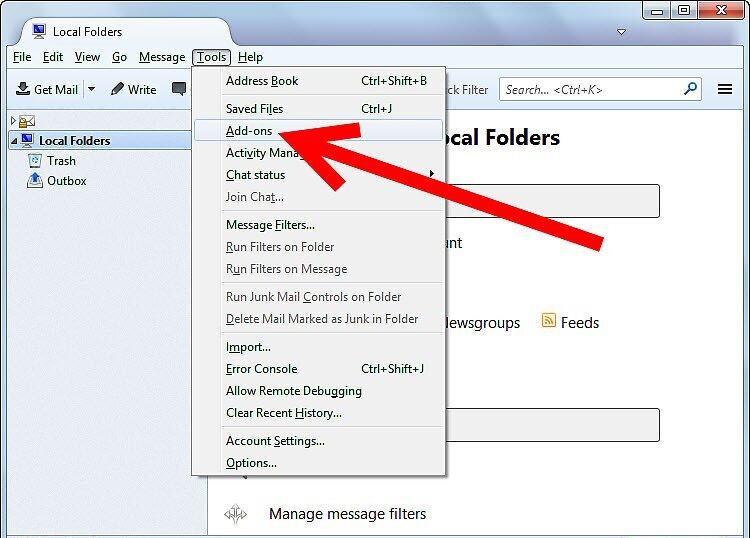
- To change the email sending interval, go to "Tools" - "Extensions." The default interval is 60 seconds (60000 milliseconds).
- If there are emails pending in the folder, the status bar will display SL8TR [PEND 3] (or SENDLATER3 in the new version). If there are no emails, it will say SL8TR [IDLE 00].
- To change the sending time of an email, open the "File" menu and select "Send Later" (or press CTRL + SHIFT + ENTER).
- In the pop-up window, specify your desired date and time, then click "Send at Scheduled Time."
- If you want the scheduled sending feature to be the default, select "Go to Send at Scheduled Time."
- Done!


