
In this article, you'll learn how to connect a PS3 controller to a Windows PC using the 'SCP Toolkit' application.
Part 1
Step 1. Turn on the Controller.

Power on your controller by pressing the stylized 'PS' button located in the middle of the controller.
- If the controller is paired with a gaming console, first disconnect it from the power source.
Step 2. Connect the Controller to Your PC.
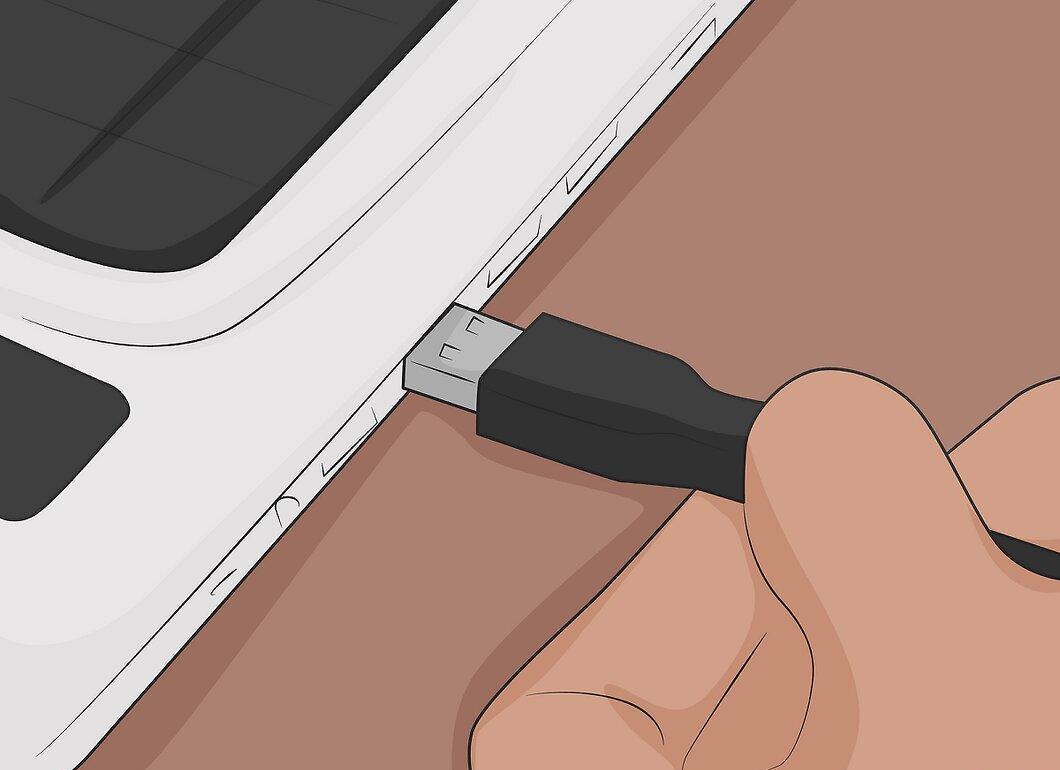
Connect the controller to your computer. Plug the narrow end of the USB cable (the controller's charging cable) into the controller and the wider end into a USB port on your PC.
- The location of USB ports varies by computer model. If you can't find the USB ports, look for them on the sides or back panels of the computer or on the back of a laptop.
- If you're connecting the controller via a wireless module, you may need to install drivers for that module first. Connect the module and carefully follow the on-screen instructions.
Step 3. Go to the SCP Toolkit Website
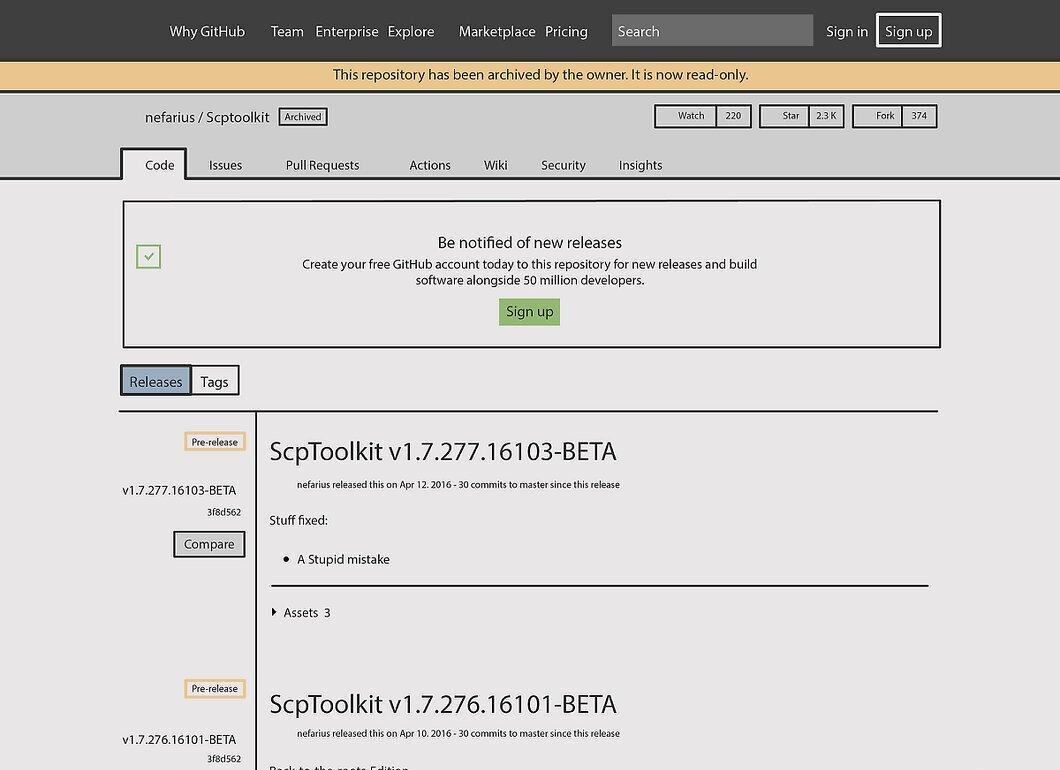
Visit the SCP Toolkit website. This program allows you to connect your PS3 controller to your PC and play various games (such as those on the Steam service).
Step 4. Click on the 'ScpToolkit_Setup.exe' Link.
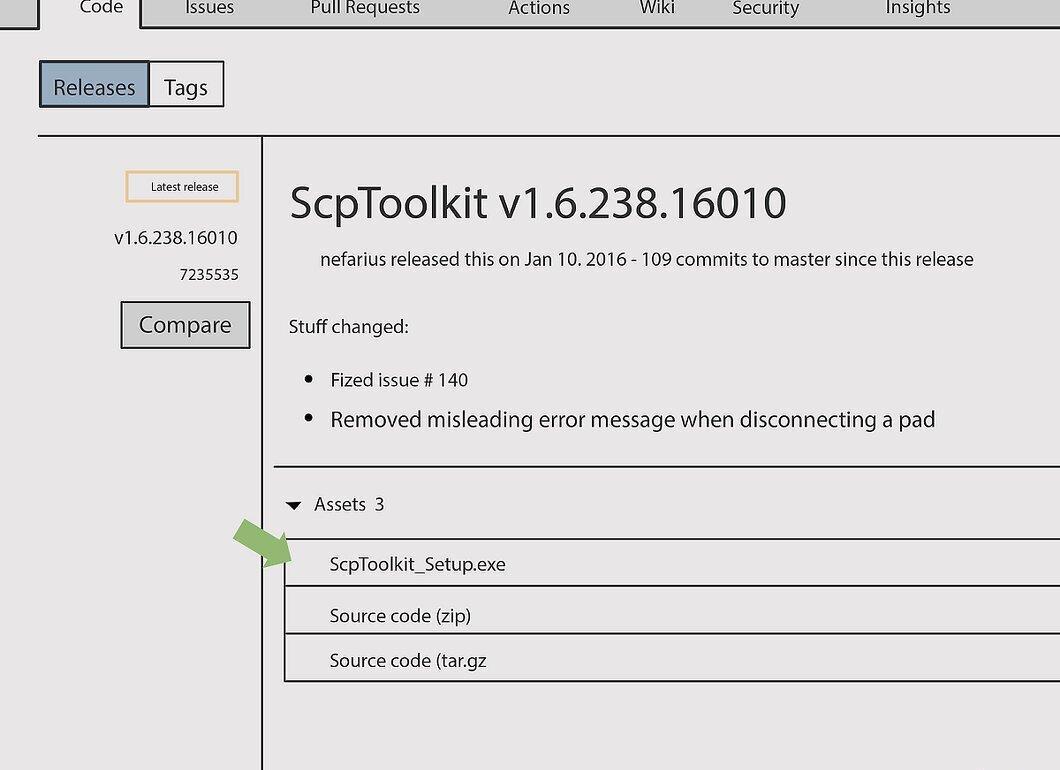
Click the 'ScpToolkit_Setup.exe' link. It's the first link in the 'Downloads' section. The file will download to your computer's downloads folder (like 'Downloads' or your desktop).
- Make sure to download the latest version of the program. If you're on the latest version page, 'Latest Release' will be displayed on the left side of the page.
Step 5. Double-click the Downloaded Installer File.
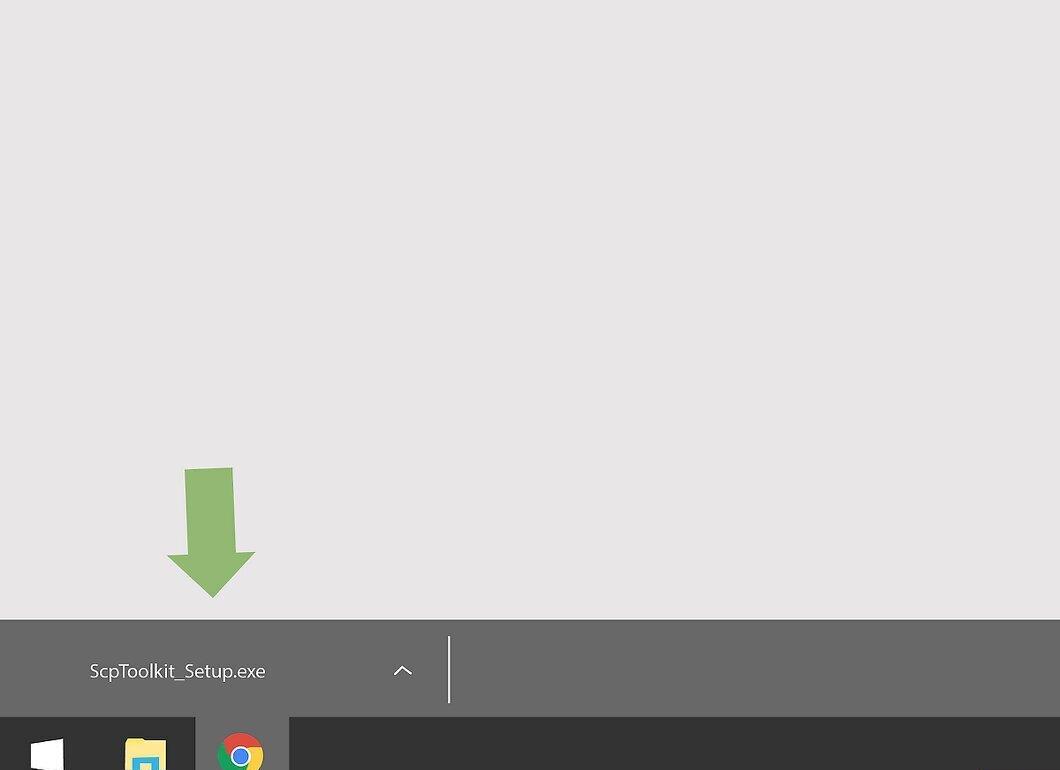
Double-click the downloaded installer file. Its icon looks like a black PS3 controller.
Step 6. Follow the On-Screen Instructions.
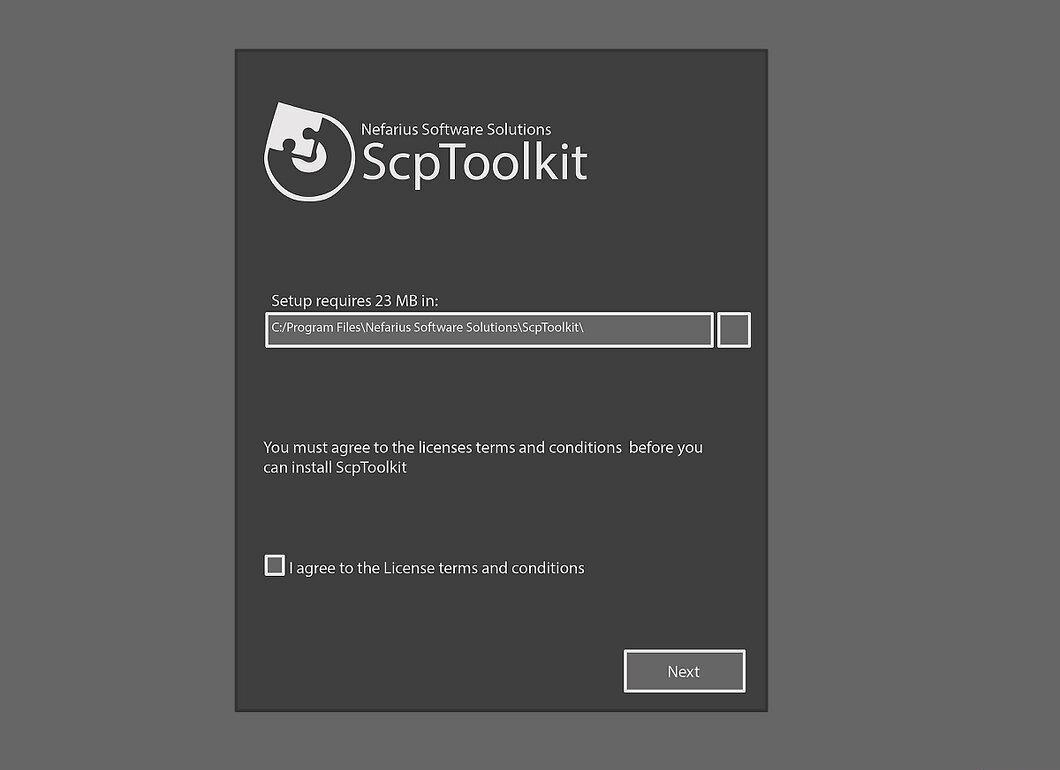
Follow the on-screen instructions. Read the license agreement and then click 'Install'. You may need to install several components, so you might have to click 'Install' multiple times.
- If you see a message indicating that certain conditions are not met to run the program, keep clicking 'Next' until the installation process starts. Otherwise, just click 'Finish' in the first window.
- If a prompt appears asking if you trust the installer file, click 'Yes'.
Step 7. Double-click the 'ScpToolkit Driver Installer'.
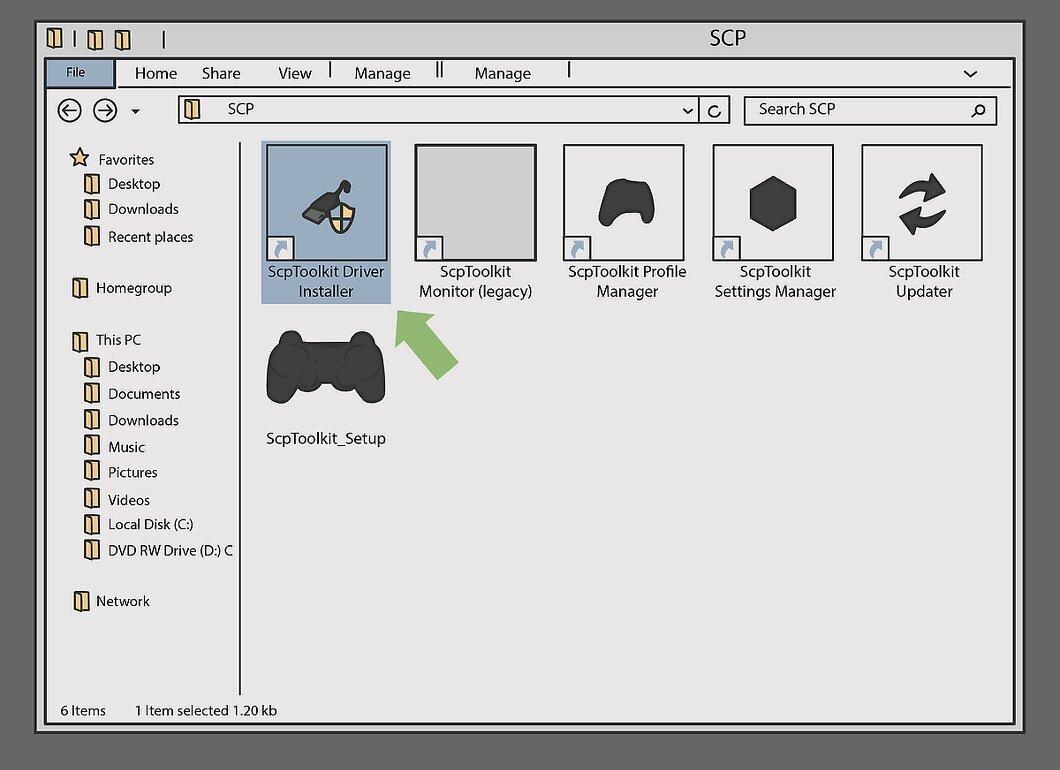
Double-click the 'ScpToolkit Driver Installer'. You will find it in the 'SCP Toolkit' program folder.
Step 8. Uncheck the 'Install DualShock 4 Controller' Option.
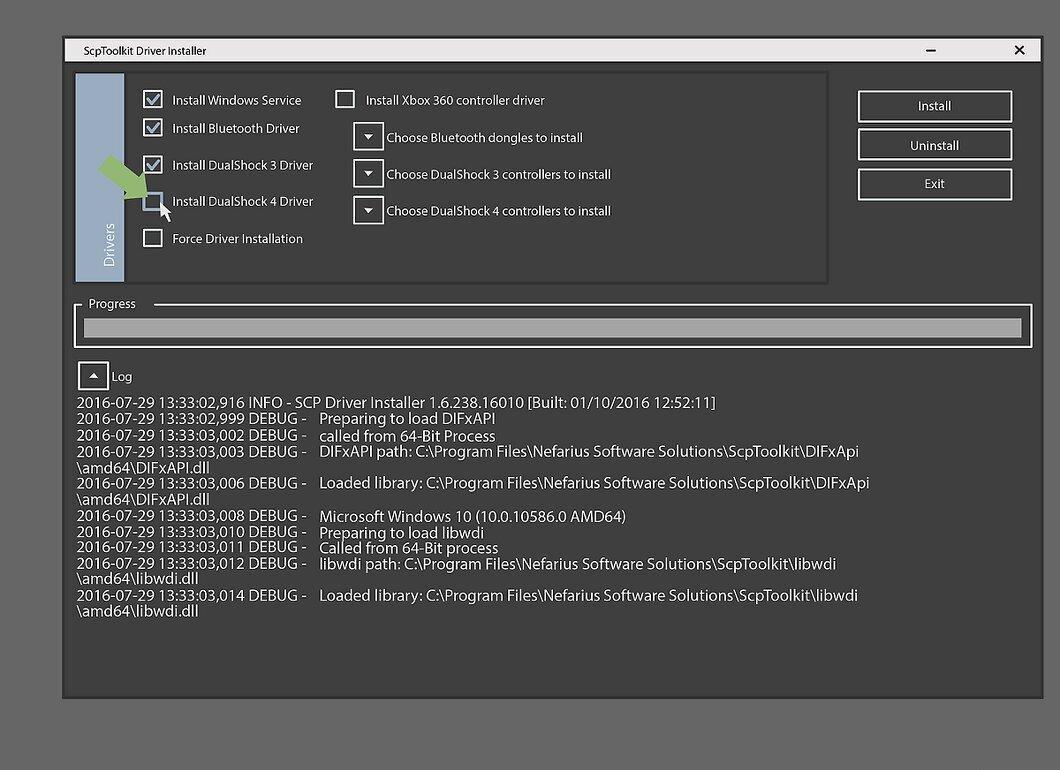
Uncheck the 'Install DualShock 4 Controller' option. It's located on the left side of the window. Since you are connecting a PS3 controller (like the DualShock 3), drivers for the PS4 are not needed.
- Also uncheck the 'Bluetooth' option if you are using a wired controller.
- It is advisable to uncheck options that you do not need.
- For Windows Vista, check the 'Force Driver Installation' option on the middle left side of the window.
Step 9. Click on the 'Choose DualShock 3 Controllers to Install' Field.
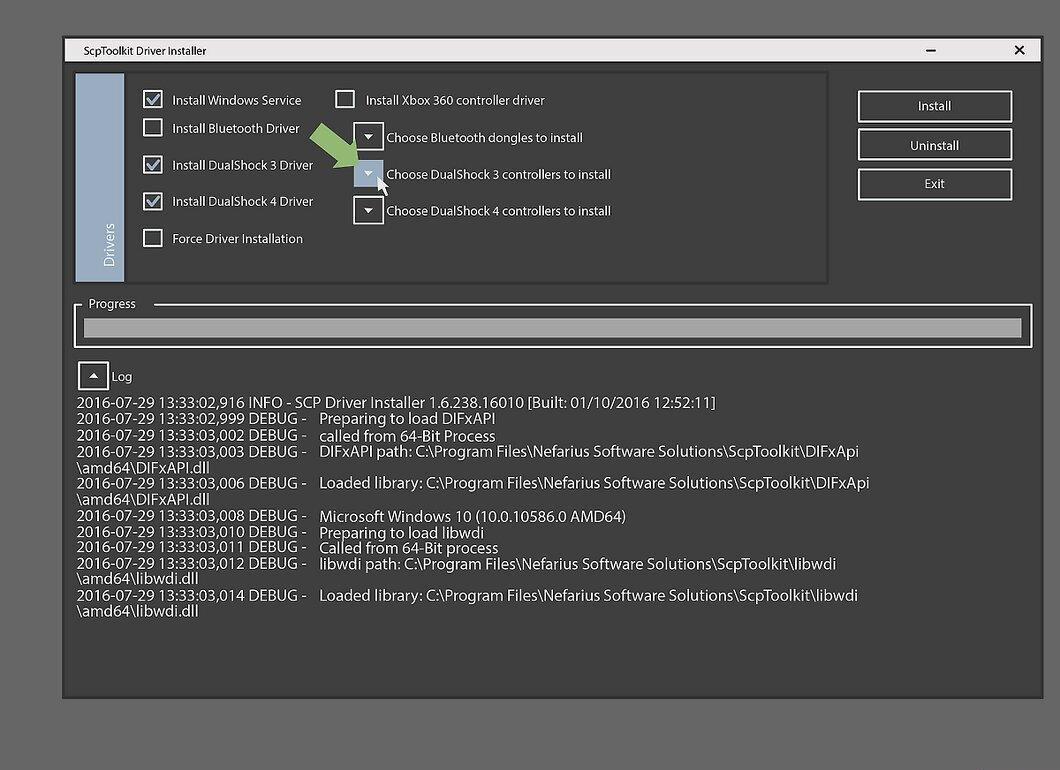
Click on the 'Choose DualShock 3 Controllers to Install' field. It is located on the right side of the window. Now select your controller.
Step 10. Check the 'Wireless Controller' Option.
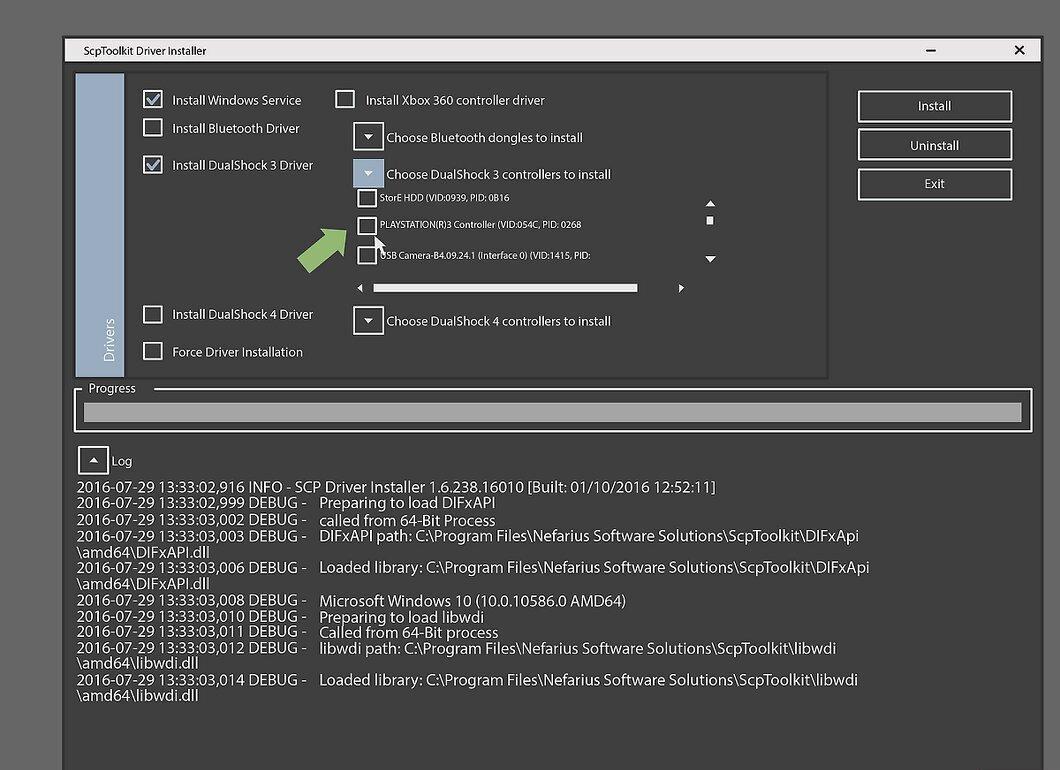
Check the 'Wireless Controller' option. You will see a list of all devices connected to your computer (like your keyboard, mouse, webcam, etc.). The PS3 controller will be listed as 'Wireless Controller (Interface [number])', where the number corresponds to the USB port the controller is connected to.
- If you are using a wireless controller, choose the USB device being used for the wireless connection from the Bluetooth section above the 'DualShock 3 Controllers' dropdown menu.
Step 11. Click Install.
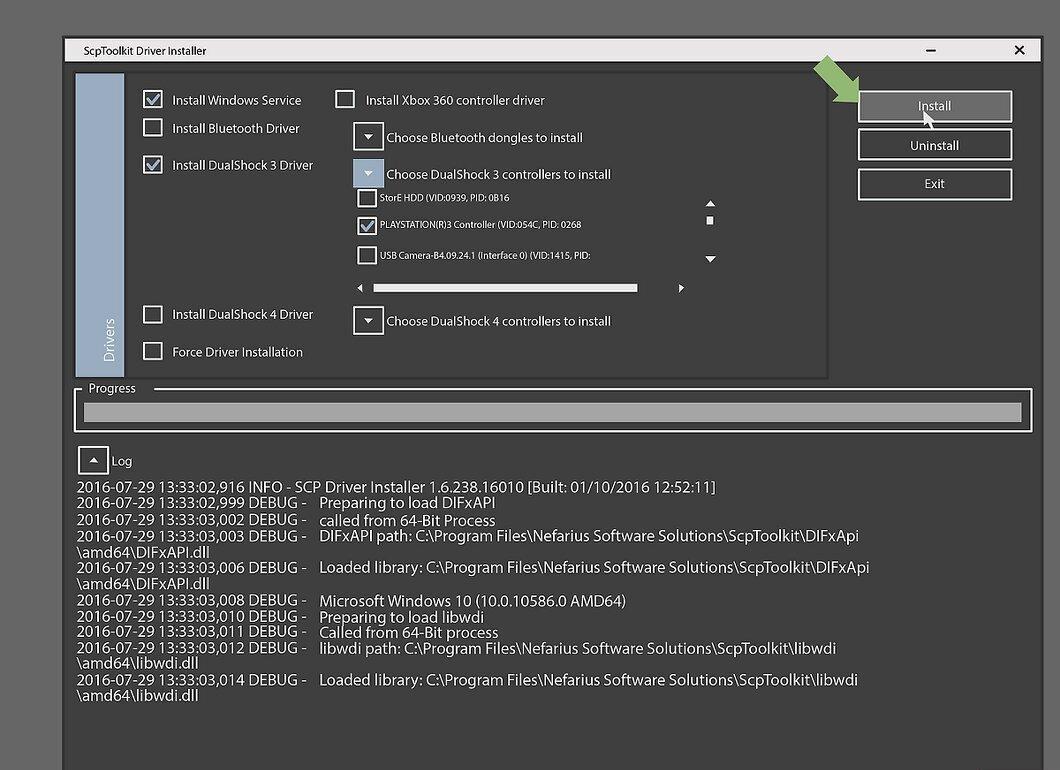
Click 'Install'. This option is located on the right side of the window. The SCP Toolkit will start installing the controller drivers; this process should take no more than five minutes.
- When the installation process is complete, a sound will indicate success.
- That's it — the controller drivers are installed, and you can use the controller in games.


