
A Micro SD card is a compact data storage device commonly used in mobile phones, GPS navigators, and cameras to store information. While you can easily format this card directly on your device, you can also do it on a computer running Windows or Mac.
Formatting on Android Devices
Step 1. Open the "Settings" menu on your device.
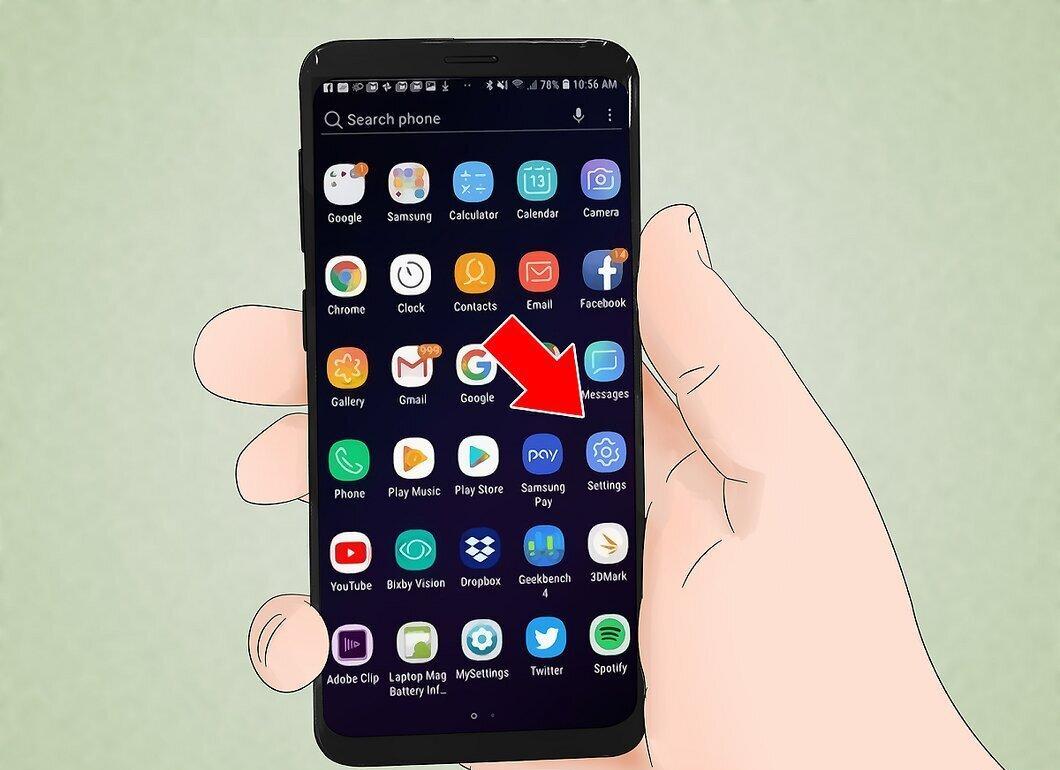
On your device's home screen, find and open the "Settings" app. Scroll through the screen to locate its icon.
- The "Settings" app icon may vary depending on the Android version, but it often looks like a gear.
Step 2. Go to the "Storage" or "SD Card & Storage" section.
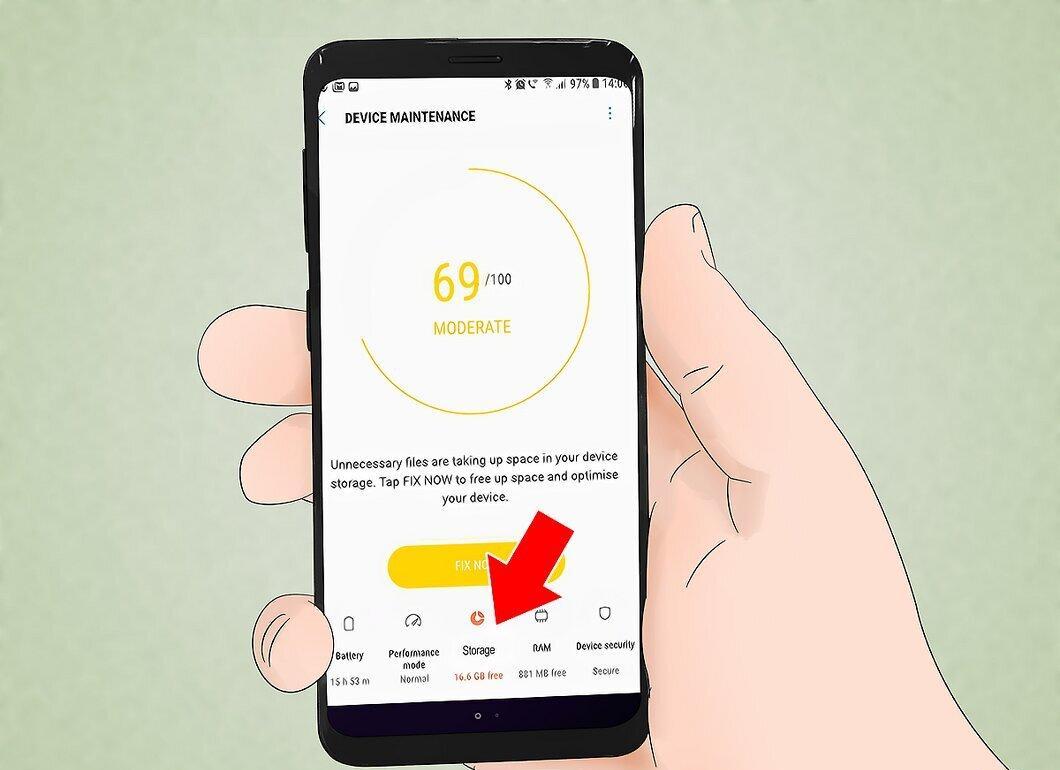
Tap on the "Storage" or "SD Card & Storage" option, depending on your operating system version. Look for a title containing the word "storage".
- This option is usually marked with an icon resembling an SD card.
Step 3. Select "Erase SD Card" or "Format SD Card".
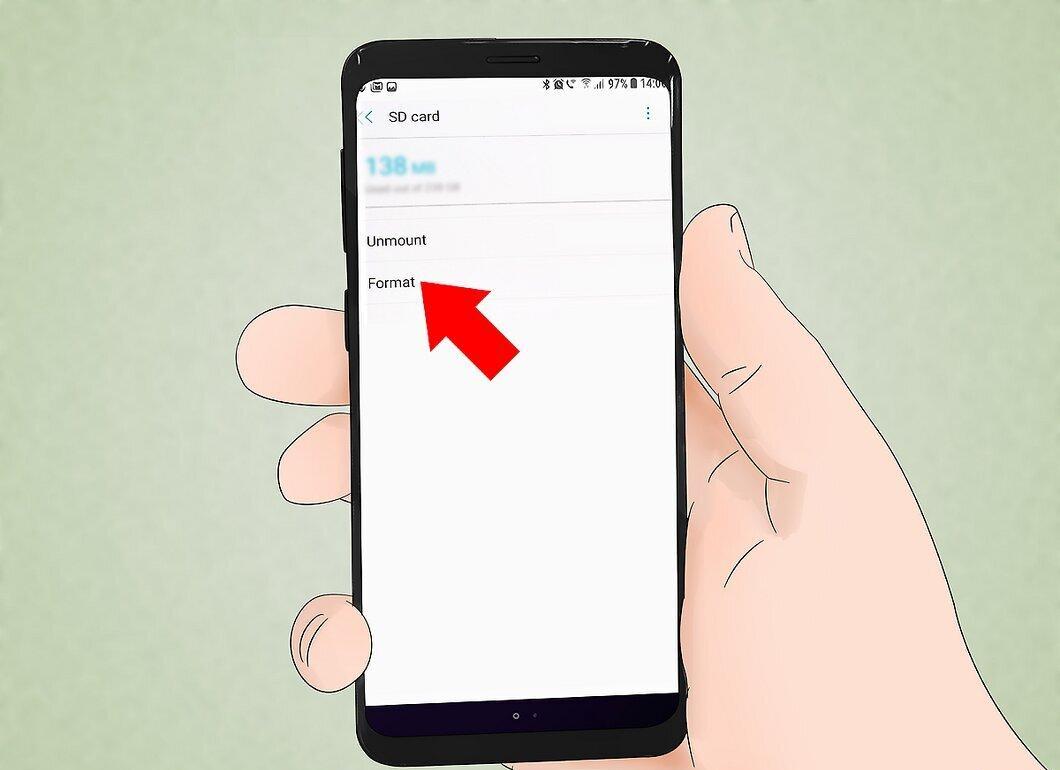
Find and select the "Erase SD Card" or "Format SD Card" option. The screen will display information about the card's size and available space, along with buttons for "Unmount SD Card" and "Format SD Card".
- If the "Format SD Card" button is grayed out, first unmount the card by tapping "Unmount SD Card".
Step 4. Confirm the deletion of all data on the SD card.
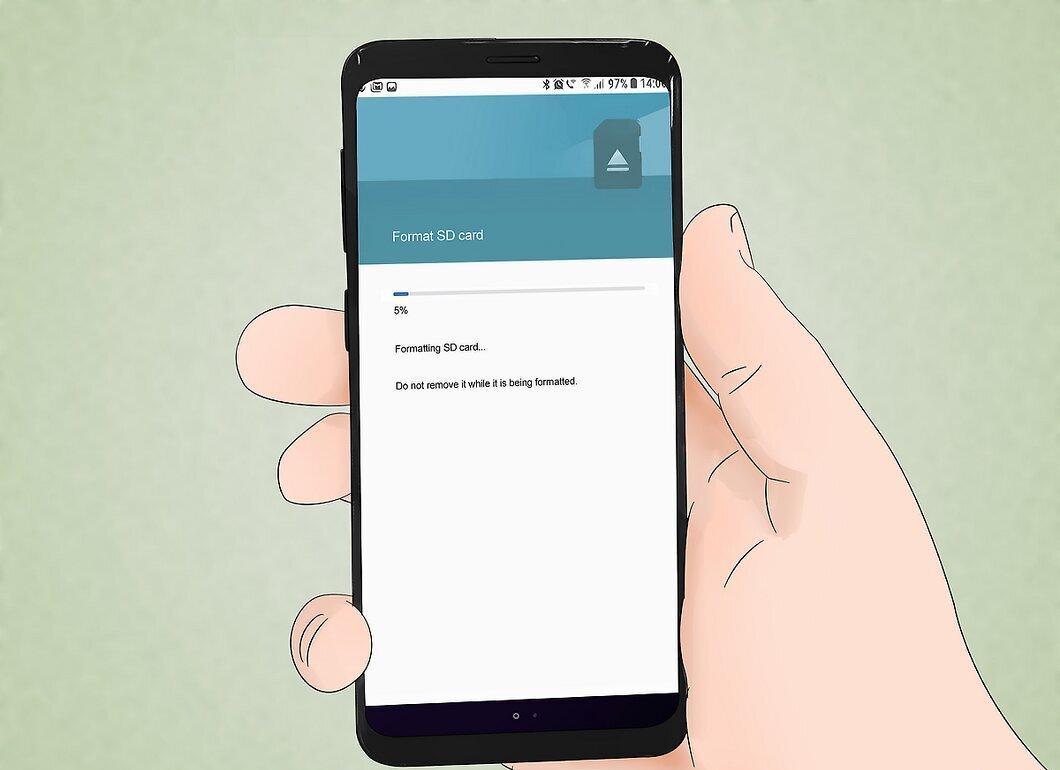
In the pop-up window, confirm your intention to delete all data on the SD card. The device will begin formatting the Micro SD card, and all data will be lost.
- You may have to confirm multiple times that you really want to format the card. Be aware that this will delete all content.
- Follow the on-screen instructions to complete the formatting process. Your card will be formatted to the FAT32 file system and will be ready for use with your Android device.
- Note that starting with Android 6.0 Marshmallow, the card can be used as internal or external storage. When used as external storage, you can use it on other devices and computers.
Formatting on Windows Phone
Step 1. Open the "Settings" app.
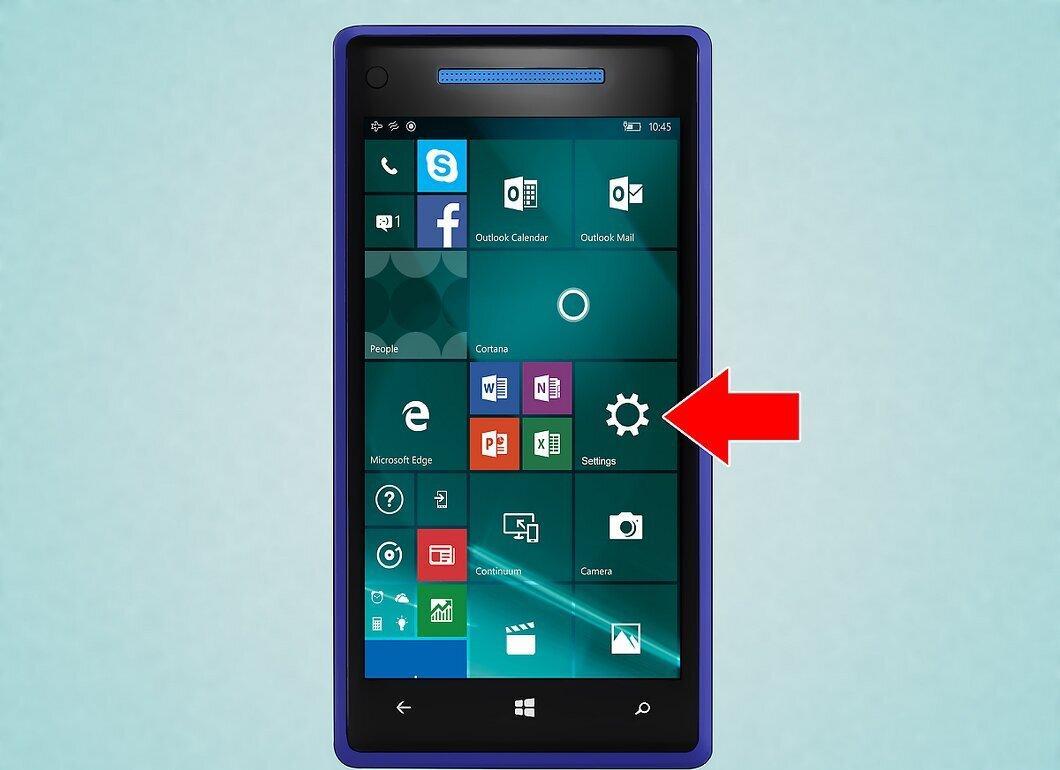
Go to the "Settings" app on your Windows Phone. This method is applicable for devices with Windows Phone 8 and newer, such as the HTC One M8 and Nokia Lumia 635.
- You can find the "Settings" app icon on the home screen or in the app list.
- Depending on the phone model, you may need to open the "Storage Sense" app if it is installed.
Step 2. Find the "Phone Storage" section.
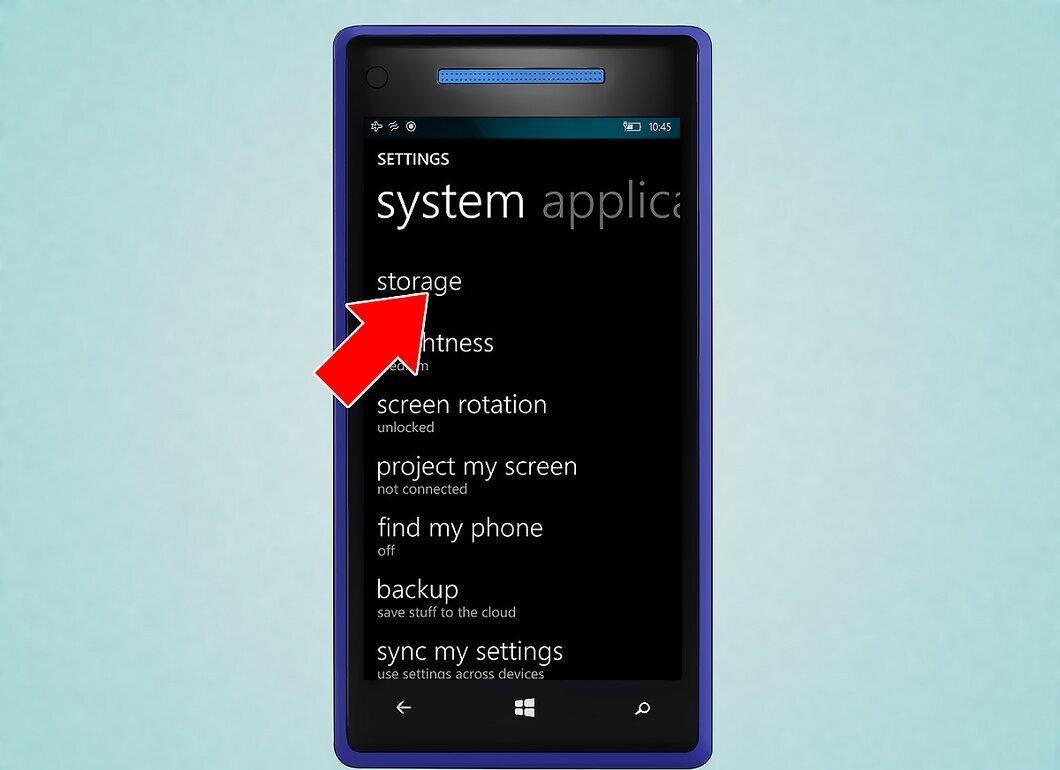
In the opened menu, scroll down and find the "Phone Storage" item, which is located between "Battery Saver" and "Backup".
- If you are using "Storage Sense", look for the "SD Card" option.
Step 3. Select "Format SD Card".
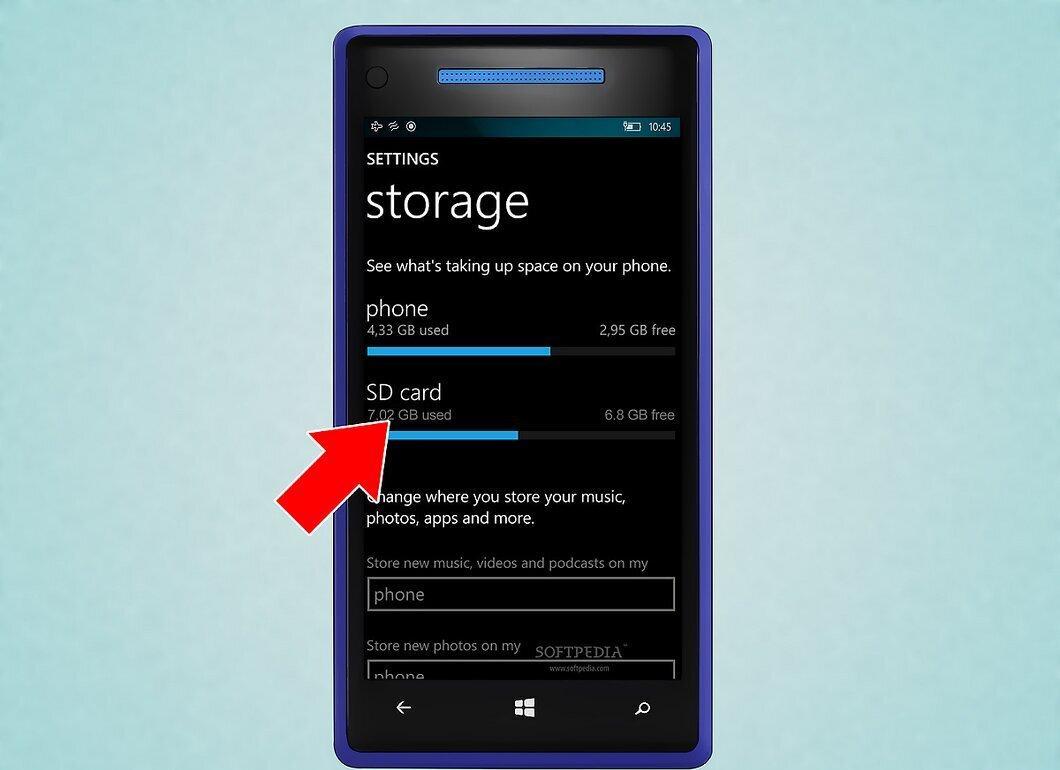
Tap on "Format SD Card". After this, information about used space and available options will be displayed on the screen.
- Before formatting, make sure to back up any important data, as all data on the card will be erased.
Step 4. Confirm the formatting.
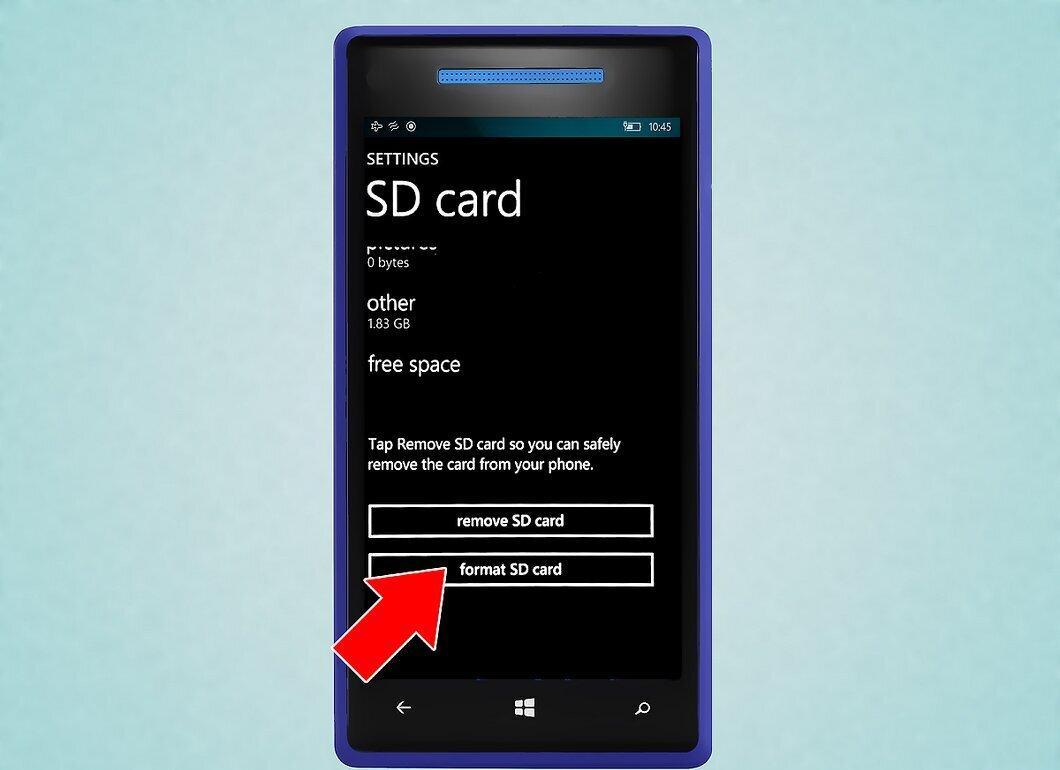
Tap "Format SD Card". After tapping, a warning about deleting all data will be displayed. Confirm your action by tapping "Yes" to start the process.
- Once formatting is complete, the device will recognize the card and prompt you to set it up again.
Formatting on Windows Computers
Step 1. Insert the Micro SD card into an adapter or card reader.
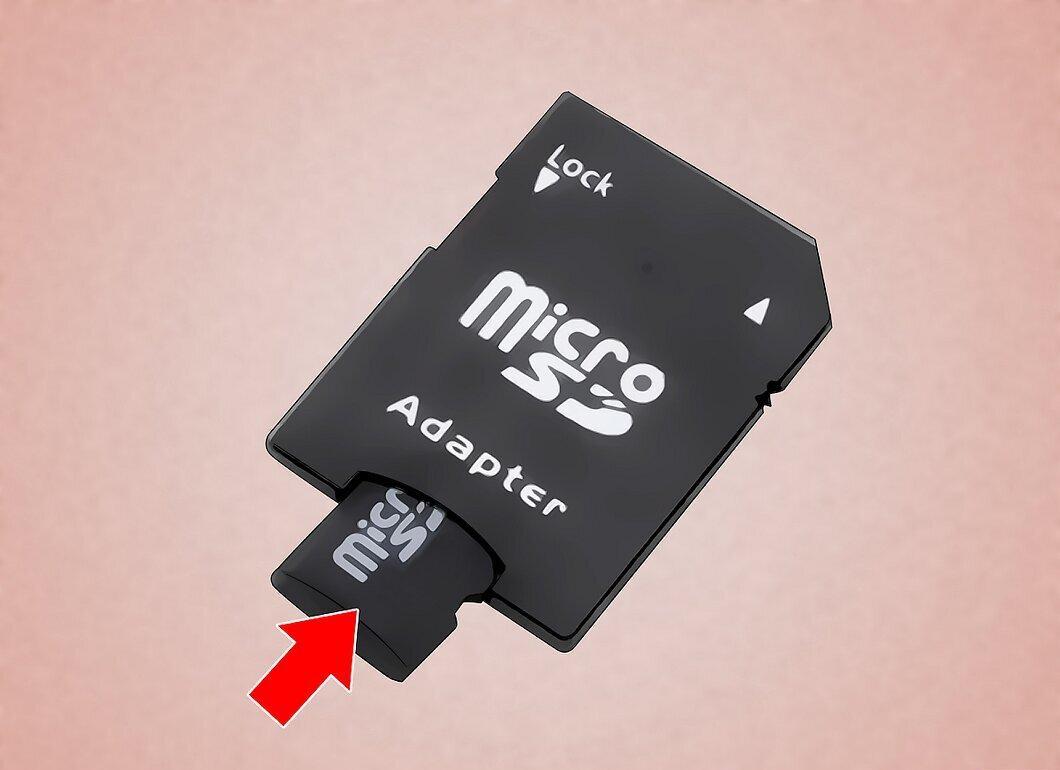
Place the Micro SD card into an adapter or card reader that supports Micro SD cards. For example, a SanDisk Micro SD card comes with an SD adapter.
- Keep in mind that cards with a capacity of less than 32 GB are usually formatted to FAT32, while cards over 64 GB are formatted to exFAT. If you plan to use the card in a phone or Nintendo DS, it’s better to choose FAT32.
Step 2. Connect the card reader or adapter to your computer.
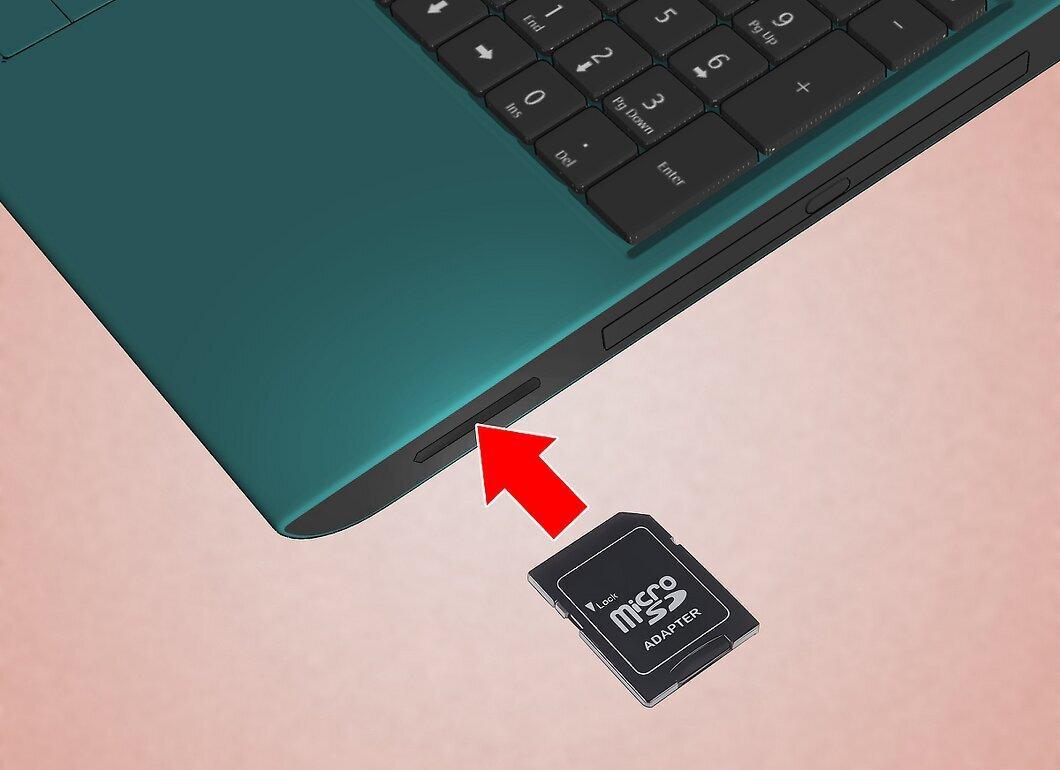
Connect the card reader to a USB port or SD slot on your computer. Make sure the write protection switch is set to "Off".
Step 3. Open "Computer" or "My Computer".
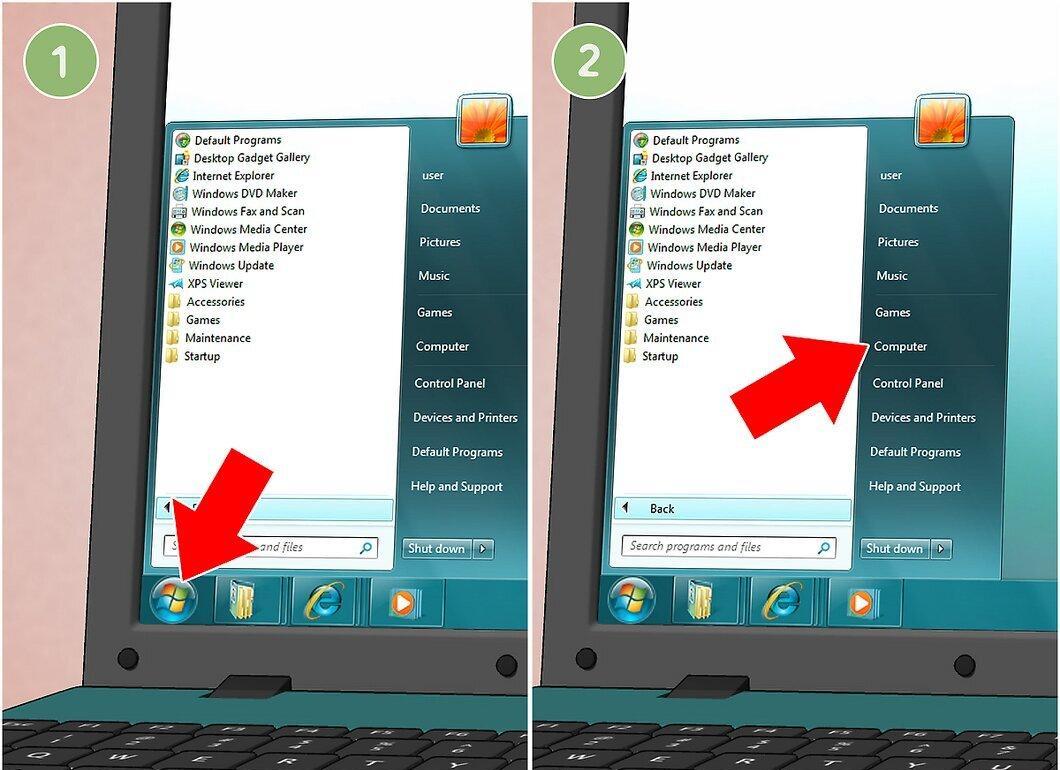
Launch "Start" and select "Computer" (or "My Computer"). In this window, you will see a list of all connected devices.
Step 4. Right-click on the card reader and select "Format".
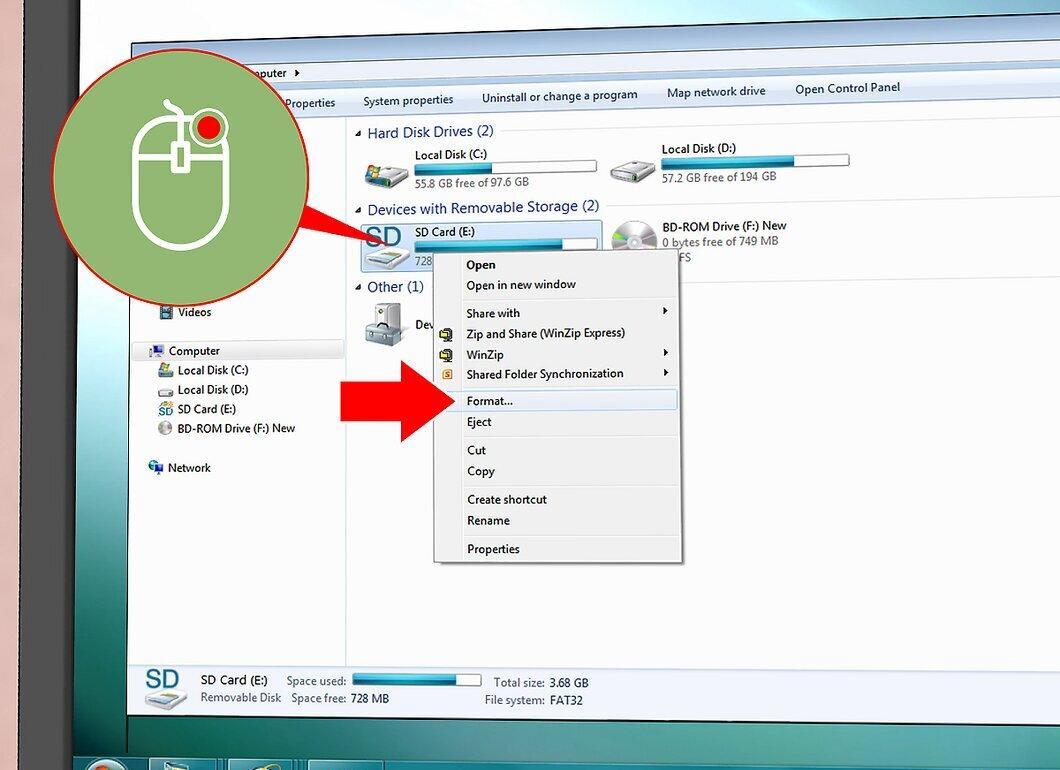
Right-click on the card reader and choose "Format". A window with formatting options will appear.
Step 5. Select "Quick Format".
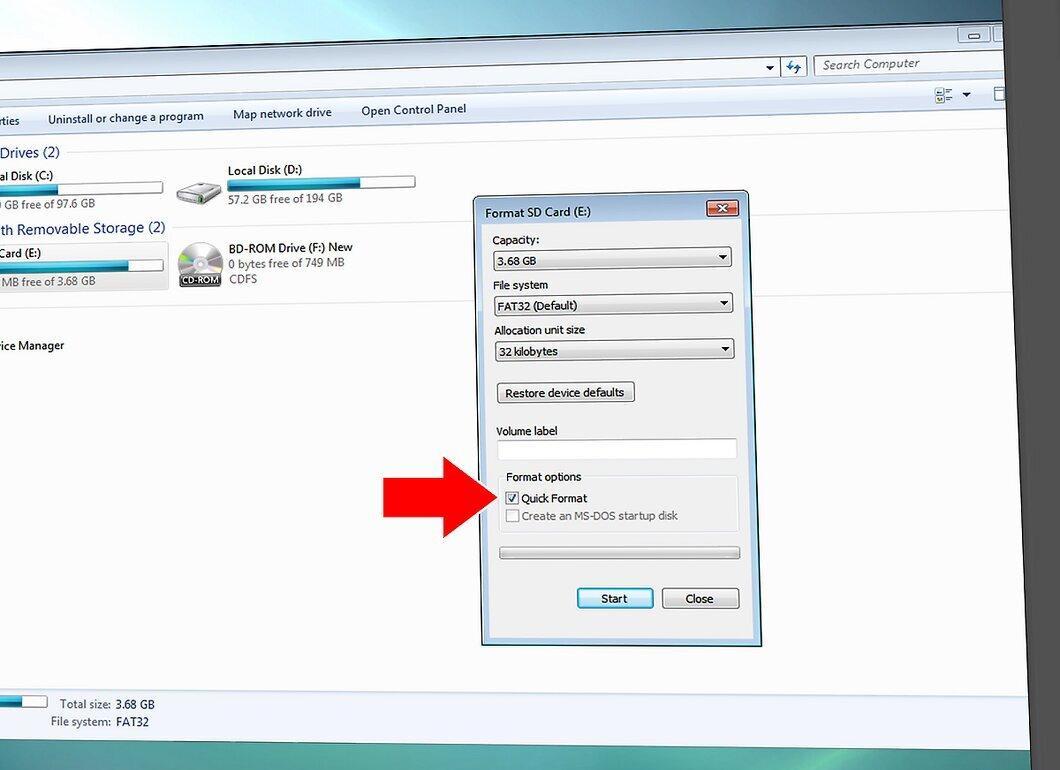
Check the "Quick Format" option. This is the best way to get quick results.
Step 6. Click "Start".
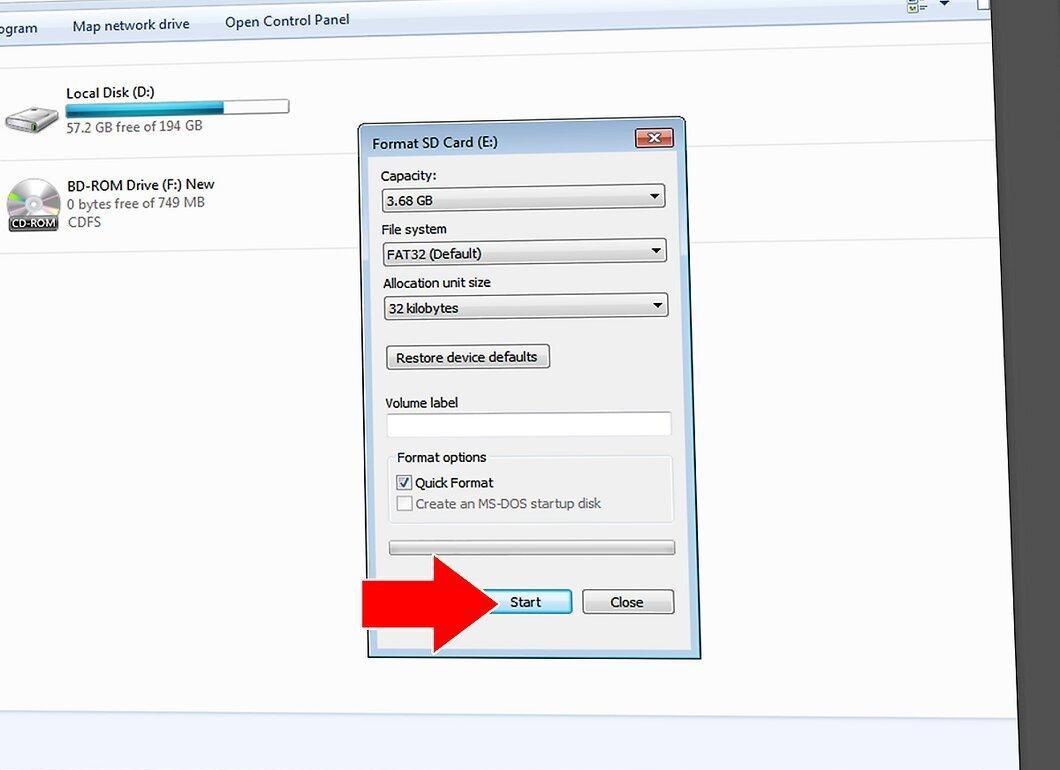
Click "Start" to begin the formatting process. All data will be erased, and the card will become clean.
Formatting on Mac OS
Step 1. Insert the Micro SD card into an adapter or card reader.
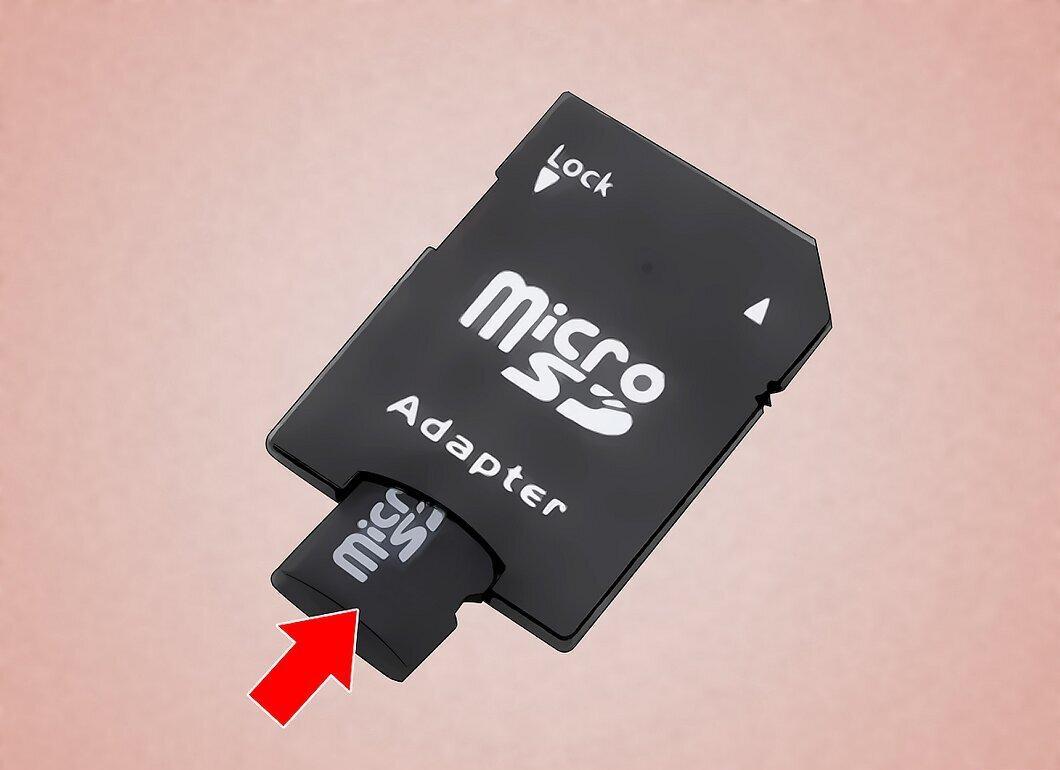
Insert your Micro SD card into a compatible adapter or card reader. For instance, SanDisk cards typically come with an SD adapter.
Step 2. Connect the card reader to your computer.
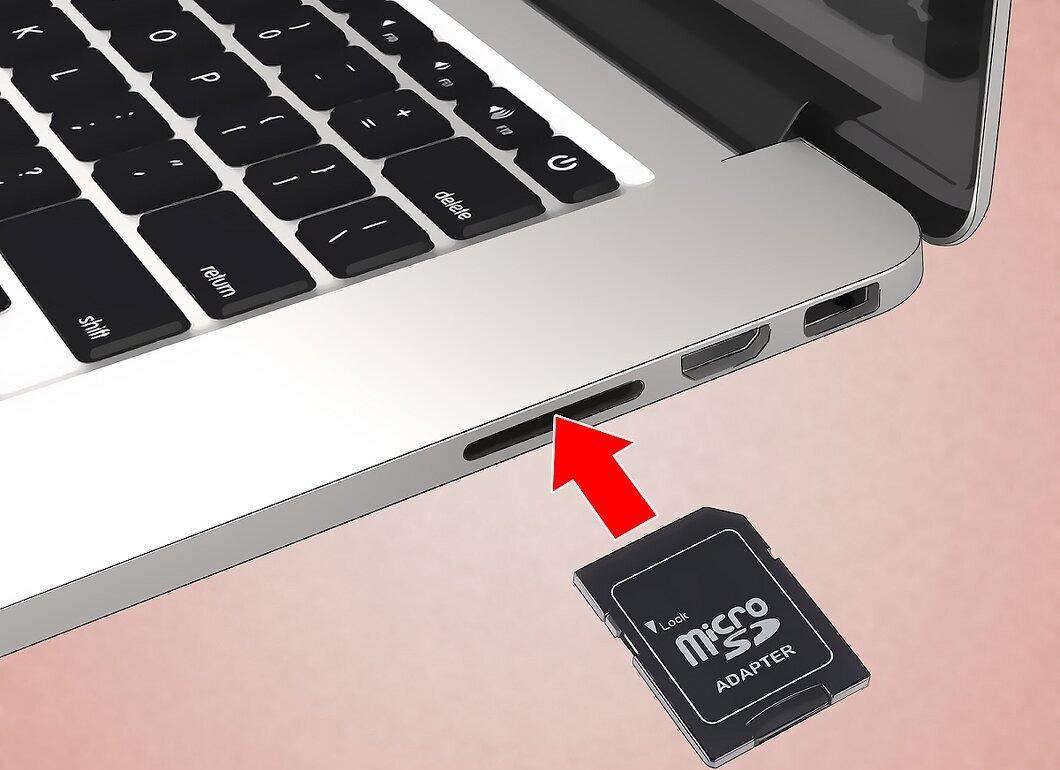
Connect the card reader to a USB port or SD slot. Ensure that the write protection switch is off.
Step 3. Open "Disk Utility".
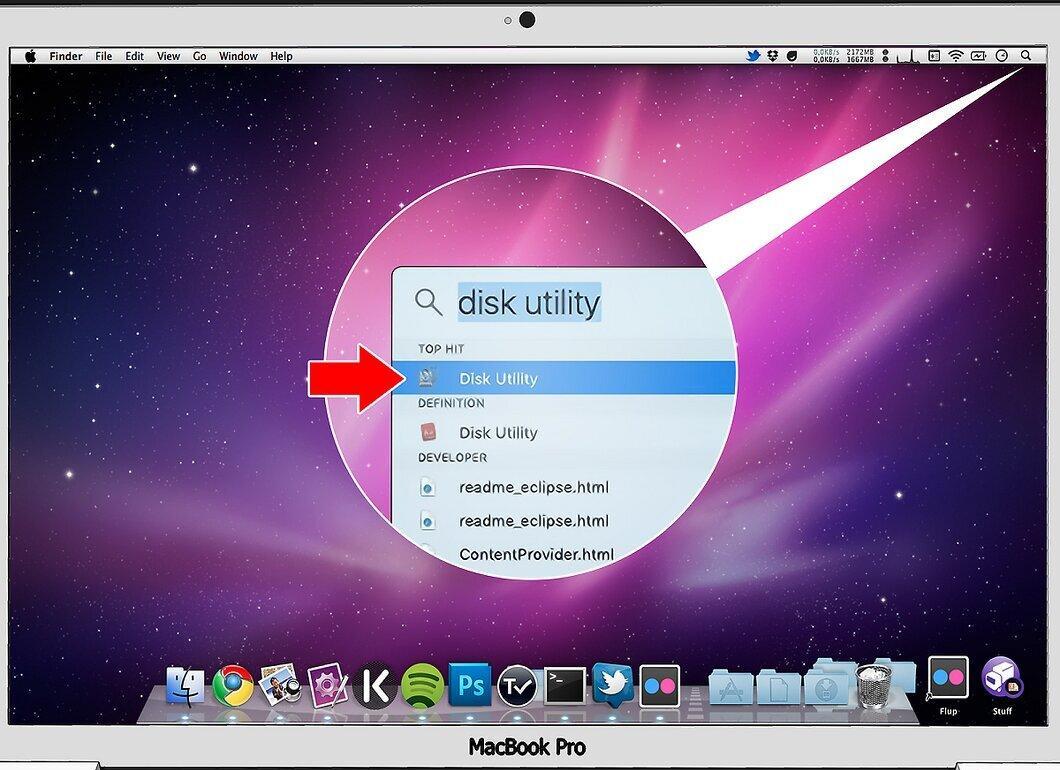
Click on the search icon in the upper right corner and type "Disk Utility". Open the application.
Step 4. Select your Micro SD card.
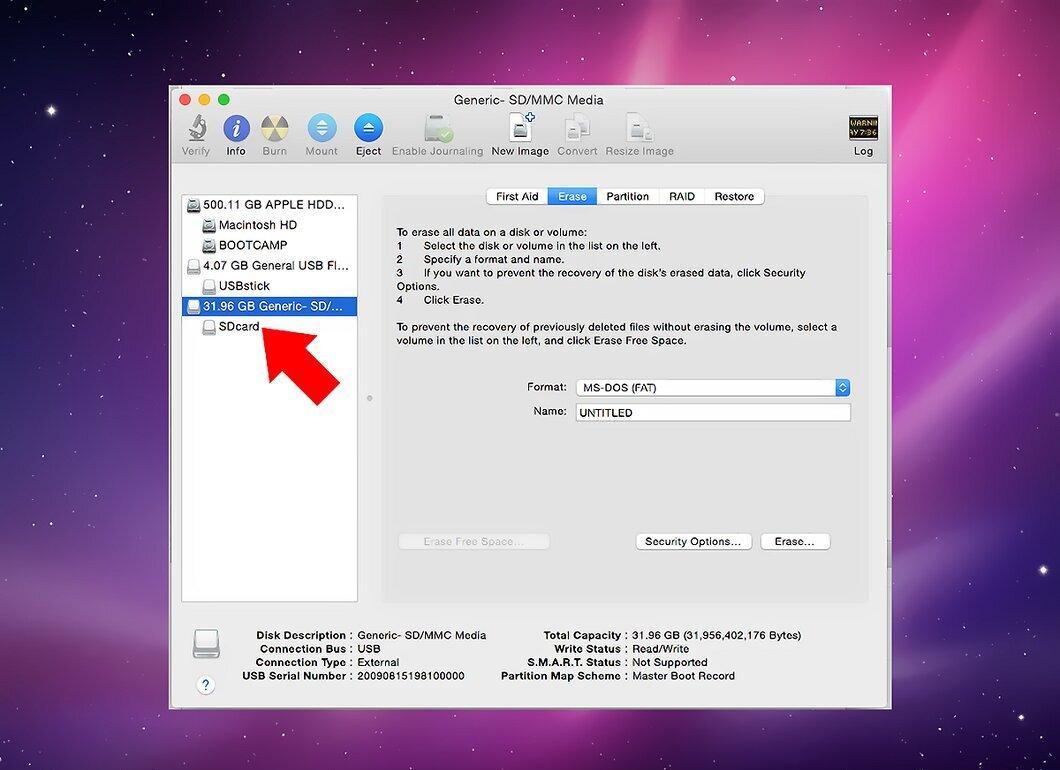
Click on the name of your card in the left panel. Here, you can see information about its capacity.
Step 5. Click "Erase".
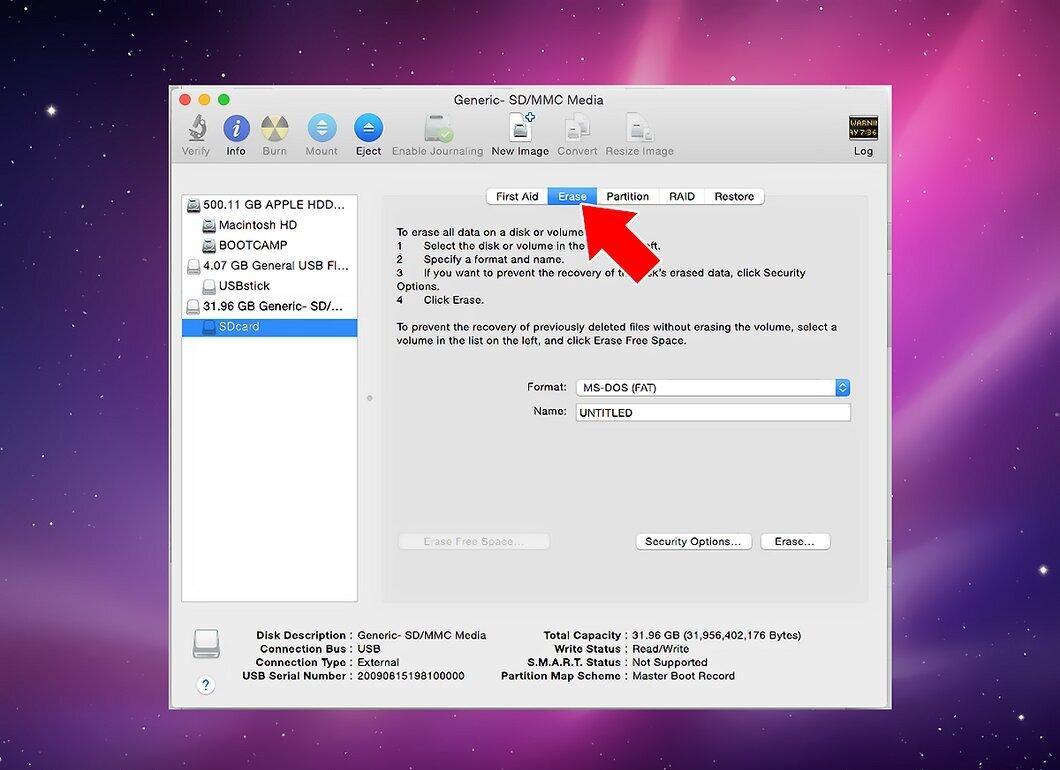
Select the "Erase" option to start formatting.
Step 6. Choose the file system.
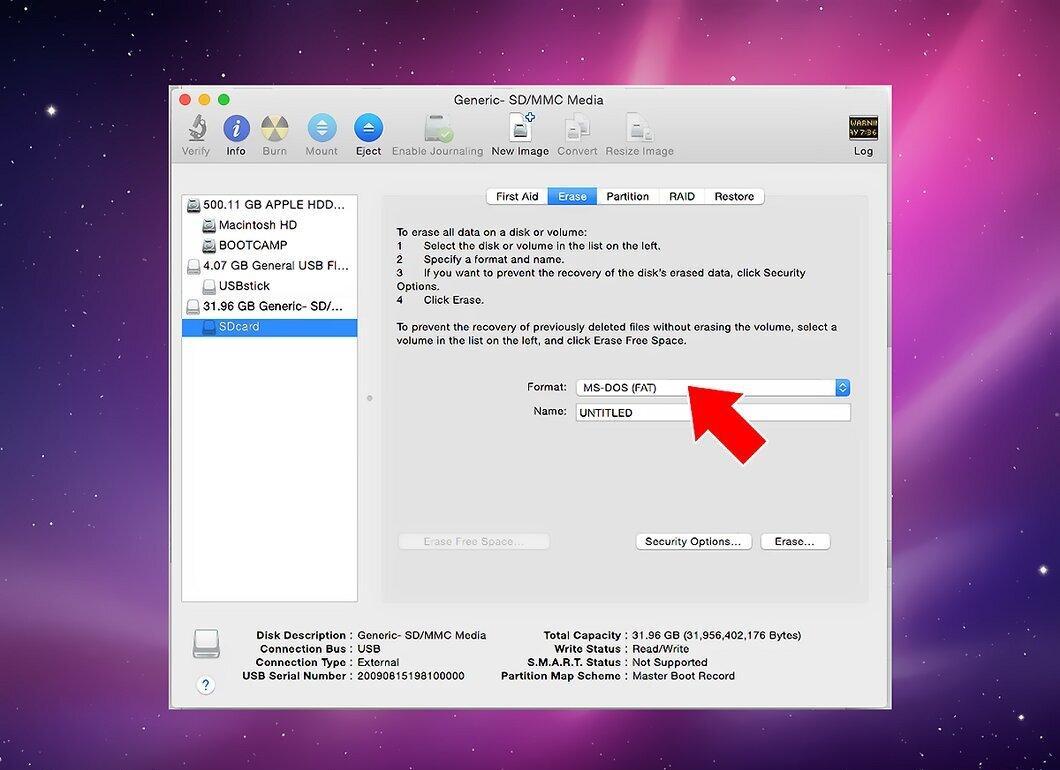
Select the desired file system format from the dropdown menu. For cards that need to store files larger than 4 GB, choose exFAT.
Step 7. Click "Erase" to begin formatting.
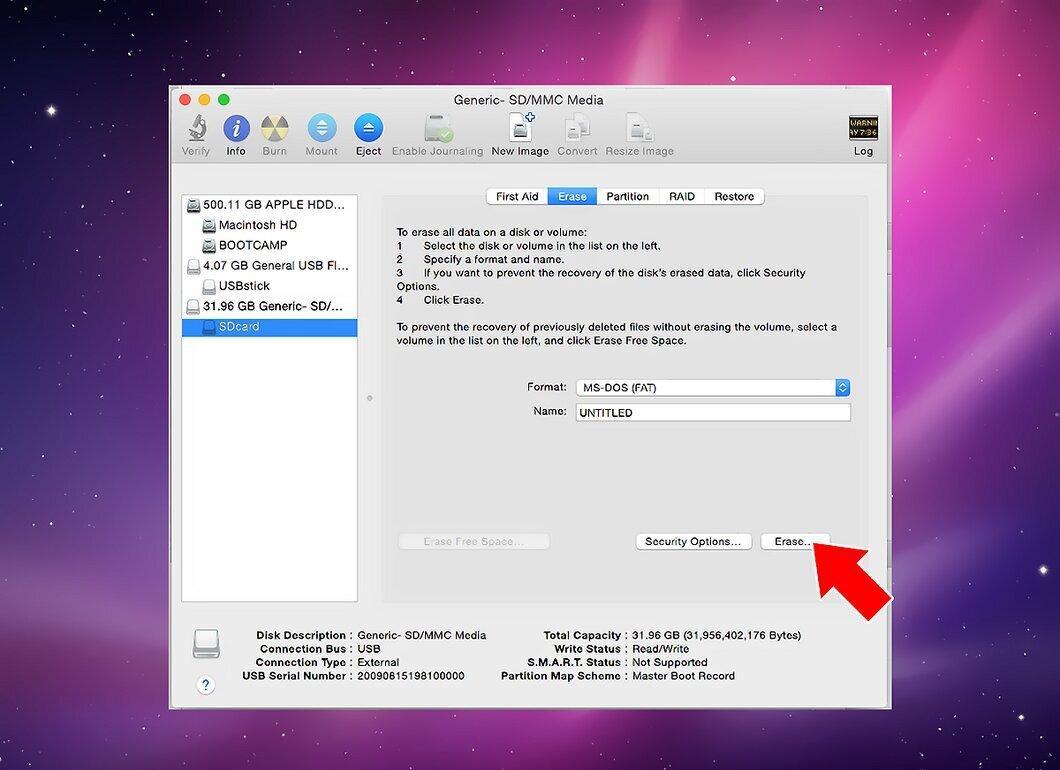
Confirm the formatting by clicking "Erase". All data on the card will be deleted, and it will be ready for use.


