
Imagine you're on a business trip abroad, negotiating with an offshore supplier. This meeting is crucial for both you and your company, promising significant career growth if successful. However, on the day of your important presentation, your laptop crashes — the hard drive has failed. In a panic, you try to call the office for an electronic version of your presentation, but due to the time difference, no one answers.
Getting Started with Server Setup
Step 1. Open your browser and go to www.whatismyip.com.
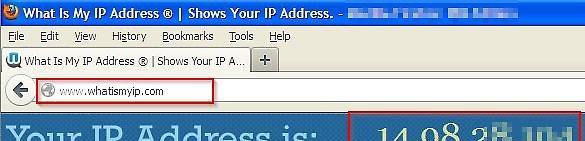
Launch your browser and head over to www.whatismyip.com. Take note of your IP address, as you'll need it for the client setup.
Step 2. Click on the "Start" button
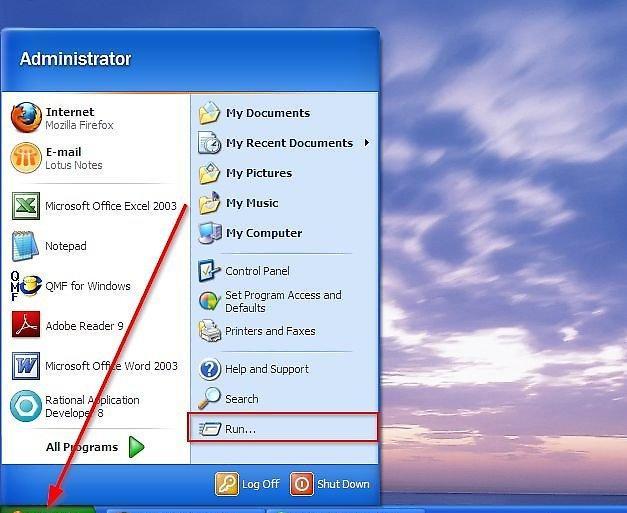
Click the "Start" button and select "Run."
Step 3. Type in "Control Panel"
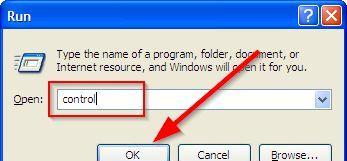
Type "Control Panel" in the box and hit Enter.
Step 4. Navigate to "Network and Internet Connections"
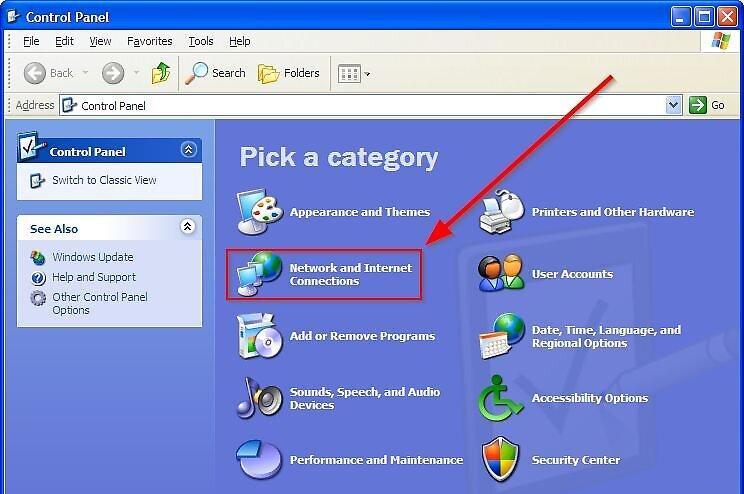
Select "Network and Internet Connections."
Step 5. Click on "Network Connections"
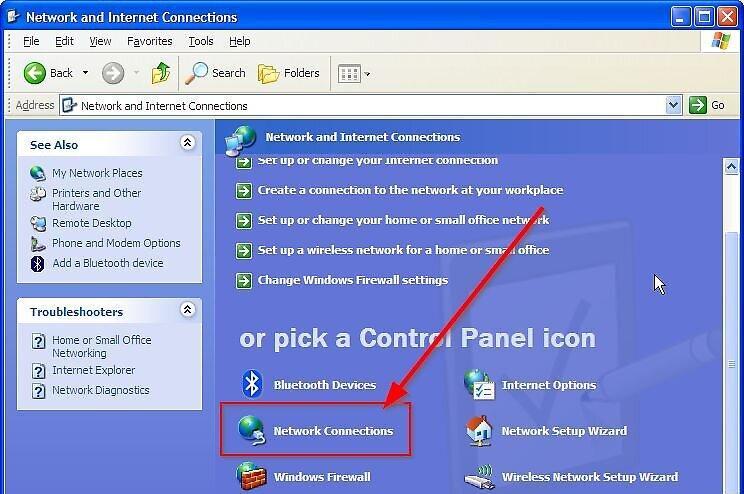
Click on "Network Connections."
Step 6. On the left side, select "Set up a new connection"
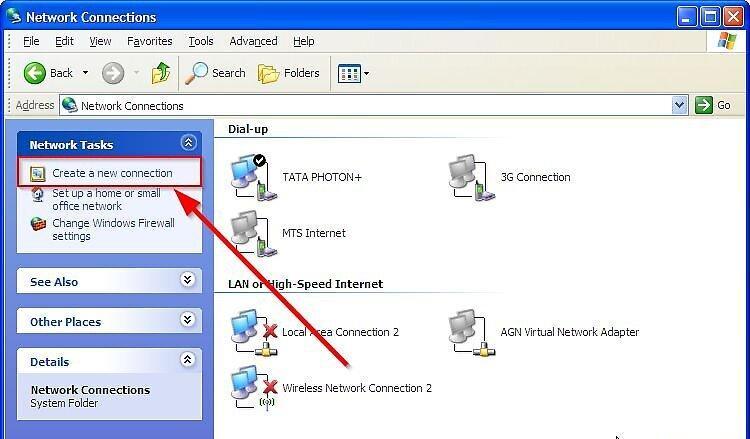
In the left panel, choose "Set up a new connection."
Step 7. The New Connection Wizard will start.
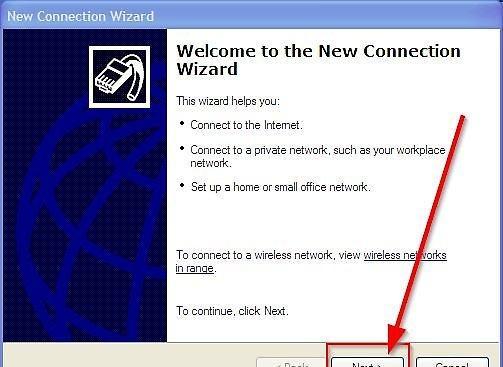
The New Connection Wizard will open. Click "Next."
Step 8. Choose the option "Set up a direct connection to another computer"
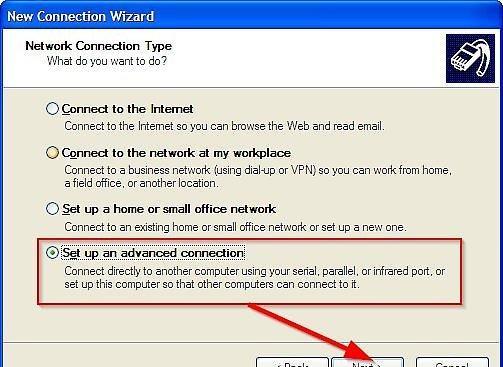
Select the last option — "Set up a direct connection to another computer" and click "Next."
Step 9. Specify "Accept incoming connections"
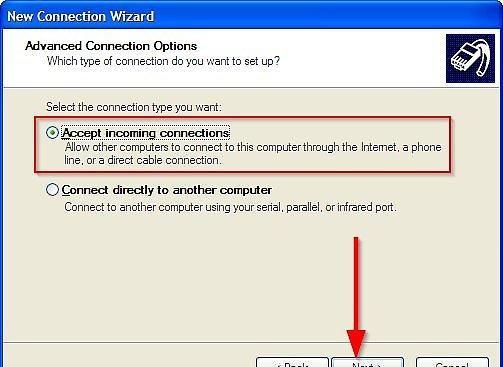
Choose the option "Accept incoming connections" and hit "Next."
Step 10. A window for "Devices for incoming connections" will appear
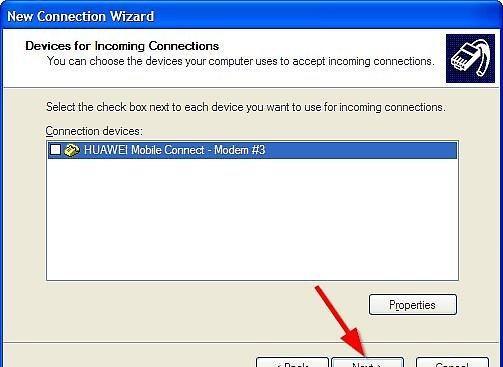
In this window, make no selections and click "Next."
Step 11. Ensure "Allow virtual private connections" is selected
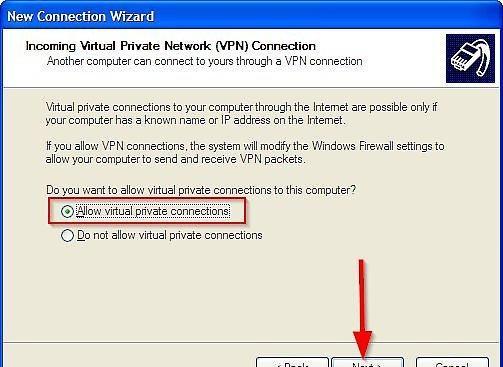
Select the option "Allow virtual private connections" and click "Next."
Step 12. Specify who to grant access to
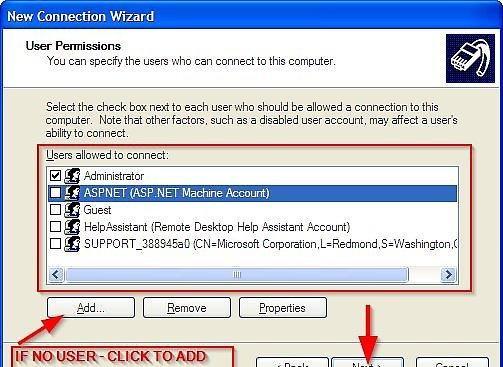
Choose the users you want to grant access to and click "Next." If the desired user isn’t listed, add them.
Step 13. Do not change the settings on the "Networking Software" screen
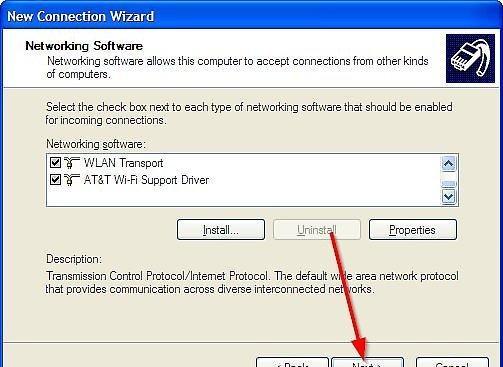
On the "Networking Software" screen, leave everything unchanged and click "Next."
Step 14. Complete the setup
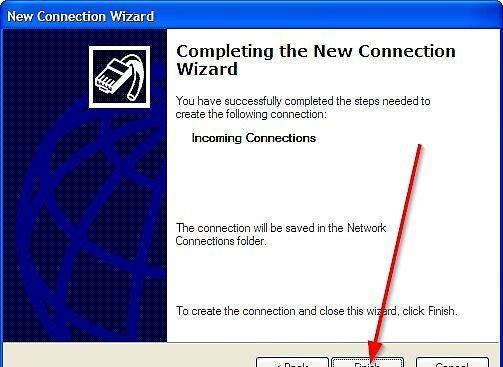
Congratulations! You have successfully set up your computer to use VPN. Complete the process by clicking "Finish."
Client Configuration
Step 1. Click on the "Start" button
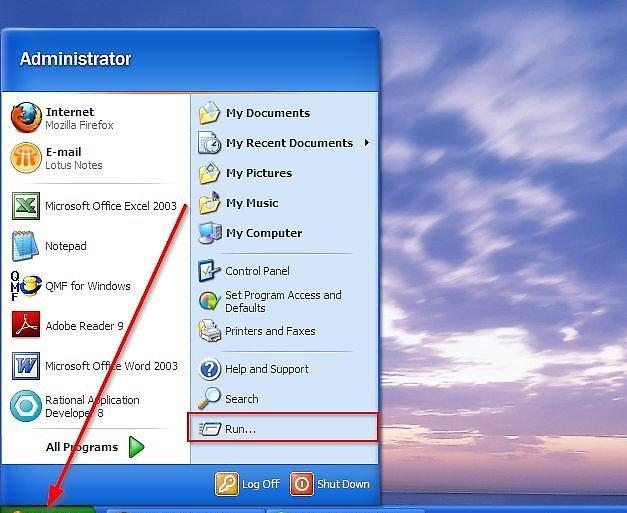
Click the "Start" button and select "Run."
Step 2. Type in "Control Panel"
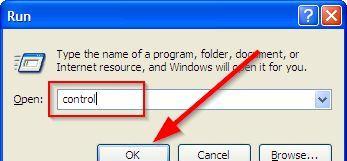
Type "Control Panel" and press Enter.
Step 3. Navigate to "Network and Internet Connections"
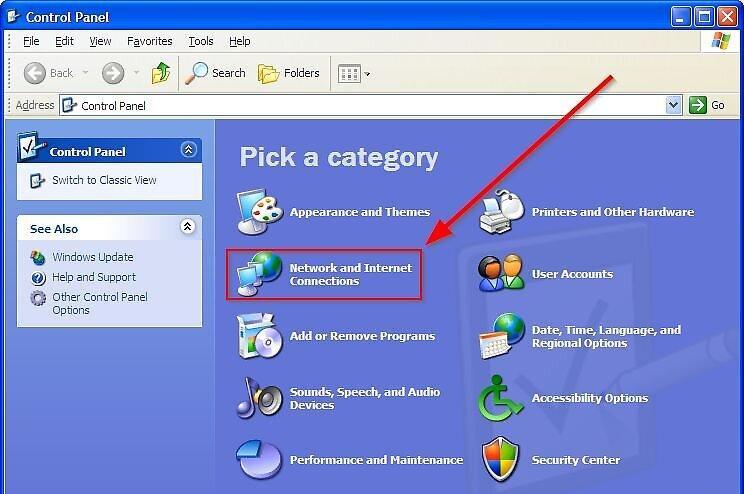
Select "Network and Internet Connections."
Step 4. Click on "Network Connections"
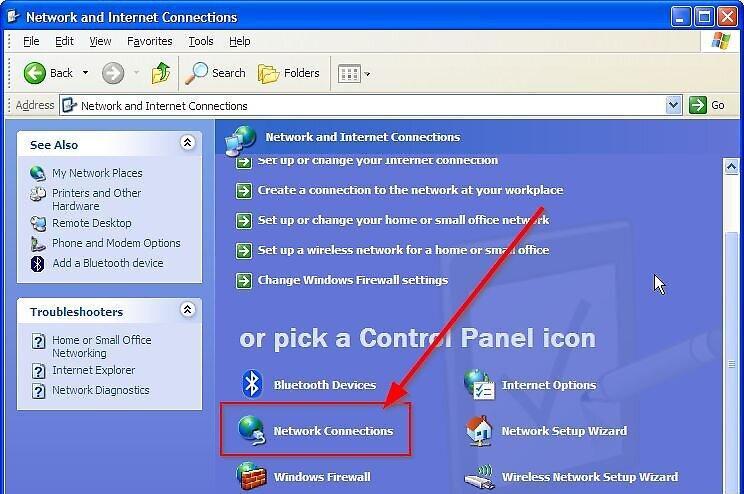
Click on "Network Connections."
Step 5. On the left side, select "Set up a new connection"
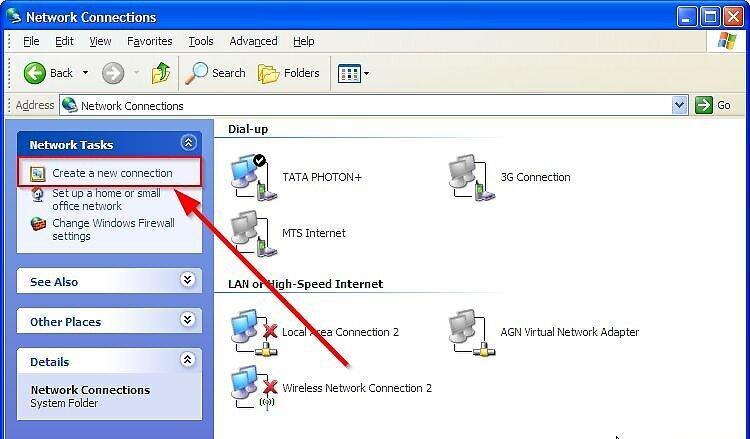
Choose "Set up a new connection" from the left panel.
Step 6. The New Connection Wizard will open.
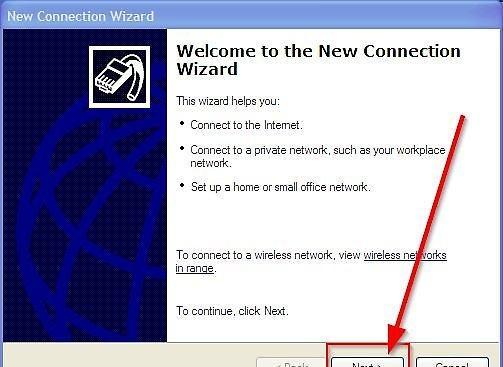
The New Connection Wizard will appear. Click "Next."
Step 7. Select the option "Connect to a workplace"
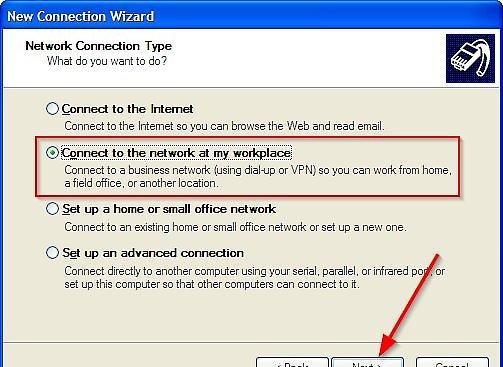
Choose "Connect to a workplace" and click "Next."
Step 8. Click on "Connect to a virtual private network"
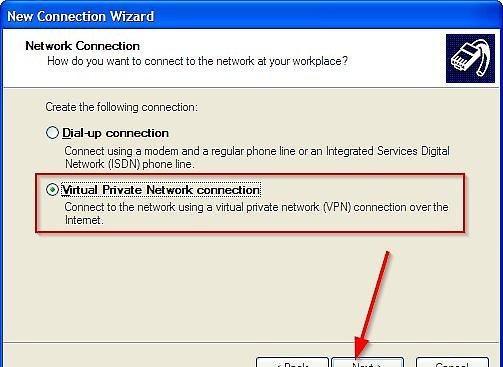
Click on "Connect to a virtual private network" and proceed.
Step 9. Enter your network name.
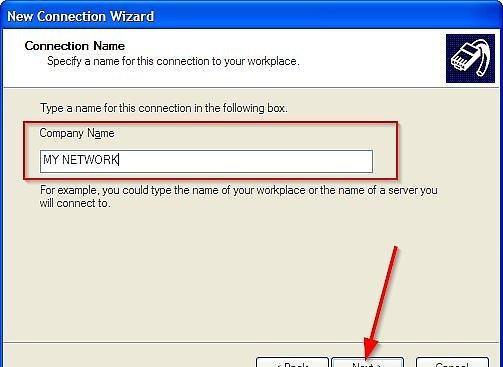
Type in your network name and click "Next."
Step 10. Enter the IP address
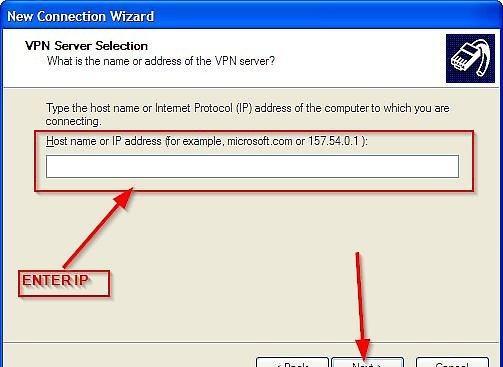
Enter the previously noted IP address and click "Next."
Step 11. Select the option "Create a shortcut to this connection on the desktop"
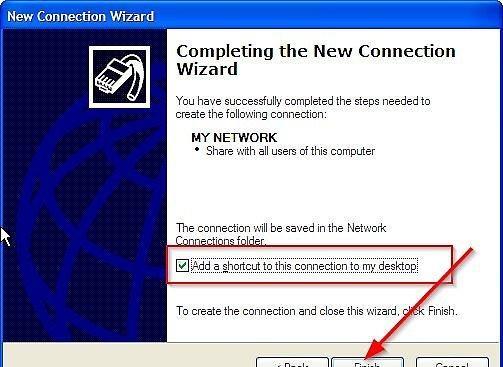
Choose "Create a shortcut to this connection on the desktop" and click "Finish."


